I really have to stop picking up these project trees. Especially tropicals. I’m just flat running out of bench and greenhouse space. Sigh…

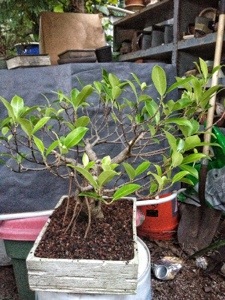
The tree is a ficus retusa. Good bones and good potential. I got it from a friend and I promised him I would make it purty.
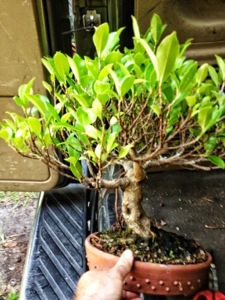
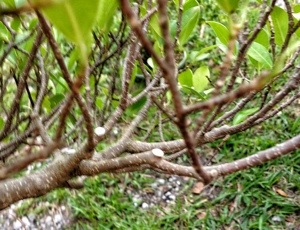
Here’s one side.
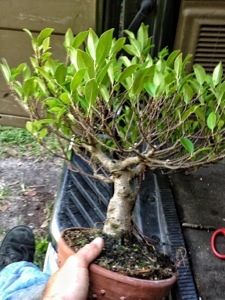
And the back.
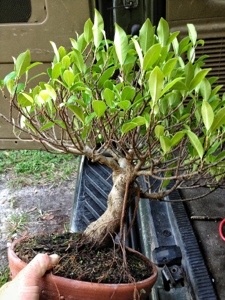
And the other side.
My job today is to prune this tree back just enough to make it healthier (the color is a little too light and the leaves are only at the branch tips.) in order to prepare it for a proper styling next spring. Contrary to popular belief, fertilizer is not food. It is more akin to vitamins. A plant makes its own food (through photosynthesis) and is able to store it. Whenever a tree is damaged (or pruned) it must use these sugar reserves to regrow itself. With a late trimming (on certain trees, not all) the tree may not recover well. Hence, my caution.
Lets begin the examination.
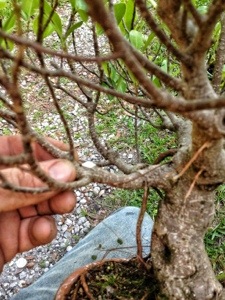
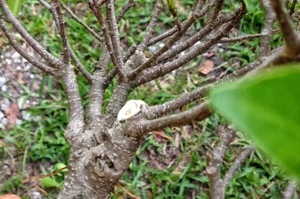
Good size limbs with lots of secondary branching.
The skeleton of the branch pad is in place. I just need to simplify it a bit and open the interior of the tree to sunlight.
This main purpose of this post will be to demonstrate restraint in the horticultural aspects of bonsai (i.e. seasonality when pruning, potting etc. ) and perhaps teach some patience as well.
They say that westerners wish to have a bonsai NOW.
That our culture is based upon instant gratification (buy now, pay later) and impatience. Perhaps this is so.
In bonsai, maybe the demonstration process is to blame; coupled as well as with the displays. Maybe I’ll get into some trouble here but……ah well.
We tend to have several types of demos in bonsai. Some require a lot of tools, some require a lot of hardware.
Let us look at this from a novices perspective:
The first type of demo we shall call the Jim/Jim method. It is a Florida kind of demo where, using a ficus or some such tropical, the trunk and only a few branches are left. Usually it’s just a sharp stick left over. This method will grow the best tree in time. Buts that’s the thing, it grows it in time. If a novice sees this demo and then sees the exhibit,without context, it will tend to discourage him. This sharp stick method teachers patience.
On the other end we have the “professional” artist whose material has been “fluffed” for him and there is just some finishing to be done. This method of demo is becoming the norm unfortunately.
The resulting tree will look much like the display trees but, the novice, trying to decide where to spend some excess cash, and inquiring how much to buy a tree in that advanced state of development, decides to go into knitting instead. At least a sweater will keep you warm in the winter (as opposed to doing the “freeze warning shuffle”: can I have an amen for that?)
The best method of demo is in between. A knowledgable presenter with good material in an intermediate state of development that shows how much work has gone before and how much is left. The novice will then see this hobby/art/passion/addiction as doable.
Hopefully, browsing my site, you will find different levels of trees that actually show you some steps in the development and aging of a bonsai. This is my aim with the whole blog project (aside from shameless self promotion, of course. Did I mention I do demos and workshops and am willing to travel to new and exotic locales to further my art? Weddings too).
My recommendation when teaching is to begin a student’s path off with an intermediately developed tree instead of a sharp stick. The lesson of patience should come after the feeling of accomplishment that a “good” looking tree brings. Then, as the student progresses, they can begin to understand the “whys” instead of just the “rules”. Maybe an apprentice/teacher teaching system is better.
Back to the tree:

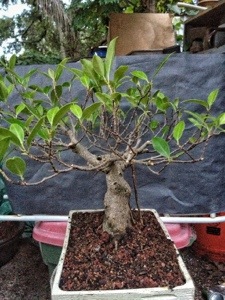
Here’s the upskirt photo. Time to prune.

Basically, I’ll be pruning out the “third leg of the trident” twigs, the top branches, the “out-of-proportion” limbs etc.; like I’ve done on all of these rebuilds.
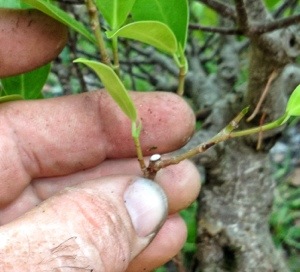
Like this.
Why do I do this? If you leave two secondaries on the branch you will end up having a straight branch. The strength will go to each branching equally and the movement will be non-existent. If there are two limbs, one primary and one secondary, the stronger limb will grow away from the secondary. Putting natural movement into the branch. This is one tenet of the “clip and grow” method.
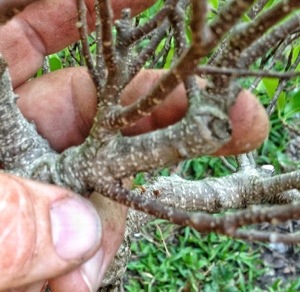
This branch is thick and ugly. It is basically a log, it has no taper or artistic value in this design.
Gone.
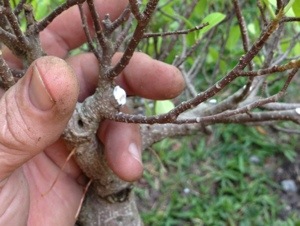
There are too many limbs at this point. So we remove the larger. Why? First, it’s too thick to move or bend, and second, it is too thick, too high in the tree.
When we think of a tree, we see in our heads a thick base, grasping strongly to the earth; a strong trunk growing high up into the sky,getting thinner and thinner, breaking into smaller and smaller branches until there are naught but twigs. The job of the artist is to take advantage of this mental image and trick the viewer into believing that this little tree we have in front of us is an old, tall tree. Taper is the best concept we have to perform the illusion.
The litany is ” taper,taper,taper”.

Snip.

That’s all I will trim now. As with the last post (click me! click me!) I will leave the terminal buds to elongate and thicken some of these branches.
Now the roots.

A little root bound (Which is contributing to the light color of the leaves)
Being that it is September 20something, and the temperatures are cooling off, it is too late to do a full repot (Which means trimming the roots.)
What I can do, though, is “plant” it in a bigger pot. Similar to the technique I used with this ilex (click on the blue pill to see the post)
First, rough it up a bit

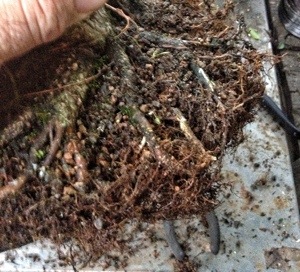
One disadvantage to this “planting” technique is I’m not able to get all the weeds out of the soil. When I bare-root a tree I can make sure I get every damned bit of weed matter out. The worst is a weed called oxalis. It looks like clover but its not. Clover is actually a good plant, it pulls nitrogen from the air and deposits it into the soil. Oxalis is a plant with a corm or bulb and its hard to remove from the planting medium. Artillery fern (not a true fern- pilea microphylla) is another weed that is hard to get rid of; it seems like if you leave any bit of plant fiber in the soil, it will begin to grow. Almost like a tissue culture.
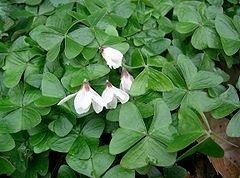
Oxalis
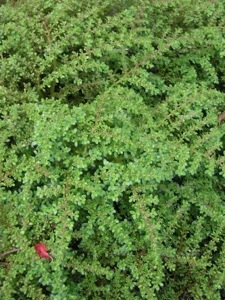
Artillery fern. Some people actually cultivate these two noxious, evil weeds. Damn them, I say. Damn them.
But I digress.
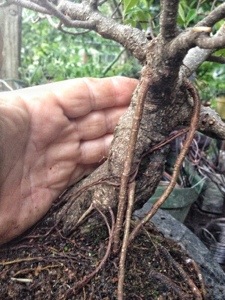
Lets address the aerial roots. I like them on this tree. If we arrange them and cultivate them properly they will serve to make the trunk look bigger.

Scoot them out at a 45 degree angle like so….
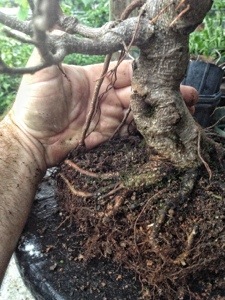
Straighten them out and untangle them.
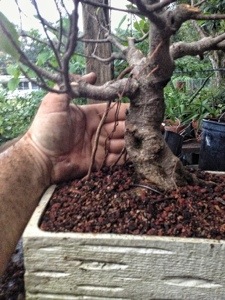
Pot it up and make sure those roots have enough soil to stabilize them.
And that’s all. No wire or any more trimming. Restraint.
Side view
Other side.
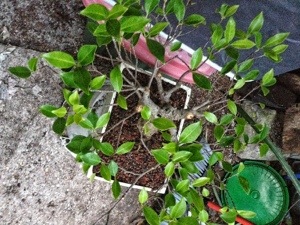
Top down view.
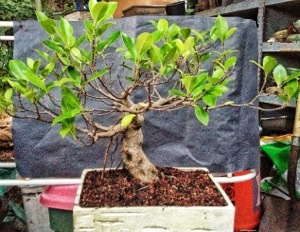
And that’s all. It needs to grow and I’ll revisit this bad boy in the spring.
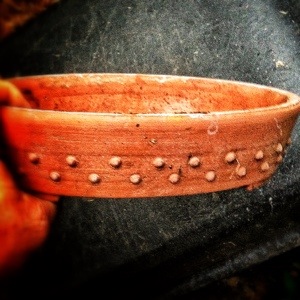
This,by the way, was the pot it came in. An early Rob Addonizio (Taiko Earth) pot. Check out his blog (here)
And the parting shot.


Adam,
I like the posts youve been doing. However, is it possible to attach larger pics so we can see more detail? If not no big deal.
LikeLike
Thanks Andrew. I do some larger, some smaller pics. I’ll try to do more bigger. If you click on the pic it does get larger. There is a limit on the WordPress site though.
LikeLike
Really loving the variety if ficus posts. I’ve been chewing over a design direction for a newly acquired ficus and your posts are giving me good inspiration. Although, I can’t say I’m any closer to knowing how I should proceed with pruning.
LikeLike
I might just wait until spring to do any pruning now. Winter growth tends to be leggy.
If you send some pics I might give you some pointers. Send them to my email adamaskwhy@yahoo.com
LikeLike
Oh yeah, I’m waiting for late June or so to get to hacking. I’d love some advice for sure — I’ll pass along some pictures. Thanks!
LikeLike
I am in Africa, and though the growth slows down at winter time (+10^C lowest temp.) the plants dont have the effect of cold winters here. Should I be so careful with pruning or I can be more drastic?
LikeLike
I think you can treat them as though its spring. Go ahead and trim it.
LikeLike
Thanks. I thought I let it grow some more….want a monster fig. He he he. The trunks / branches are just too thin compared to the trunk. I am going to wait for it to develop roots( does not have much now) recover and it is going over a tile in the ground. Want nice thigh branches.
LikeLike
Hey Adam! I love your blog and pretty much everything you said about what was happening to bonsai beginners happened to me (even the knitting part). My ficus retusa was given to me almost dead and so I helped it revive. Not knowing to taper the branches, it went just like you said; straight branches, big leaves, lifeless shape. And I am too embarrassed to bring it to a bonsai show for help. There are pictures posted on my blog. I repotted it 3 weeks ago, and I don’t know whether to cut it, let it grow, wire it, shorten the leaves, or what shape it needs… Thank you for posting so much on things no one else posts about. It makes it for a very engaging read.
LikeLike
First, thanks for reading and for your compliments. I try to write the blog as though you’re standing in front of me. I hope I’m successful.
As for your ficus, I would cut the branches too about an inch long.
How is the weather in Canada now? If its warm enough I would move it outside if you can.
LikeLike
I like these bonsai.I am having one ft height,14yrs ficus religimosa bonsai. i am glad when
see ur photo thnk u
LikeLike