I think I’ll do a post on the lowly boxwood.
It’s an over and underused plant; the boxwood is a tree that many beginners pick up because, as is, it’s very tree-like. They have a nice rough bark texture, almost always a good nebari (root spread), small leaves and a dense growth habit (They are a hedge plant after all.)
Boxwood are very easy to take care of; their watering needs are moderate, potting them into bonsai containers is achieved using a saw and some scissors (the root mass is very dense and requires very little root raking) and the growth is not too fast to keep up with.
They’re underused by more advanced bonsai-ists because, as beginners, their initial tree gets hacked up trying to fulfil the “cookie-cutter” approach to bonsai (with the #1 branch #2 malarkey) either by them (with the help of not so helpful books) or by another person who “knows how” and offers them help. This, then, acts in destroying that original allure the boxwood had, replacing it with disgust at this slow growing, skeletal, funny looking shrub with funky balls of foliage at the tips.
My first advice; don’t cut everything off.
The boxwood is like a juniper, if you remove all the green on a branch, that branch is prone to dying. And a boxwood is very slow to grow. It’s better to try to use what’s there than to try to grow new branches.
The boxwood is again like a juniper in that you will have maybe only two trimmings a year. If you need to fiddle with your tree more than that, don’t get a juniper or a boxwood, try a ficus.
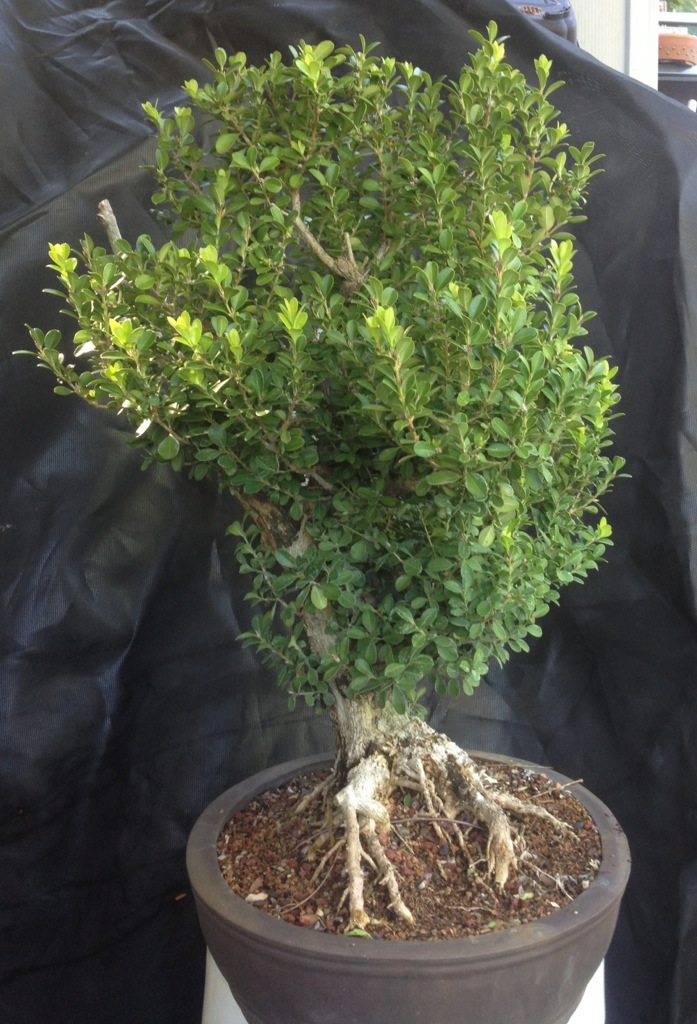
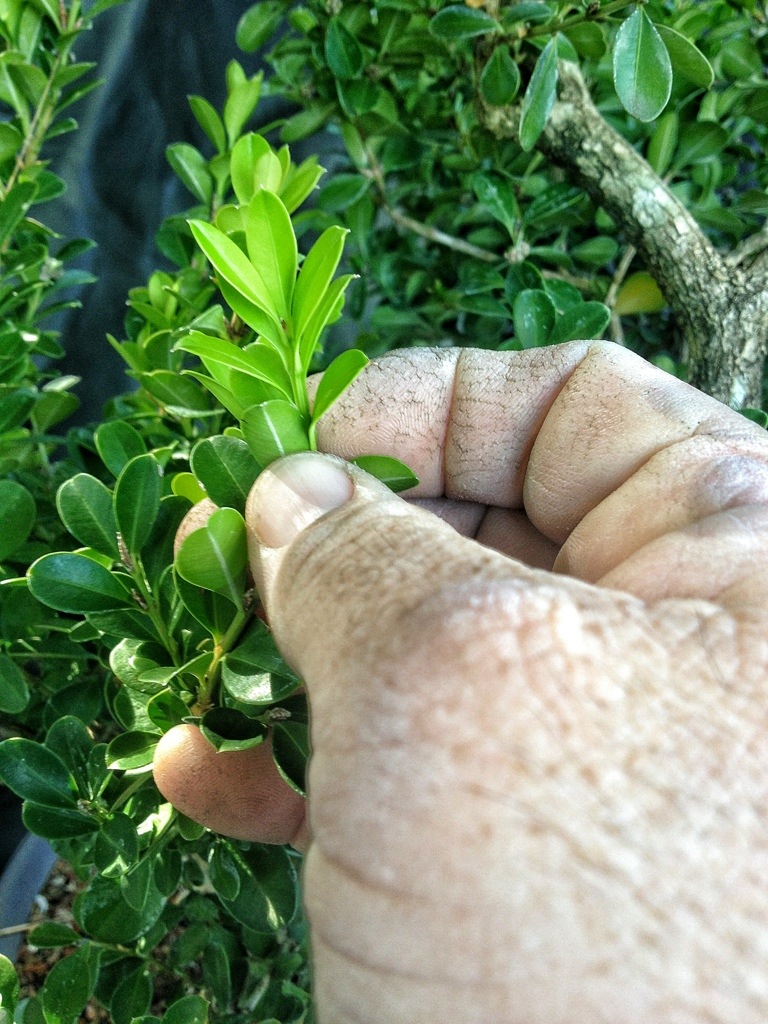
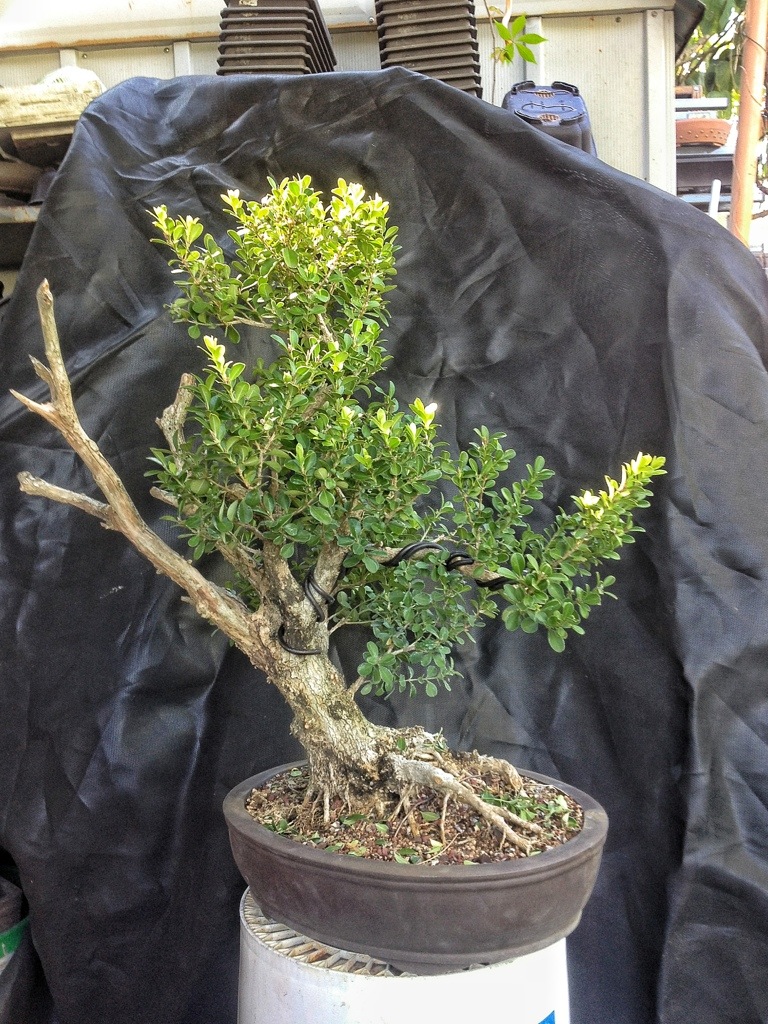
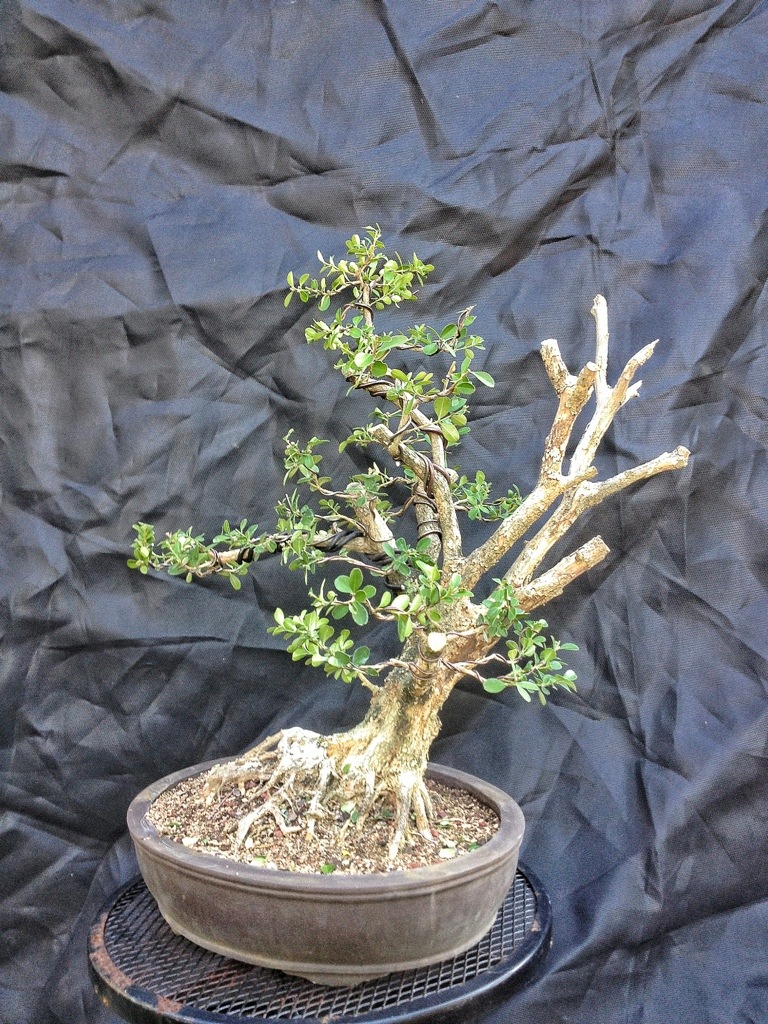
Here’s the tree of the day:


When most beginners (after reading their first book or looking at the “beginner” sites online) first try to style a tree they get this image in their heads

Which is what the books call informal upright or “pine tree” style. When you follow these rules with a boxwood you tend to get this
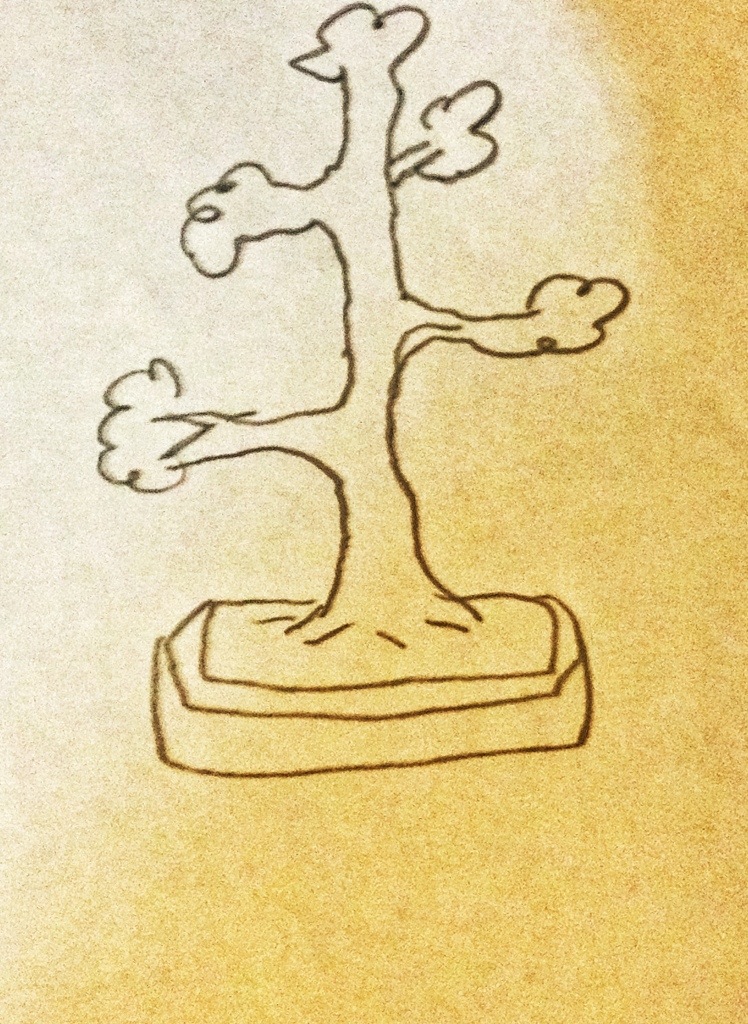
Which we will call the “poodle tail” style.
This buxus (japanese boxwood, buxus microphylla japonica) does not bud back well at all. It’s important to keep interior branching until you are sure you don’t need them.
The best styling look of most buxus will be to make it resemble a deciduous tree. Sometimes we will even make it look like the dreaded “live oak style”

It’s more natural and tree-like than the stylized and typical Bonsai tree.
That’s not to say that you can’t do something different but its best not to try to force a tree into a style it’s not suited for.
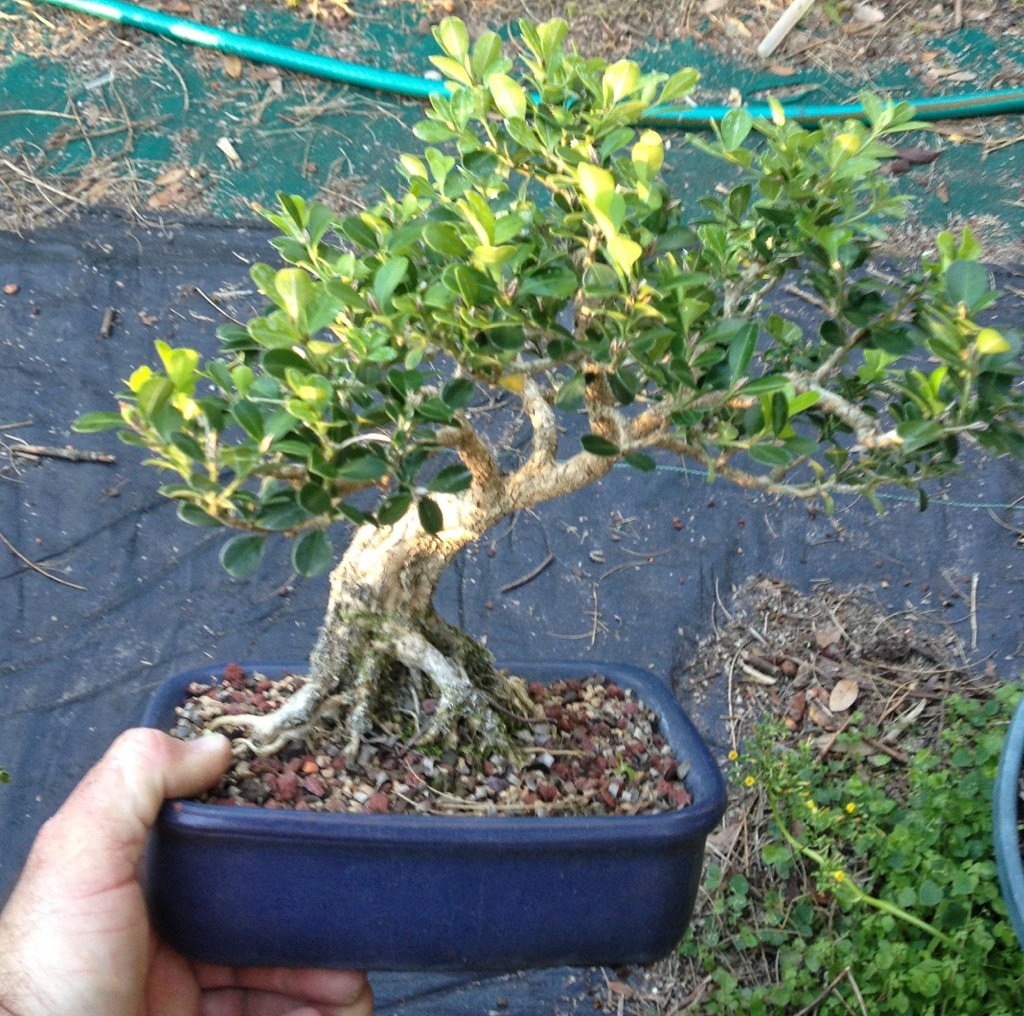
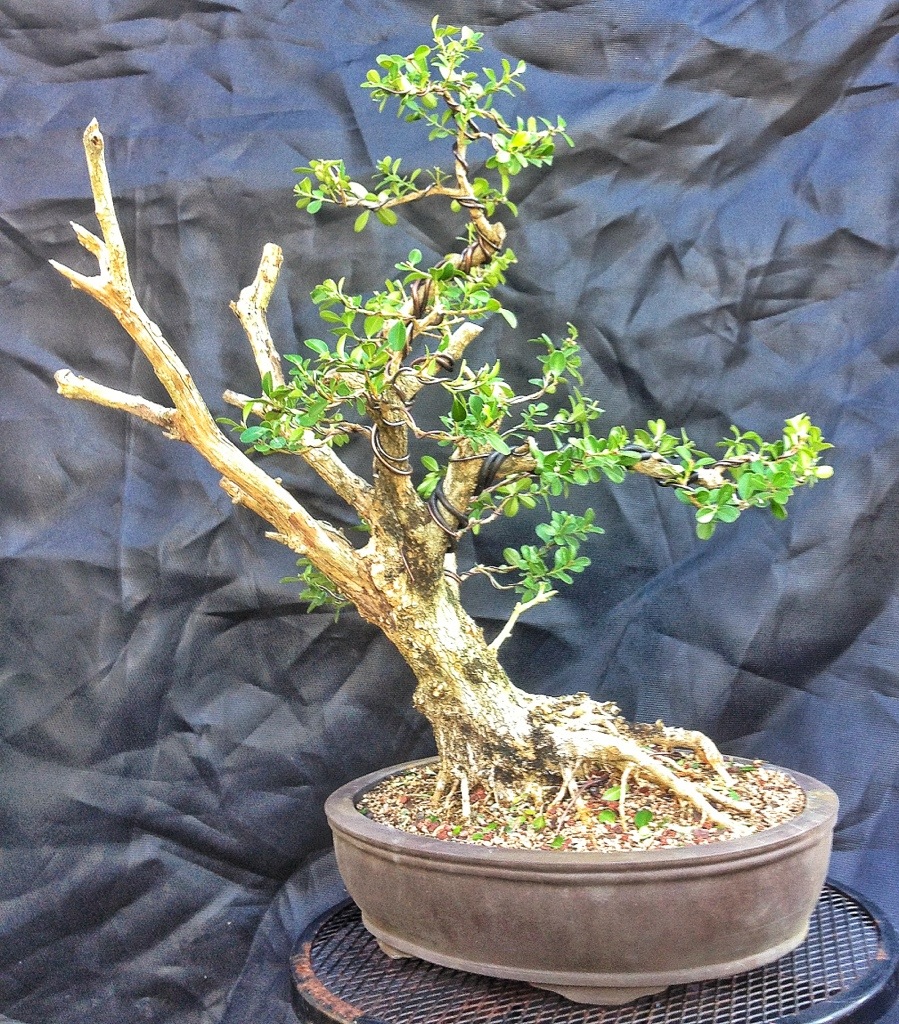
This boxwood needs wire but it’s styled as a nice pine-tree looking bonsai.
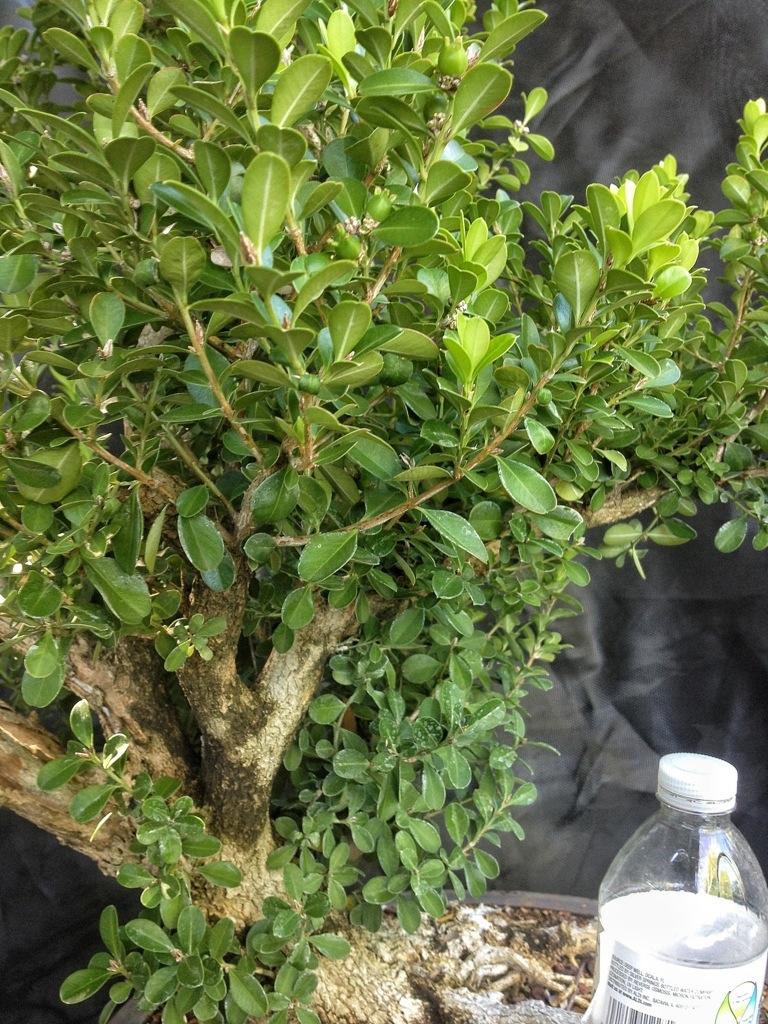
Ok, back to the styling:

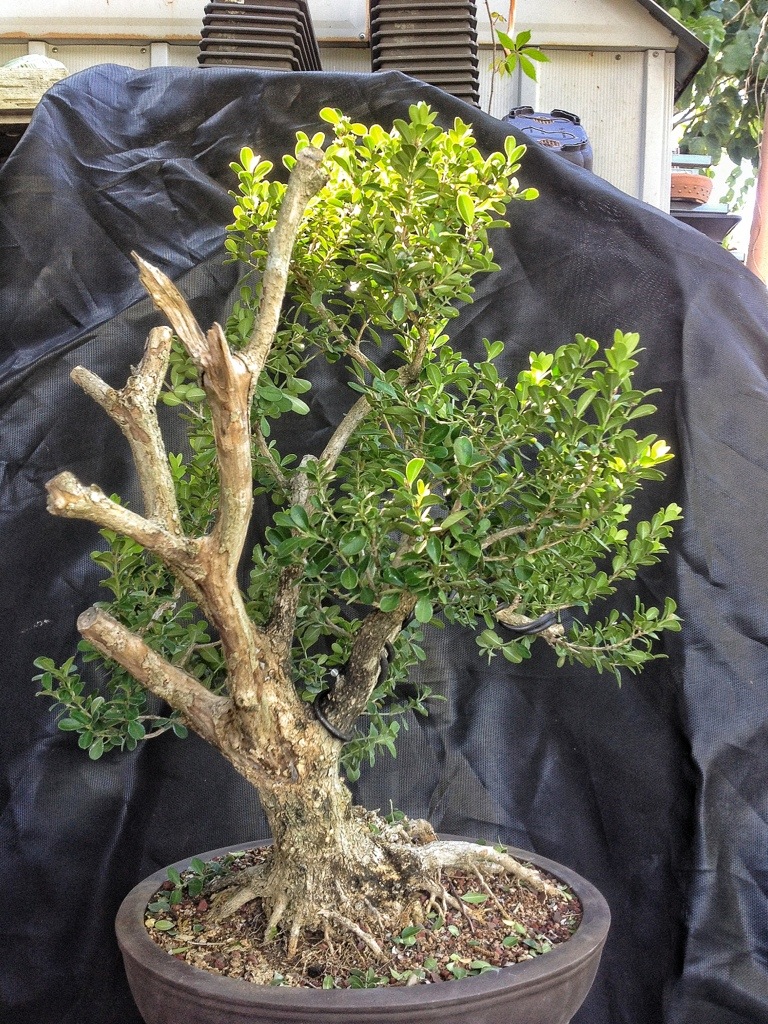
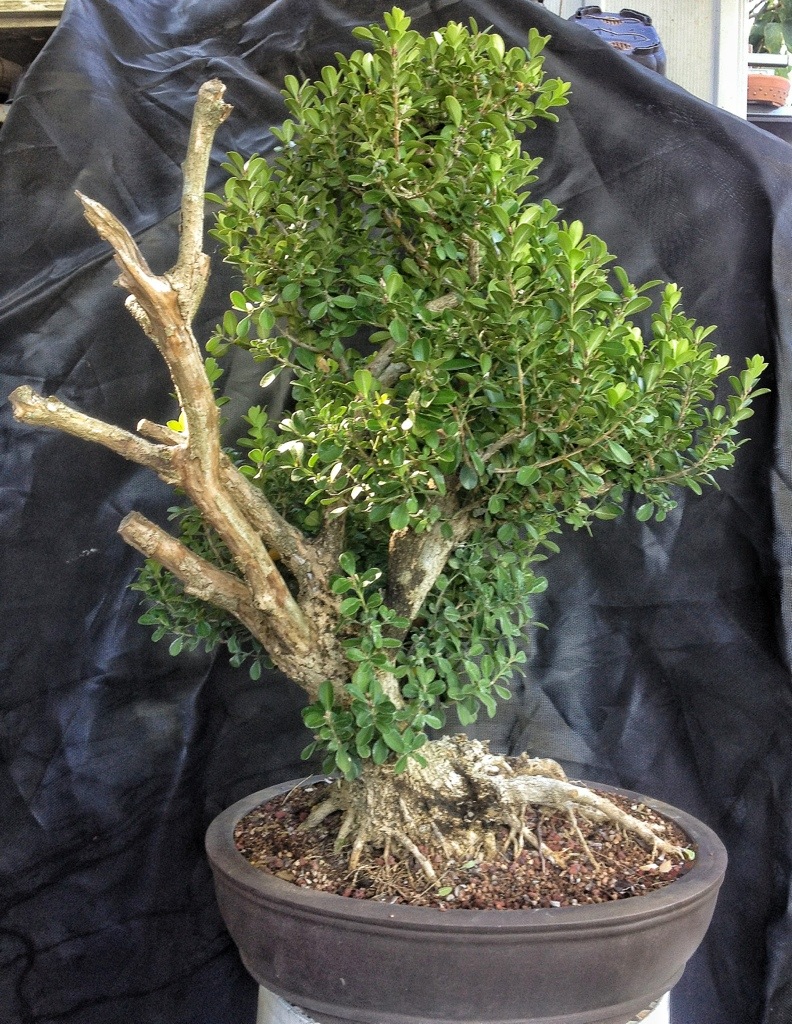
The water bottle gives you an idea about the size of the trunk (I know, it’s water, not beer, but it was early in the morning) which, when most people see how big it is, say “Wow! That’s a big piece of wood! ”
It is uncommonly large; not to brag or anything. Most boxwood are small, maybe an inch thick.
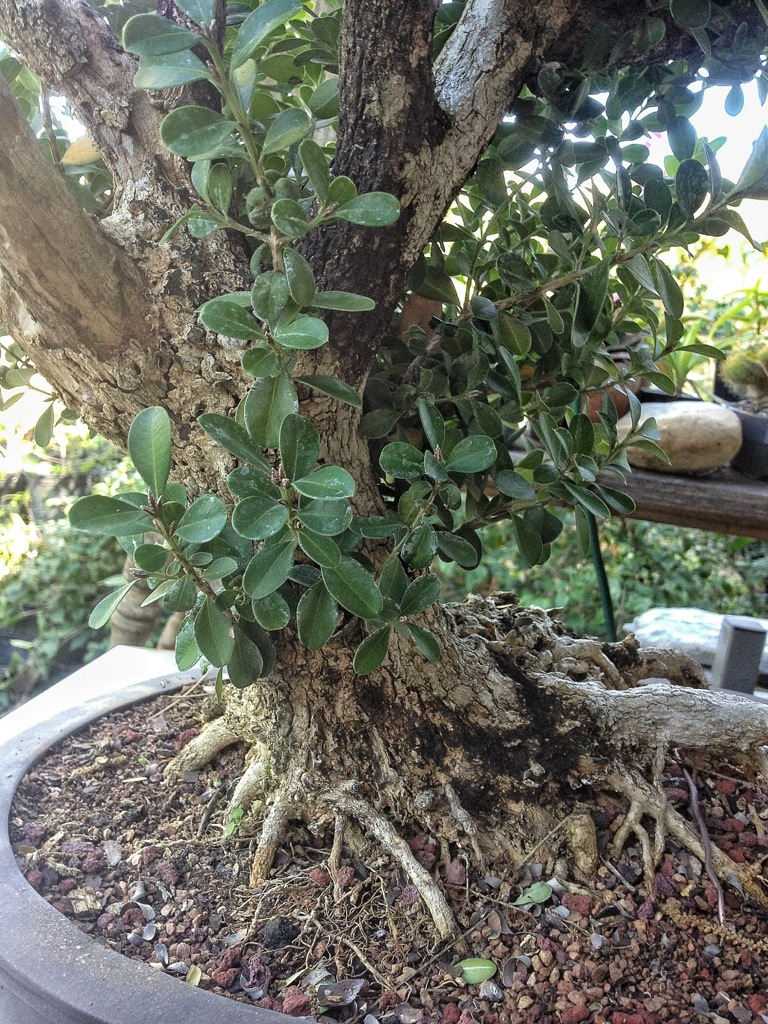
About 3 or 4 years ago I cut back the branches and then left the tree to grow.

The foliage has filled in nicely. The dead branches (henceforth to be called Jin) were there before.
The boxwood is prone to a root fungus which manifests itself by top growth dying back. Which is how we got the Jin on this tree. Putting it into good bonsai soil remedies that.
The dead branches give us the opportunity to apply some drama to our composition.
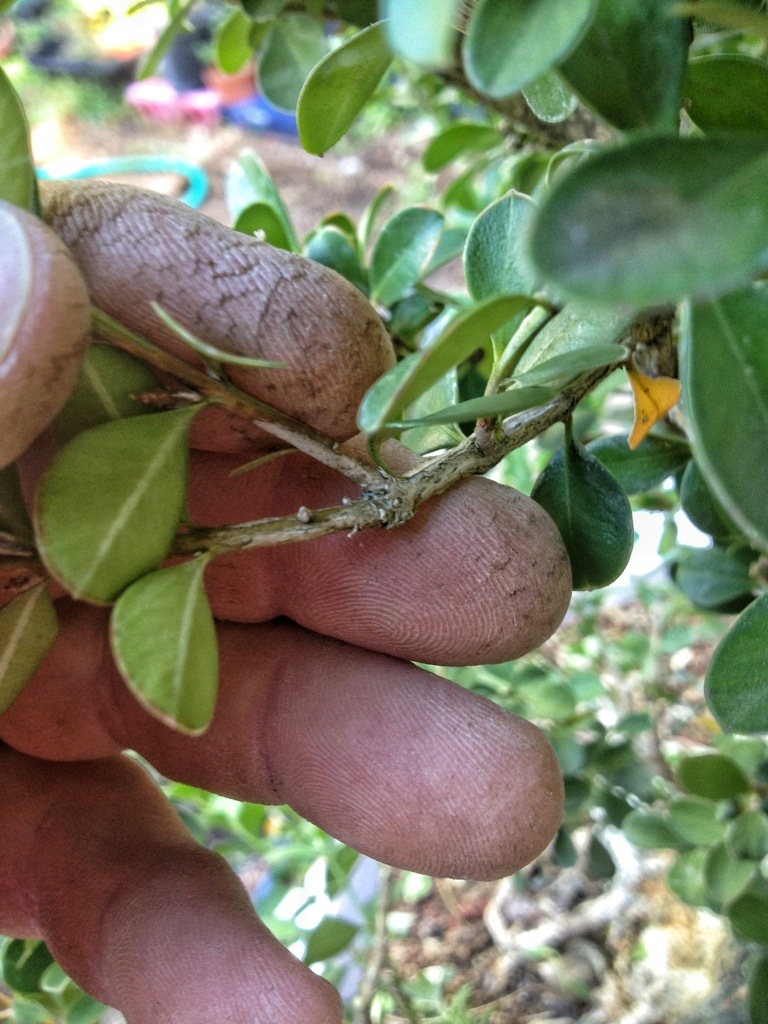
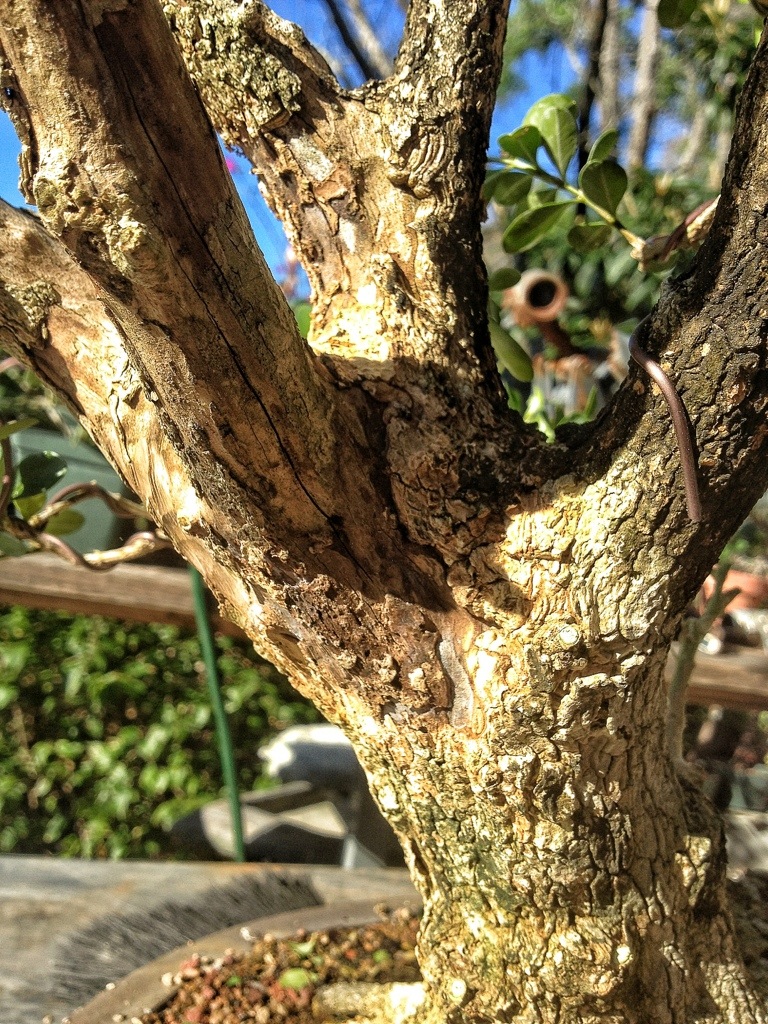
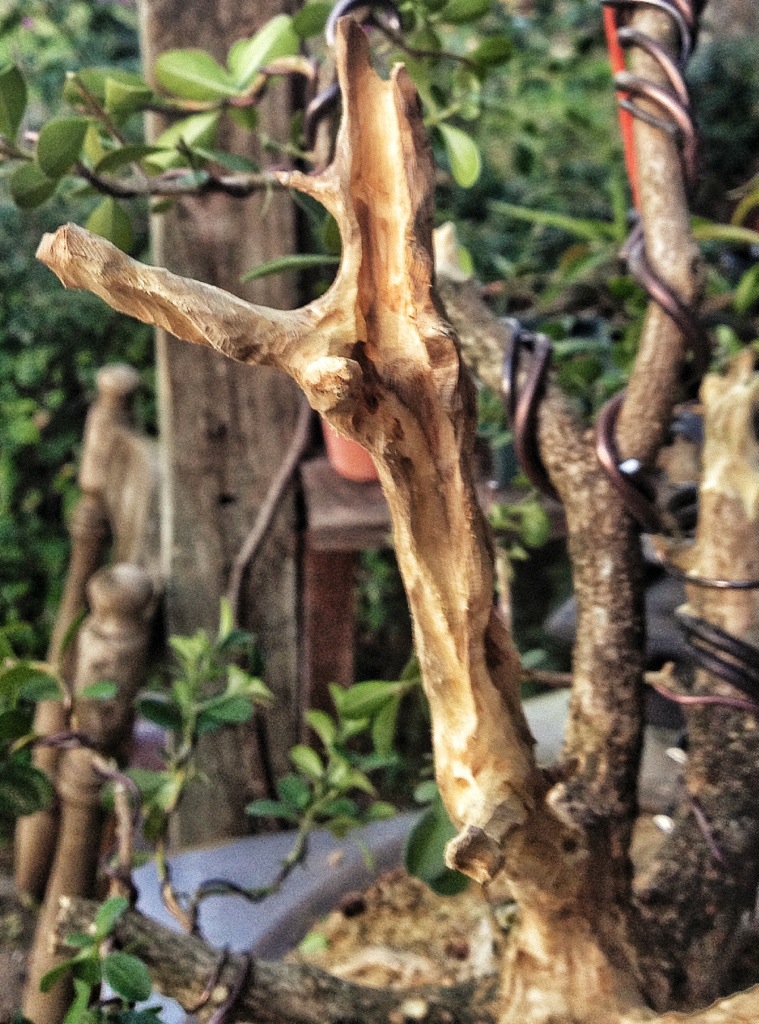
It’s early spring, and this is new growth. This is the best time to prune it here in Florida.
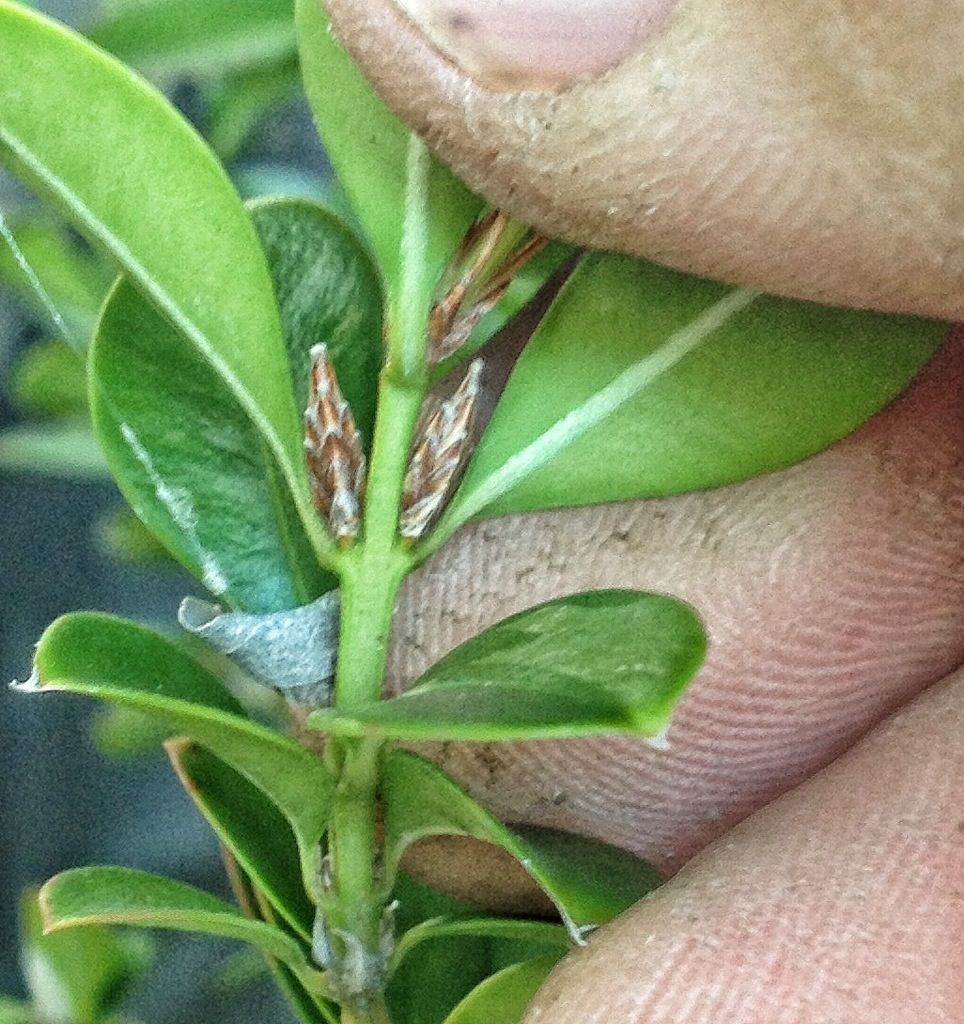
The spearhead looking things are the new buds. I will try to preserve at least one on each branch when pruning
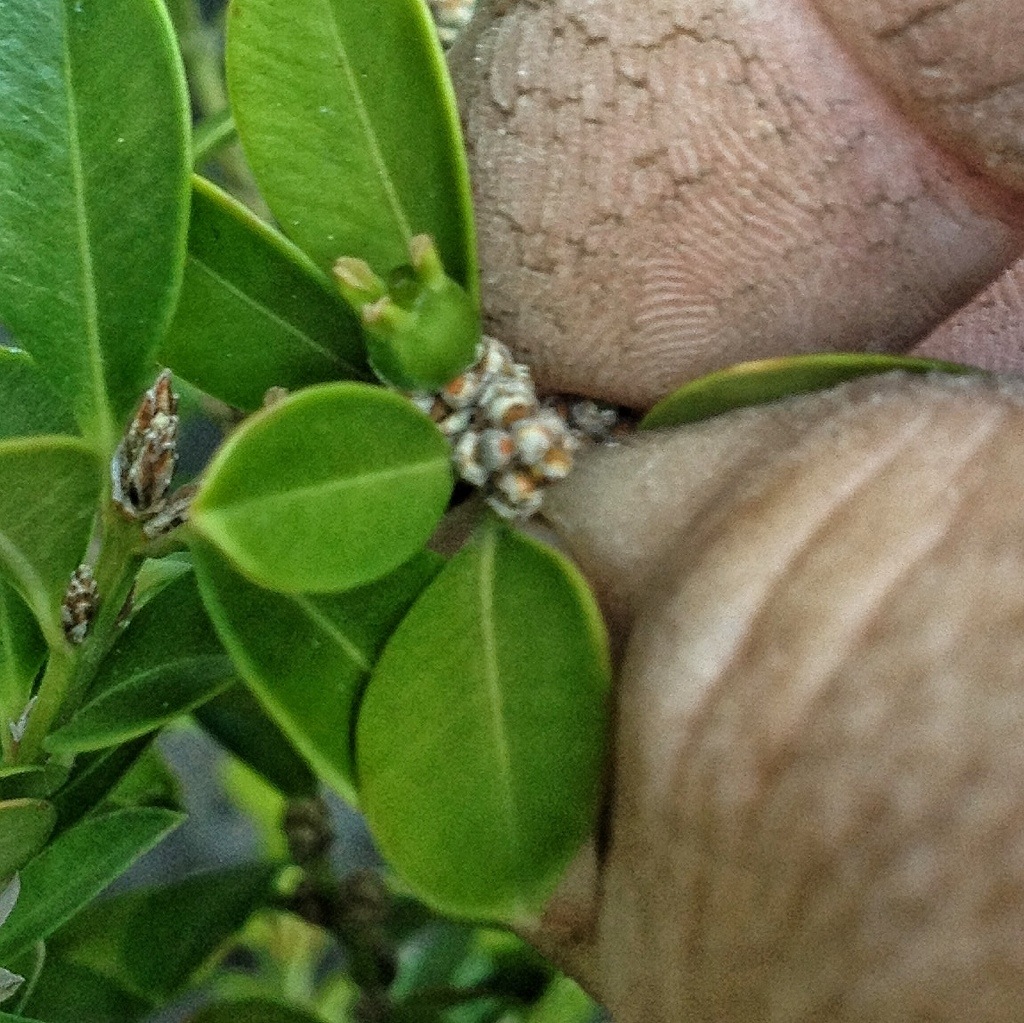
And that is the flower and fruit. The flower is the grey, tan, orange thingy on the bottom; the fruit is the green thingy on the top.
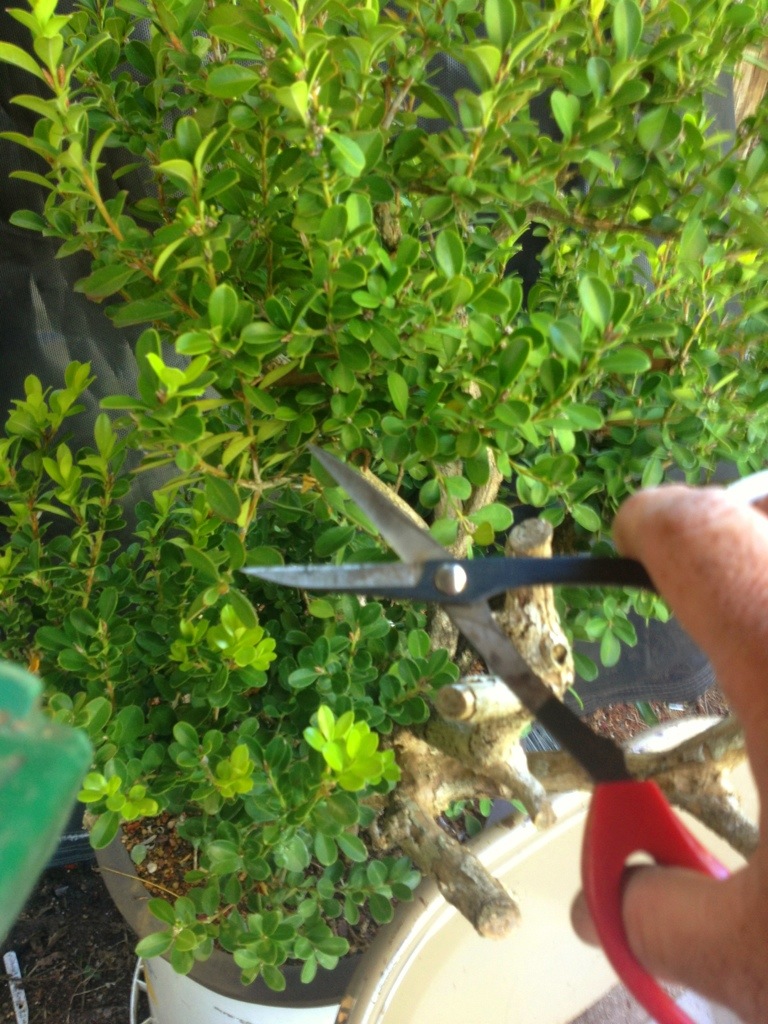
Time for the initial trim.
First, a shave, then a haircut

I don’t need the front growth, it obscures the trunk; so if you don’t need it, cut it off. Like my wife says to my son “You need to shave that scruff off your face, I can’t see your face!”

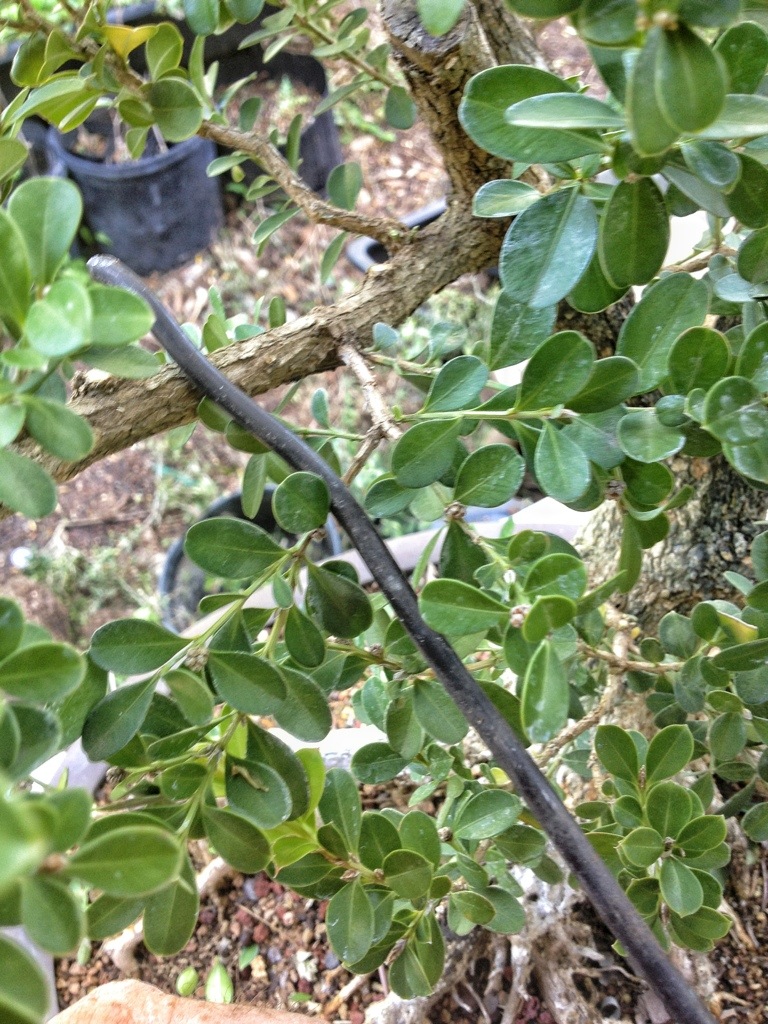
This is typical of the growth habit of a boxwood: three shoots from one spot. Simplify this to two.
From here its just standard pruning practice.

To use what we have means that, instead of cutting to a hard line and using a single leader we try to think in 3 dimensions, building the tree with multiple trunks and treating them as individual trees with their own tops… You’ll see….

Lets move some big branches with some wire.
One tip, these branches are very stiff, even if you can move the branch with wire, it may not stay. To ensure that the branches stay, you have to make sure that the outside of the bends start to crack, if (on this tree) there is nothing to heal, the interior hard wood core will just bend right back to its original position. It is not how long wire is on, but the growth, that sets the branches in place.
Pretty thick wire
That’s the first go through; cleaned up, to use the vernacular of the trade.
Now, I can’t stress this part enough, never think that the angle and position that a tree is potted into its container will be the best angle or the front.
The original potting orientation was good, it was just a bit conventional.
To give some dynamism, even drama, to the planting, I’ll move it like so
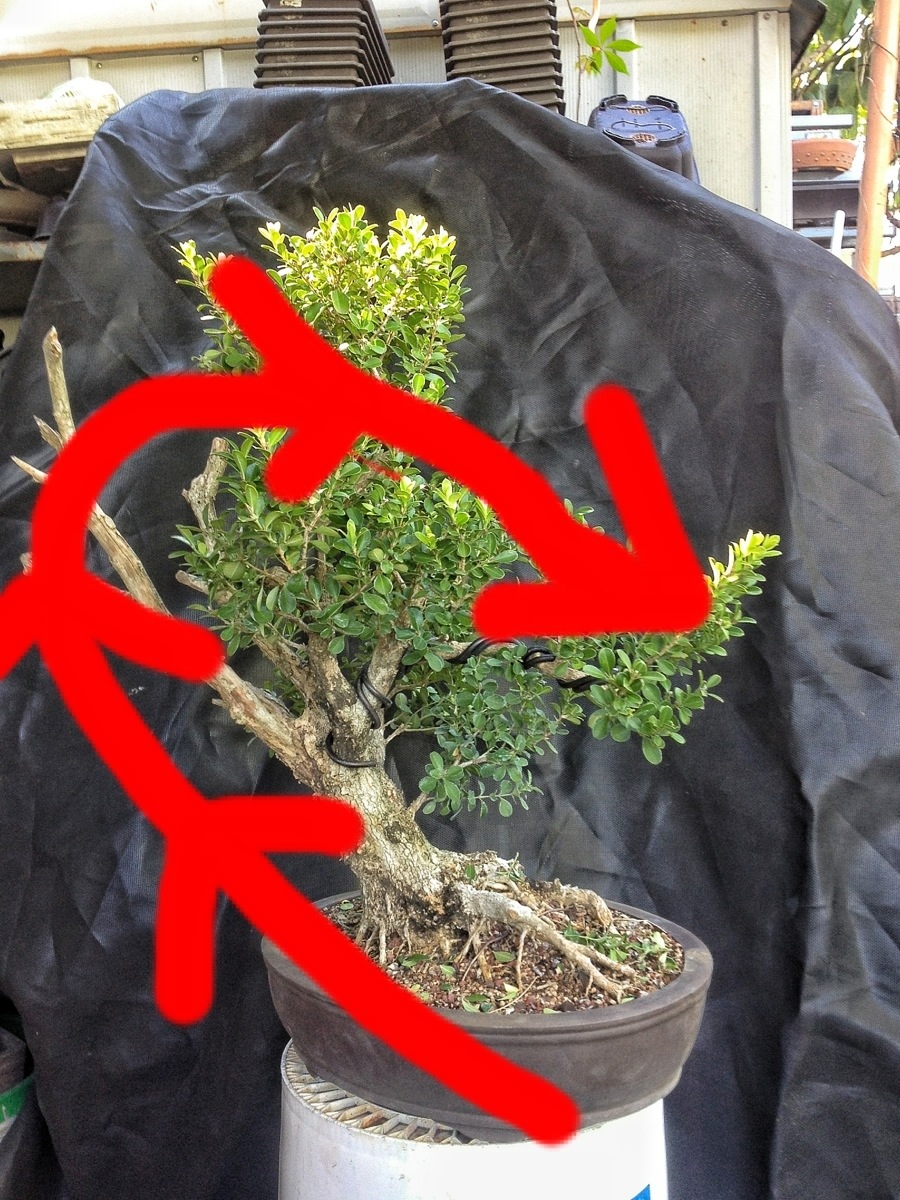
The composition as such will move the eye in this way.
When I say composition I mean the line and flow of the piece. The composition is what moves the eye. The principle is to keep you looking at the tree. You might see a Jin, which is next to an oddly twisted branch, which in turn moves your eye to the trunk, and down to the nebari, to the pot, etc, etc…
This is an important aspect in art and design.
With bonsai it is more difficult because you have the limitation of the medium: a tree that must be alive. One can’t simply put something where it can’t go. It has to either grow or be there already or be able to to be moved into place.
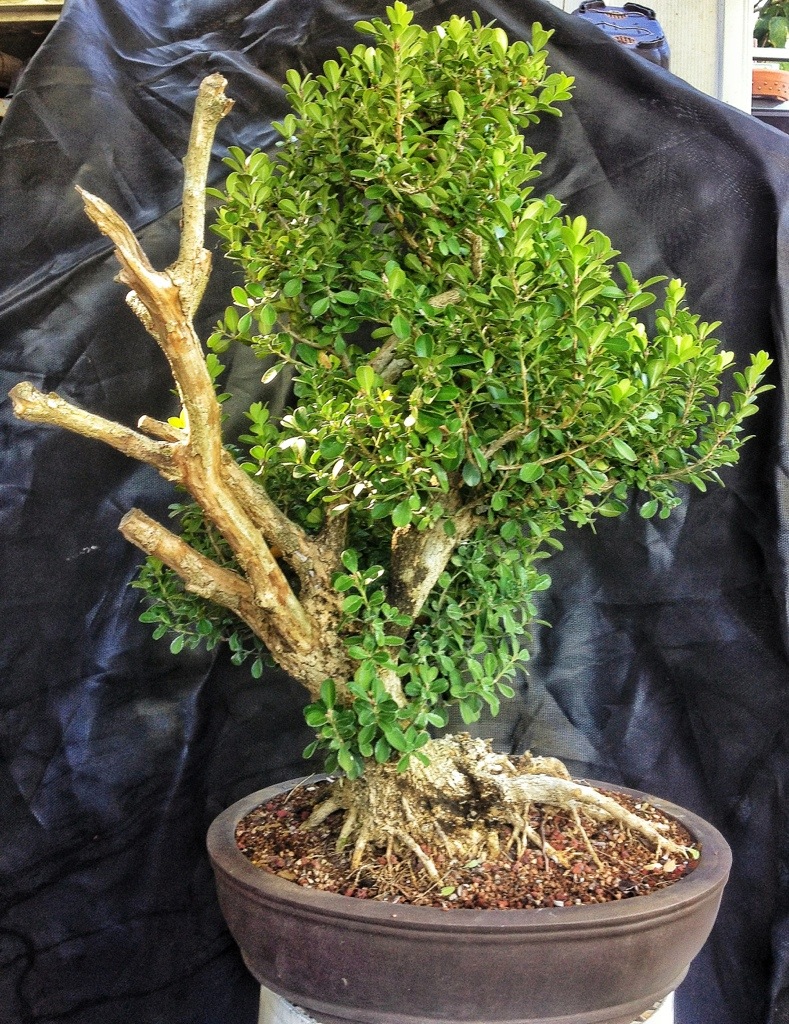
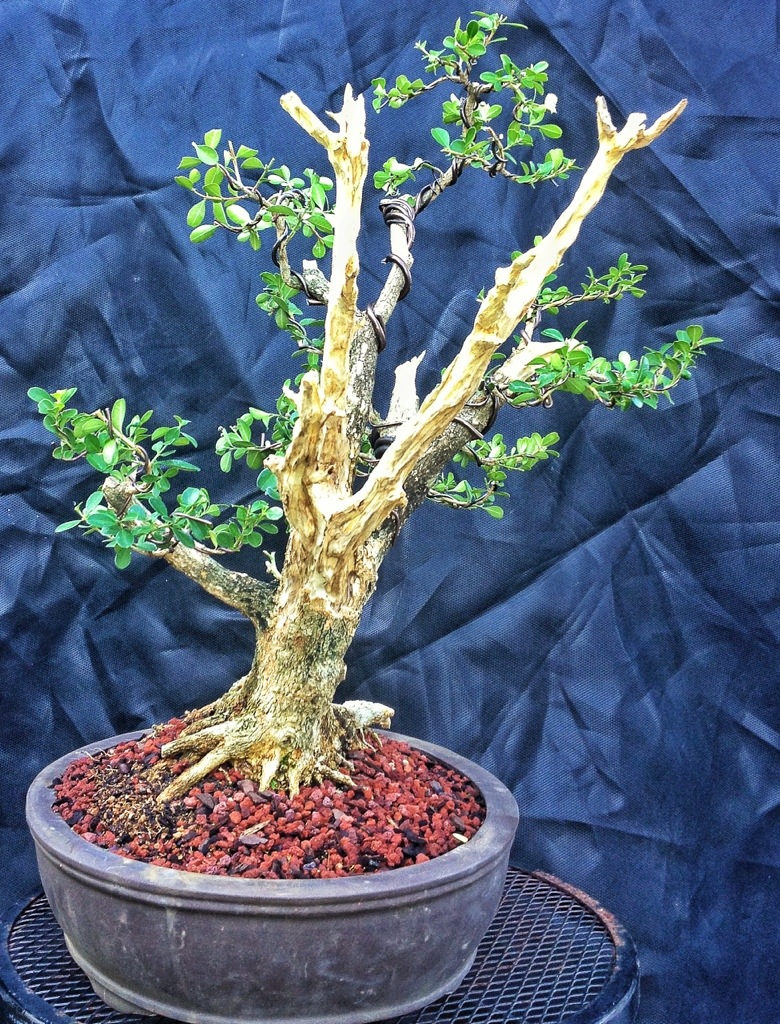
Review: above is how we began.
Every branch wired and trimmed. Now for carving of the deadwood.
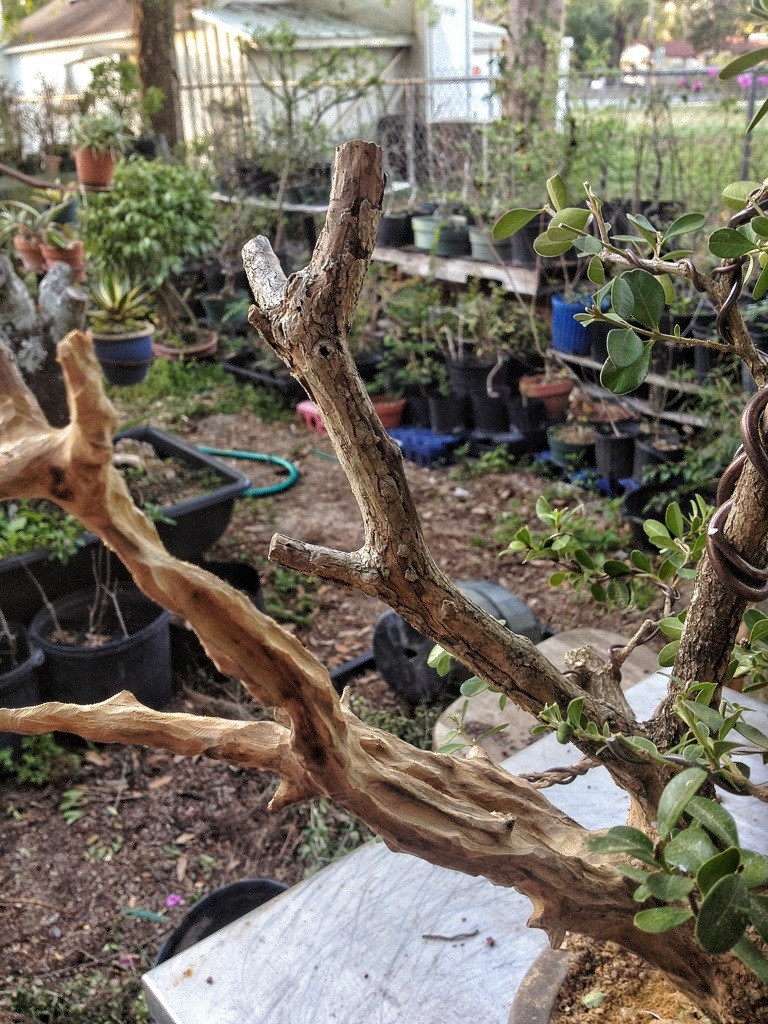

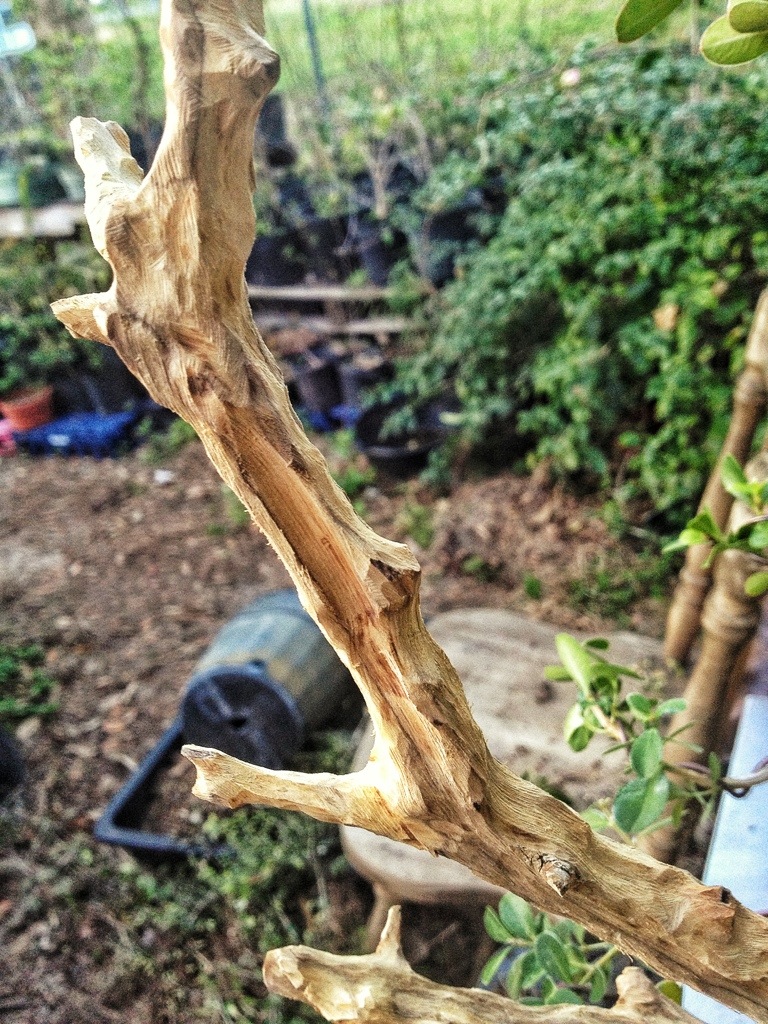
The way I “see” the carving is to imagine water continually pouring down the tree, eroding the softer wood and revealing the dense, hard wood under.
I also prefer hollows to sharp sticks.

Repotting.
Like I said earlier, the initial potting consists of sawing the rootball to fit, and teasing out some of the exterior roots.
To repot it

you just tease out the bottom and side roots and trim them. The root mass on a healthy boxwood should be like a brick. If not, you’re repotting too early. Or there’s a disease.
I’m rotating the tree clockwise about 30 degrees so the right front corner and the left rear corner have to be cut back.
I know it sounds like I’m cutting corners with this tree,but this is how it’s done with a boxwood. (I’m sorry, bad pun)
This root

has to go. It’s above the soil level, which makes the tree appear unstable, and it’s in the way when I try to put it into the pot with our new front

Hey, it’s Miller time!
The next morning I took a video and some pics of the finished piece.
here’s the video
Which helps you to see the three dimensionality a little better. And I added some really dramatic music for your enjoyment.
A photo cannot show the depth and feel that seeing a tree in person.
Here’s the before again:
And the after:

Rear
Side

Other side

Deadwood detail

Another deadwood detail…..

Sketch (kinda fancy…I got carried away)
And,
wait for it….
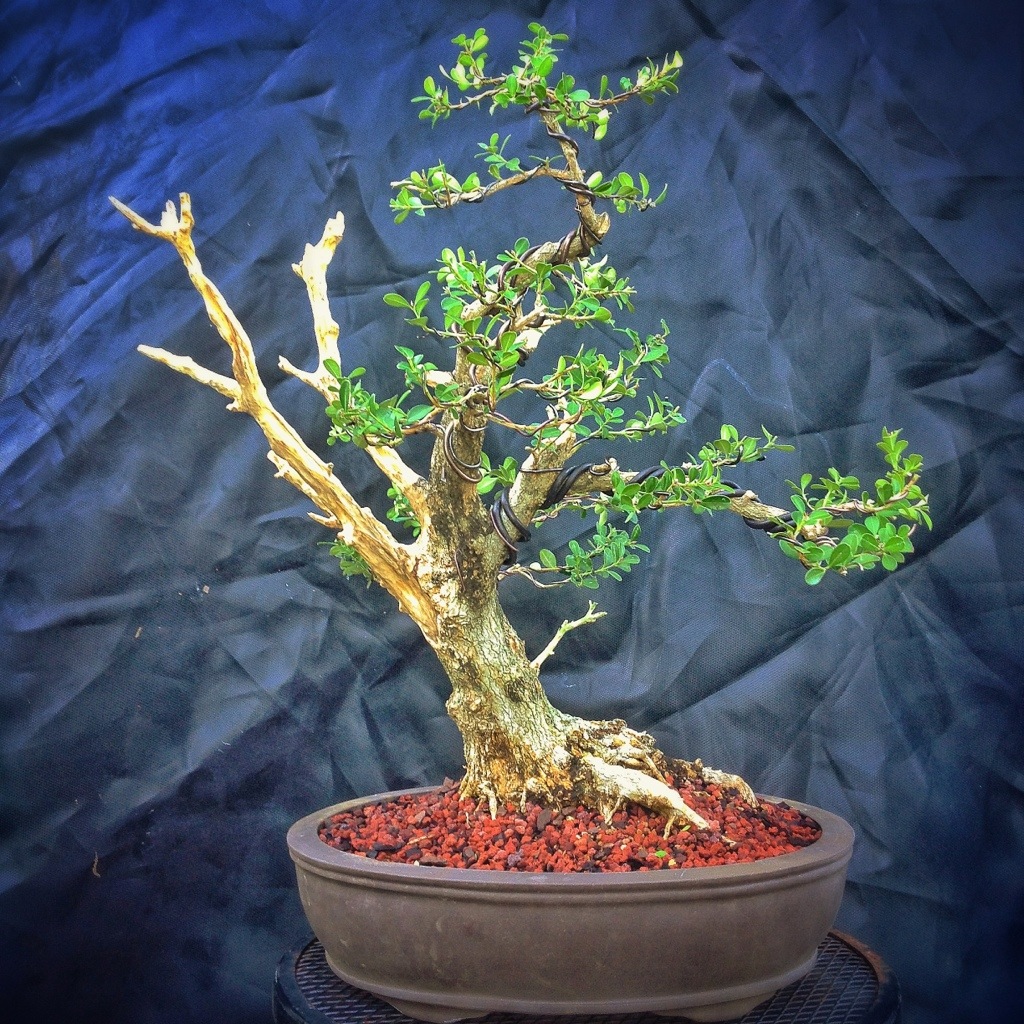
The front.
So what have we learned?
The boxwood is easy to take care of but slow growing.
Don’t trim too much off, utilize what you have (this ain’t no ficus baby!)
And try to think in 3d.

Great post, excellent. Love the video especially the sound track.
Thanks Adam, you are a bonsai master!
LikeLike
Thanks Tommy, I’m not a master yet, I’m still learning but I’m trying to have fun while doing it and hoping that my sharing helps other people learn too. And smile….that’s important.
LikeLike
You got that right, we are learning from you. So much to learn. My osmosis works great when the teacher is as good as you are. Thanks for sharing.
LikeLike
Great post Adam! Nice to have so many photos and a video to capture the sequence of change.
Now I have to grow a boxwood!
You are an inspiration.
LikeLike
Thanks for reading Bob. How did you like the music?
LikeLike
The music on the video is a “hoot”! I can just picture you walking around the tree being absorbed in the work. I look forward to your posts.
LikeLike
Now, we’re whistling “Dixie” !!! This is some input I’ve been waiting on – some good tips, pointers and ideas for the “commoner” buxus – so far Kingsville’s my favorite micro. Simplifying 3 to 2 branches to control the direction of growth is a good tip that I can apply to any of the boxwoods. And I like the idea of treating a multi-trunk as separate trees – I’ll try that on a 3 trunk semperverins I’ve been saving. You are working with one impressive old specimen – that must have been saved from the landscapers dumpster – I like what you’ve started. You enjoy tackling the *hunks*. 🙂 Taking the first step is the hardest; maybe it’s time for me to move forward.
LikeLike
I got the multi trunk idea from Dan Robinson actually. He’s a great observer of nature and that’s where he got it from.
Believe it or not, a big tree is as easy as a little tree, if not easier. There’s more room for mistakes that can grow out. A small tree only has so many branches. Go for it.
LikeLike
Adam – another super post. Never been a fan of the traditional use of boxwood: Hedgy, boxy, and flowers that smell like cat pee. Judging from my granny’s garden, served as a roost for flies and wasps, as well. (hey, can 10,000 flies be wrong???) My heart sank when I say the initial pix. I thought ‘god, I hope he does something good with that sawed off bush’, but kept on reading anyway. As usual you did not disappoint. Great final (well to be continued) result. Am going back to sample the video again. Just great. And this coming from a boxwood hater…they still smell, but I see there is hope after all.
LikeLike
Thank you Sharon. These Japanese boxwoods don’t tend to smell like the English boxwoods. Or so I’ve been told. I don’t smell anything from them myself.
LikeLike
Sorry, did not mean to diss the humble boxwood – they were over used and poorly tended in the ’60s when I was growing up. Also, must have missed the variety cite as Japanese rather than English. My error.
LikeLike
Completely awesome video. Music – Very dramatic. Thanks for the tips really useful and helpful.I love what you did with it. The after shot of the tree is beautiful. Do you have an update on how it looks this year? Would be great to see. Thanks again.
LikeLike
Hi Michelle
I did just remove the wires but I didn’t trim it. I’m letting it grow this yeast look for an update next spring probably
LikeLike
Hi Adam, I was given 10 Buxus plants in September from a friend who was clearing his garden, I haven’t done anything to mine apart from planted around 7 in the ground and 3 in large pots, no pruning at all, I am looking forward to spring to start have having a go at these fellas, I am a newbie to Bonsai I have a couple of other bonsai that got me started. How early can I transplant the ones in the ground to pot ? I live in the UK
LikeLike
I would say maybe early spring for you. Just as the plant might begin growing again. Good luck
LikeLike
Can I make a hedge of boxwood but leave the trunk bare for the first 3-4 feet and then a regular like hedge on the top? I have a old home with a great low fence that I want to show off but need a hedge to give privacy.
LikeLike
I don’t see why not. But you’ll have to use one of the tree sized boxwoods, Japanese boxwoods like this one don’t get big enough for what your thinking of doing. You’ll have to find a landscape nursery that carries them. The most famous nursery in the US that deals in them is Saunders Brothers.
LikeLike
Ciao Adam, hai giá visto il mio bosso, quando posso lavorare il legno morto? Penso in qualunque momento…. Pensi vada bene una fresa dremel? Oppure devo averne una piú grande tipo Makita? Cosa può essere che le foglie sono orlate da un verde più pallido? Grazie ancora 💀💪🏾💀💪🏾💀
LikeLike
You can carve anytime. You can use a dremel, it just takes longer. The light green edges on the leaves are nutritional. Try using chelated iron to help green them up
LikeLike
Adam, was wondering how this Boxwood is doing today? I have a similar large old(30 -40 year old) landscaping boxwood that I dug up 2 years ago and transplanted to a shallow bin with bonsai soil. This weekend I repot it into its first true bonsai pot and am wondering about how much to cut back the foliage. You seem to have cut this one back extensively and was wondering how it was doing today? Thanks in advance!!
LikeLike
This post is the follow up: https://adamaskwhy.com/2015/09/29/japanese-boxwood-redux/
LikeLike
Great box article. I’m new to bonsai so this helped very much. Thank you. Especially loved the dramatic music to the video. I want it for a ring tone. Lol. Thanks again.
LikeLike
As always an awesome article. I am looking to take over a 1m tall (and probably 1m wide) boxwood that my neighbour don’t want anymore, and I am considering how to deal with it for bonsai. It has been trimmed into a ball over the years and is very dense with hardly any green foliage in the interior, only around the rim of the ball. Any suggestions on how to cut it back? I am a complete newbie so it might not be the best tree to begin with, but the guy says it has to go now…
Alternatively I could keep it as a regular garden plant for a year or two in my own garden.
LikeLike
It’s always best to keep some green foliage on a branch when cutting it back. In your case it may take several years to chase the green back closer to the trunk. Just have patience and don’t rush it. It sounds like a good challenge. Good luck!
LikeLike
Thanks for the tip!
Once the winter sets in I need to start a blog too to document all my failures 😀 (not insinuating yours are failures – but mine are)
LikeLike
Awesome work! It may be just a lowly boxwood to some but the little tiny leaves of a boxwood make for a great bonsai miniature tree. I’m working on one now. Cheers
LikeLike
“They” say bonsai is an art, then immediately start listing rules and rigid lists of styles, etc. I also dislike many of the traditions, including the concept that the plant must be hacked to a stump, then reshaped to the narrow vision of the so-called “artist” , who merely wants to fit it into a pre-defined shape. I’m just beginning my journey into bonsai, with a little Japanese boxwood that caught my eye at a local Wal-Mart. Blog to follow.
I look forward to my journey. I also look forward to following yours.
LikeLike
Hey, Adam! Long time lurker, first time commenter, with a question. (Also the link I followed promised 8X10 full color glossy photographs, but I see only one circle and no arrows, much less a paragraph on the back of each one. BOGUS.)
I scored a sweet little Japanese boxwood on super-sale this week, and today went about repotting it into something inorganic. Like a total masochist, I combed out all the roots, to get out all the bits of bark and soggy peat chunks and also was hoping to find good nebari. I *think* I did, but . . . damn, they’re a long way down.
So I think I could cut out roots until I get down to the good stuff and have a much better flare and root base, but that’s going to take out maybe 1/3 of what it has, which scares me spitless. Sure, I paid 2.5 mocha frappuchinos for it, but still — I already murdered a juniper this year, and I’m still moping about it.
Should I stop being such a coward and go for it? If I do, should I reduce foliage proportionately, or count on the tree to kill off anything it can’t support?
LikeLike
If you’ve gone this far, you can reduce some of the roots. I might not have bare rooted it in the middle of summer myself but (if it’s summer where you are) but you might as well go for the gusto and do it all the way. And maybe reduce the top by a third
LikeLike