I got a package!
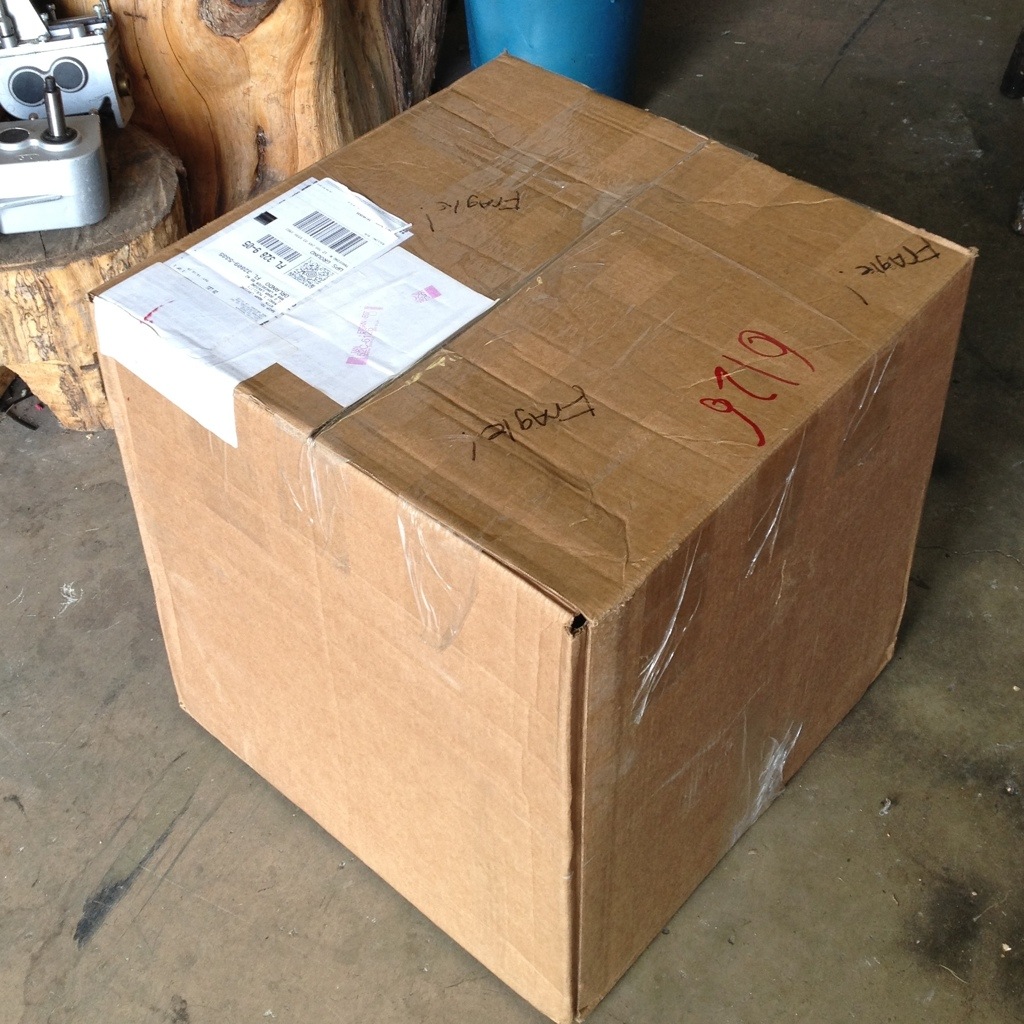
It’s like Christmas!
All the way from New Orleans, Louisiana.
A tree! (Of course it’s a tree, this blog is mostly about bonsai).
I got a Facebook IM from a friend, Jim, who lives in New Orleans.
He asked me if he could send a tree to me to restyle.
I said sure.
He said I could have my way with it too.
I have never heard of bonsai styling by mail but perhaps we could start a trend.
He packed it pretty well for his first attempt.
He wrapped the pot in tape and bubble wrap and put adequate packing material all around.
The only thing that could have been better would have been for the box to be taller and to secure the pot to the inside bottom of the box.
The only damage was at the apex.
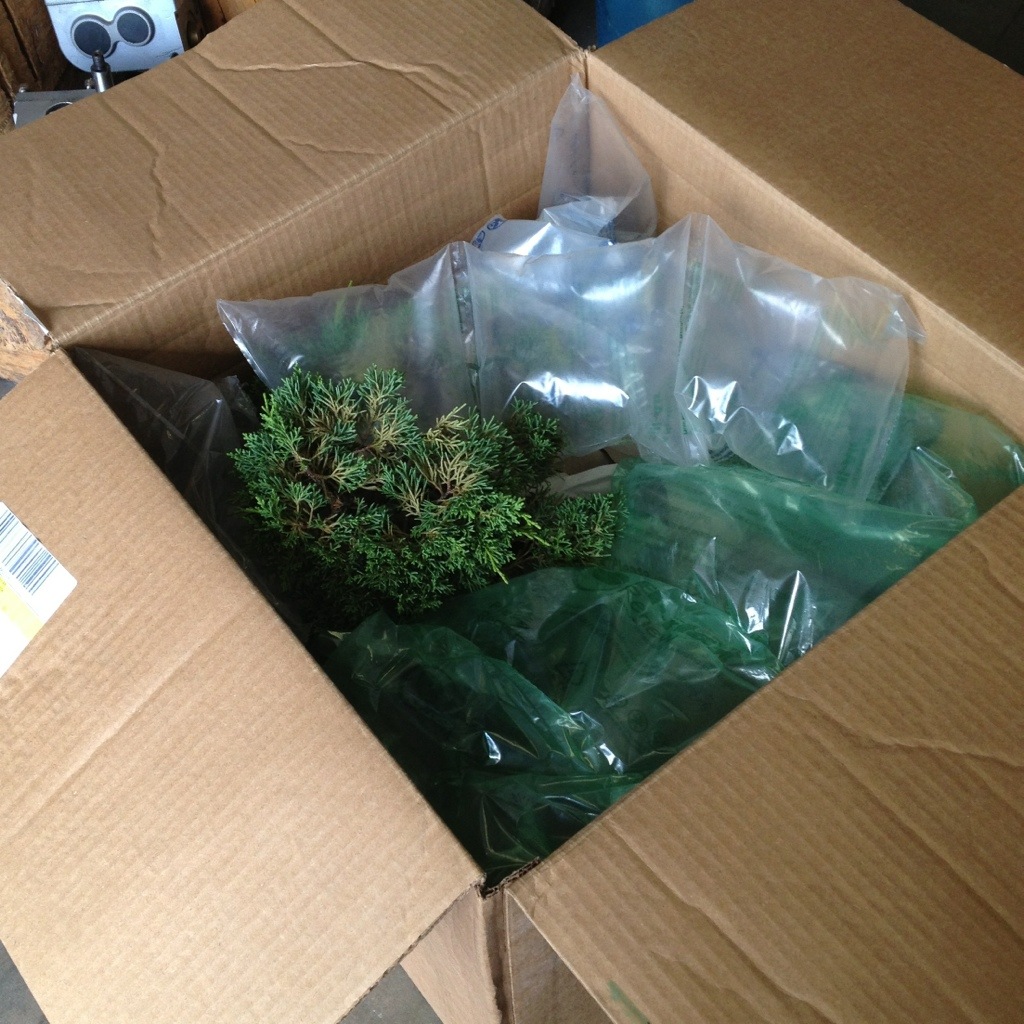
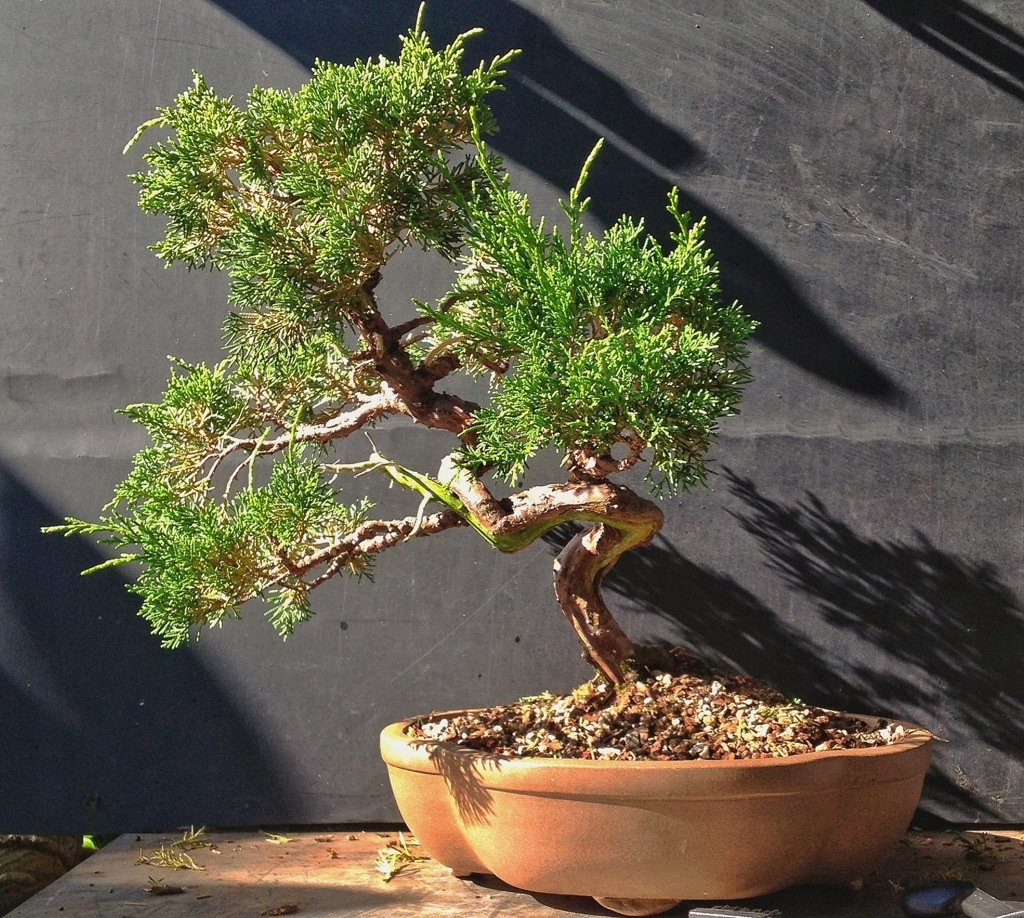
Here it is just out of the box (please excuse my workbench, I believe that an empty desk is the sign of an empty mind)

The soil had shifted a bit.
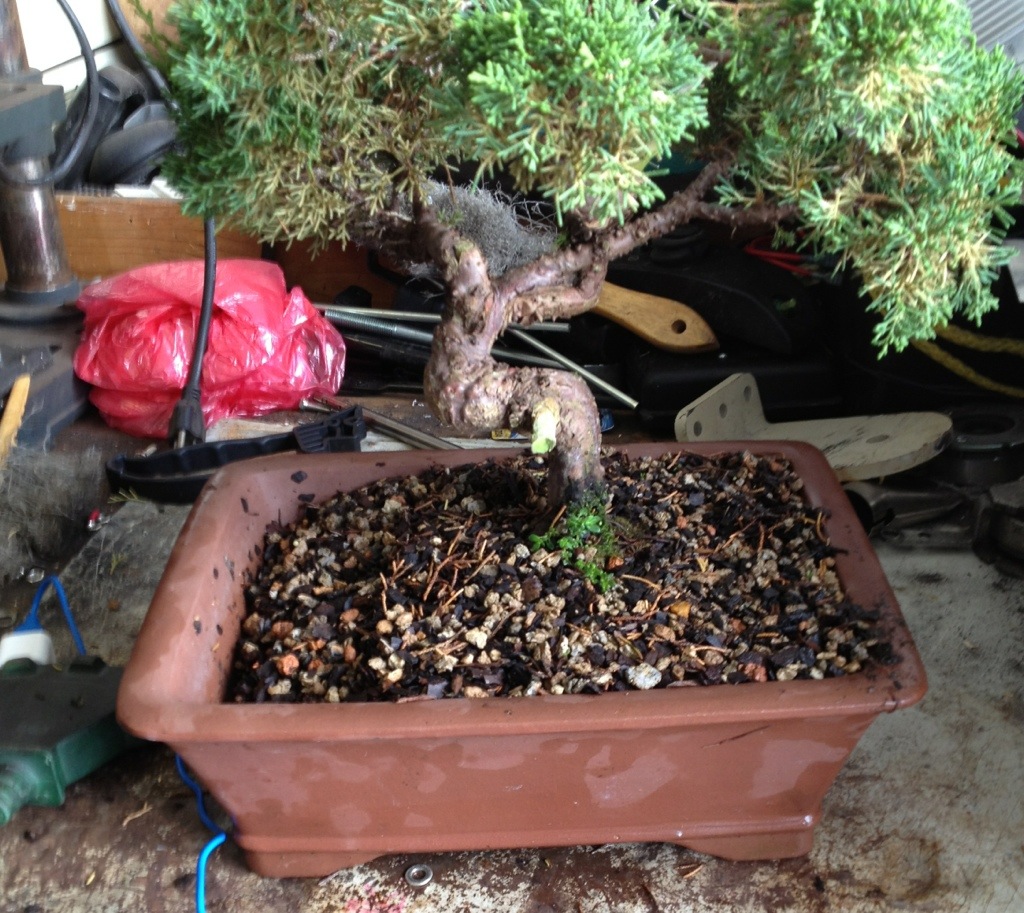
Which shouldn’t be a problem since I’m going to shift the tree more than that.
Let’s get back to the nursery and do some real work instead of just my job (I am done for the day Bossman, jeez).
Bright light today. Bad for photos.
That also means the humidity is low; the water in the air acts like a filter. Winter is so bright here in Florida that the light will get trapped inside your head and bounce around, causing all sorts of short circuits and misfired neurons that ends up driving you mad……heehee.
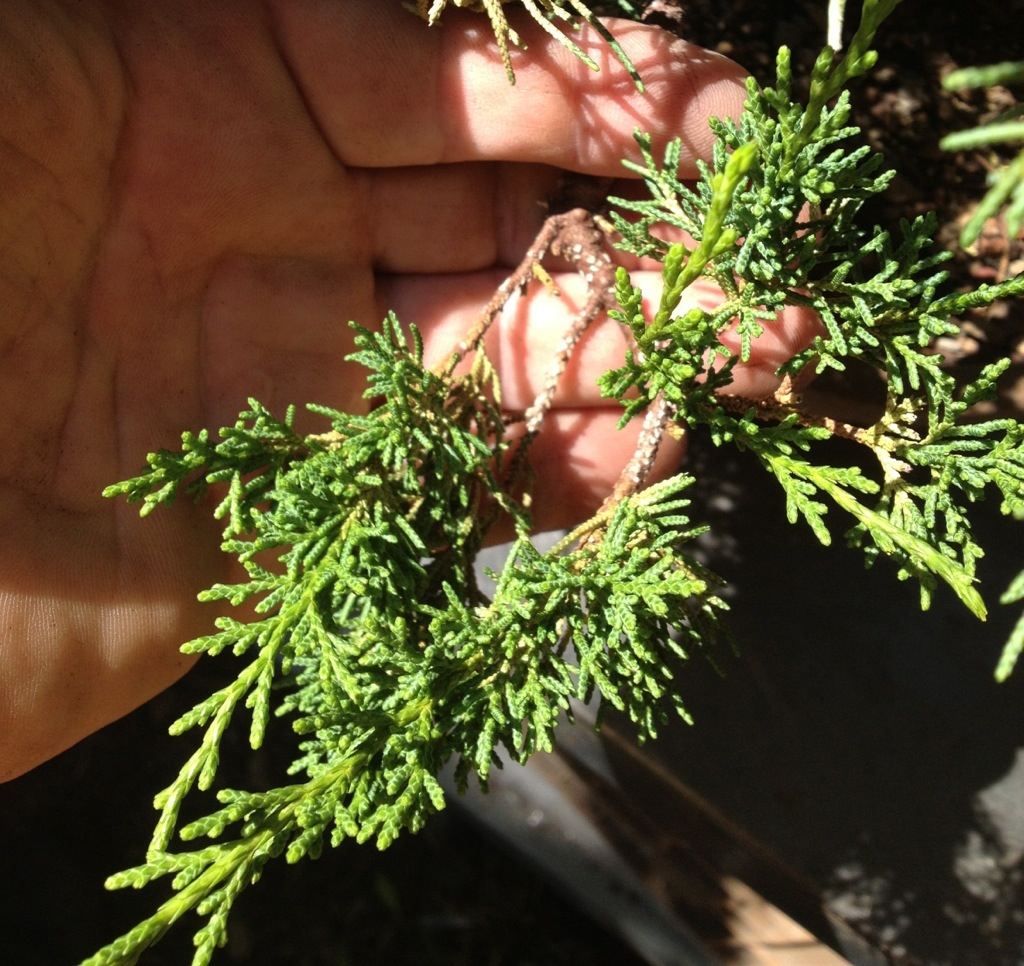
Looking at the tree I can hear all the shimpaku aficionados out there, seeing the tree and saying
“It’s dying! It’s infested! Oh no!”
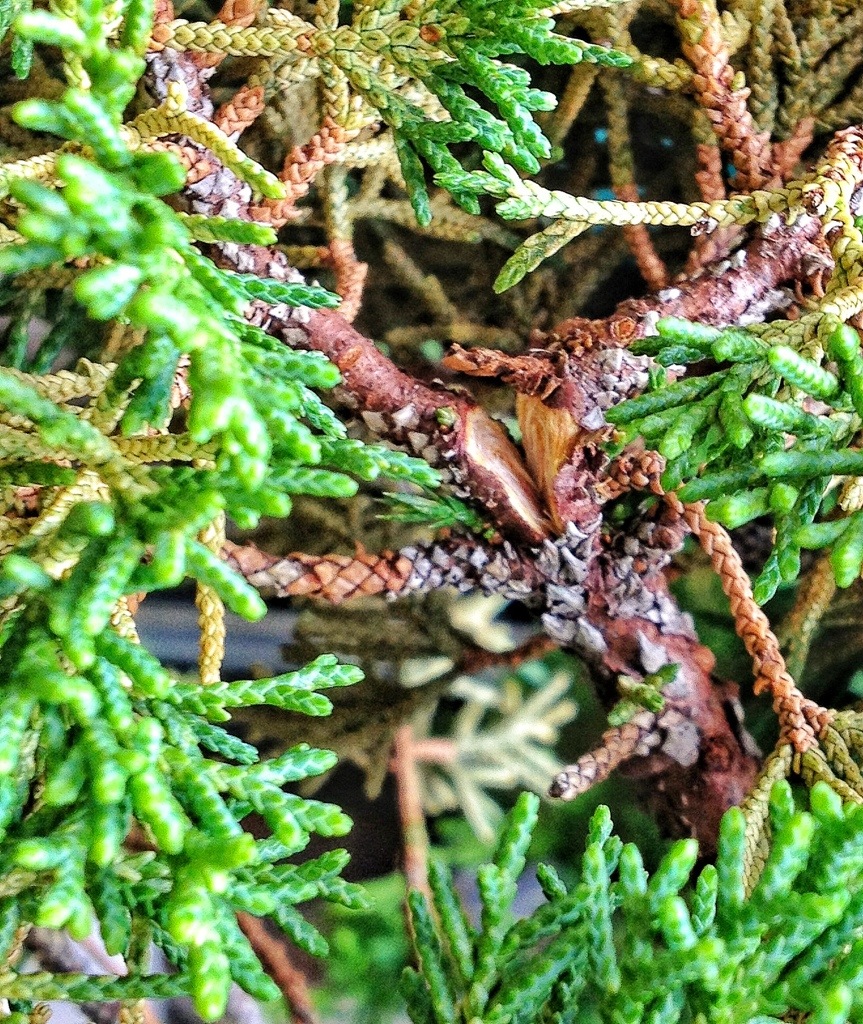
It was probably close to death but Jim did an amazing job bringing it back to life.
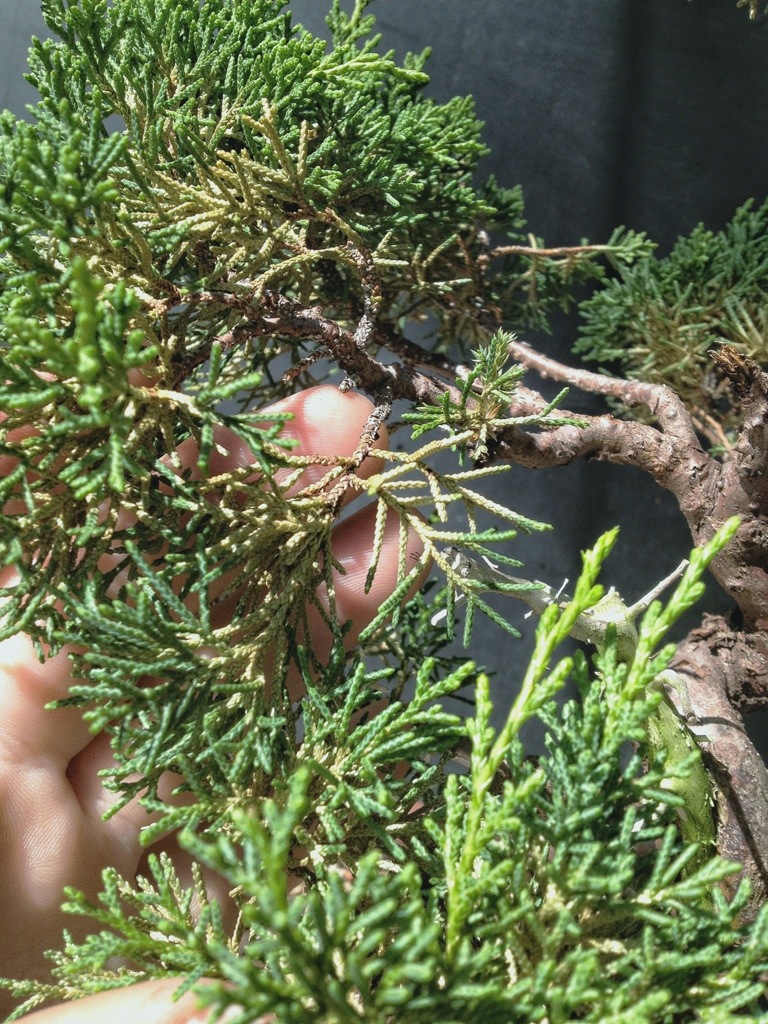
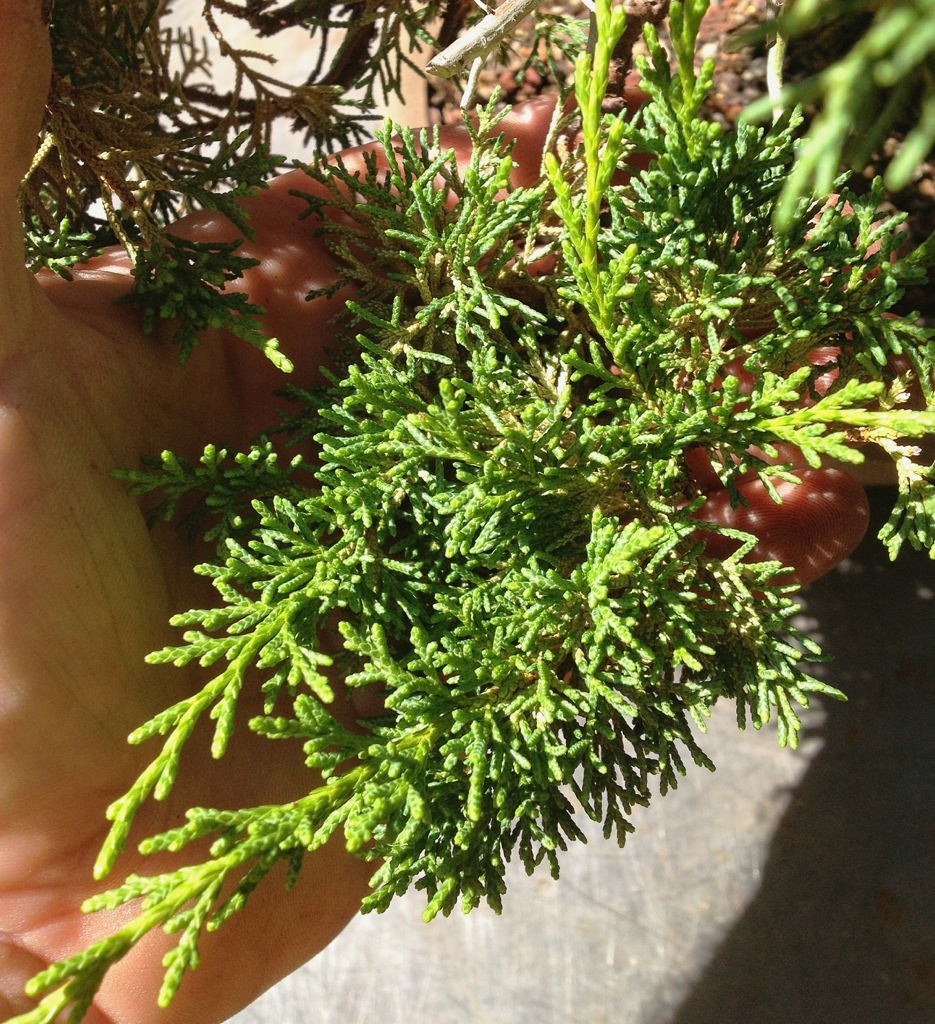
It had spider mites and that greyish/ olive drab foliage you see is one of the symptoms of it.
It’s growing really well now-

He treated it with a product that contains insecticidal soap (it basically softens the exoskeleton and causes all kinds of leaks and such) and he believed it also contained pyrethrins (which are derived from chrysanthemums, garden mums) which acts against the nervous systems of the mite, causing the neurons to fire too rapidly (they get that twitchy look) and it eventually kills them.
There are various chemical treatments specifically for spider mites that are effective as well. Be aware, they must be labeled for spider mites, insecticides do not kill them. Spider mites are arachnids.
An oil spray is effective as well as it suffocates the bastards.
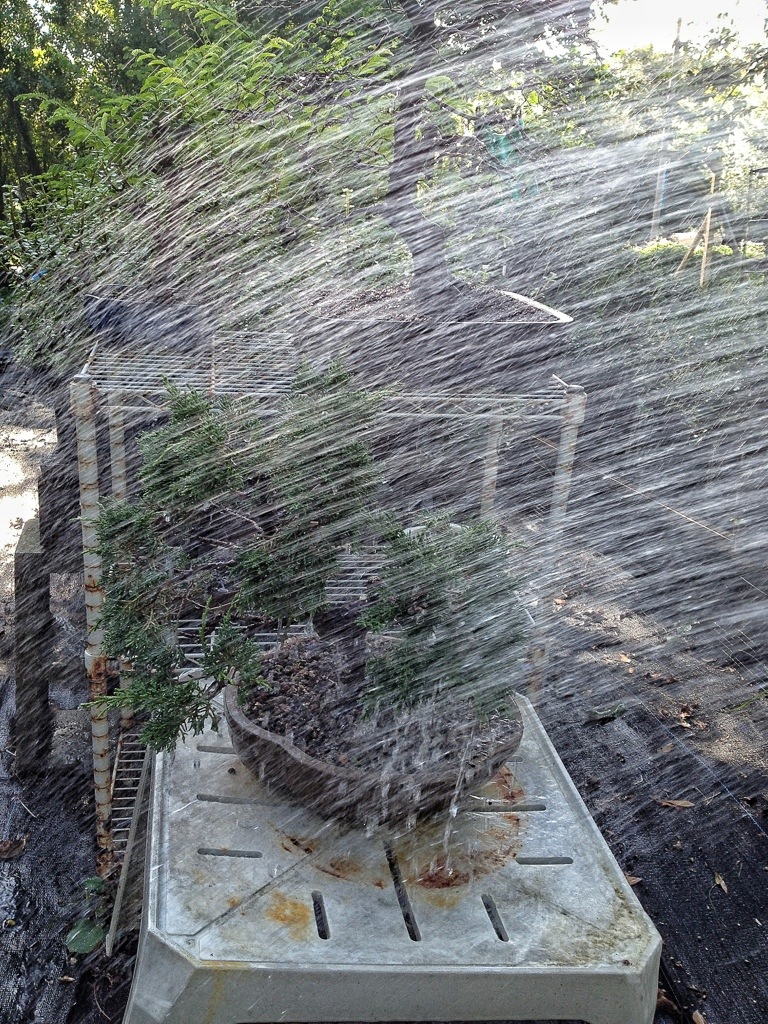
One treatment is totally chemical free: spay the foliage thoroughly with a hard blast of water.
The evil spider mite will weave a web in the hidden recesses of the foliage to protect itself from predatory mites (the good guys). By spraying the foliage with water, you are blowing off those webs and any stray mite that’s out for a snack. The advantage to this is it gives the predators a chance to get the now homeless mites and a balance will be found. The circle of life.
The indiscriminate use of oils and chemicals will kill those beneficial mites too, and it is possible that you will breed super spider mites that become immune to your chemicals (it’s hard for them to become immune to a hard blast of water) and with your good mites dead you are then screwed.
It will be like a zombie apocalypse.
I haven’t had problems with spider mites so I can’t really tell you what’s the best way you should go. I can tell you this: every third watering or so I blast the foliage of my junipers with……water.
Is it effective or just luck?
That’s all I have to say about that.
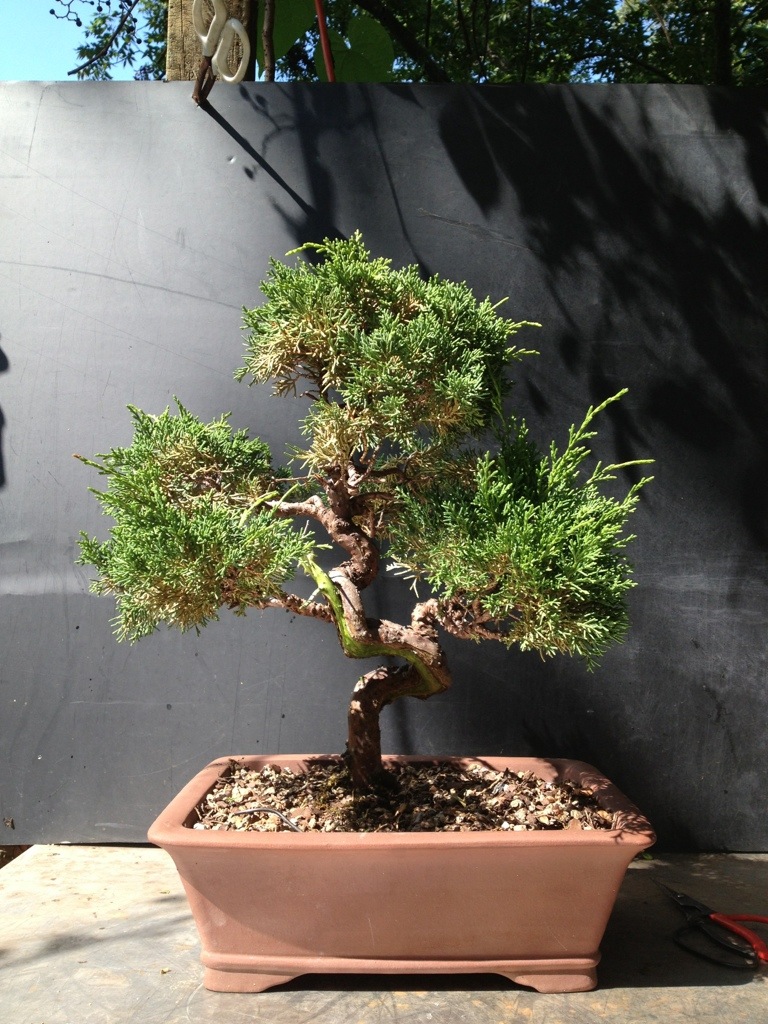
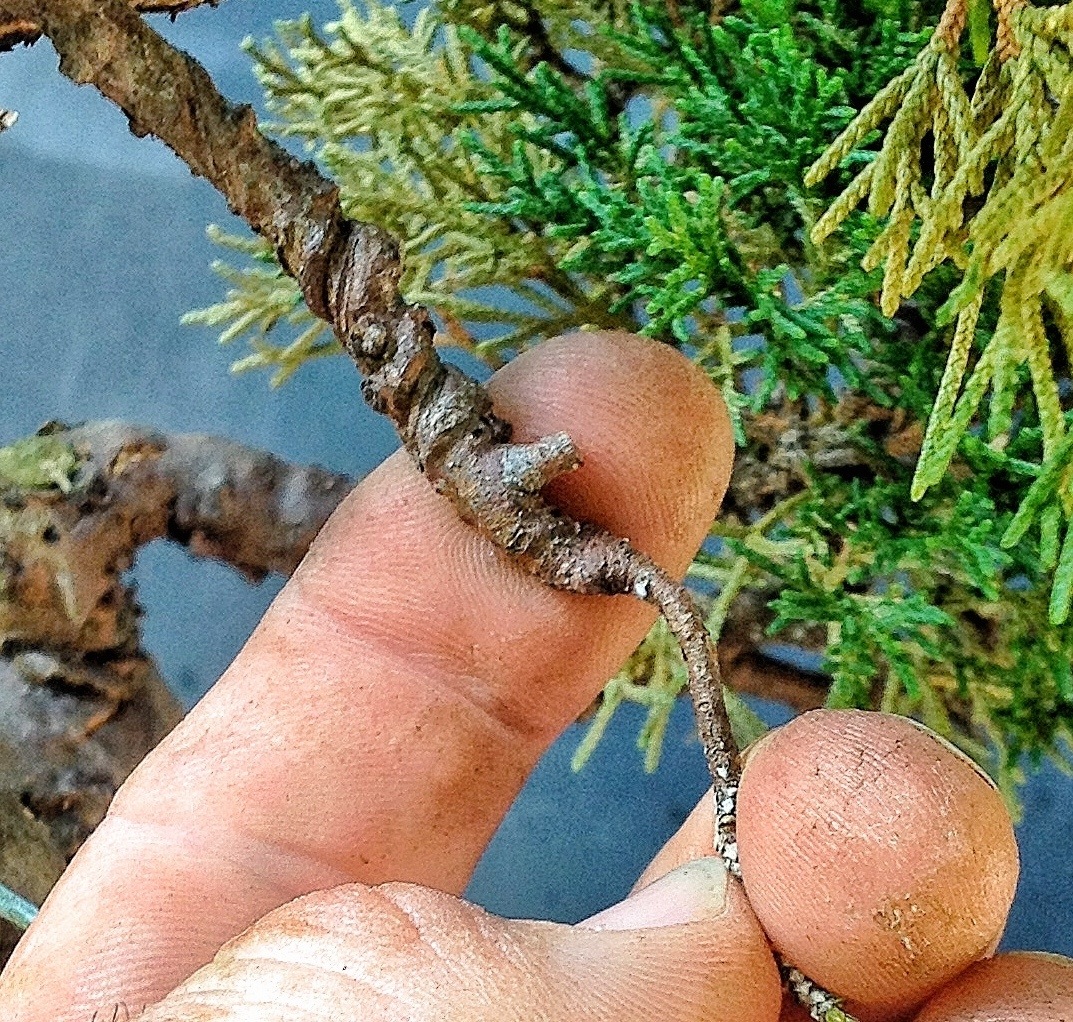
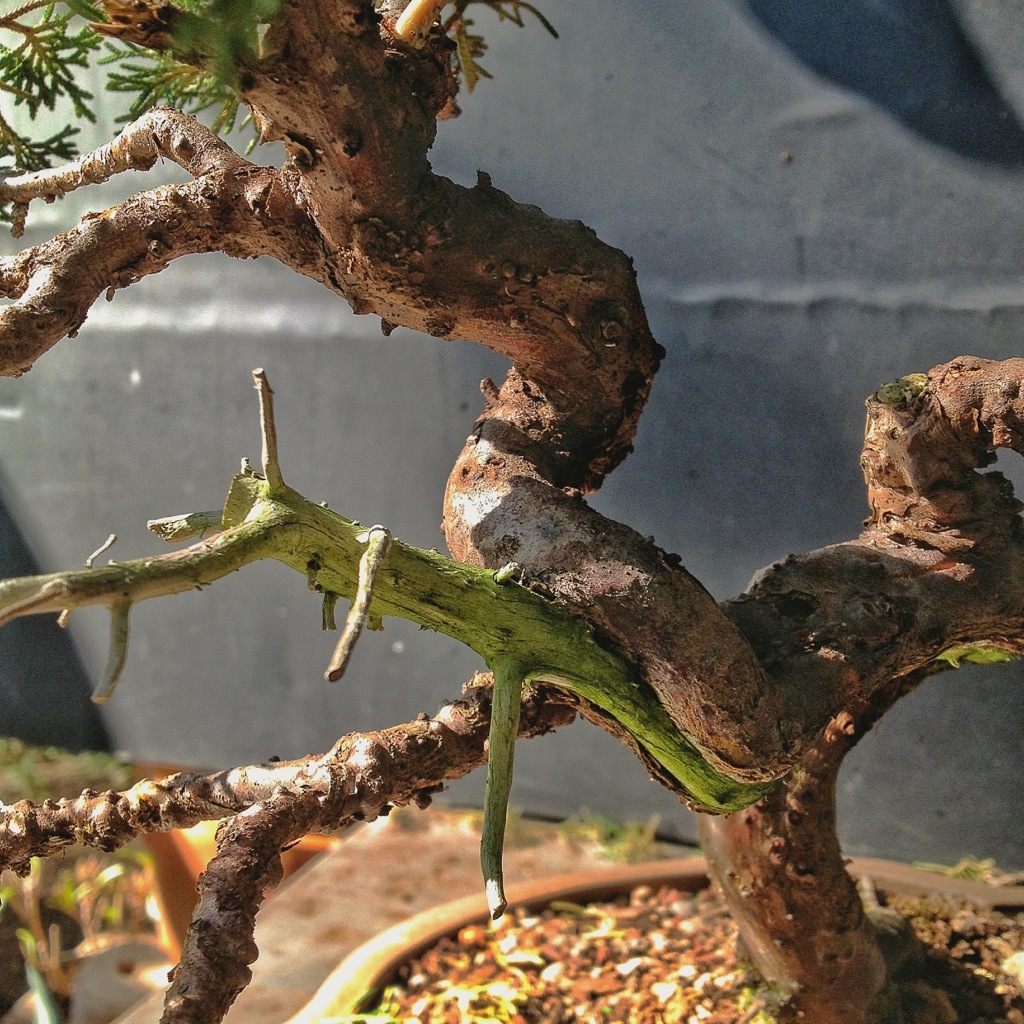
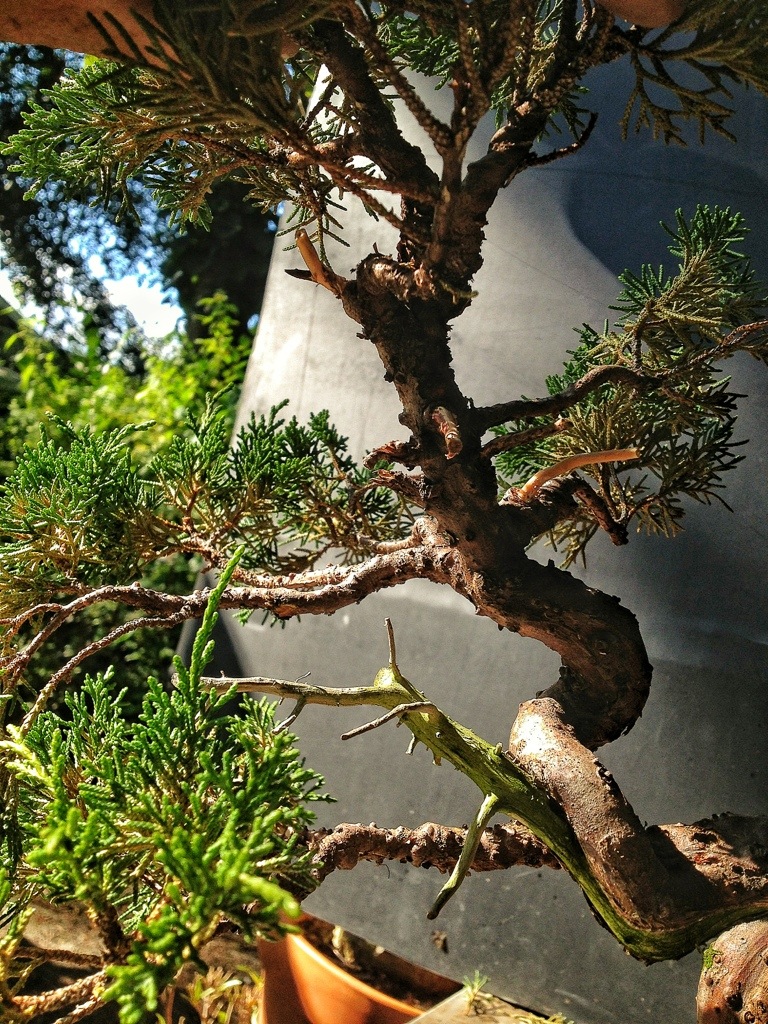
Let’s have a look at the trunk-
It has good twists and curves in three dimensions but the problem is this
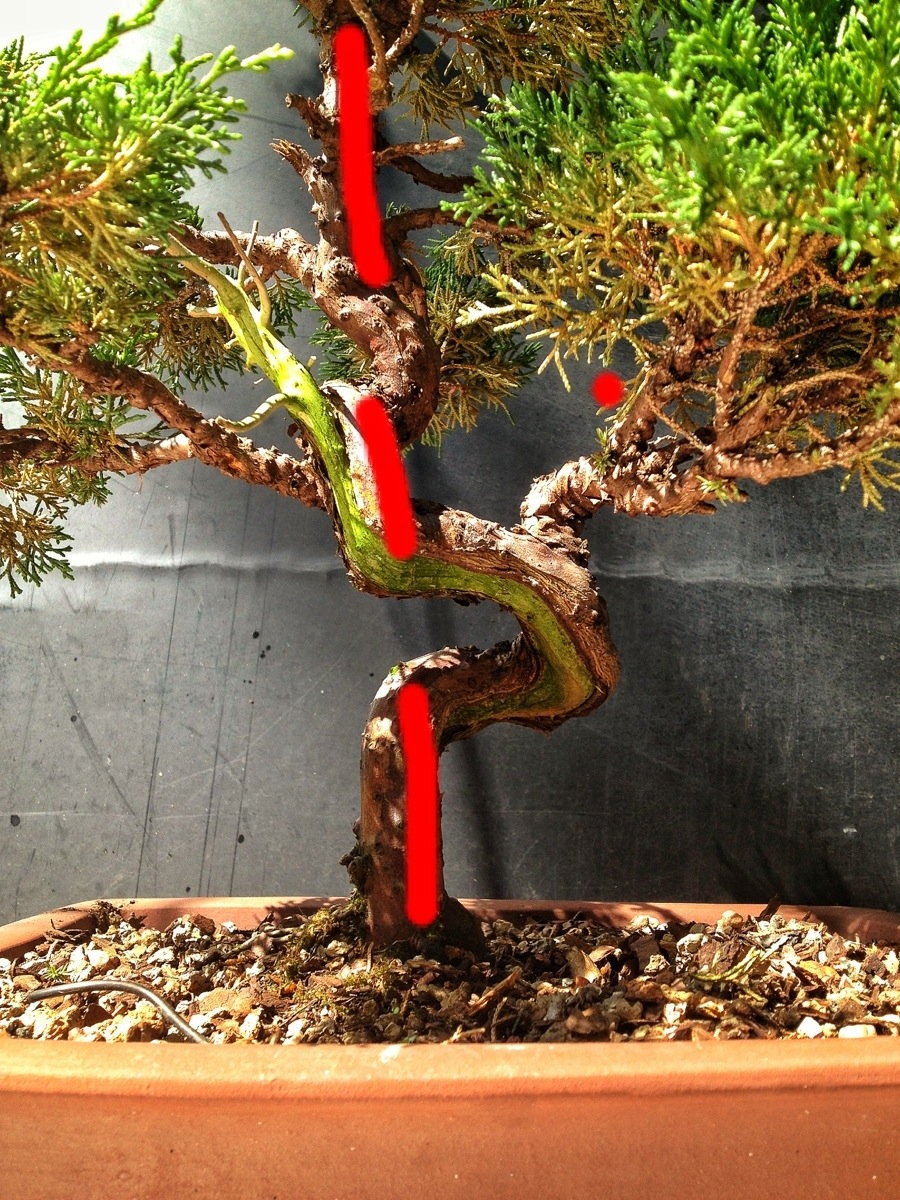
We have a straight line.
Something must be done to break that up a bit.
Lets look at the root base-

There’s a nice root present, so the flare is a little better than a normal juniper.
I find it funny that the most important feature on a bonsai is the root flare but most junipers (what most of the world thinks of when they think “bonsai”) has crappy bases. It’s all ironical and ev’ryting.
My first step in redesigning this tree will be to change the planting angle.
Kinda like this:
A look at the roots
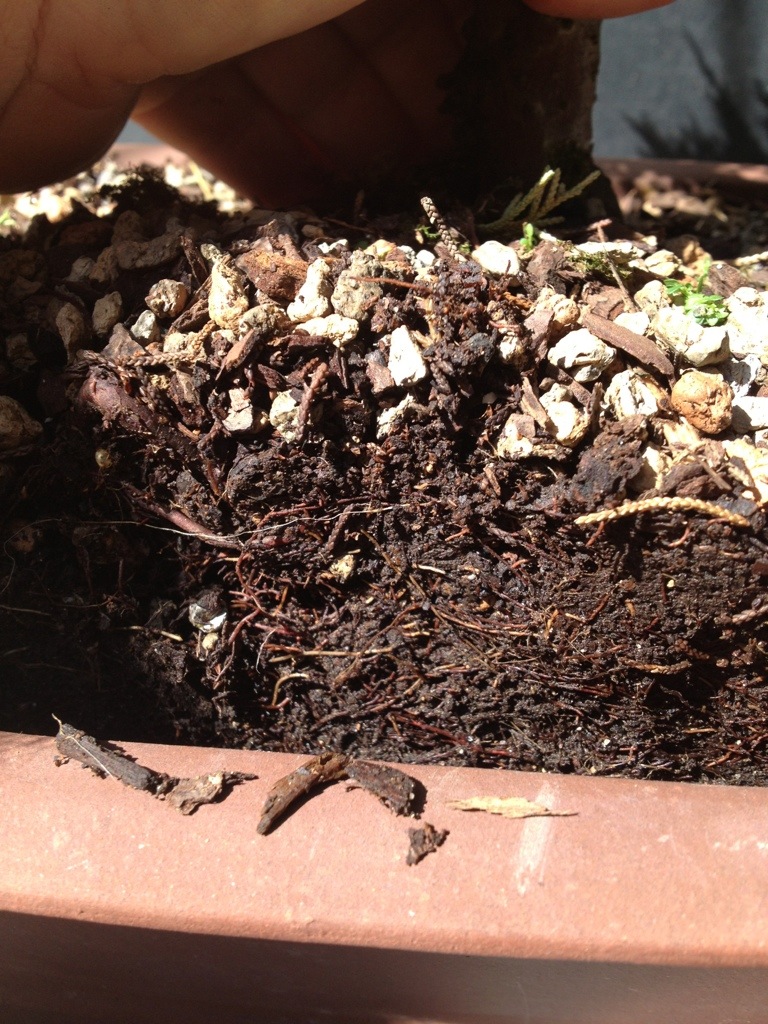
shows that they are surprisingly healthy. It also shows that the pleasing soil mix on top is mostly only on top. Sigh.
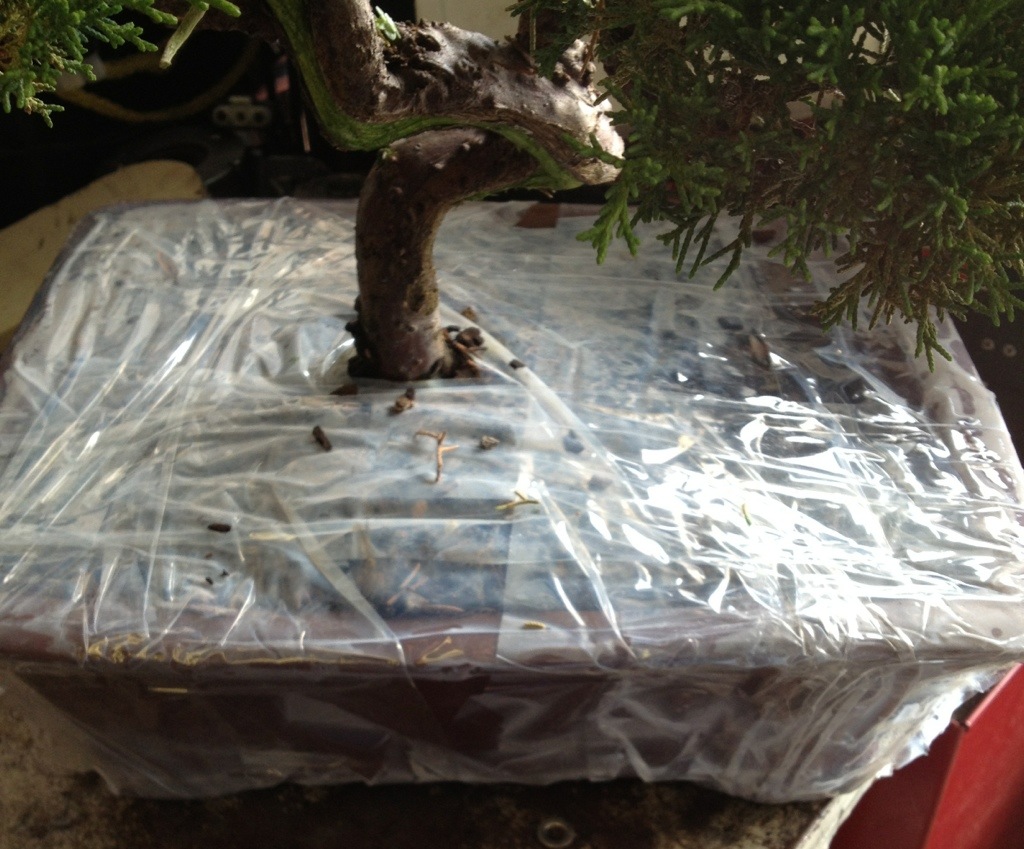
Plop!
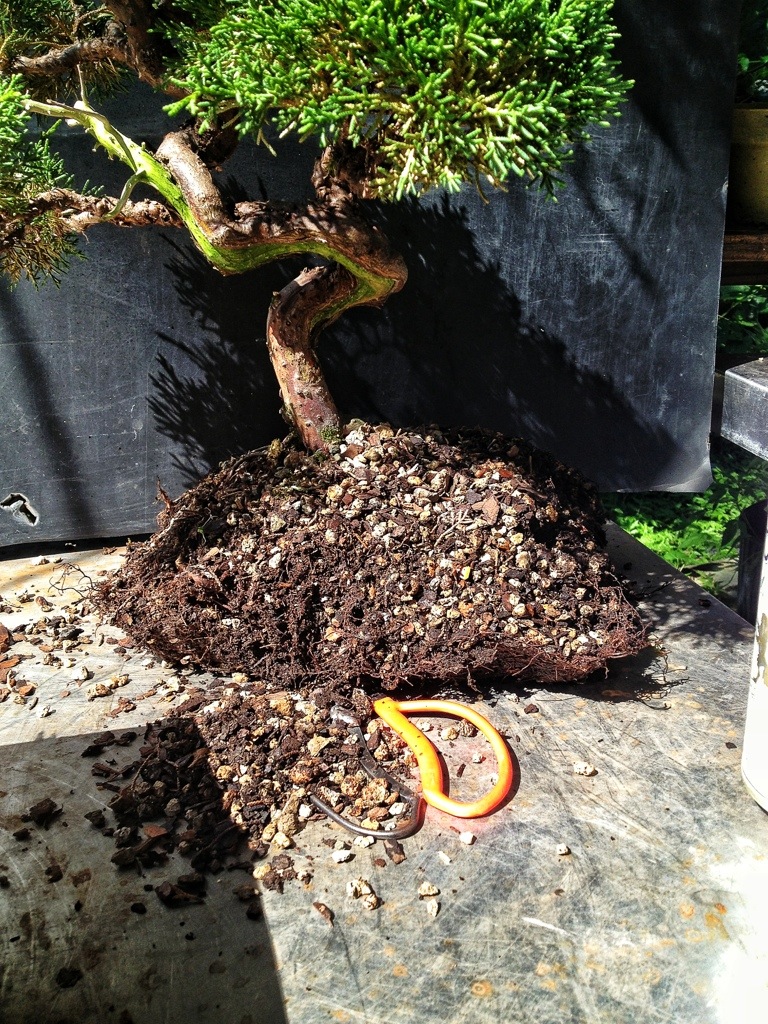
Being hot and kinda dry (even in the winter the humidity is high) I am making sure to cover the roots with a damp cloth while I am putting the tree into its new pot.
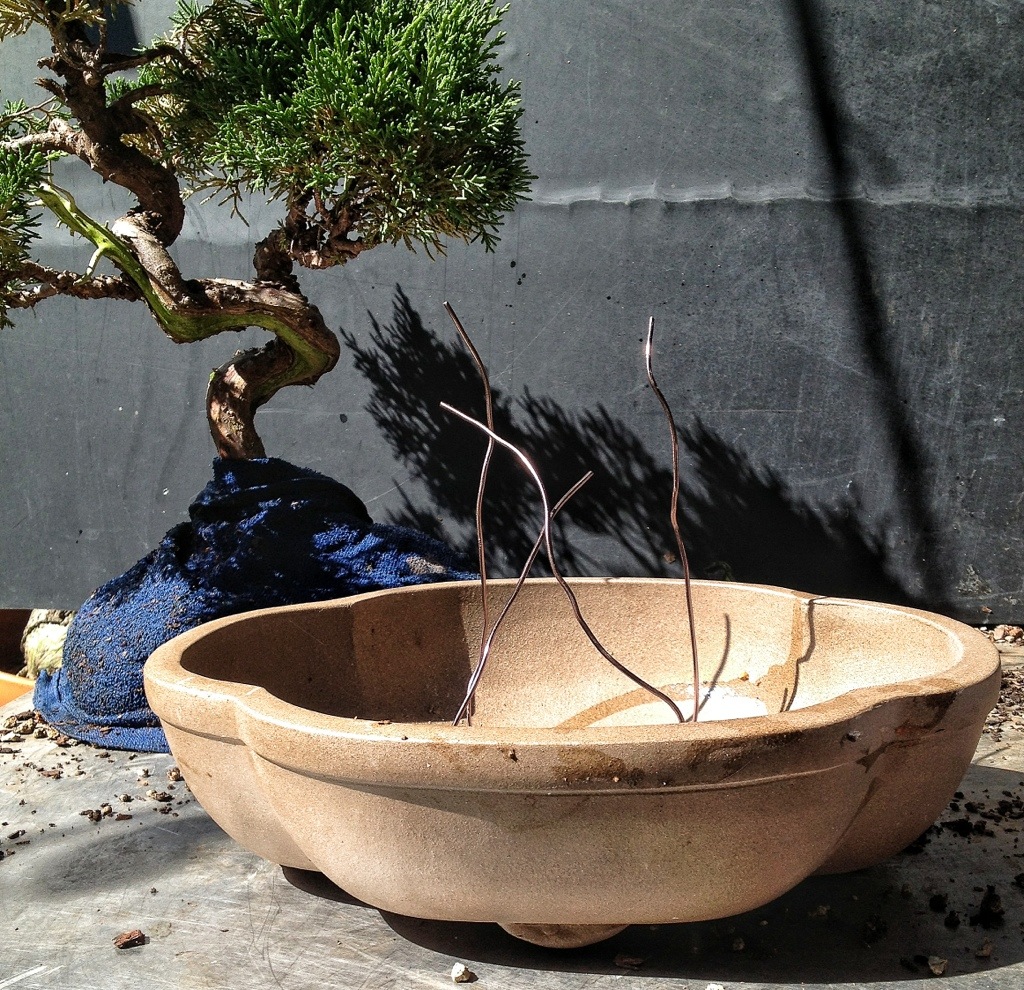
That’s the blue thing above.
The old pot doesn’t have much in the way of drainage-
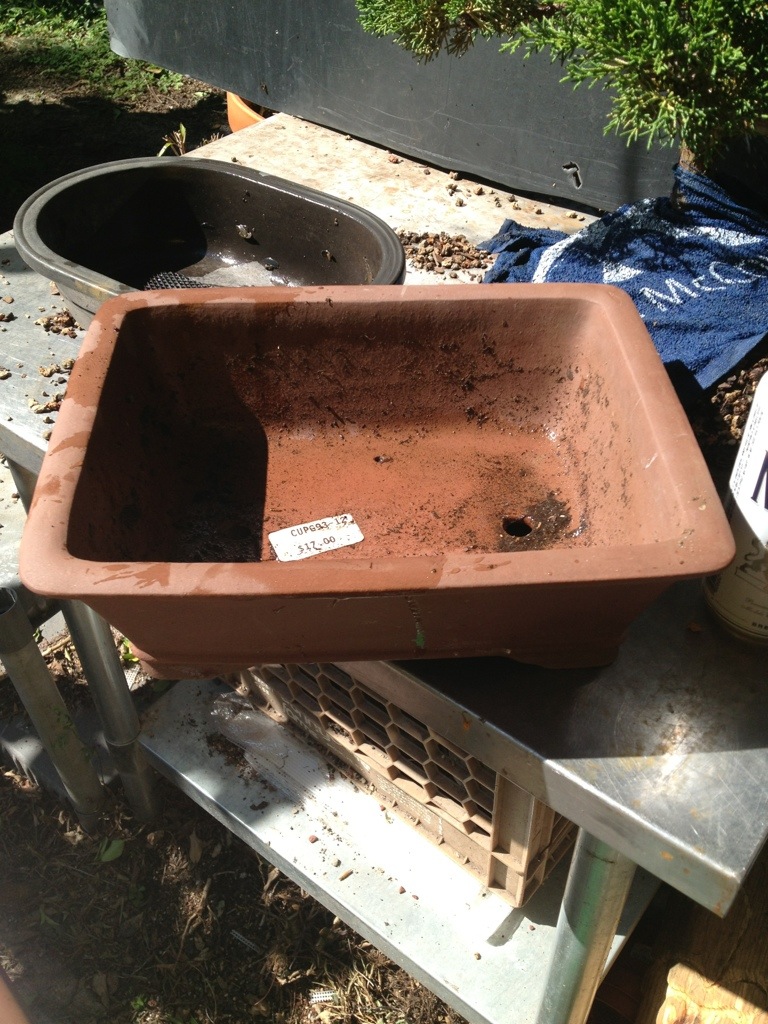
Which is one reason why I’m changing it. Plus it’s ugly (Sorry Jim. Hopefully this is the pot it came in, and not your favorite pot).
The new pots shape will complement the styling a bit more.
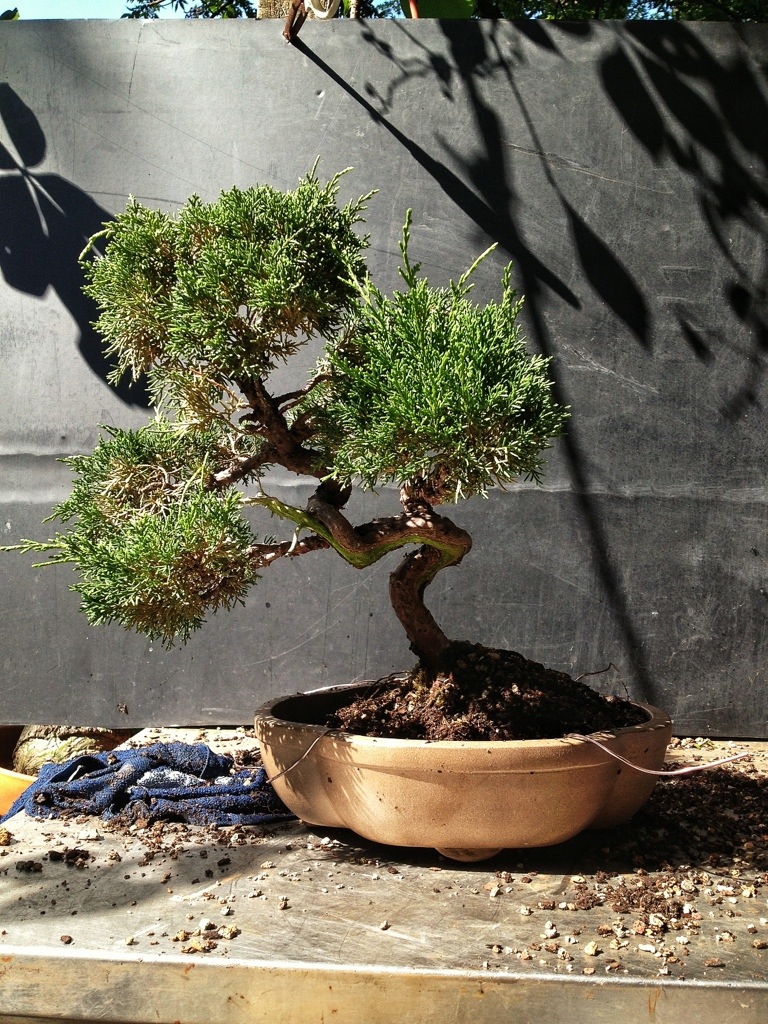
I see it in a round pot eventually.
The next step is a clean out.
What I am not doing is pinching any growing tips.
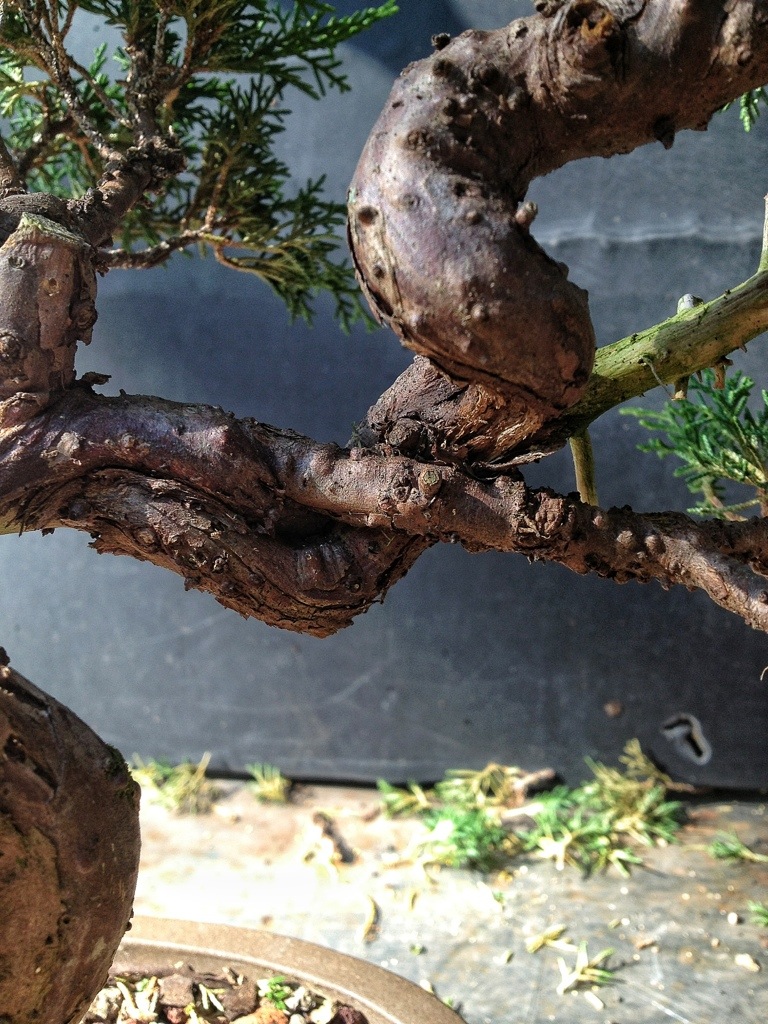
Here’s a branch
I am removing weak branches. I remove any brown, dead stuff as well as those buds growing up or down on the branch and those in the crotches too (I love that line.) and I am also taking off a lot of the spider mite damaged foliage. It won’t ever get better.
Here are two examples of weak branches.
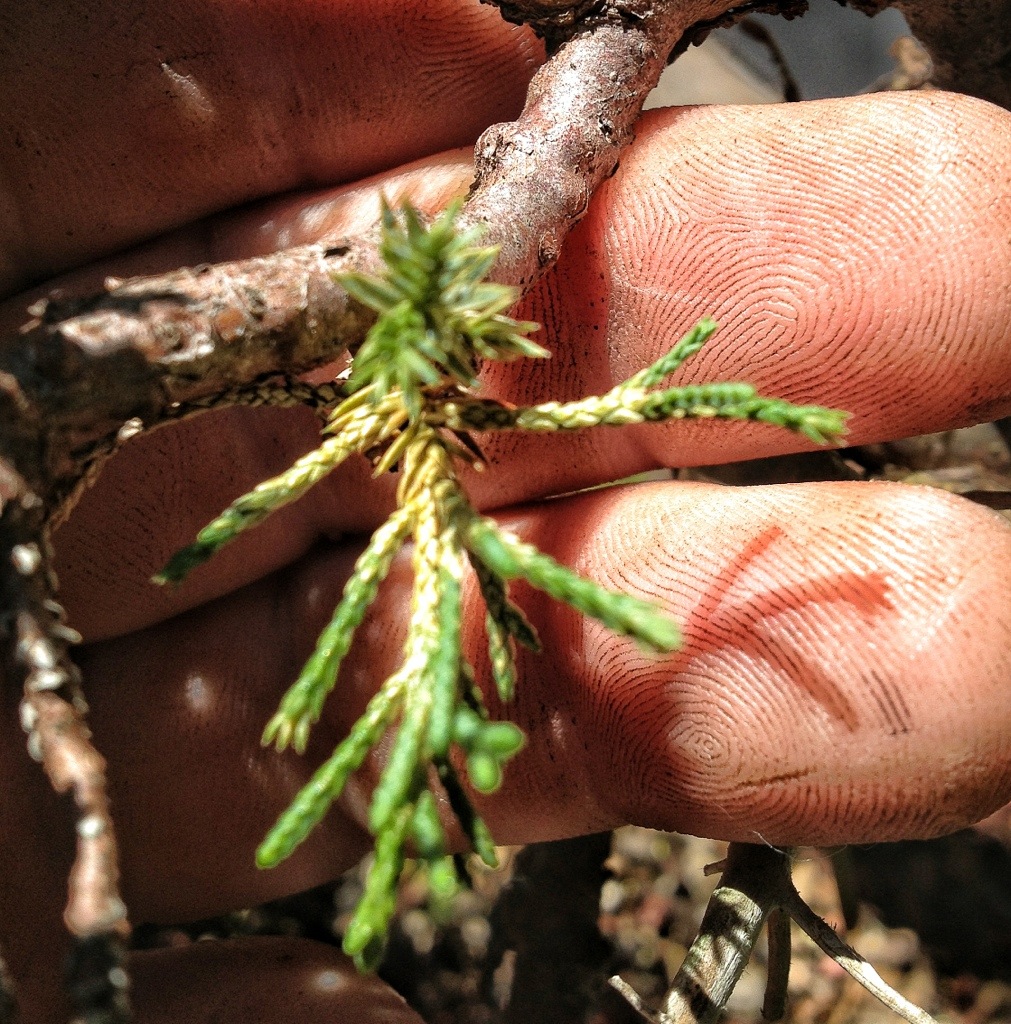

The second one looks like it was a branch that was cut back to a weak bud.
If the tree were in a three gallon nursery pot and that was the only thing growing in that area, it would strengthen and turn into a healthy branch. But in the training stage (in a bonsai pot) that branch will just exist, not doing much at all, just existing (much like my brother in law)
All thinned out.
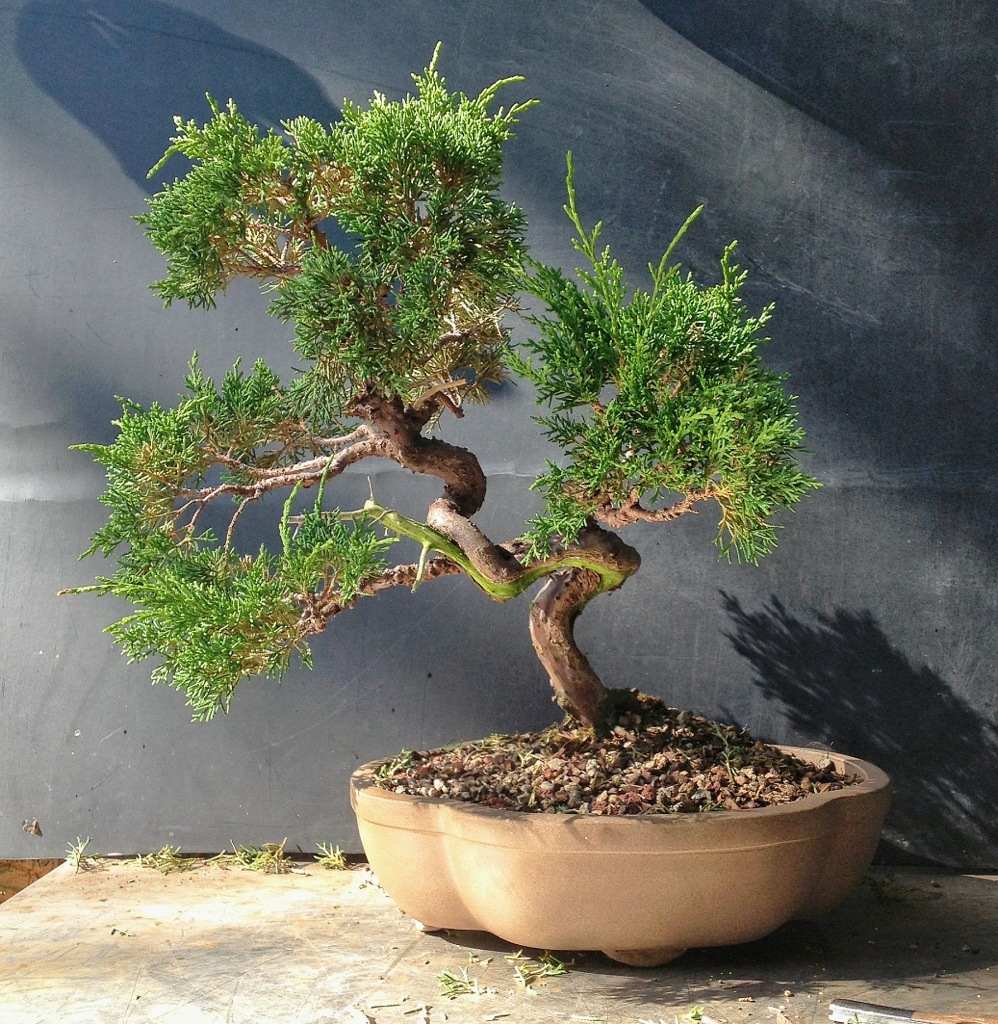
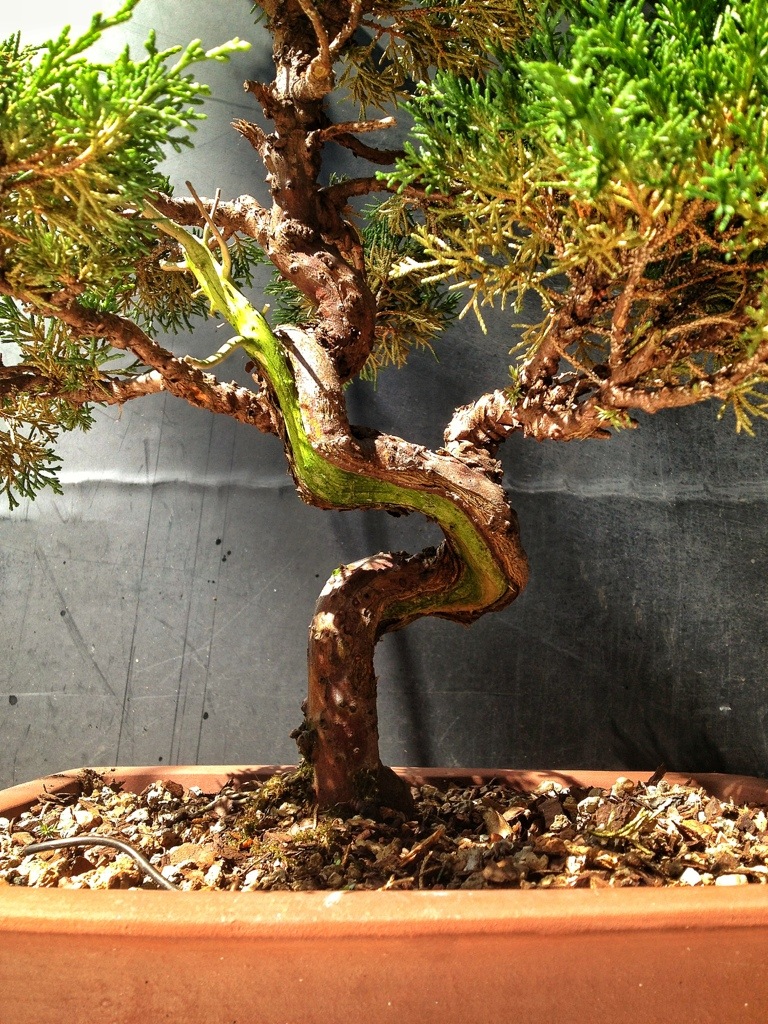
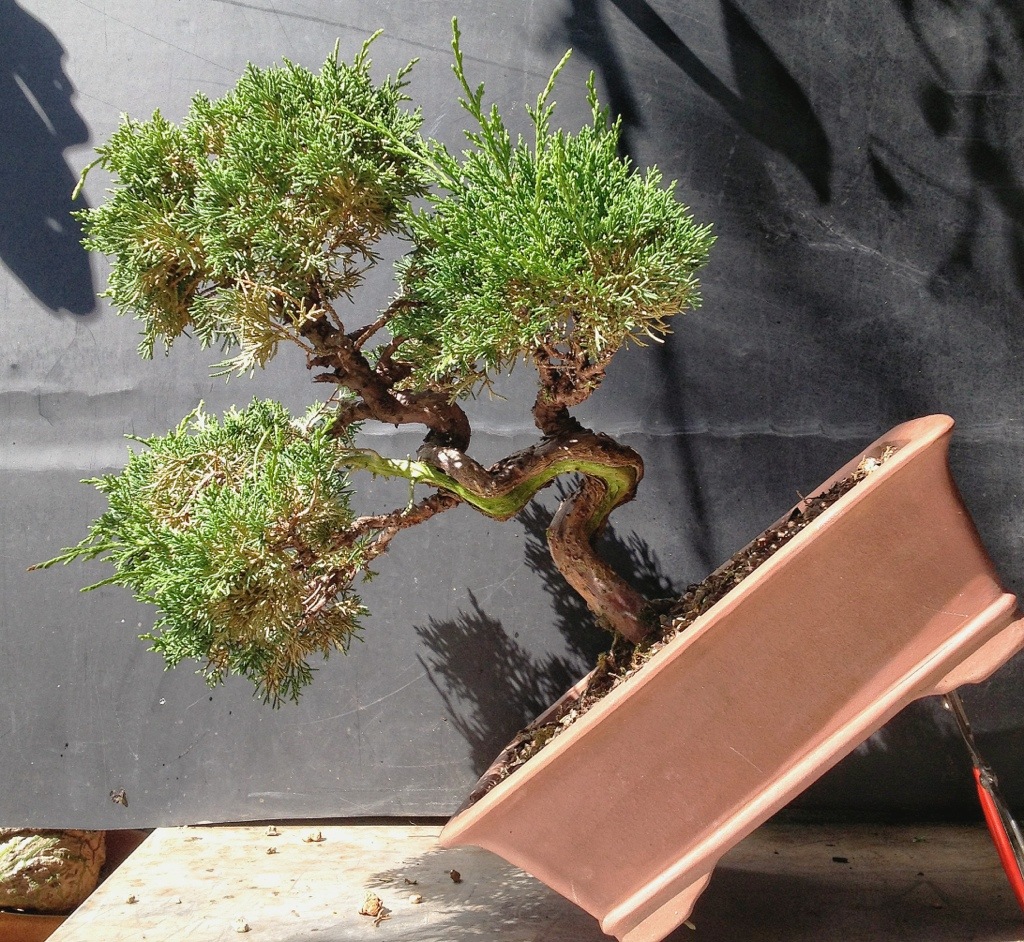
Let’s look at the trunk:
It has good dead wood, Jin and Shari.
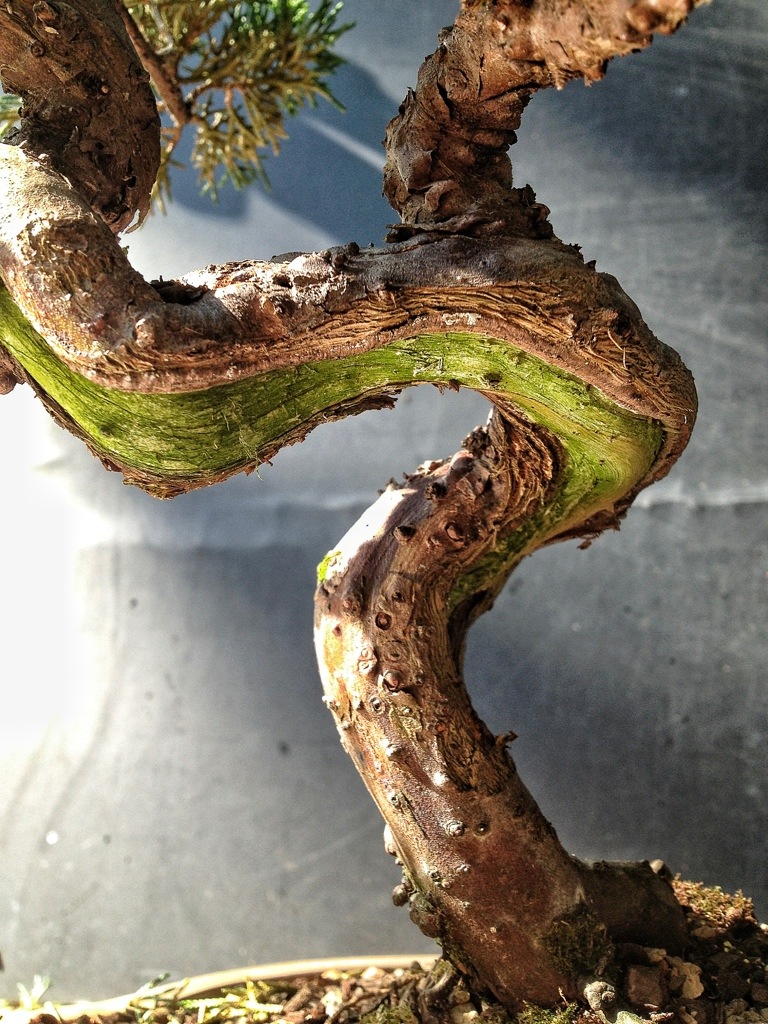
It’s a little green but that’s easily taken care of with some lime sulfur.
There are a few flaws to deal with.
The first branch’s secondary branching all grows from the top of the branch.
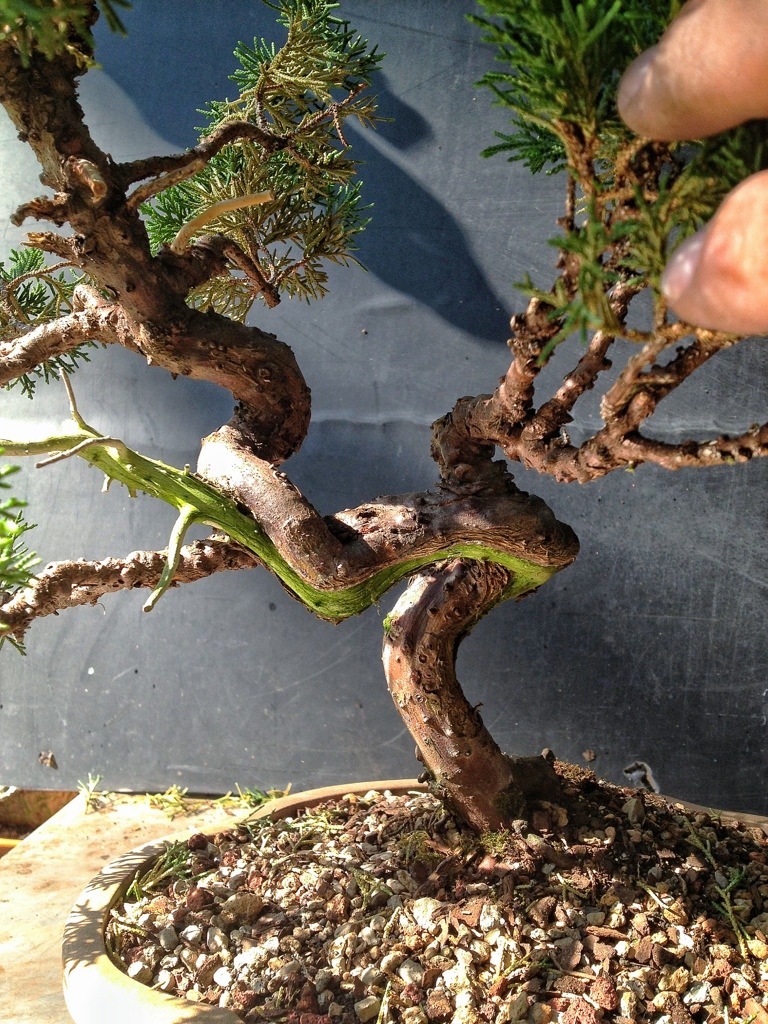
The branch on the left is coming out at a weird spot from the back.
There actually isn’t much in the way of back branches at all.
The whole tree has twists and turns and then at the top and it just goes straight.
Looks like this to me.
The top is a little weak too so my plan is to let it grow for a month or two.
I am putting it in full sun on a table that’s sitting at an angle.
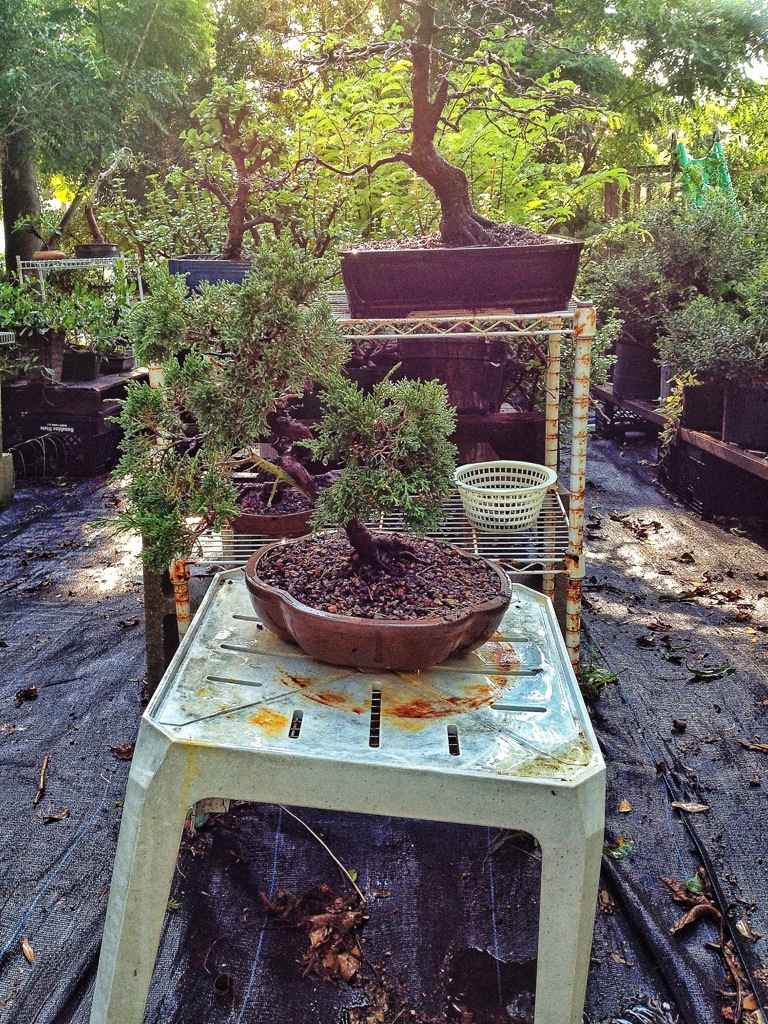
This angle will let it drain better when “monsoon come”.
If you’re a regular reader you’ll know I have some sketches for you.
Looking at the tree as it is:
I could leave all the branches-
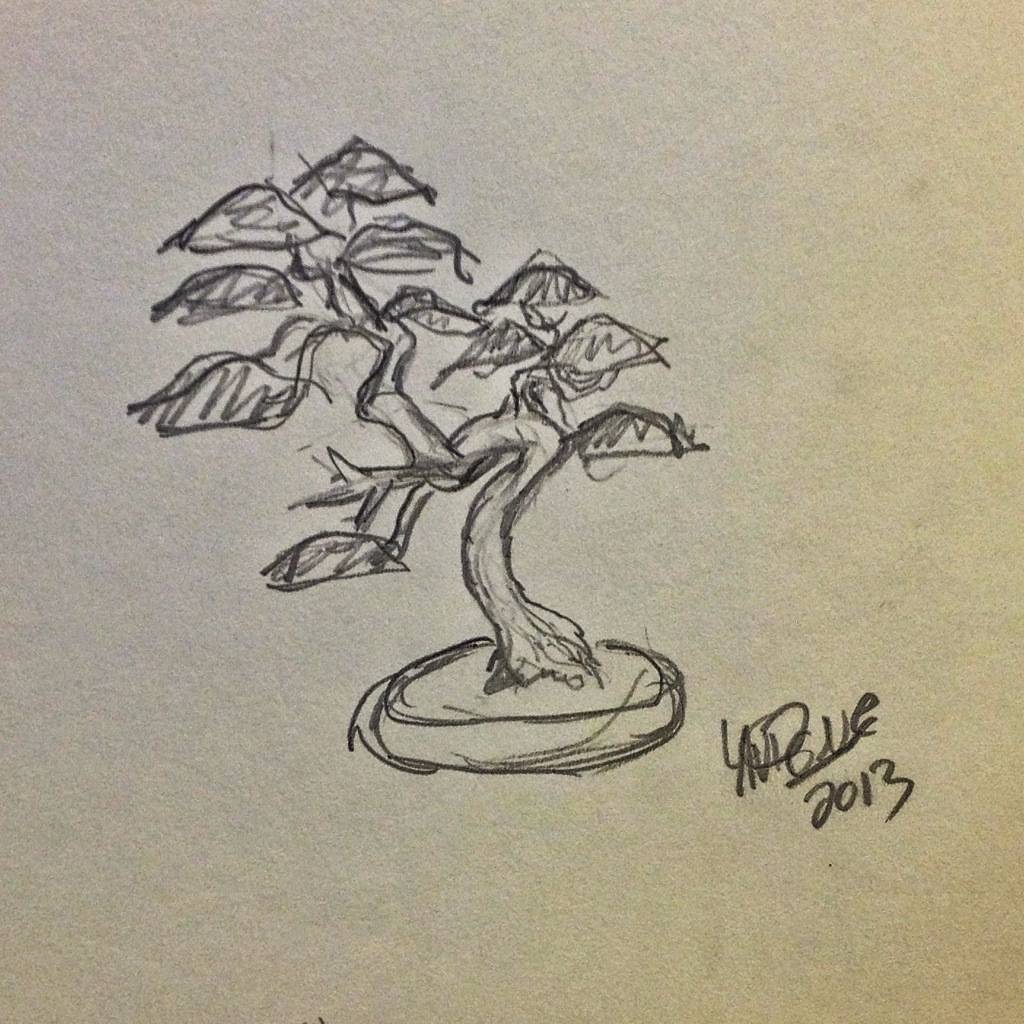
It would be traditional but also really cookie cutter-ish too.
How about if I Jin everything except the first branch?
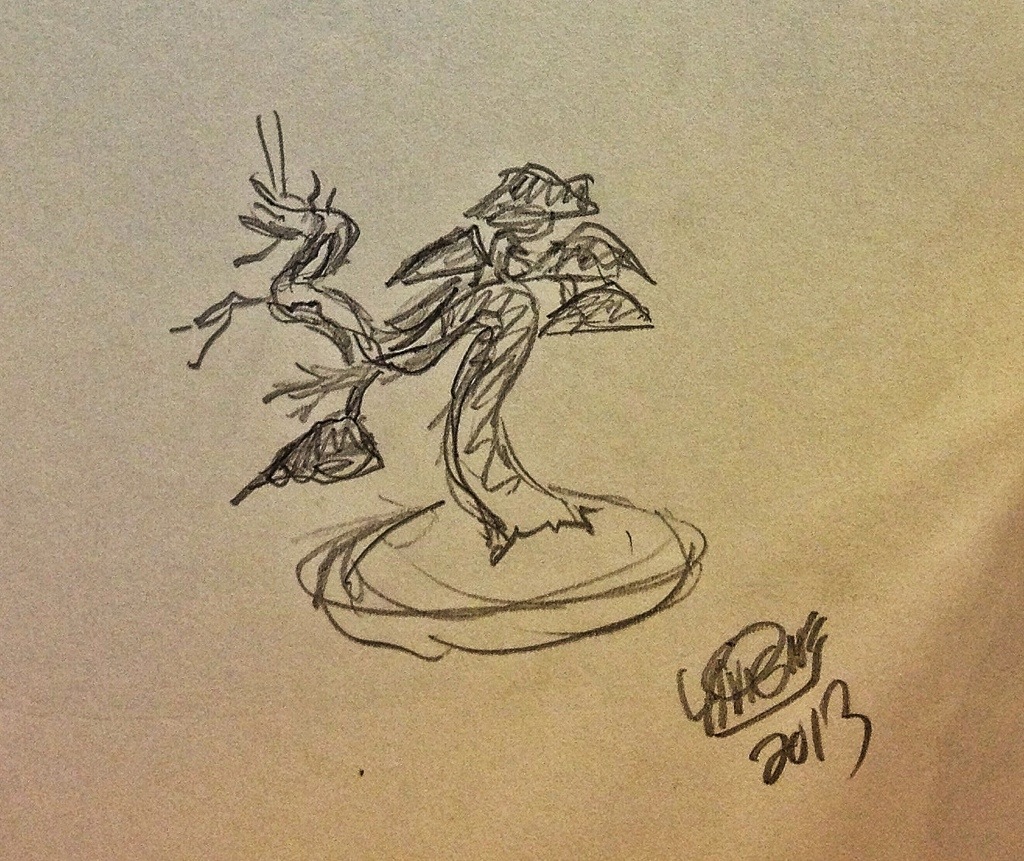
It would look a bit like I was trying to hard, I think. You have a tree with all kind of movement in the deadwood but the live part, consisting of only a curve and a mushroom top would be a bit affected.
The next idea is to Jin the first branches and leave the top
Not too bad but a little boring. Predictable.
And I’m not sure if the top growth is strong enough to pull that off.
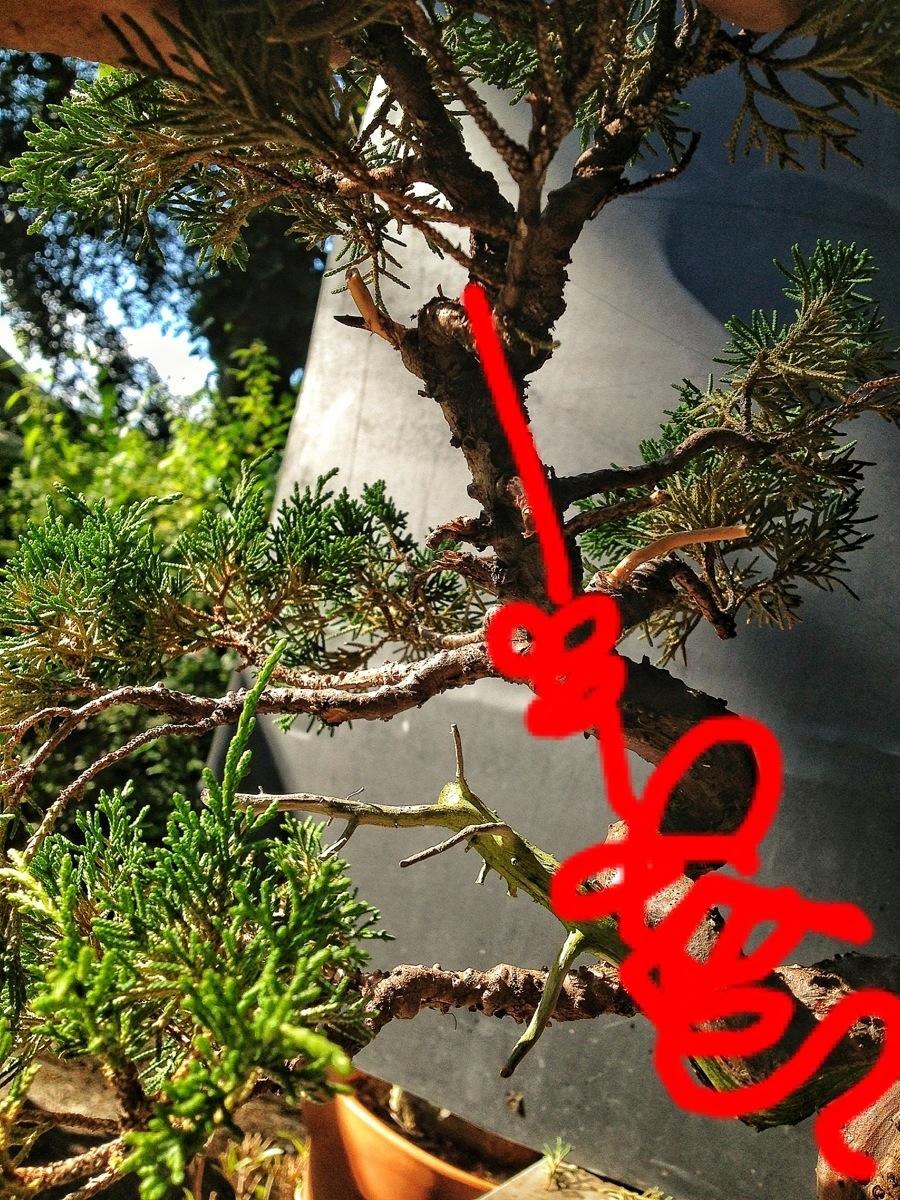
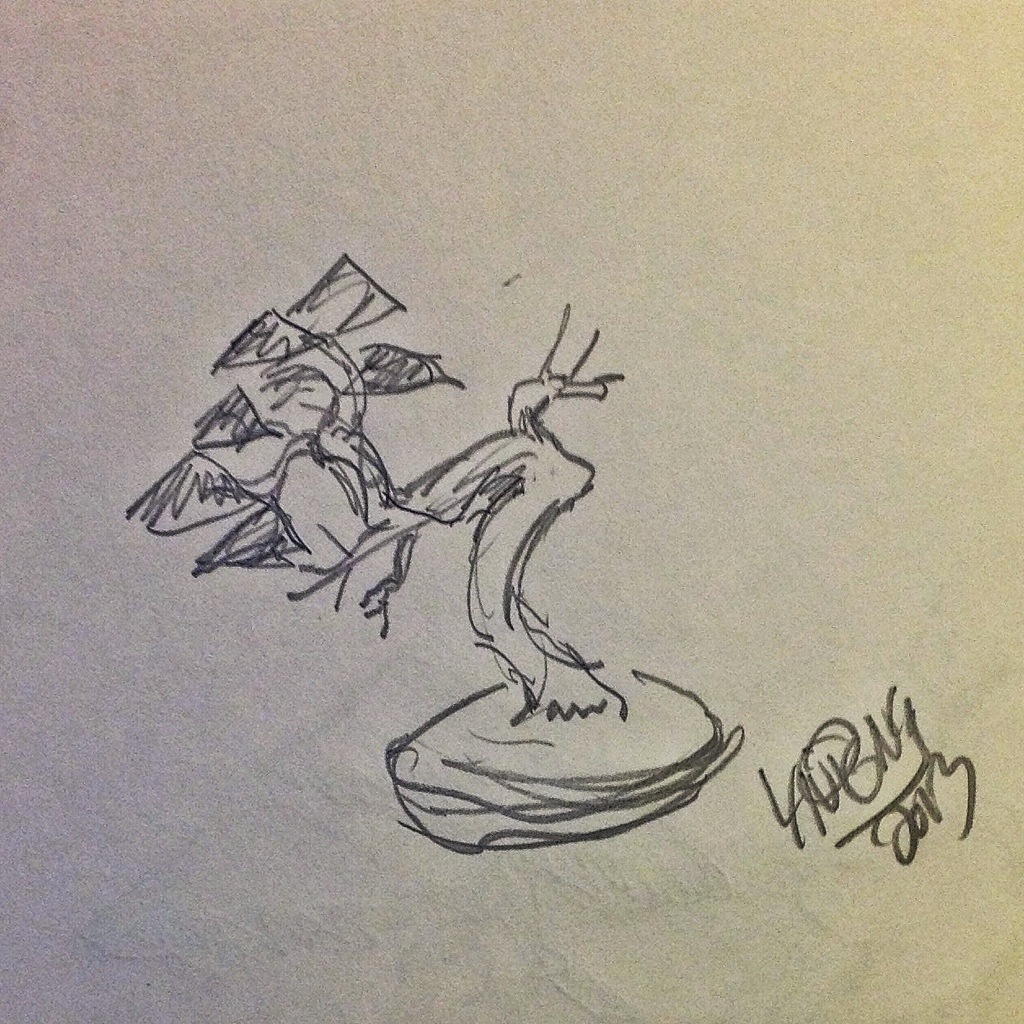
Here’s a sketch with a jinned top and bottom-
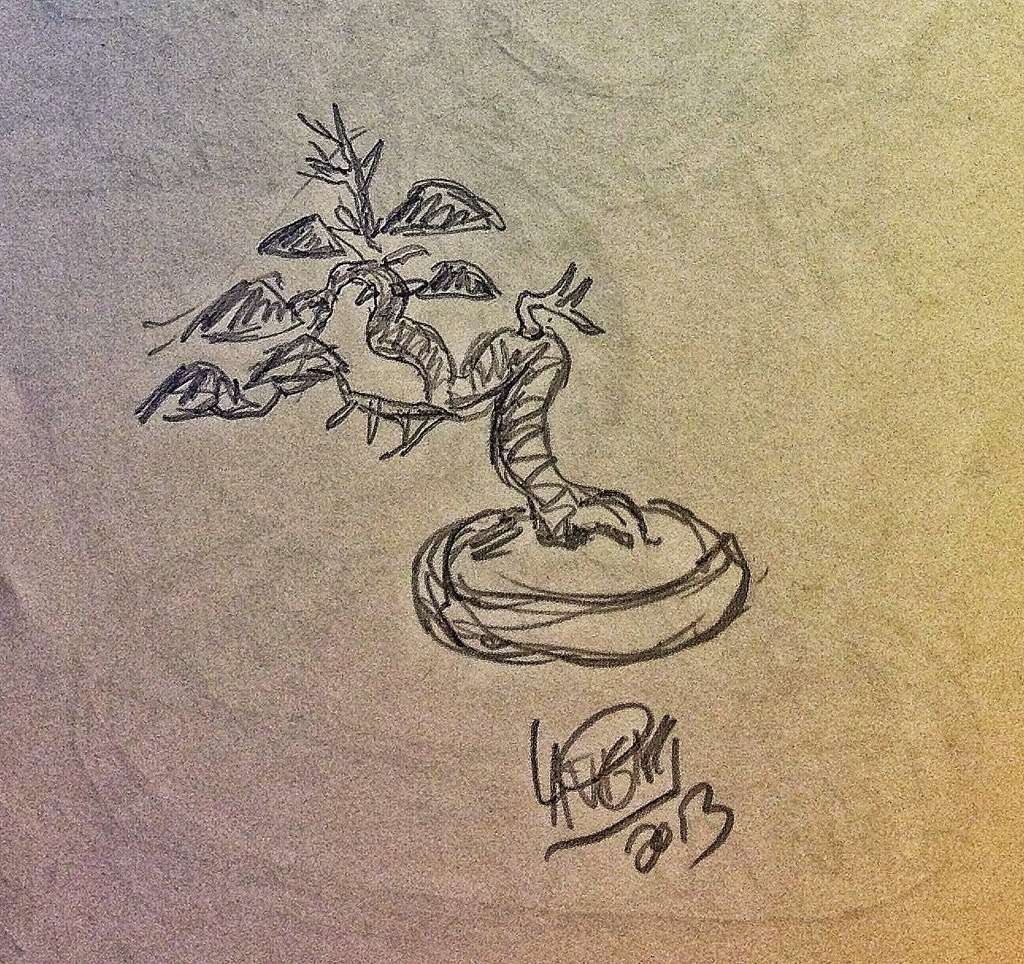
I think this will be the final look.
My job now is to watch this tree. I need to observe how fast it drains, dries out, uses water, and grows. I’ll need to watch for further spider mite attacks and be careful of fungus (among us).
And determine what it needs for the continuation of the health and the vigor.
I need to learn the tree.
I do intend to push it a little but hopefully it won’t be too much.
Hopefully by spring it will look a bit more like this:
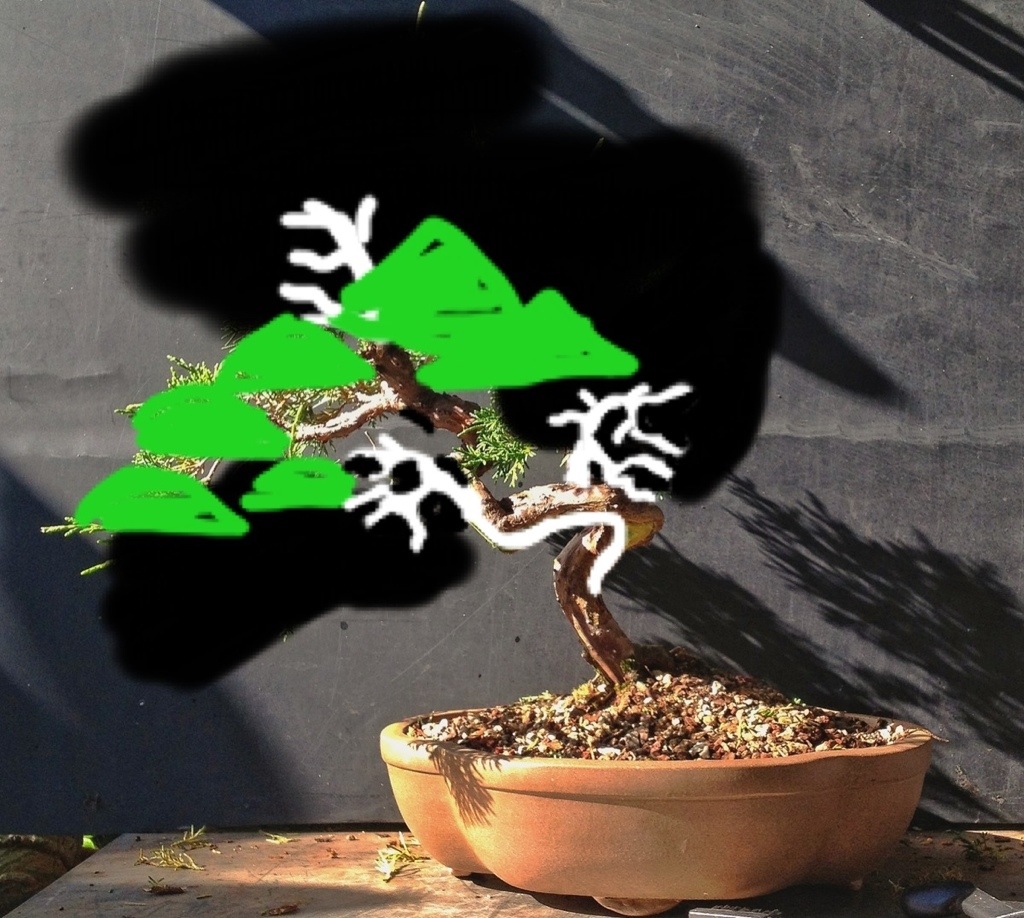
We shall see. Patience.
- Comment
- Reblog
-
Subscribe
Subscribed
Already have a WordPress.com account? Log in now.

Nice …. I’ll be watching to see how it develops. Jim said something about getting you to come over to New Orleans. Hope we get to make it happen.
LikeLike
He was thinking in the spring to work on some tropicals. I can’t wait
LikeLike
Looking at this tree I can see soo many possibilities. I guess every one can add one or more virtuals. That is why they say the artist puts it’s stamp on the art work.
Very good virtuals!
LikeLike
Hi Adam, usually after repotting, certain parts of the soil dry out faster than the others (perhaps due to uneven roots distribution). What do you do in this case? Do you water just the dried area(s) or do you water as per normal, drench the pot completely until water drains from the hole. Thanks.
Also, i’m new to shimpaku and am just wondering if it is true that the needles are soft when lacking water and more rigid when not lacking water. Can i use this means as a guide to water my shimpaku? .
LikeLike
It is tricky when going from one type of soil to another and experiencing what you describe, if a more or less moisture retentive soil is used. But the best policy is still even watering until water drains out of the bottom. The tree will respond with more growth in the drying and looser soil spots so it will get better as time goes on.
To make the wetter areas drain better, maybe using a chopstick to poke holes would help.
As far as trying to figure out when to water, it is tough with juniper. I water every other day, allowing the soil to dry out, but use a hard blast of water on the foliage every day. I’m in Florida, so it dries out in the sun.
This is a good practice, first, because the foliage takes in water, and second, it keeps spider mites away.
LikeLike