First lesson today:
Get the before pic.
Sorry.
I got carried away.
It was really just a standard prostrate growth juniper.
DOH!
The second lesson (of which some of the drama is lost because I didn’t get that before pic):
Don’t accept the planting angle that your tree is currently sitting as the way it should stay.
Tilt the tree, man (or woman, or child…)
That said, um…ta-da?!
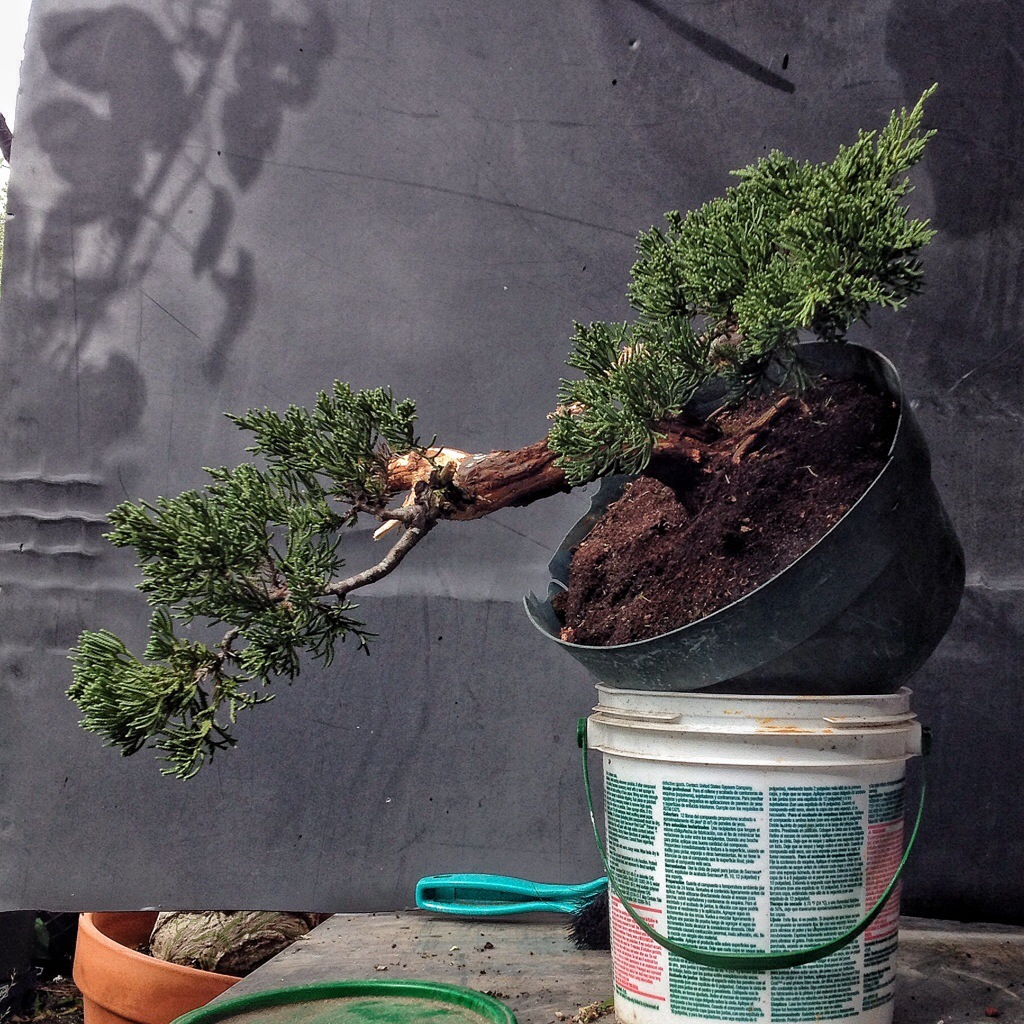
Sooooo….that’s a pretty harsh angle change. I’d say about 45 degrees, right?
The angle is what was needed to make some drama.
Let’s proceed then.
I’ve killed off and removed the bark from two back branches and did a crude carving on them-

And now what’s left is just some wiring.
A couple of establishing shots:


Some cleaning out and some wire:

I prefer to use aluminum wire; mostly because I like the fact that I can reposition the branch after I’ve moved it (which you don’t want to really do too much, but it’s always good to have the option) and it’s cheaper and reusable. The way I wire is to use larger gauge on the big branches, position those, and then wire the secondary branches.
The before:

The after:
>
The secondaries wired and placed

Another view:

And now the cascade (or semi-cascade- for the style nazis out there).
Before:

And after:

All together.

I see the tree in an amorphous container, not too shallow but not a full cascade pot either.
The sketch-

I like the idea of using a non traditional stand with this tree. Maybe I’ll start making them.
Something like this:

That’s my one indoor bonsai by the way, a glass Japanese cherry.
Finito!
A short, quick post for you.
I’ll repot (and report) in January on the tree (for the curios, it’s probably a parsonii juniper but it’s very healthy so the foliage is super green and it had almost no juvenile foliage on it.)

Next post will be on my demo tree at the Bonsai Society of Brevard’s annual show.
See ya’ in the funny books!
- Comment
- Reblog
-
Subscribe
Subscribed
Already have a WordPress.com account? Log in now.

Still got this one, Adam? How about an update?
LikeLike