TAMARINDO! 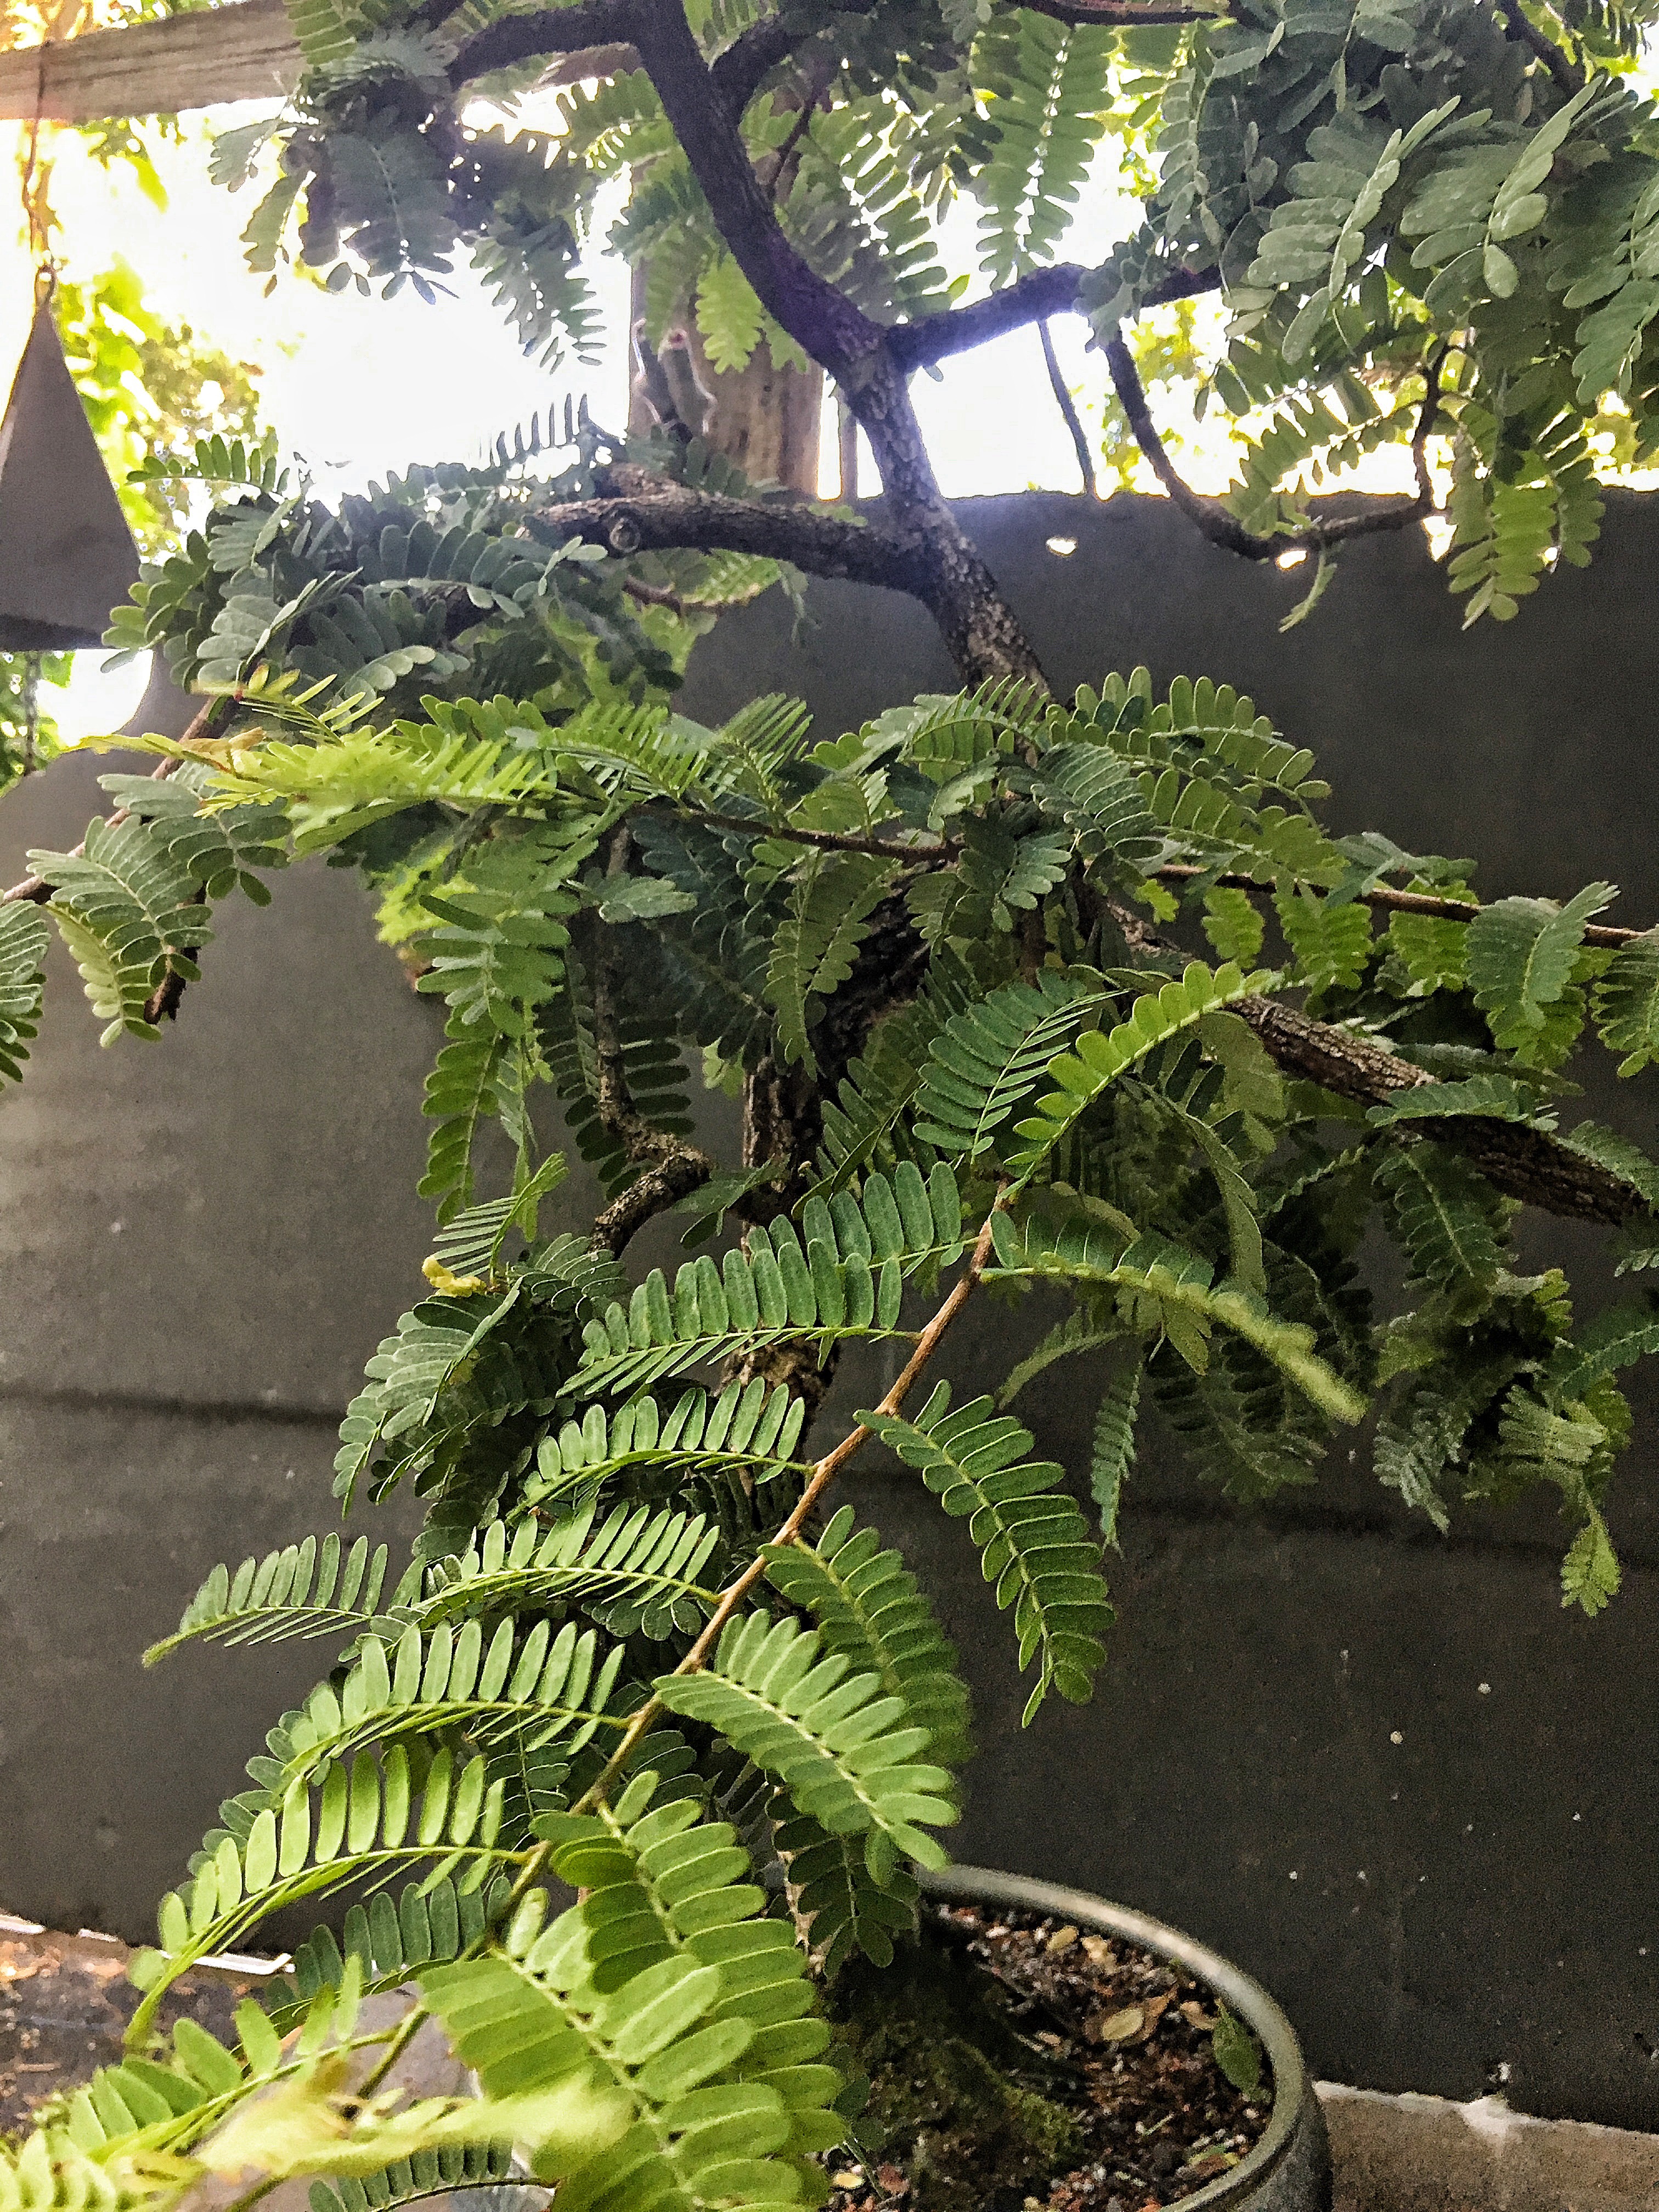
That’s what they call it in Latin America at least. In old world Latin, it’s tamarindus indica. The name comes from Arabic: Tamar Hindi, which is Indian date. It was changed (probably because British don’t pronounce the letter “h”) to “Tamar ‘indi” which gives you “tamarindi” (for Latin words you add the “us” ending, like fic-us or maxim-us) so that’s why it’s “tamarindus”. With Spanish, the endings are usually an a or an o, like loca, or loco (crazy with a male or female ending) tamarindo. In English we don’t like words with a vowel ending so the “I” or the “o” is dropped (I guess it comes from Germanic gutteral endings. Spoken English is hardly ever called pretty or song-like, except for those with Irish accents, and they tend to add a vowel sound on the end of word in their speech patterns). So I call it “tamarind”. Weird how words morph from language to language.
Anyway, like me, this one needs help. 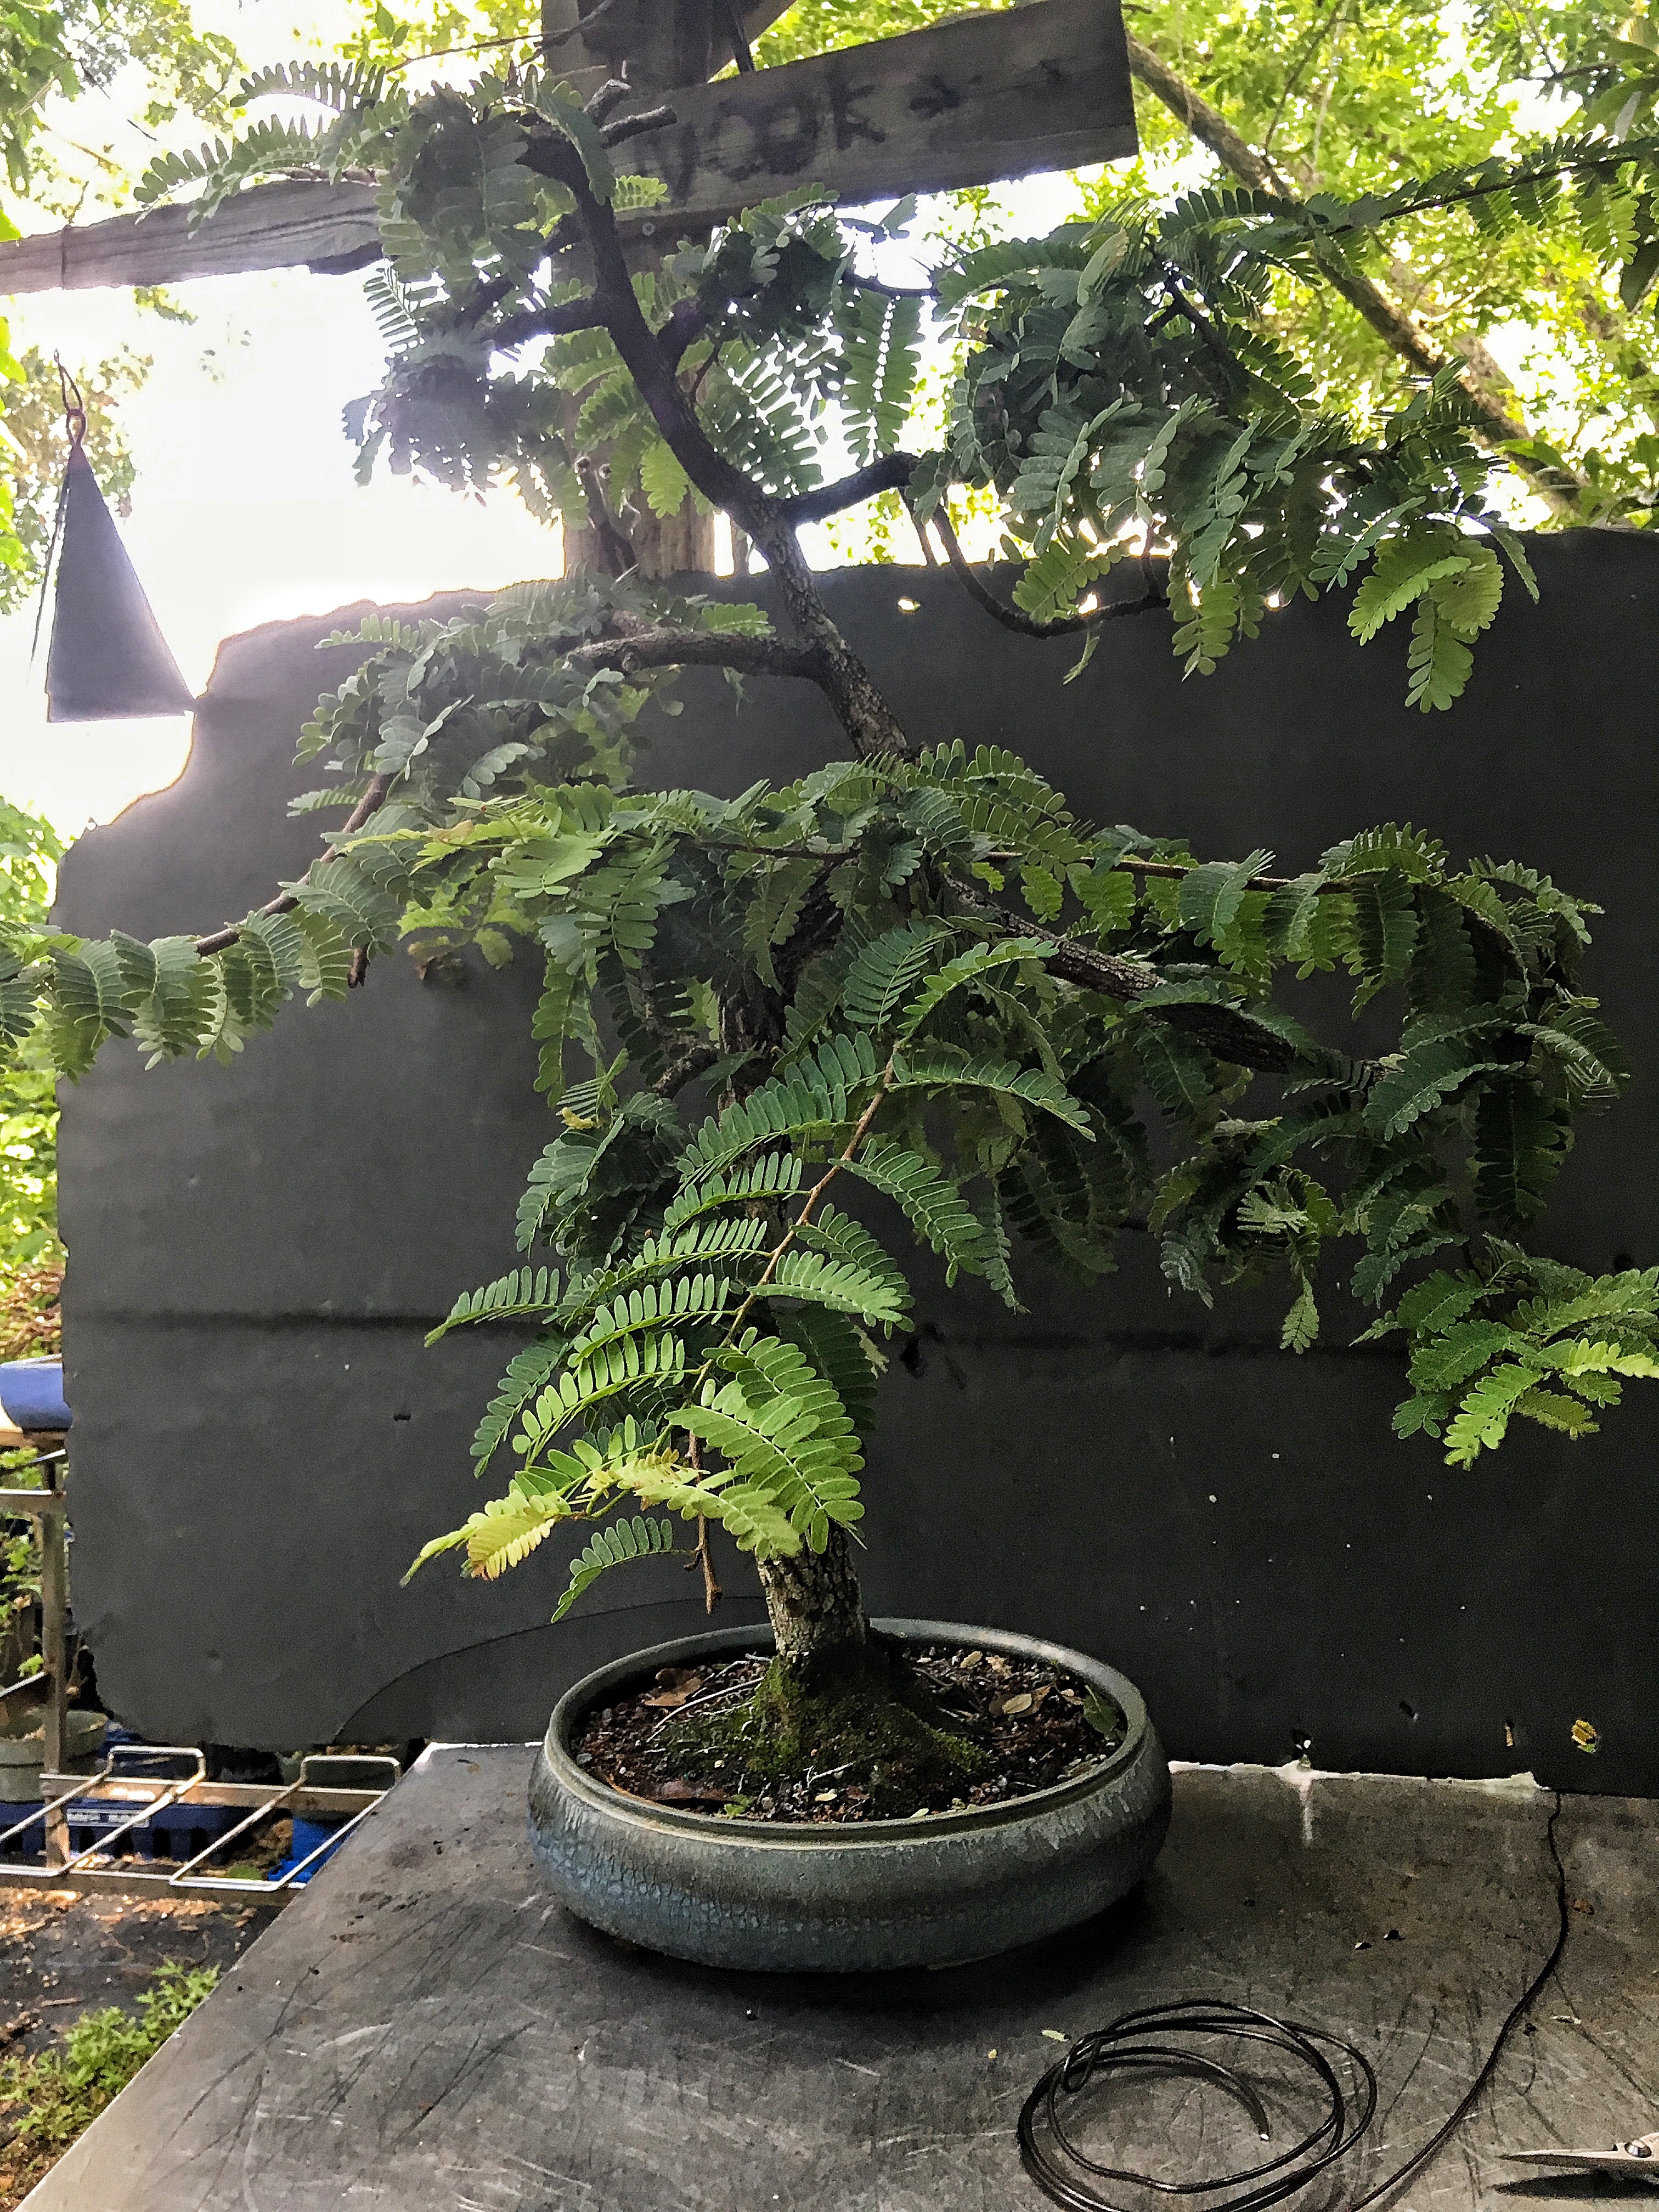 I love a project tree. This one has all types of potential.
It has a good hefty trunk. 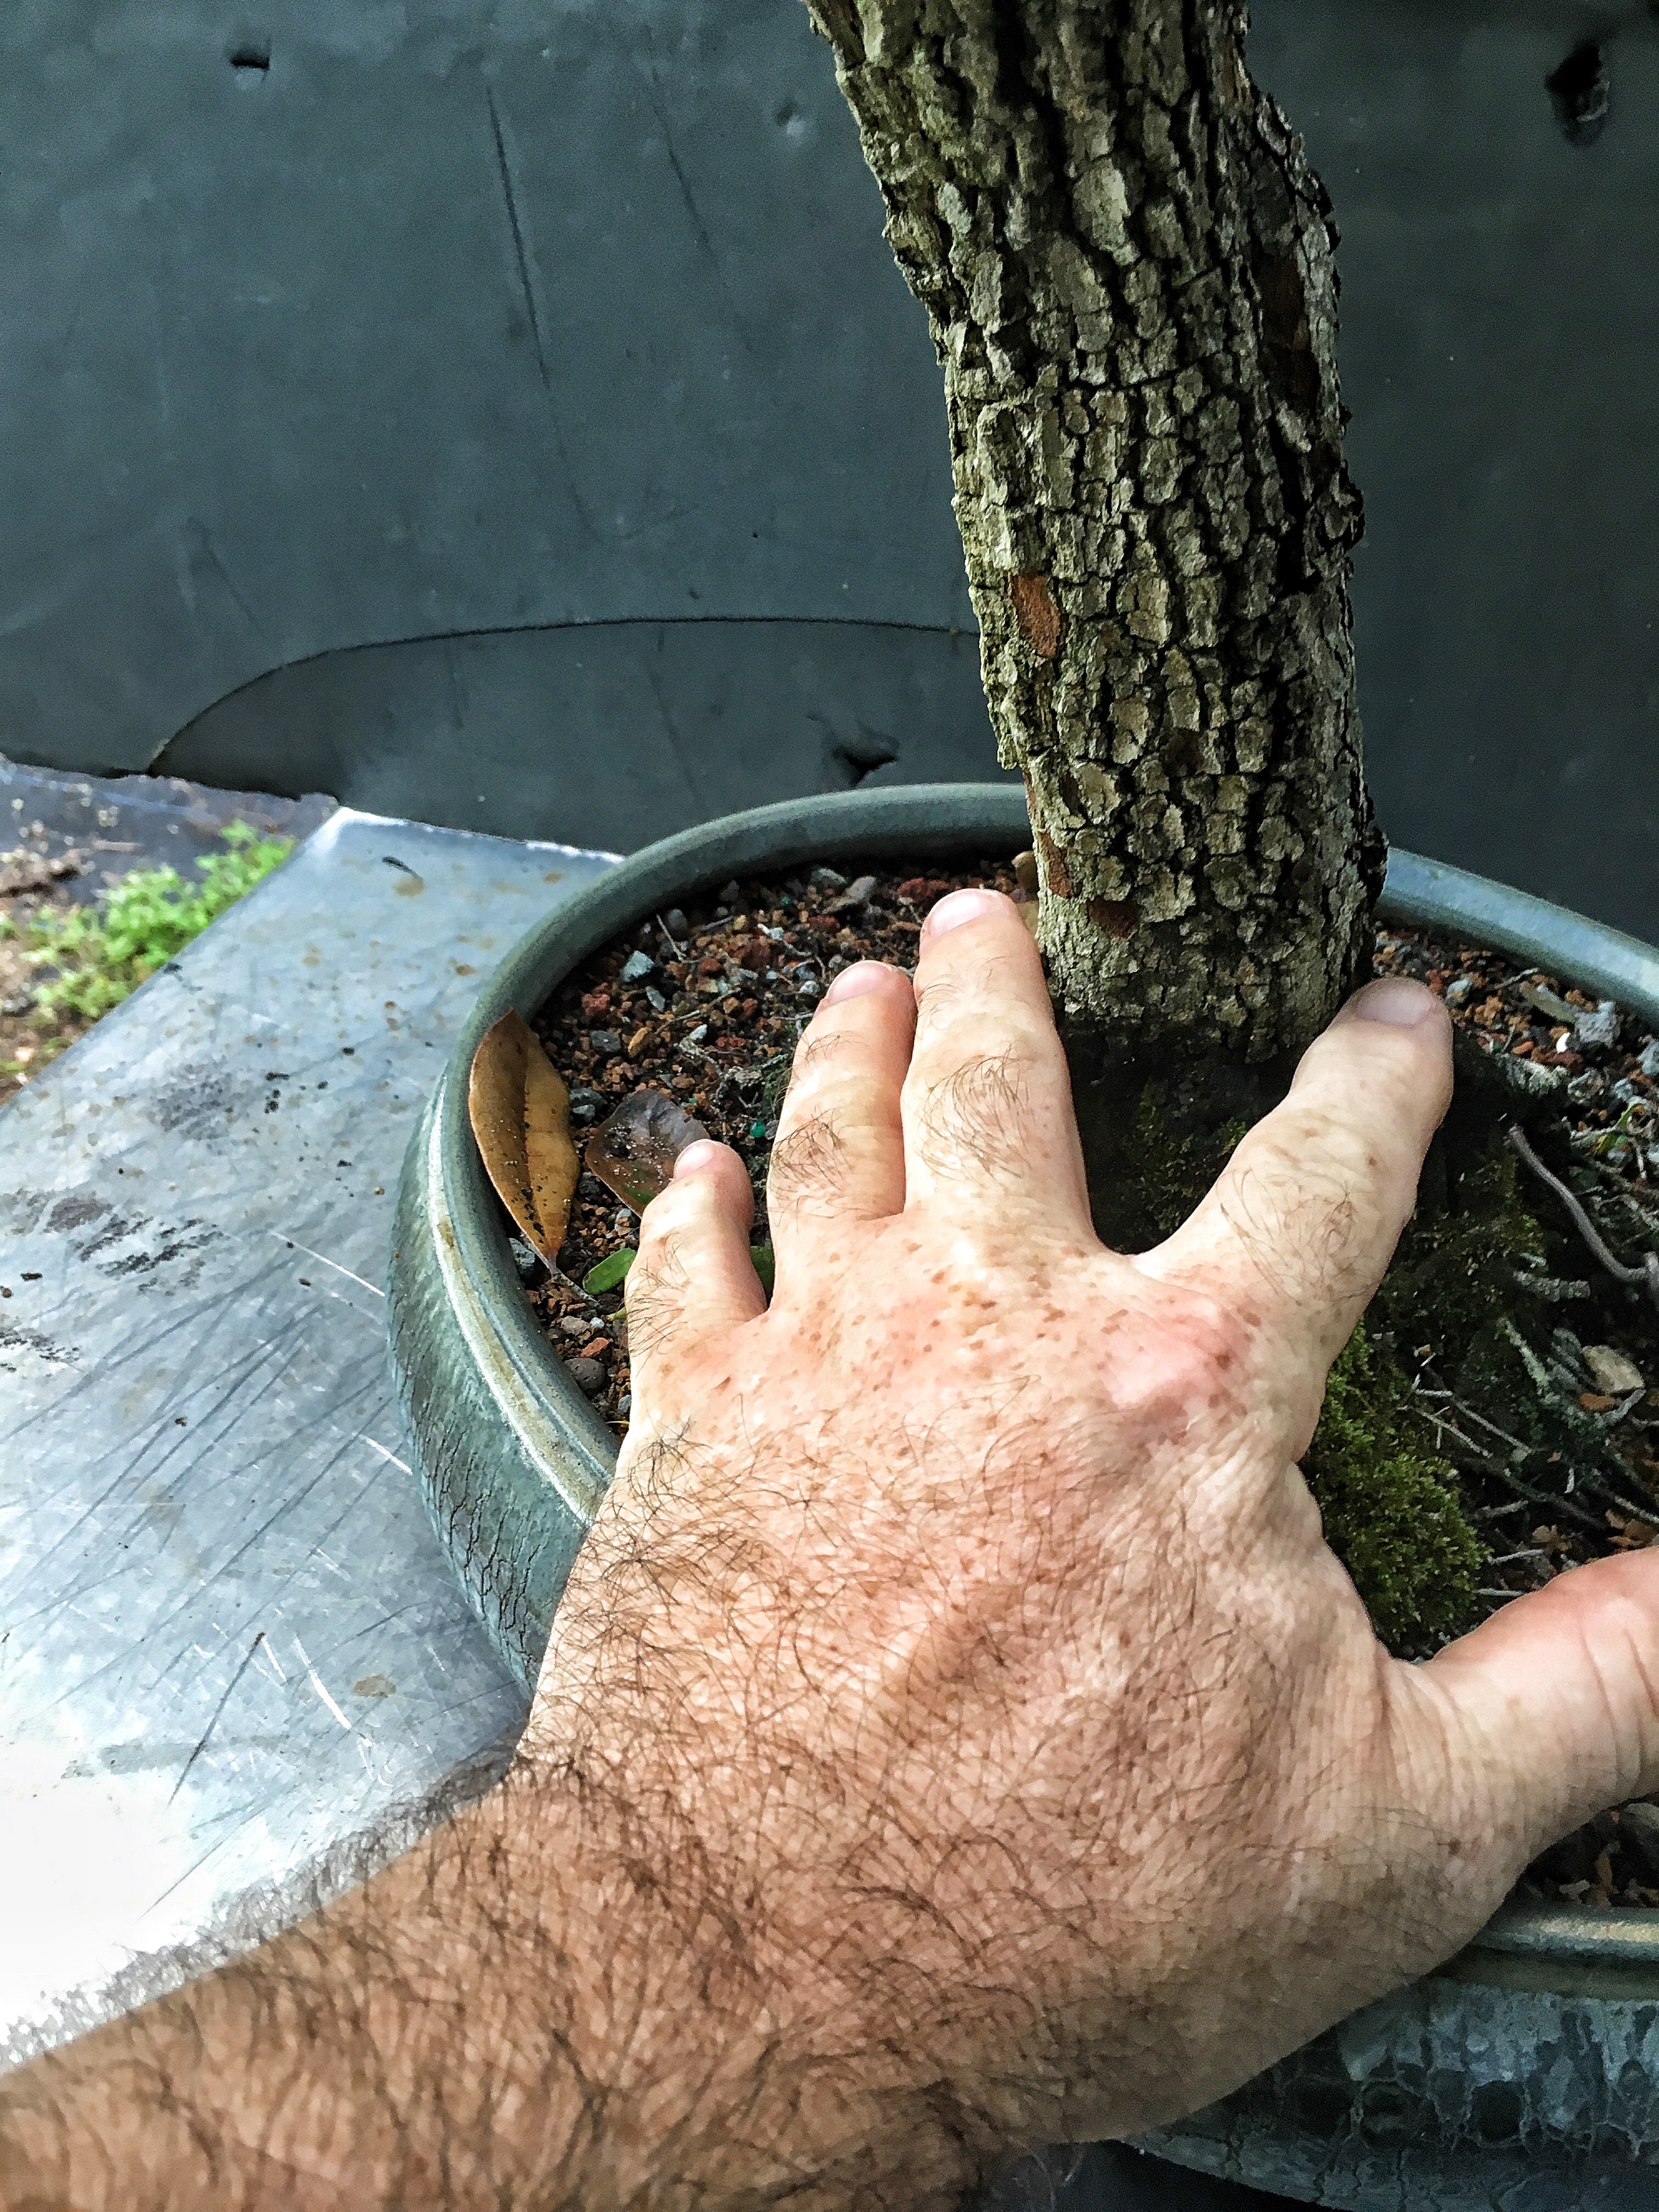
Nice bark and it’s not a telephone pole, it has some movement.
Until you get up top that is. 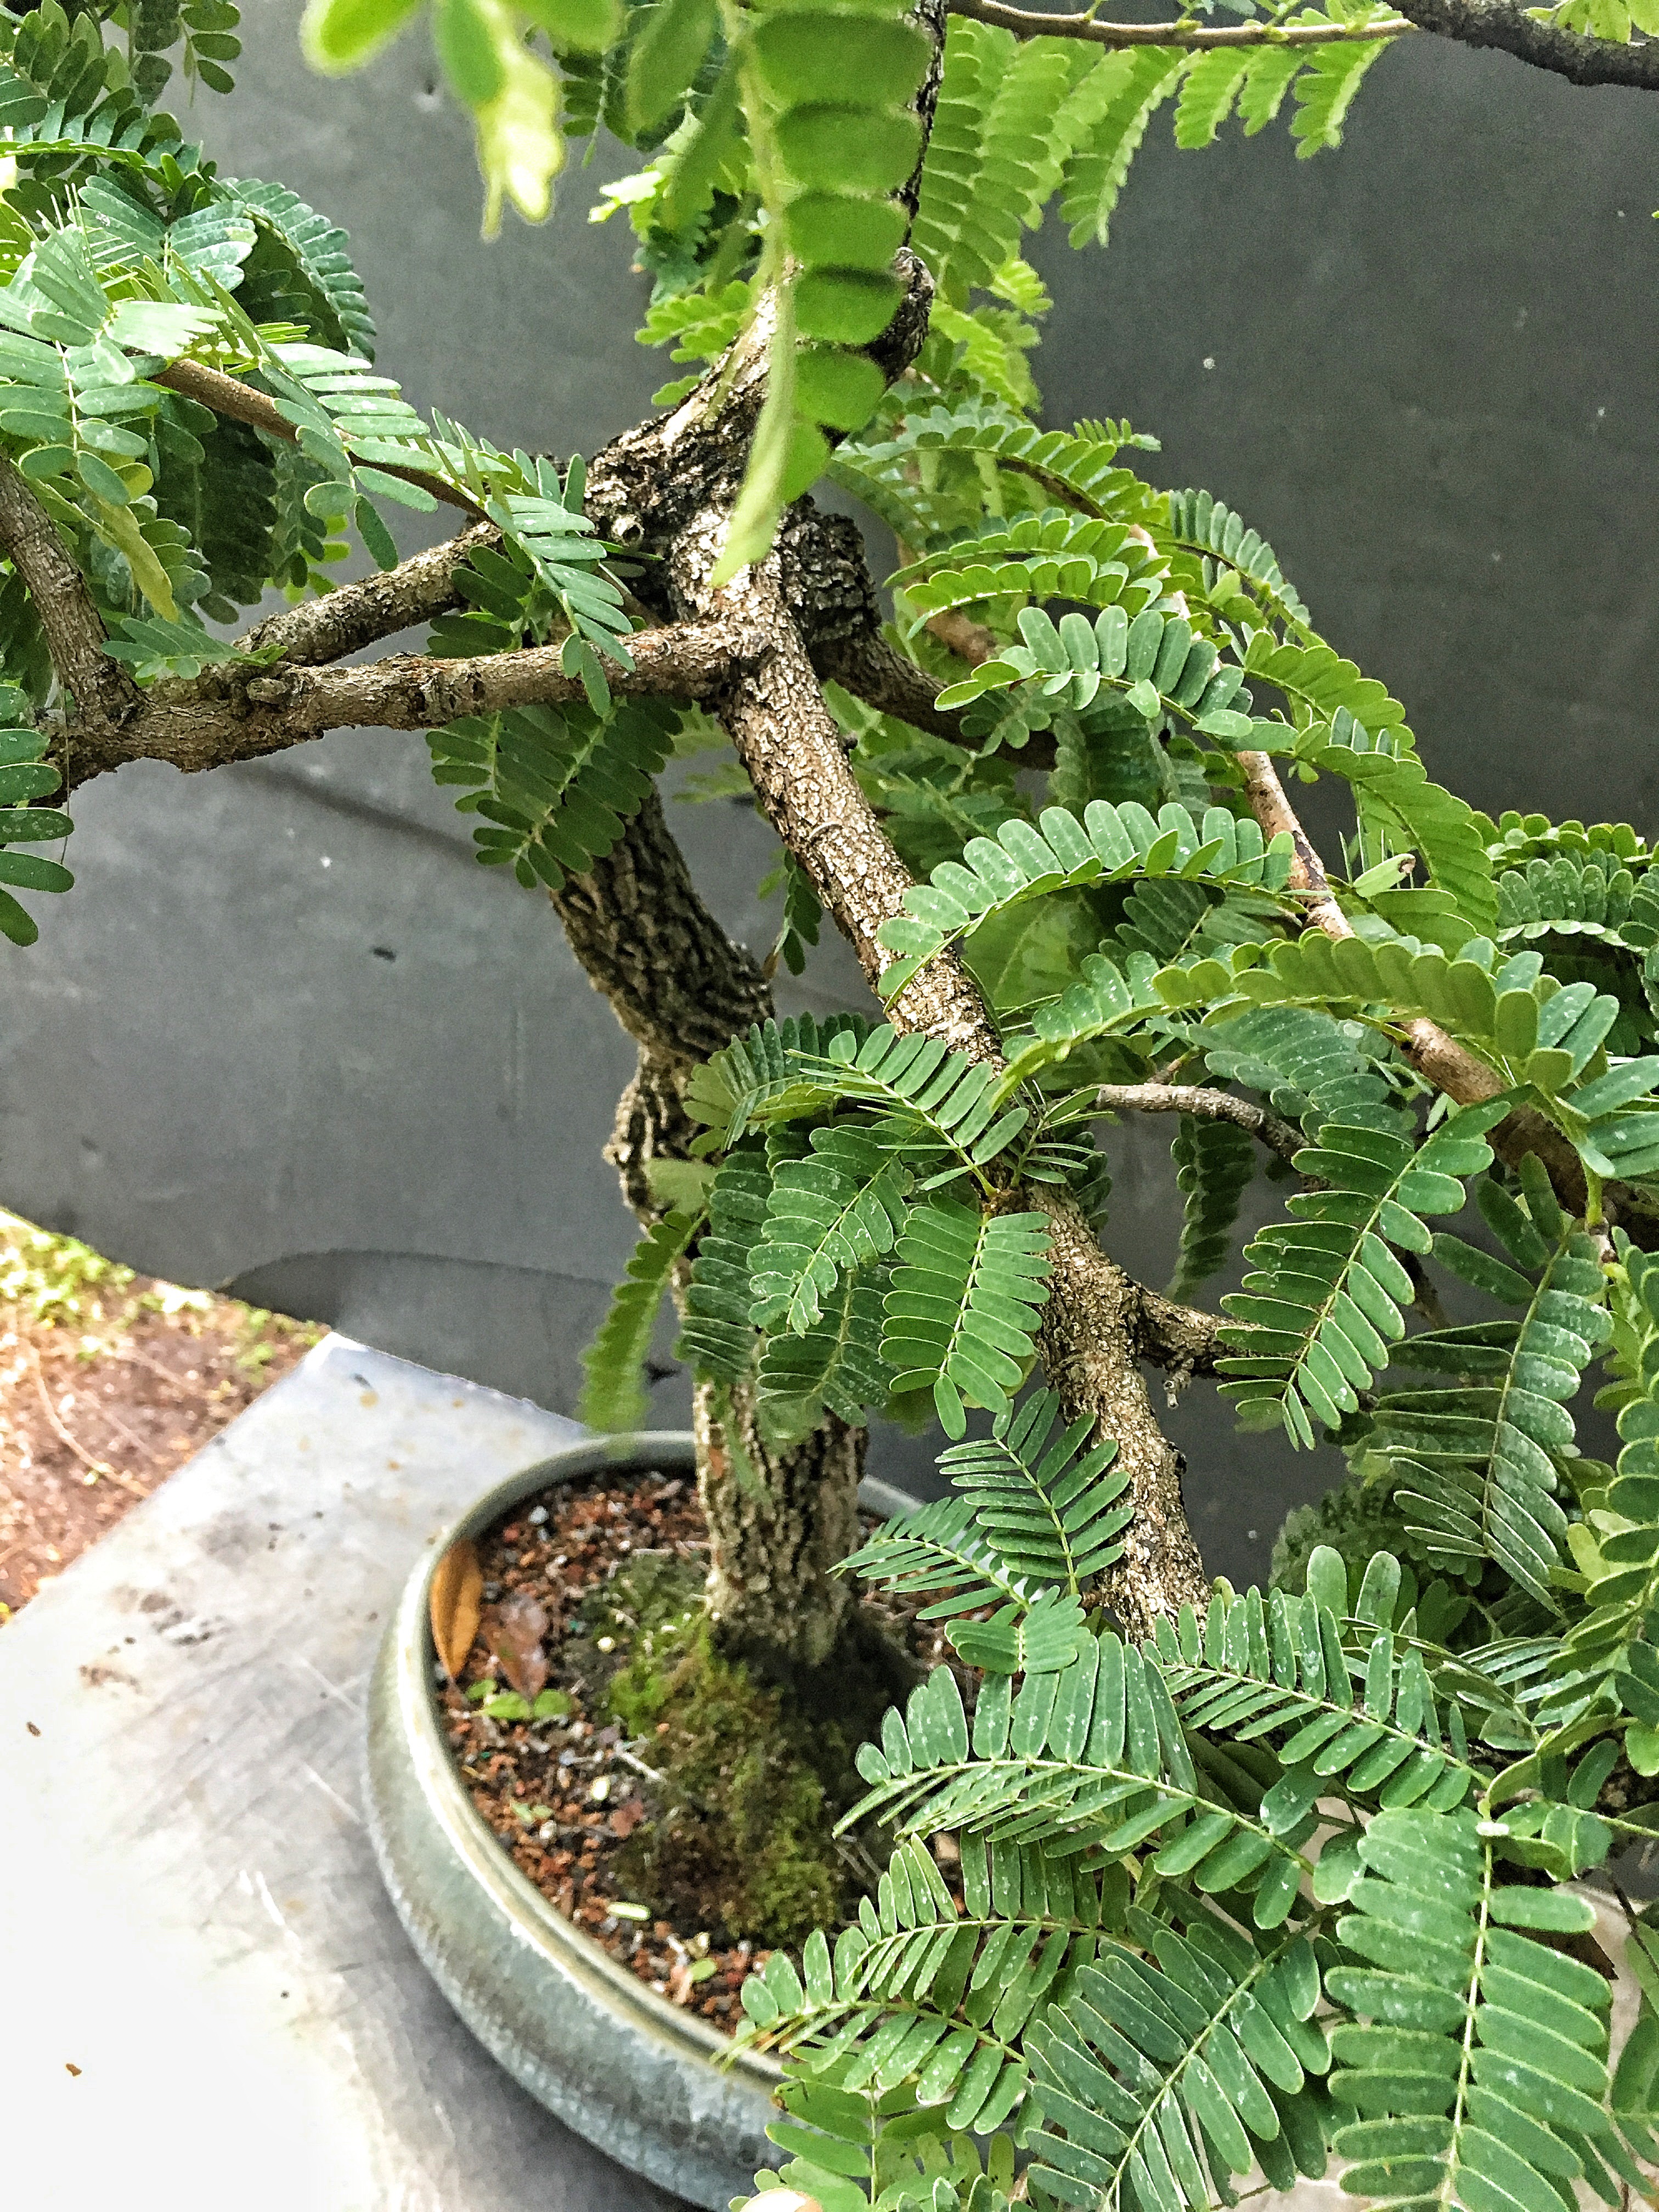
You could build a house with this angle. 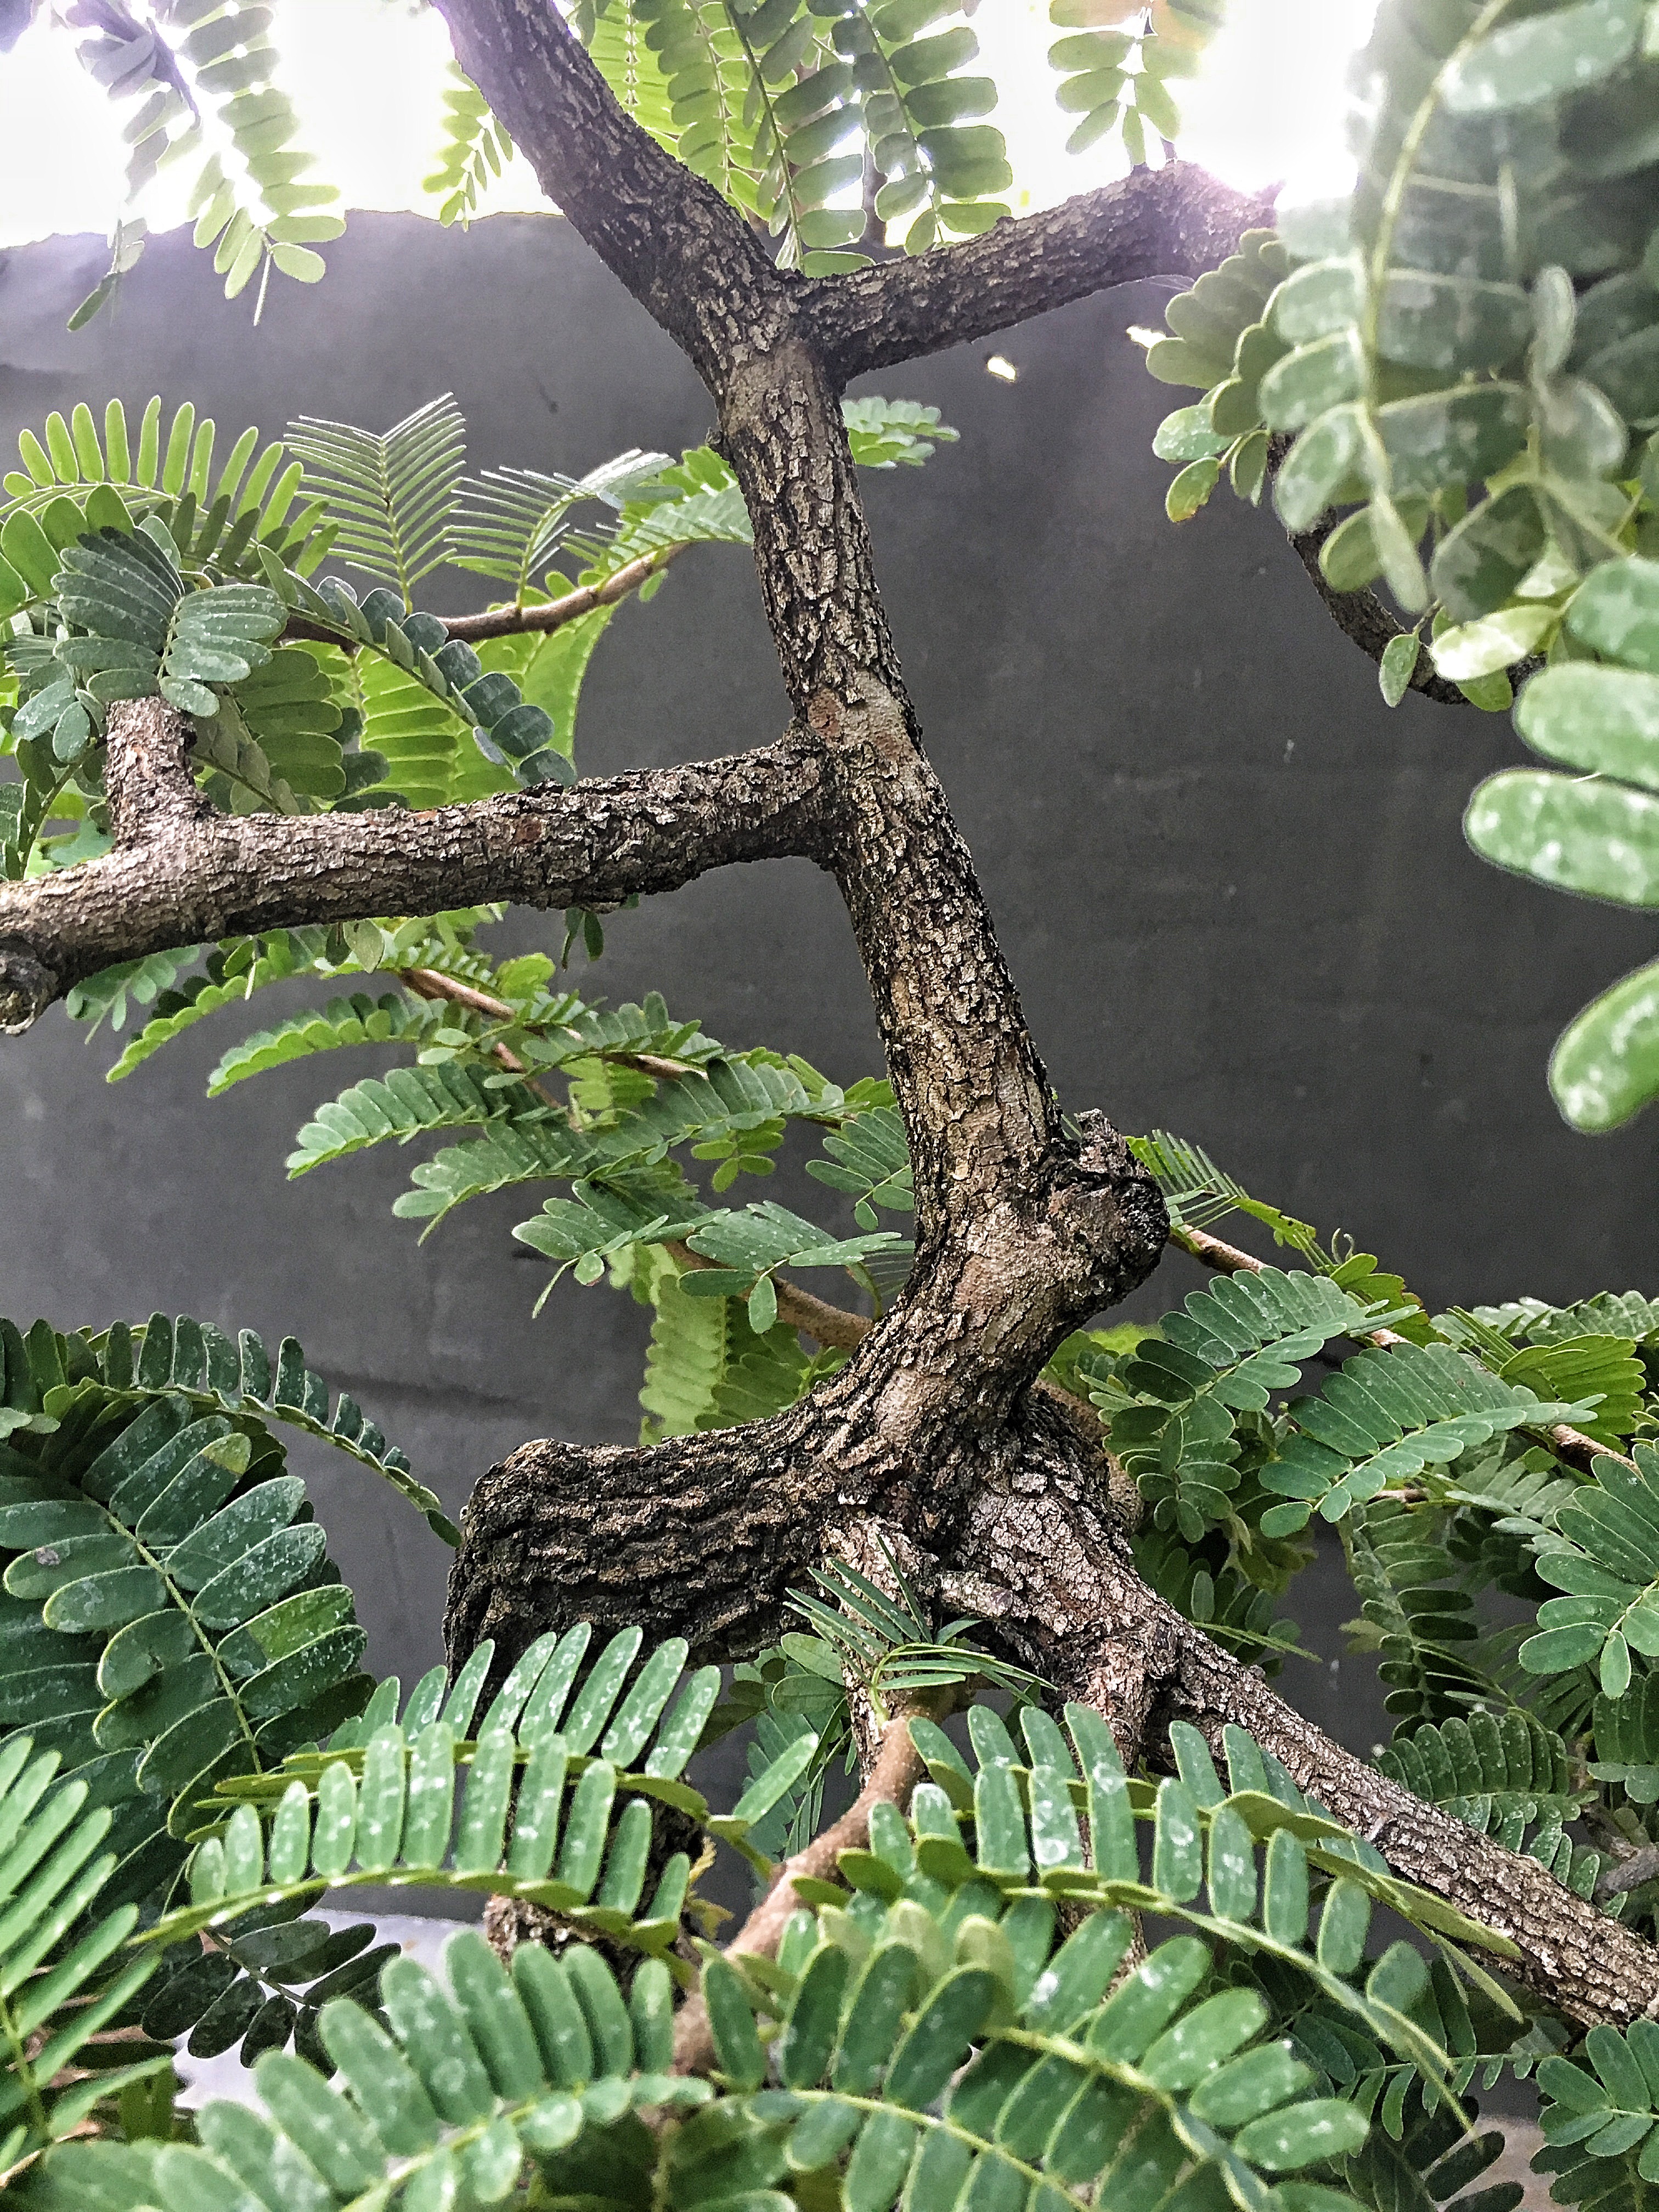 Who says that nature doesn’t make right angles or straight lines?
One solution is to cut it all off and start fresh, they respond really well to a trunk chop. But, that’d be too easy. And not much entertainment either. You’re gonna enjoy this one. Or call me crazy. Or crazier. I’m shooting for the craziest actually. El Bonsai Loco!
First, some housekeeping. Then the bondage (sounds like a good plot line….)
Clean the moss off the base. 
Clean up some crossing roots. 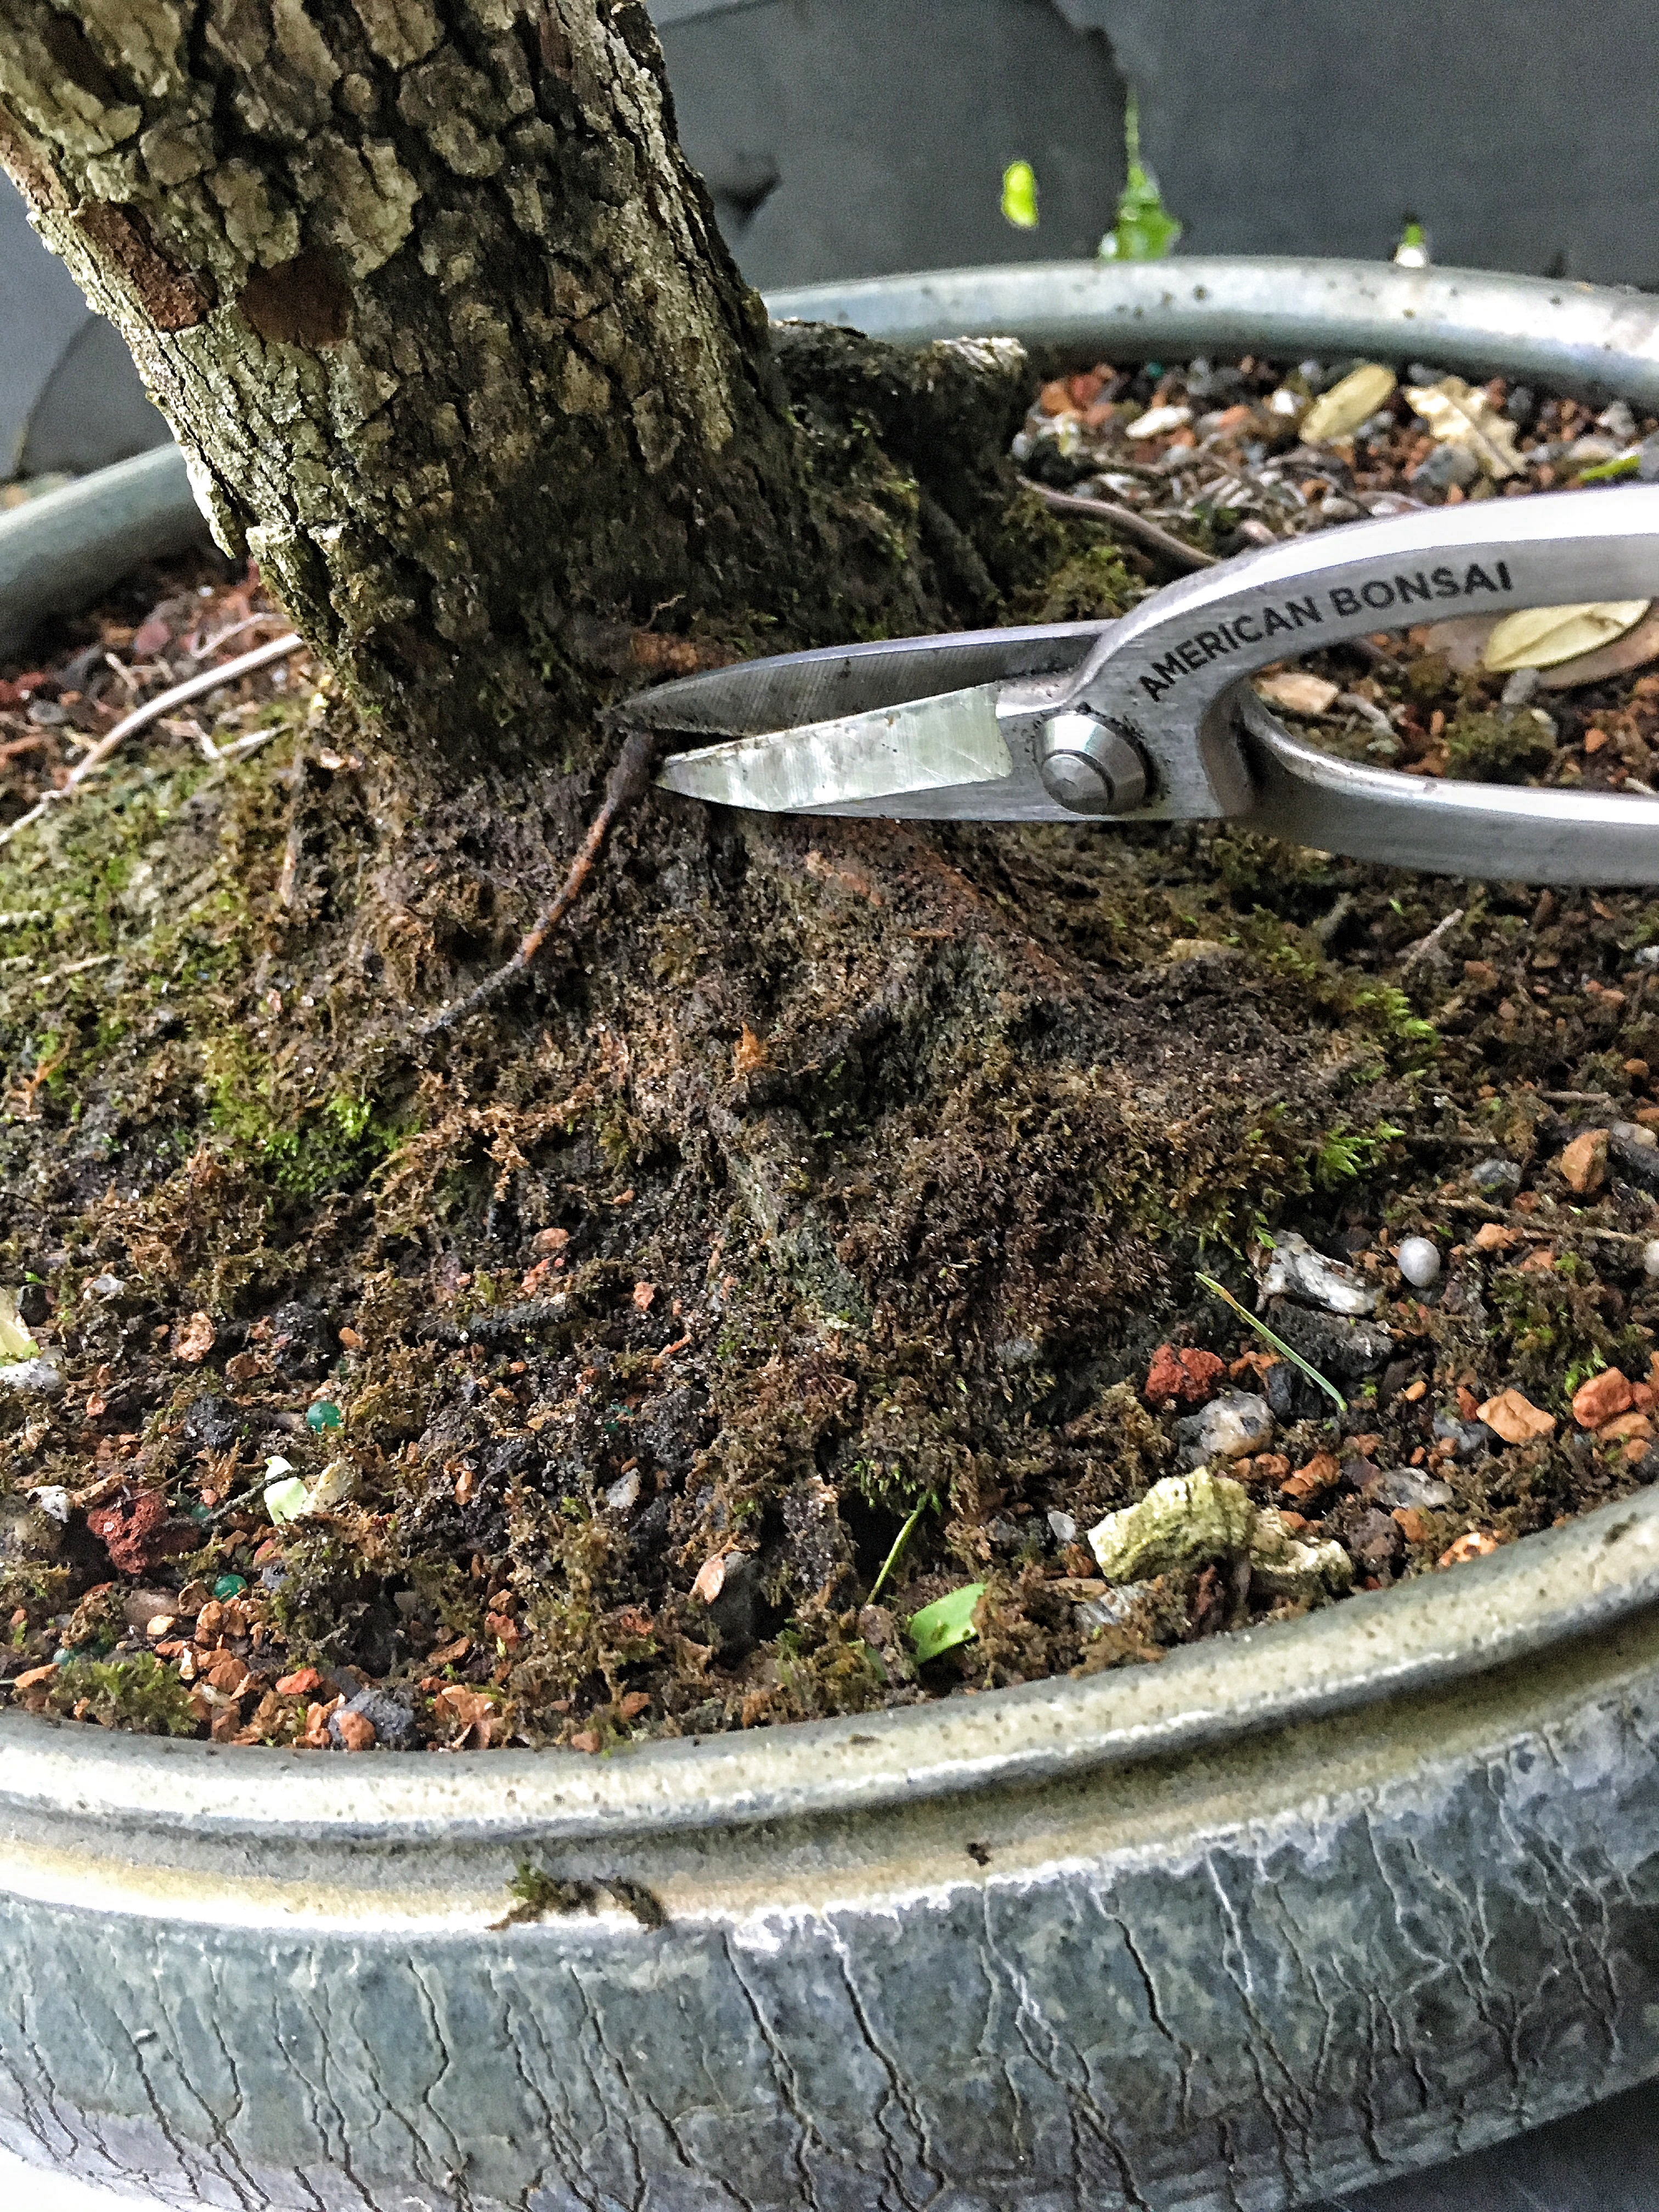
I won’t be repotting it but I will practice some “soji” on it (a term I just learned from Juan Andrade, it means to remove the top layer of compacted soil. I’ve practiced it often enough, but I didn’t know it had a bonafide bonsai name).  But I’ll do that after I make all the mess.
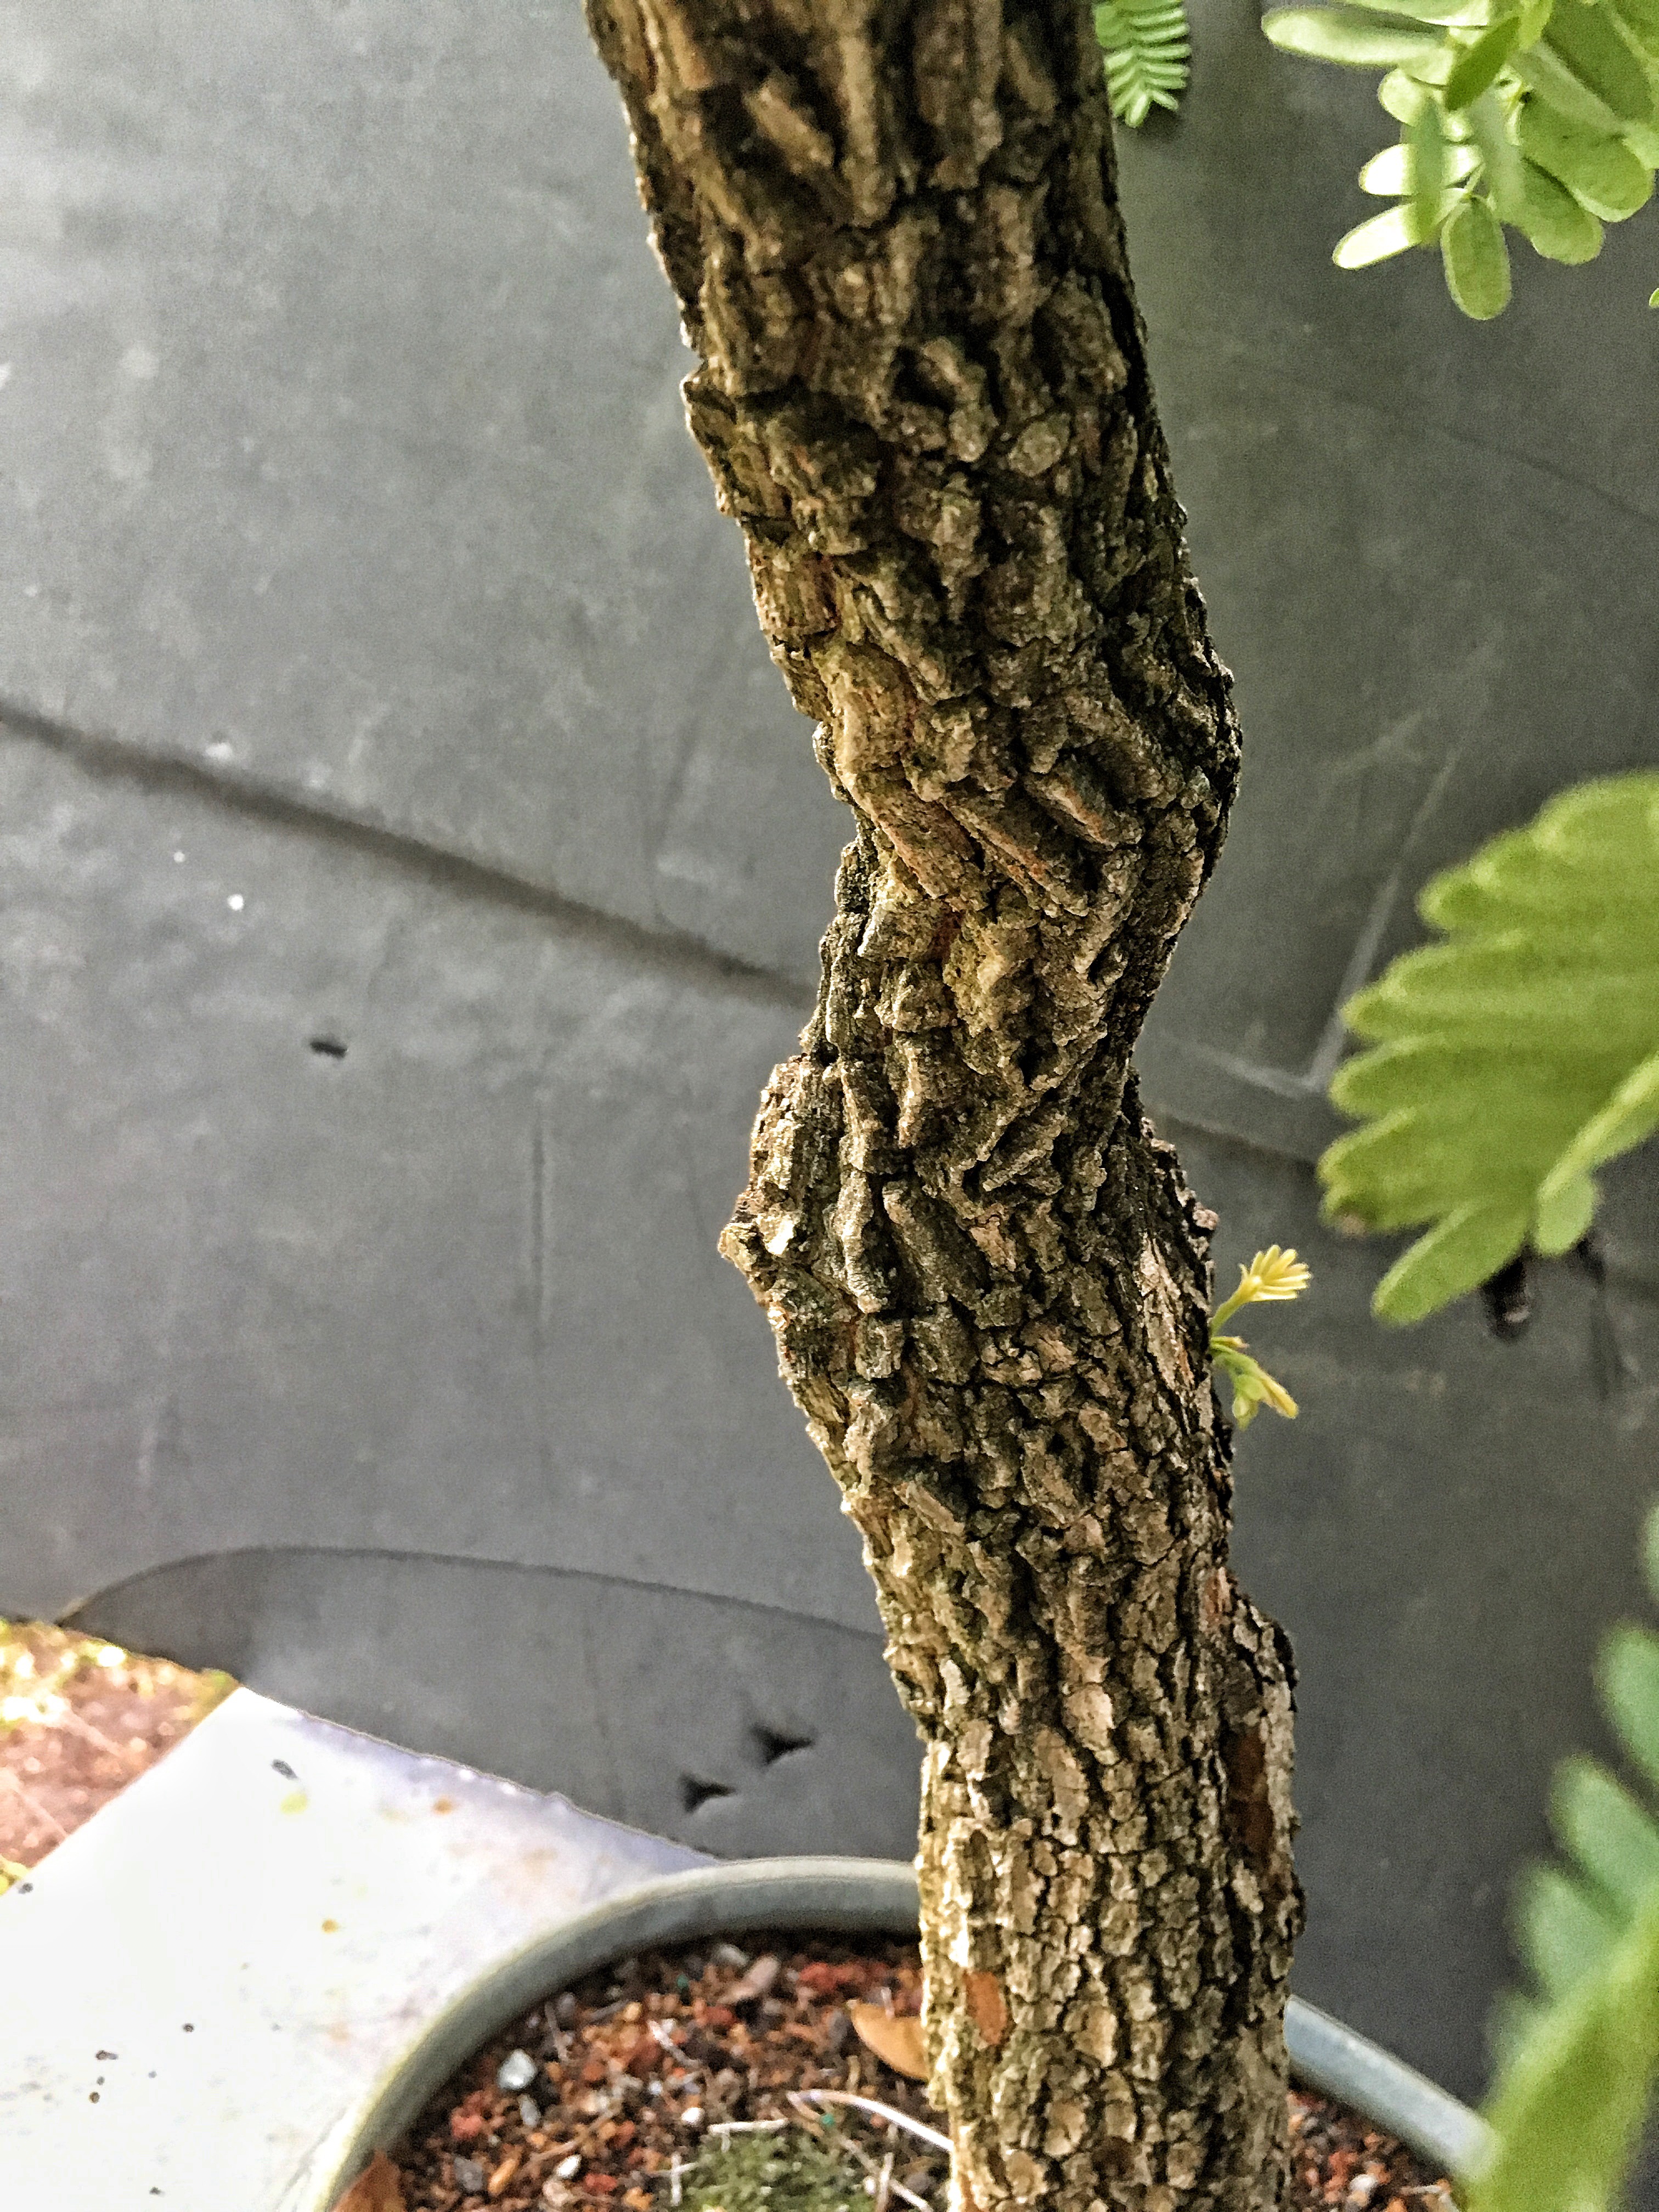
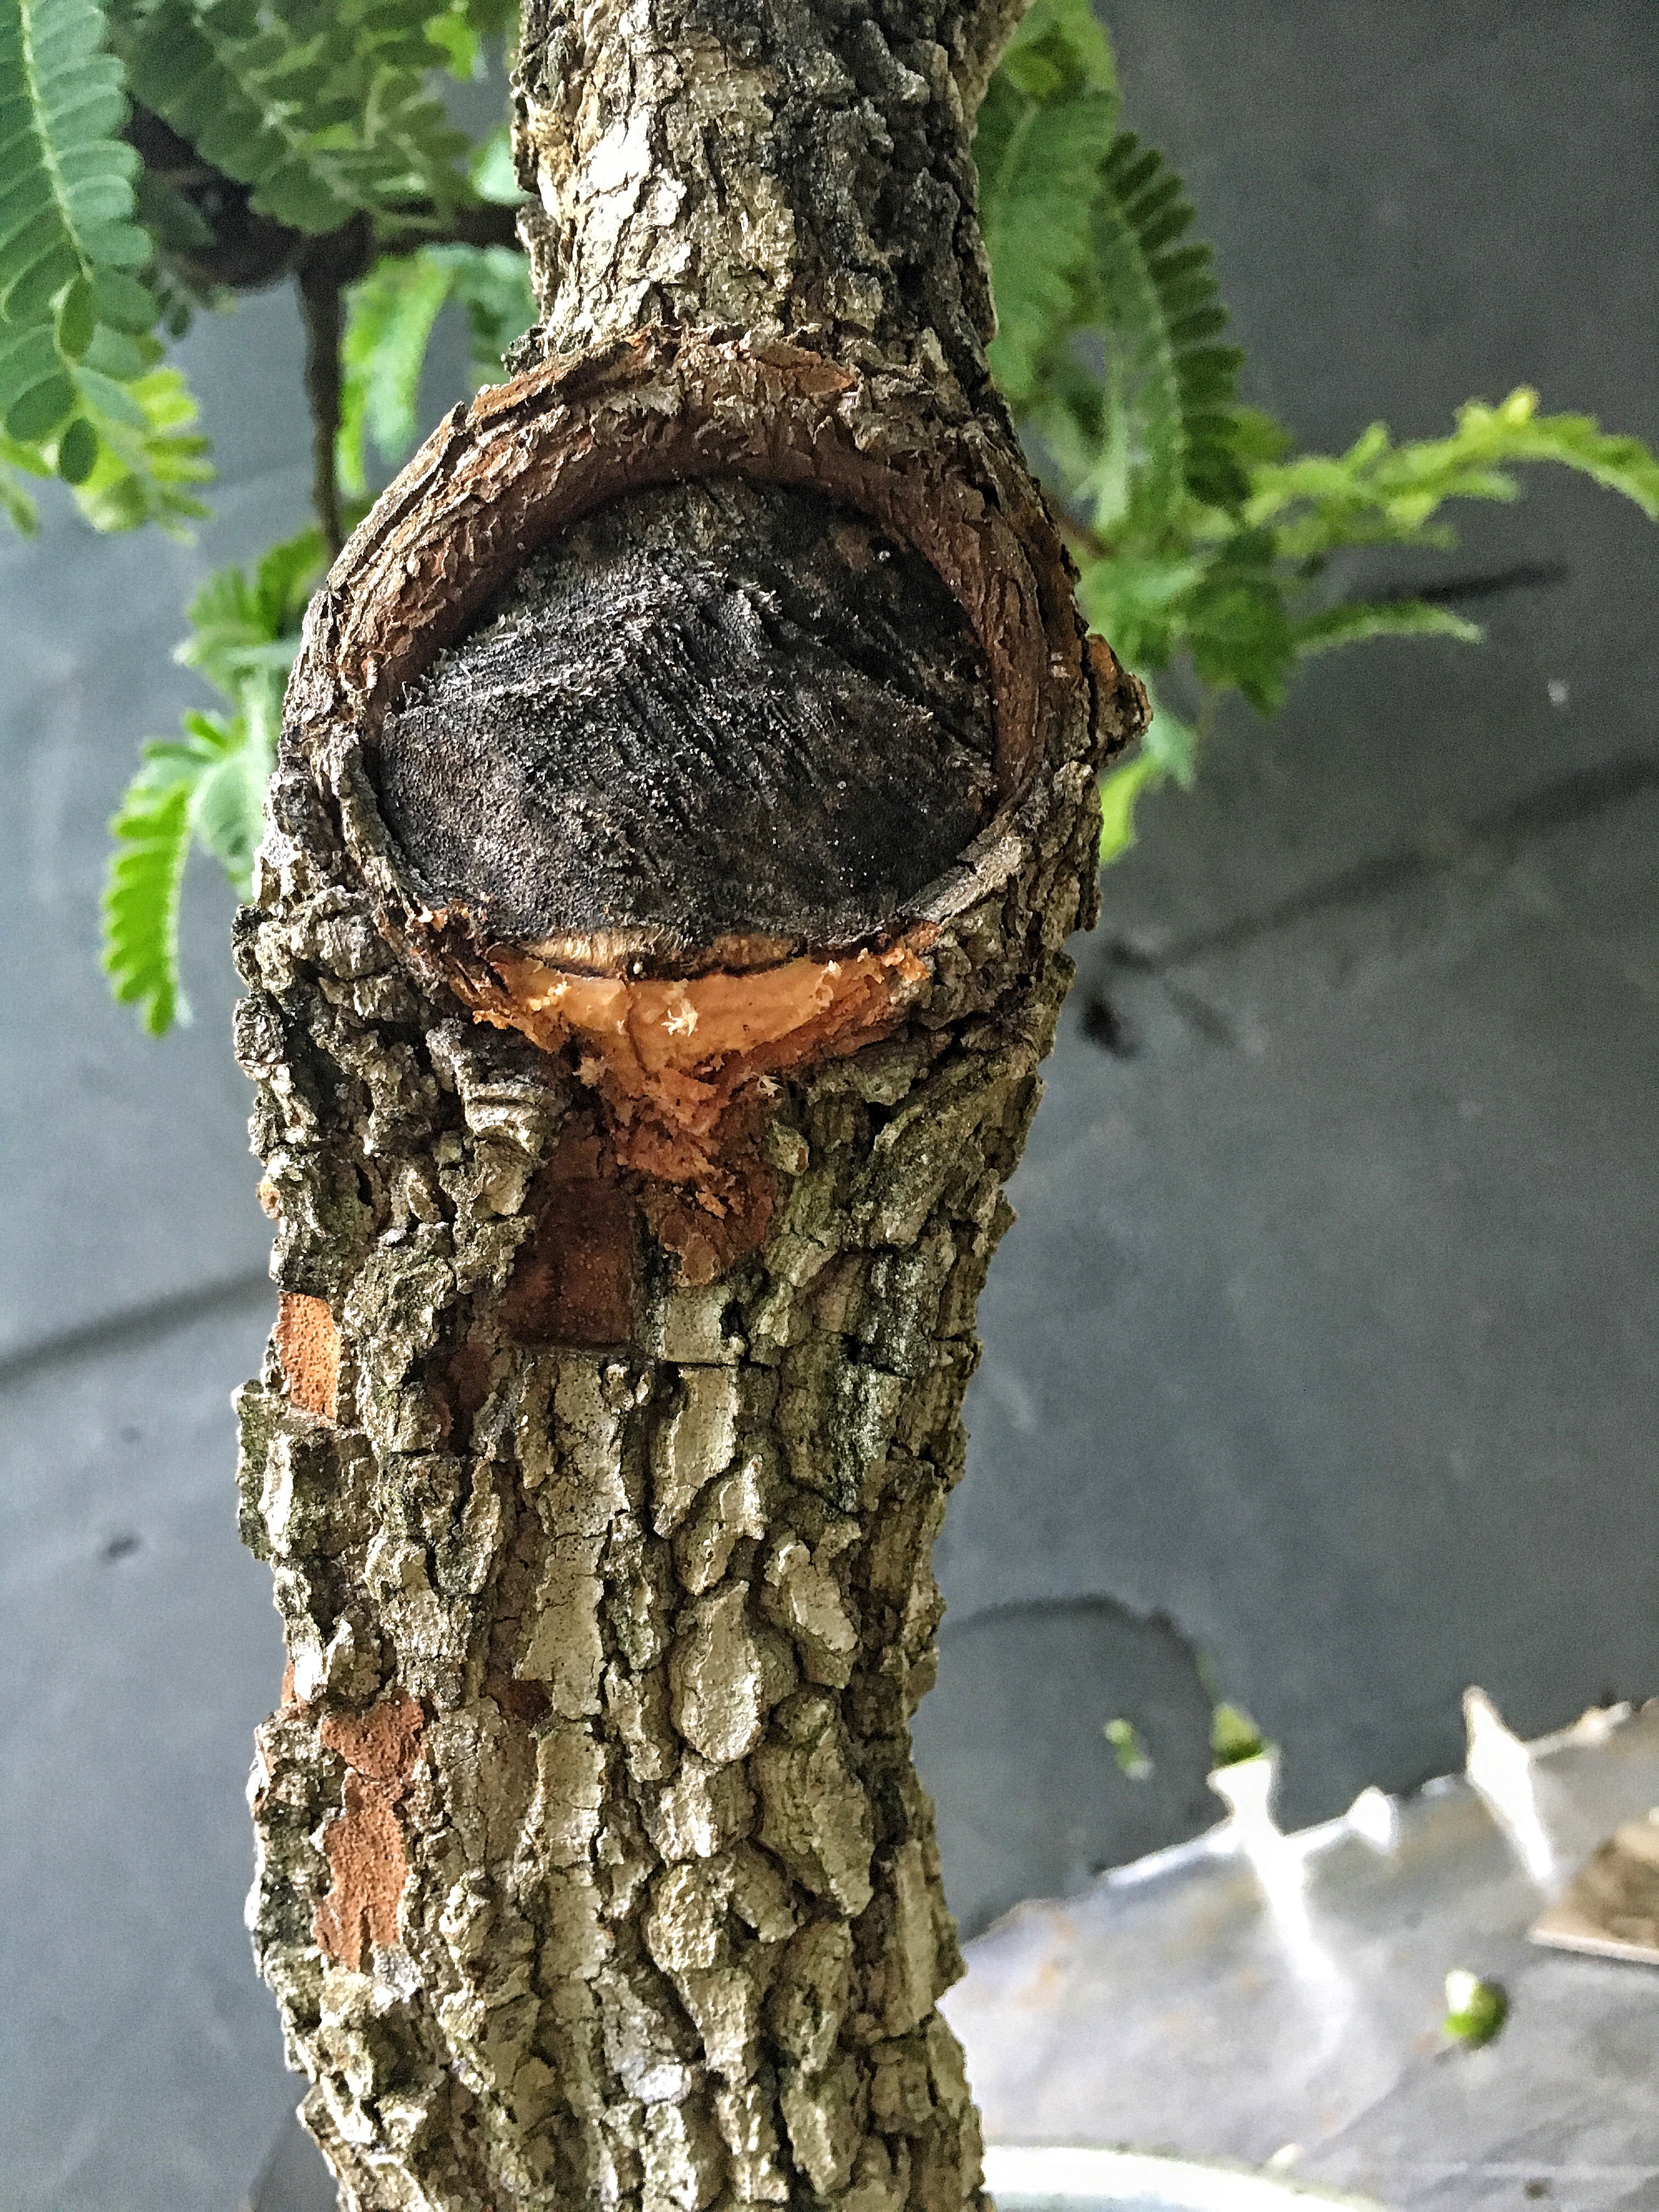
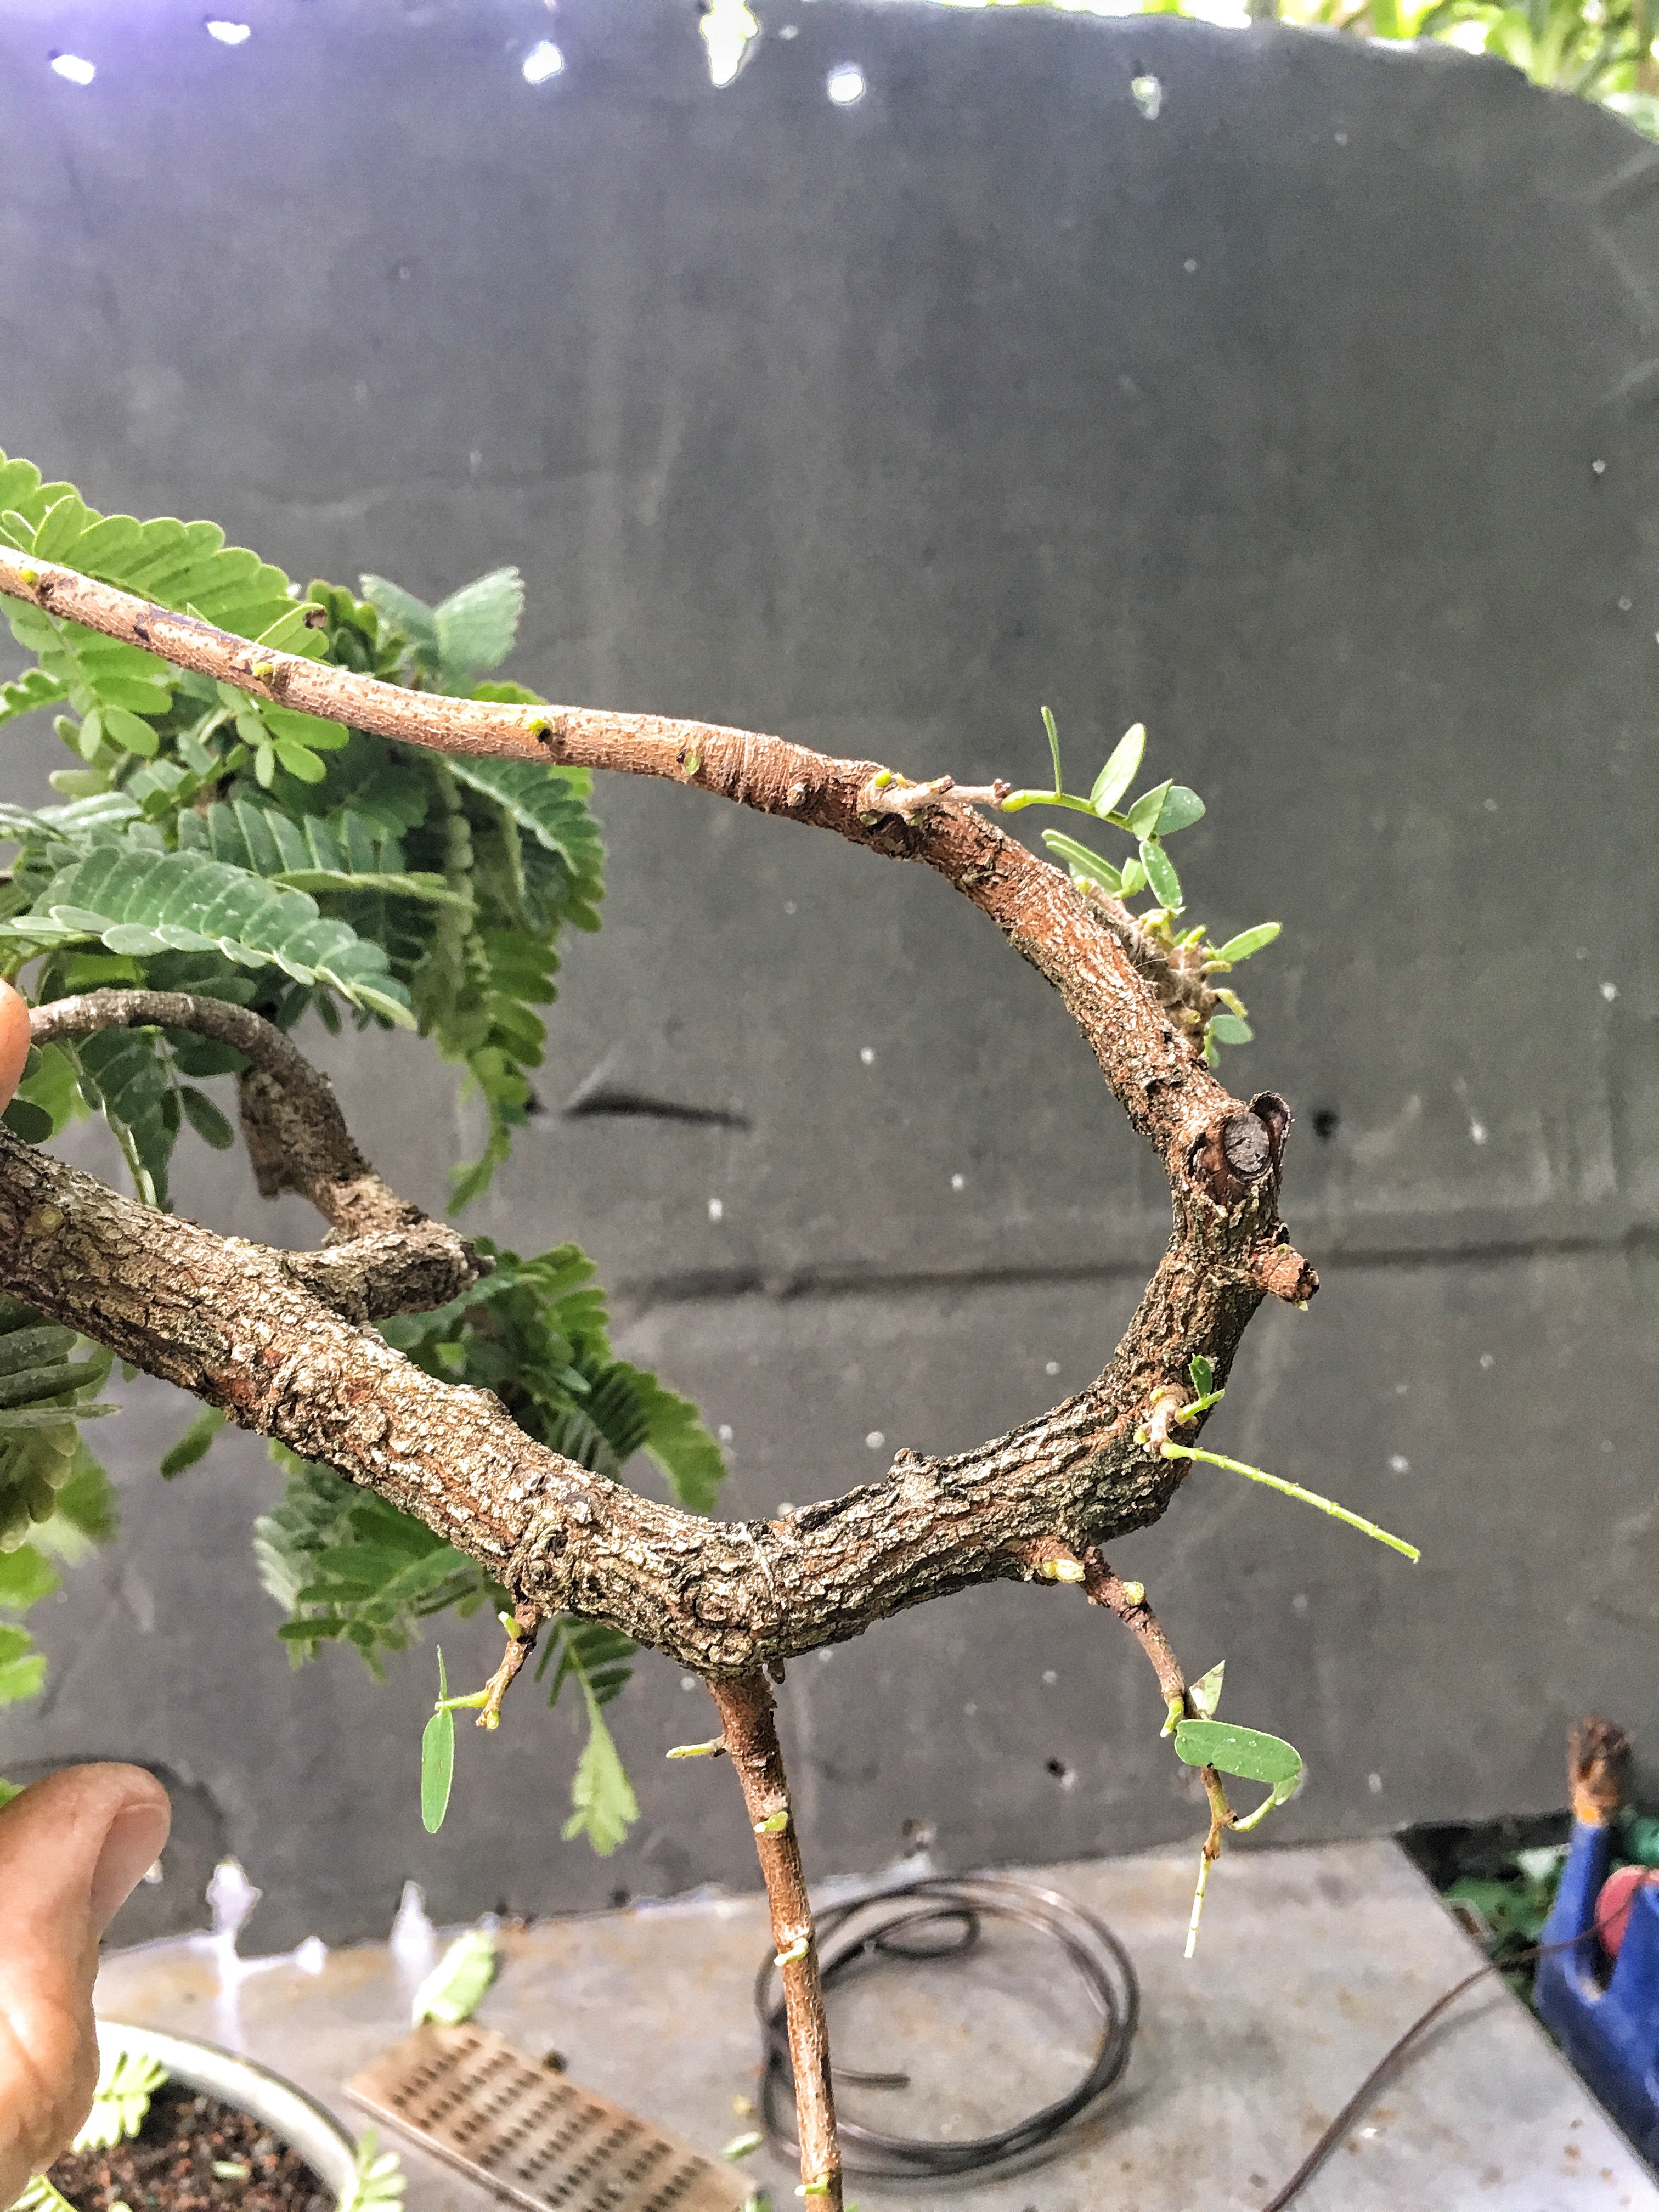
Next, I need to re-dress this wound. 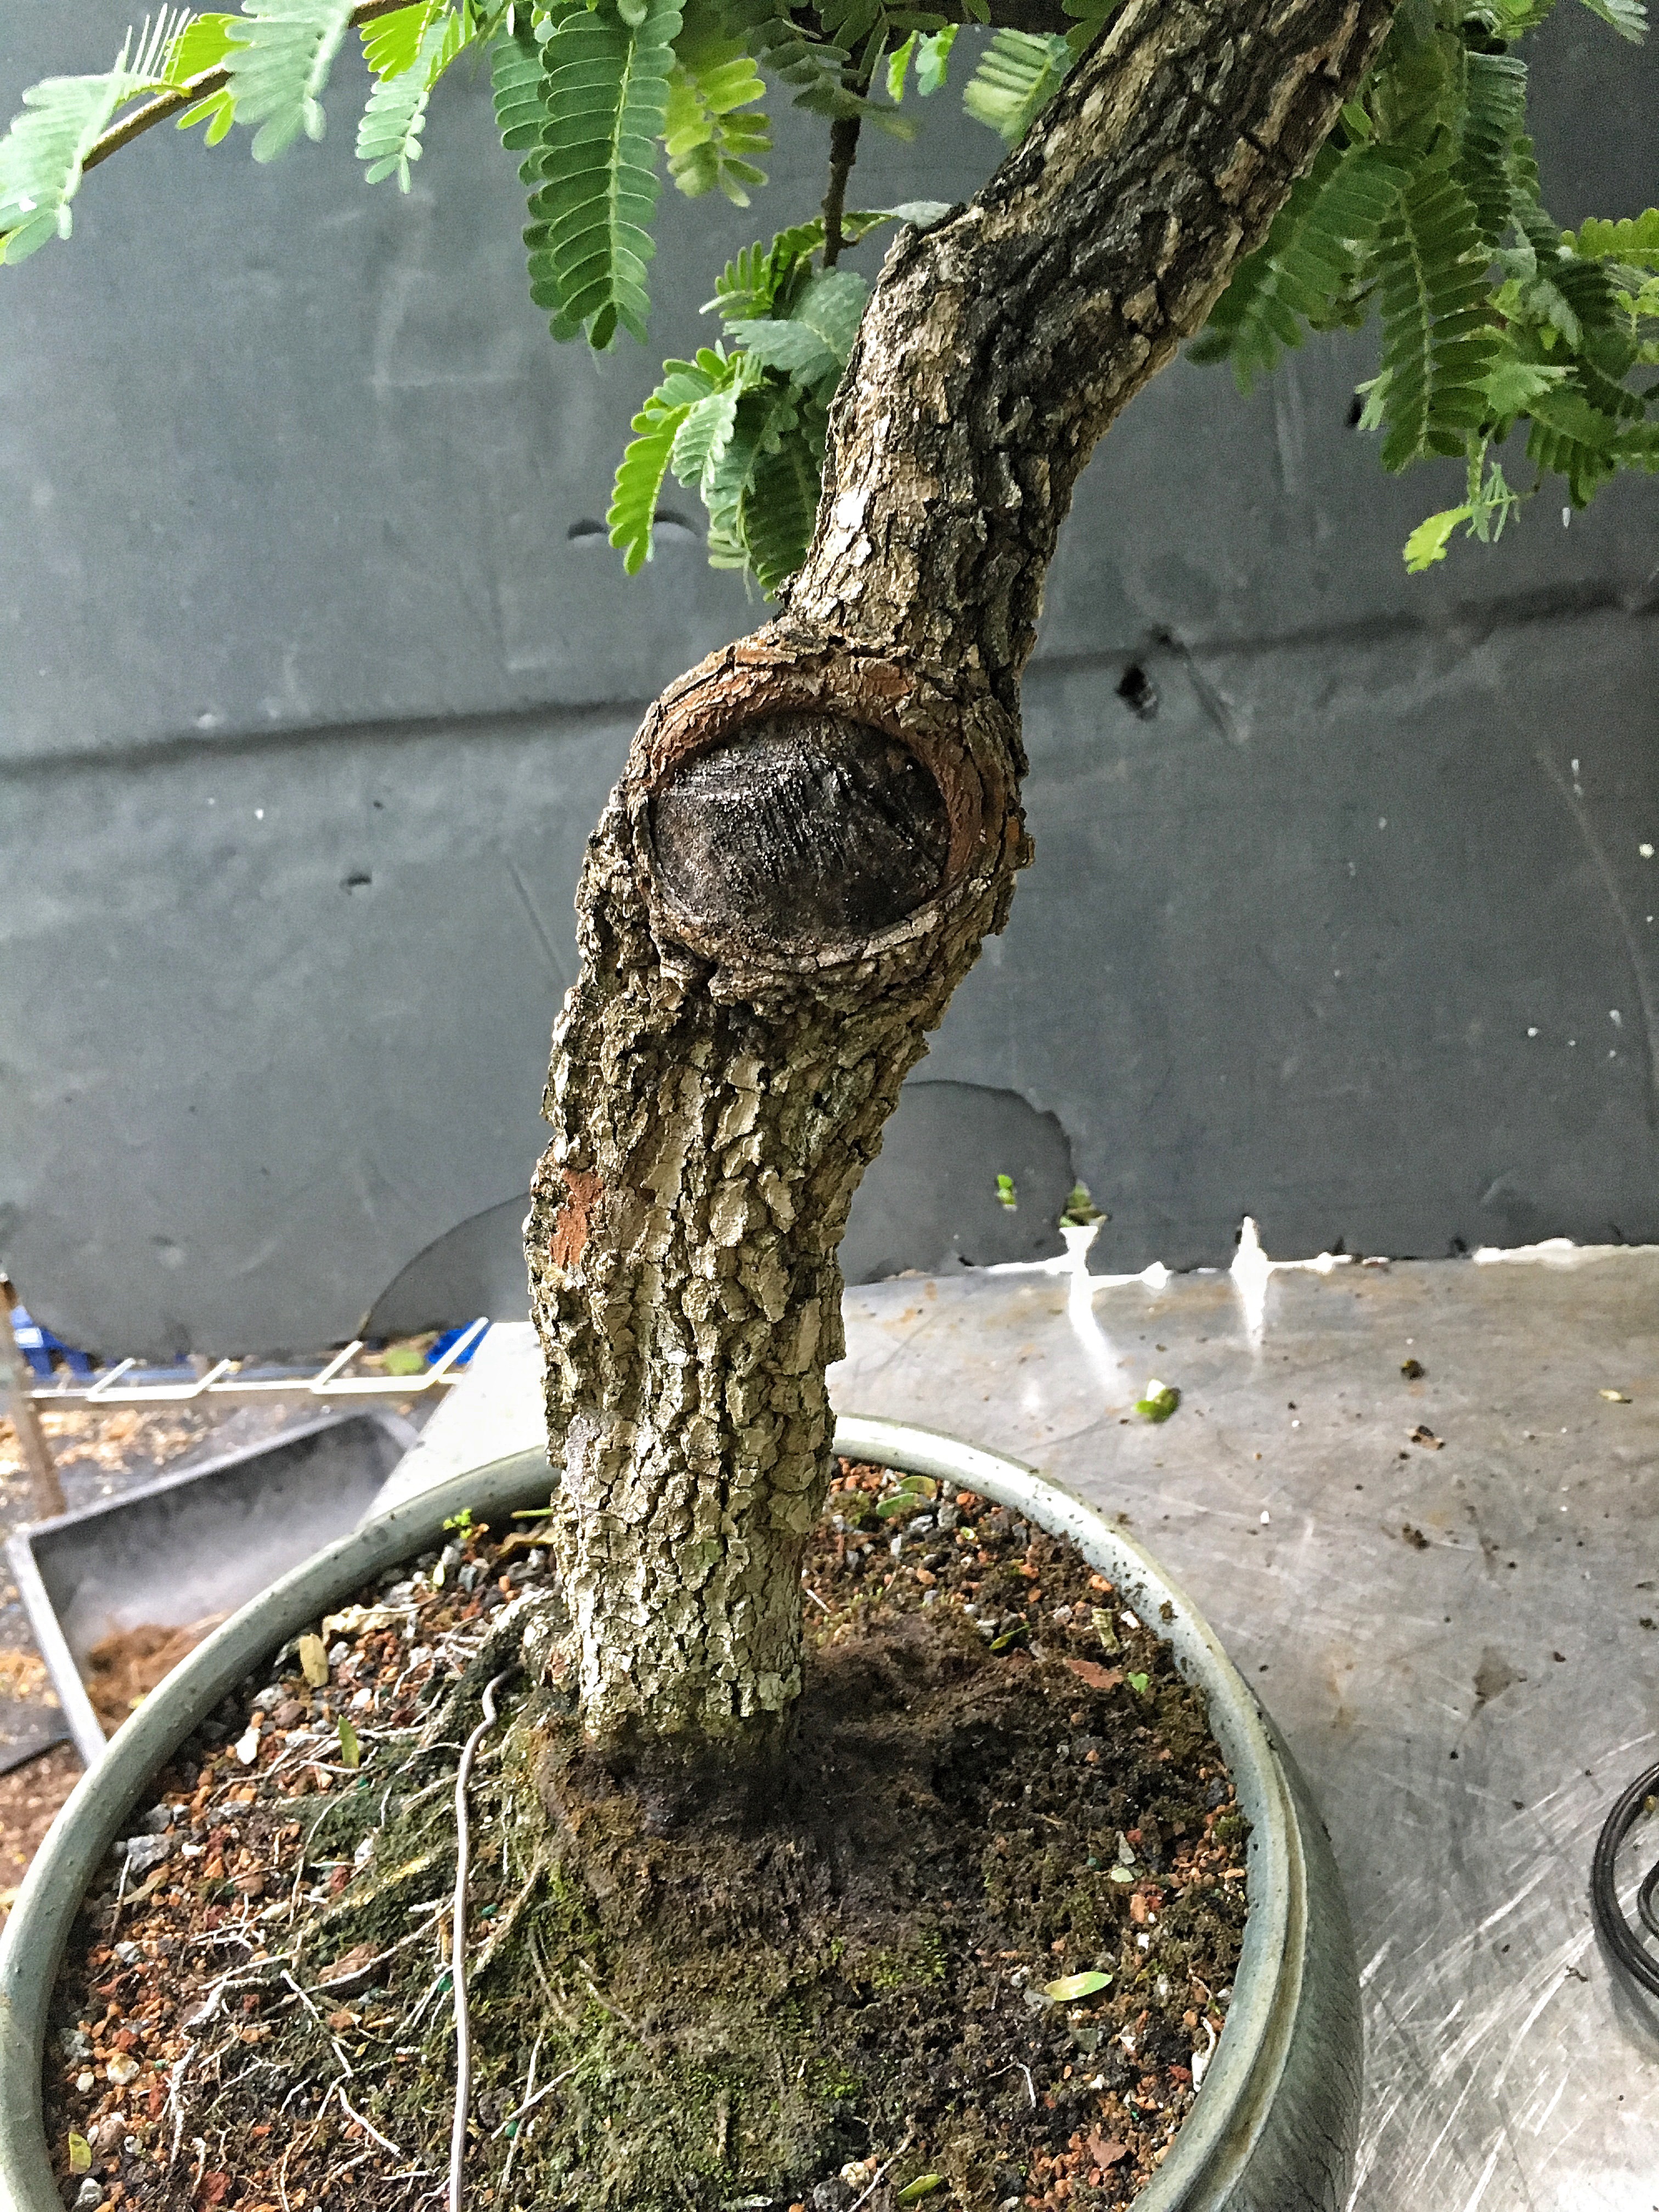 See the weird way it’s healing? The cut was made too round. Let me illustrate.
We have an unwanted branch. 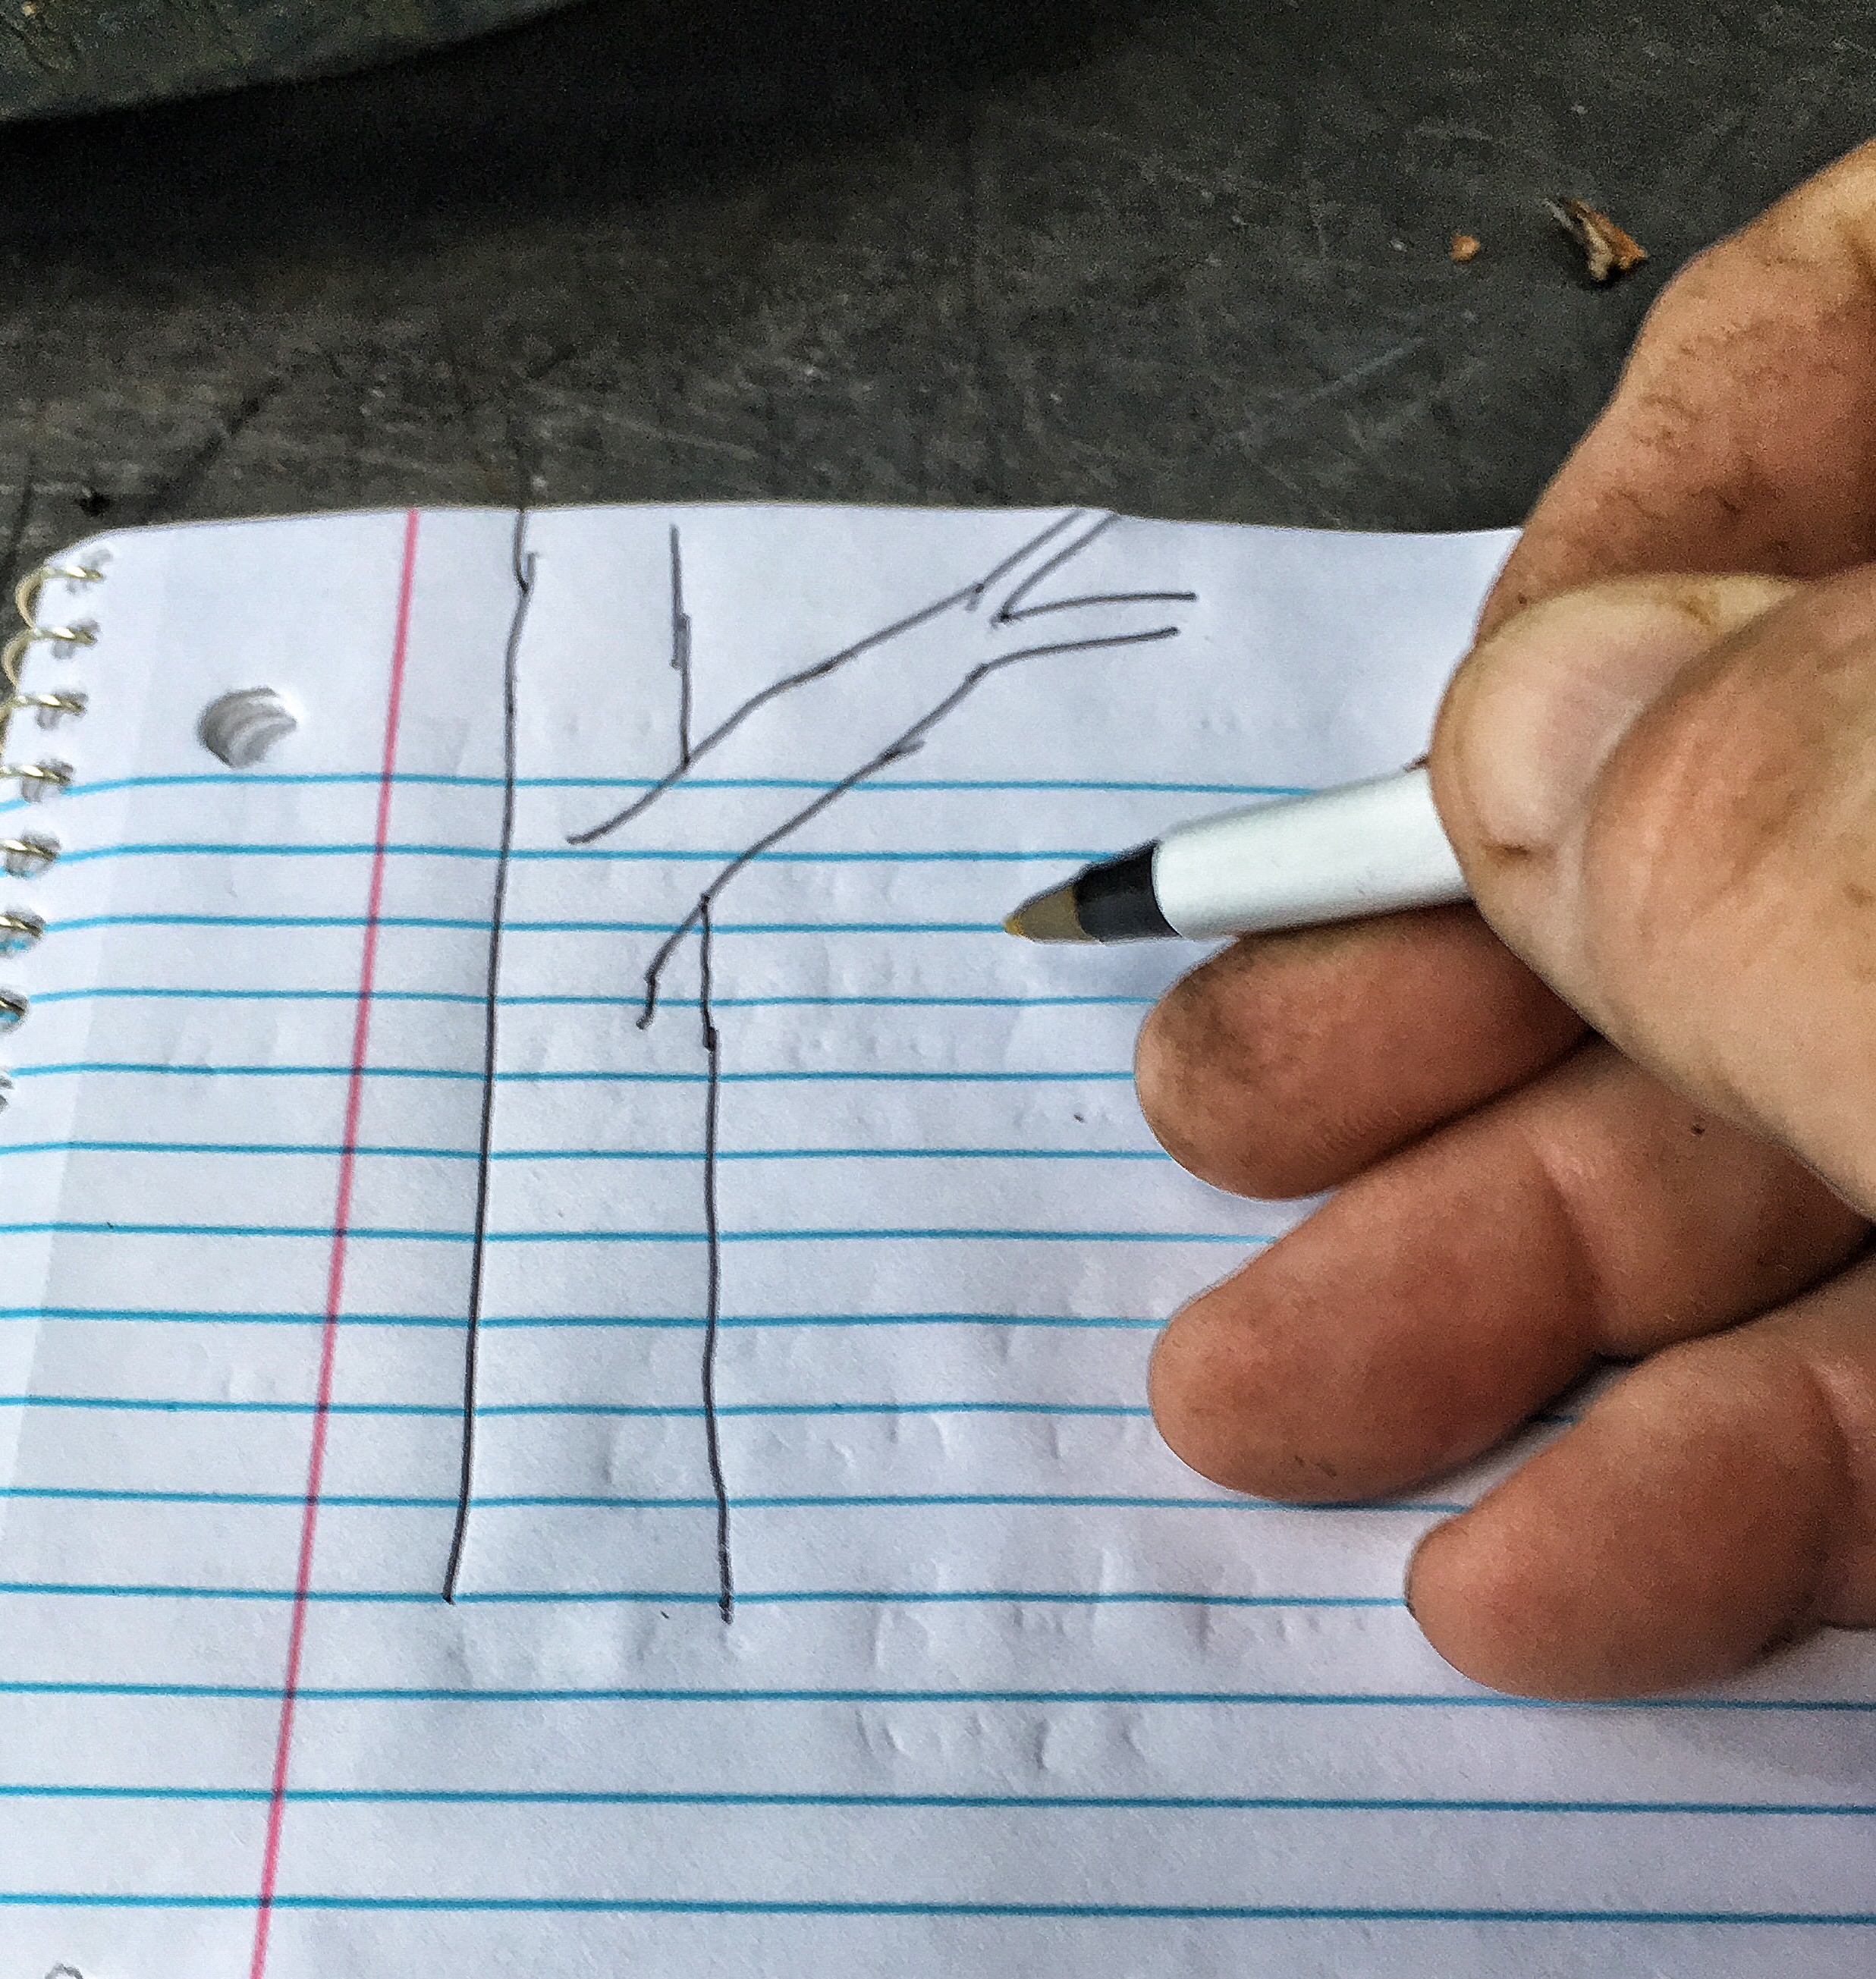 In this case, it was cut it off flush. In many cases I might leave a portion to have a Jin (or I had some gin and I wasn’t cutting so good…). But since we have a tree that can heal a wound like this, we will take advantage of the way sap flows to help heal it faster.
With a round cut….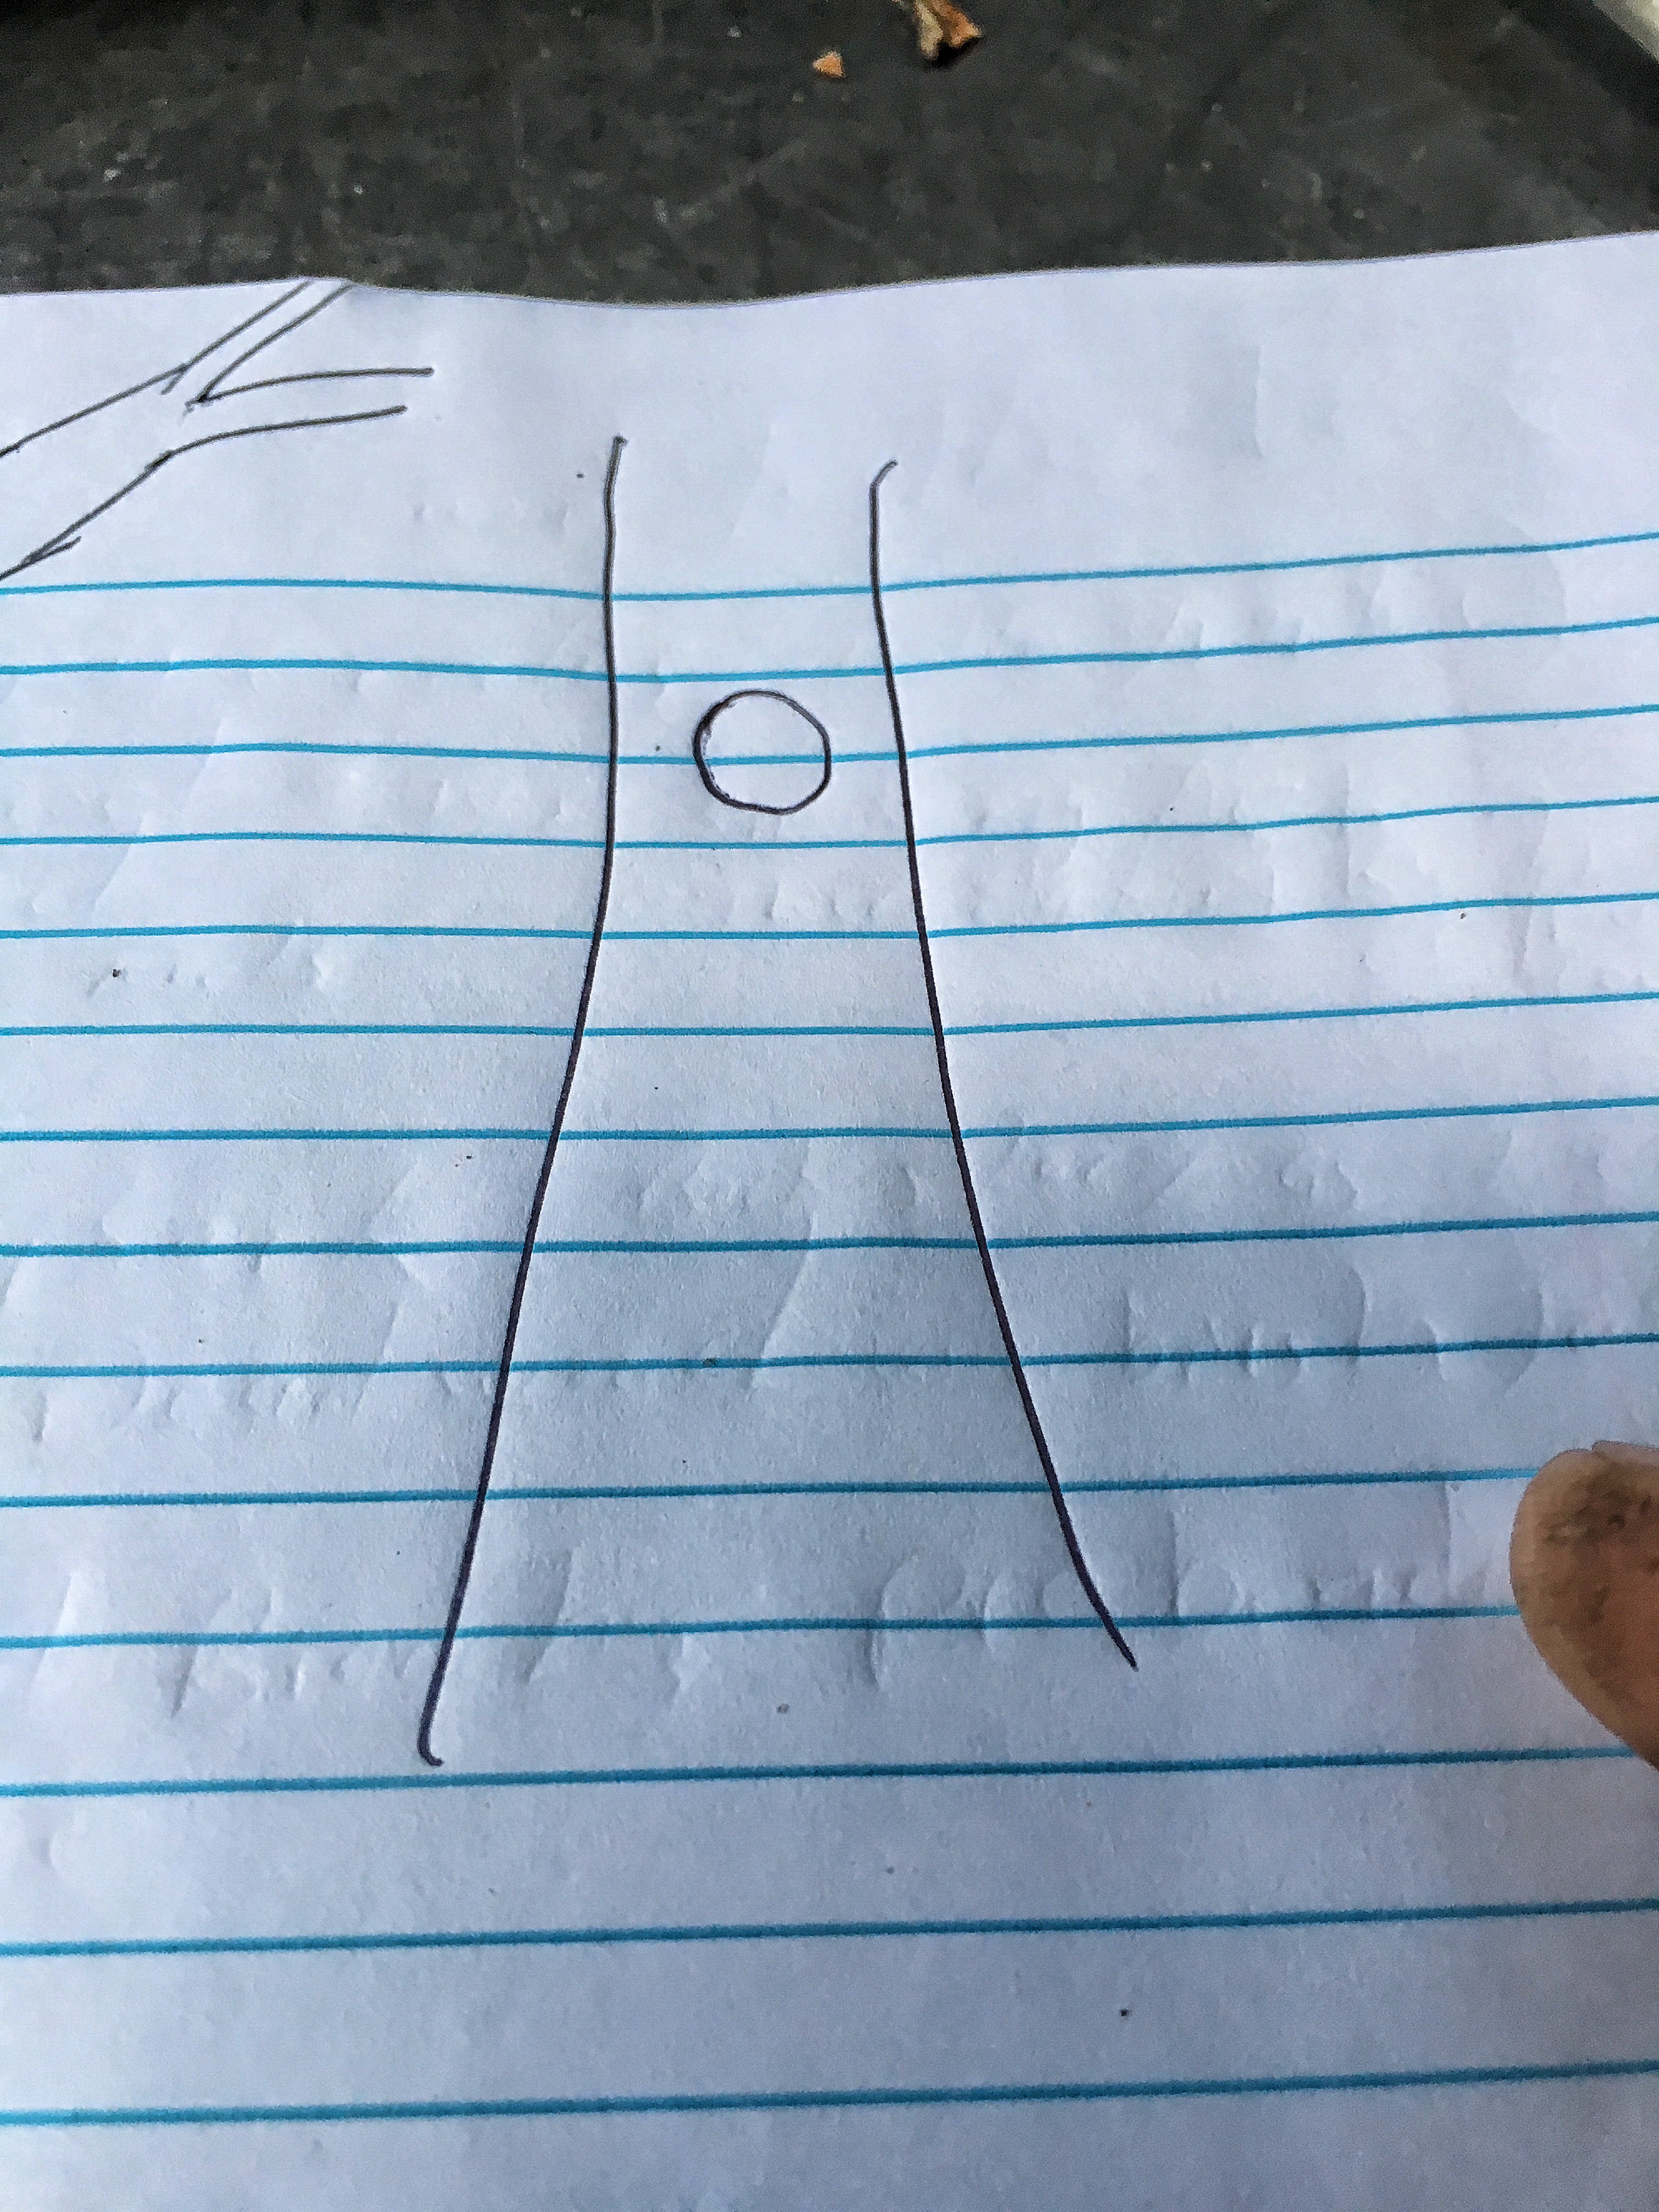 The sap will flow up….
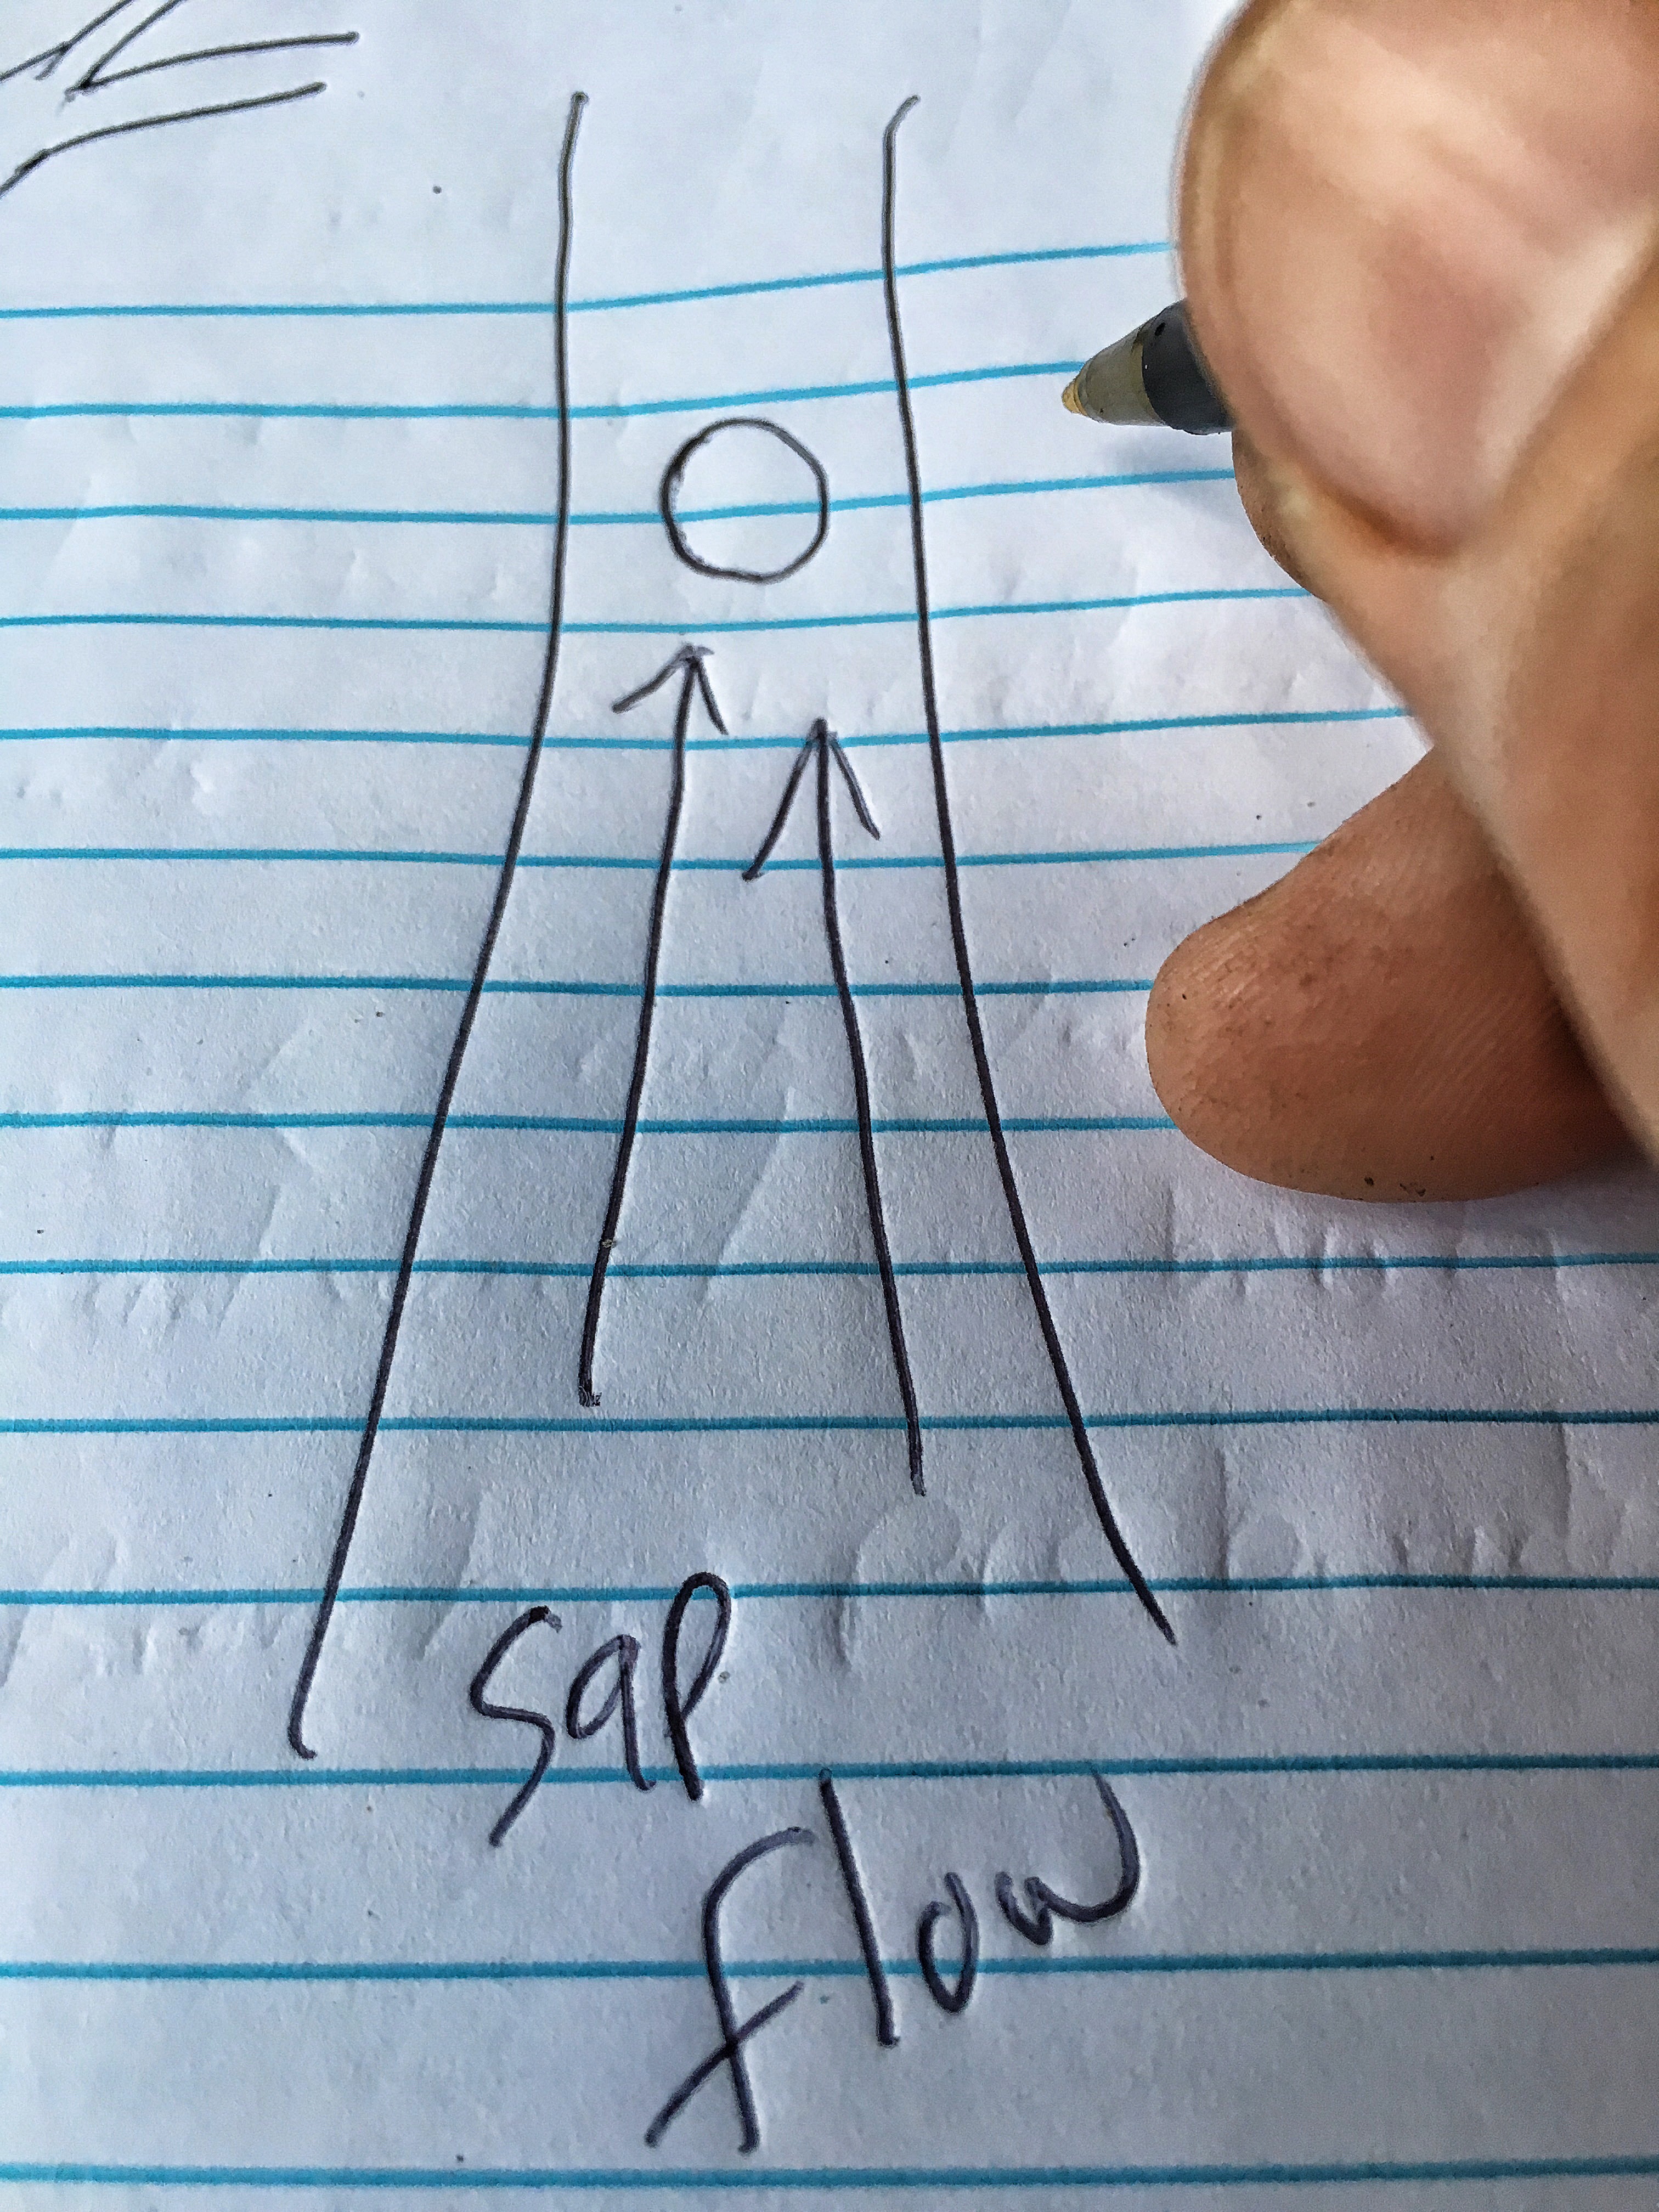
Hit the cut…. and have nowhere to go. The flow has to regrow a new path around the cut.
 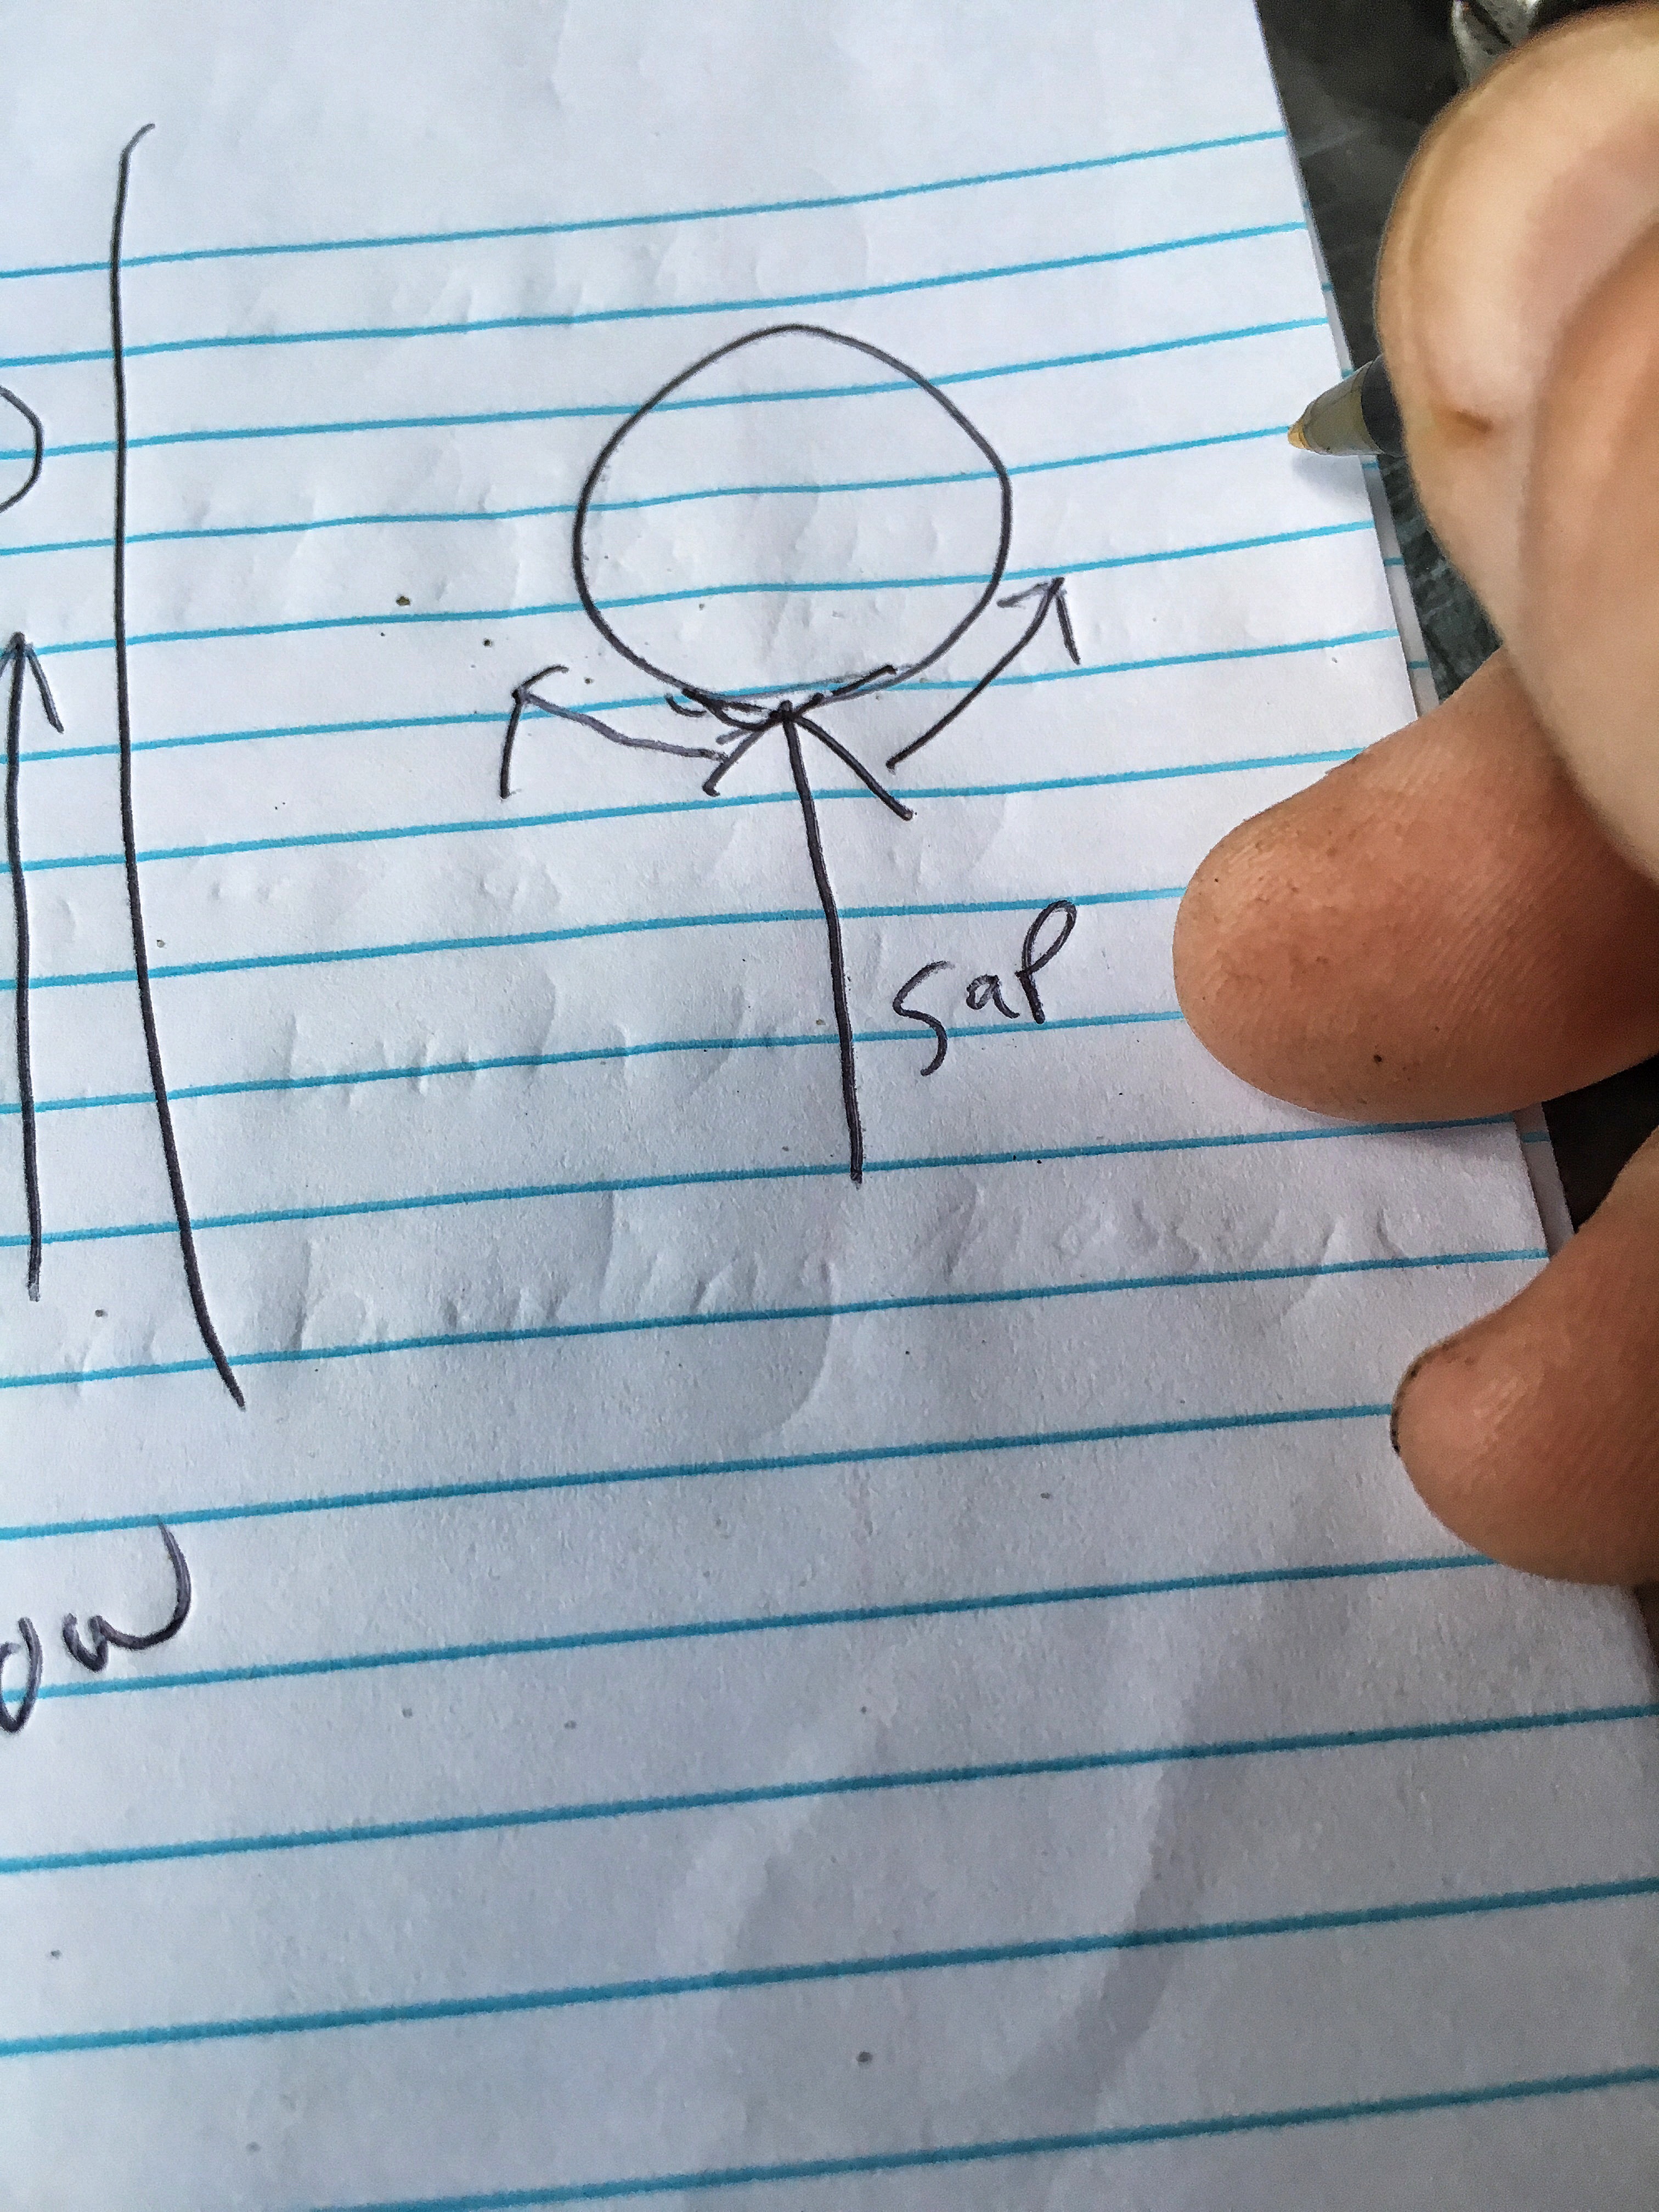 But…BUT… if we make the cut into this shape…
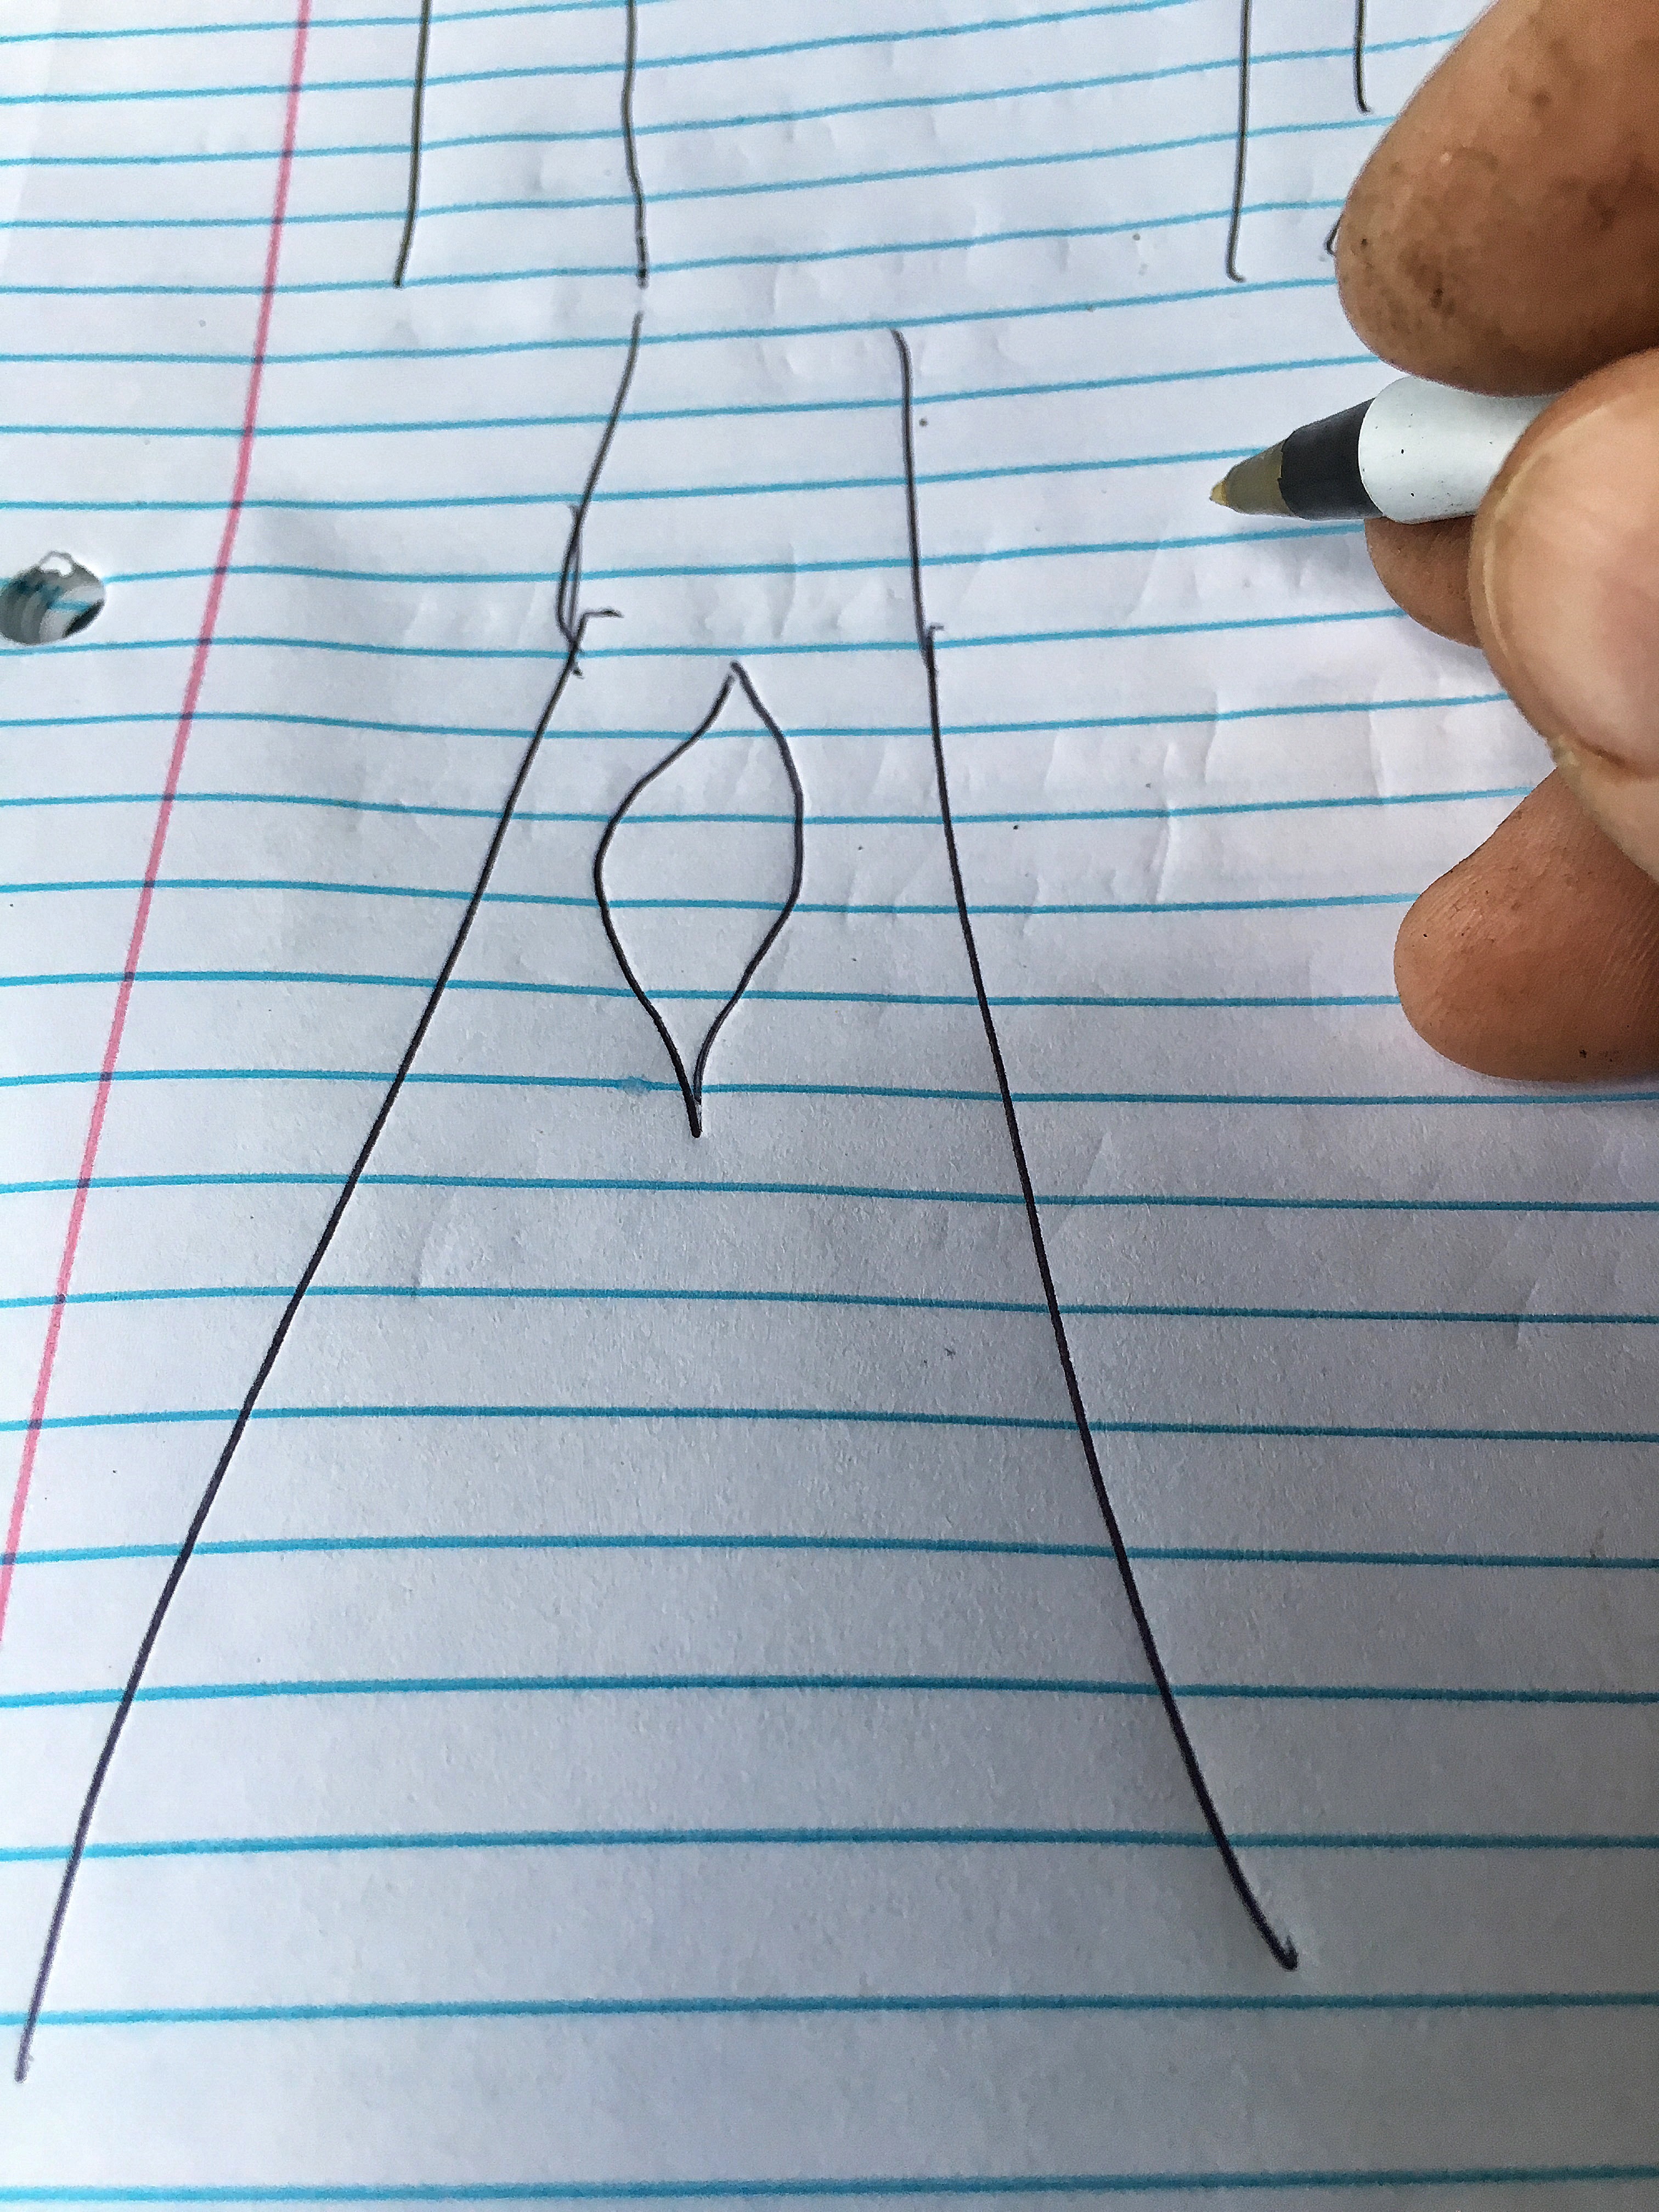 the sap has a quicker path to the top….
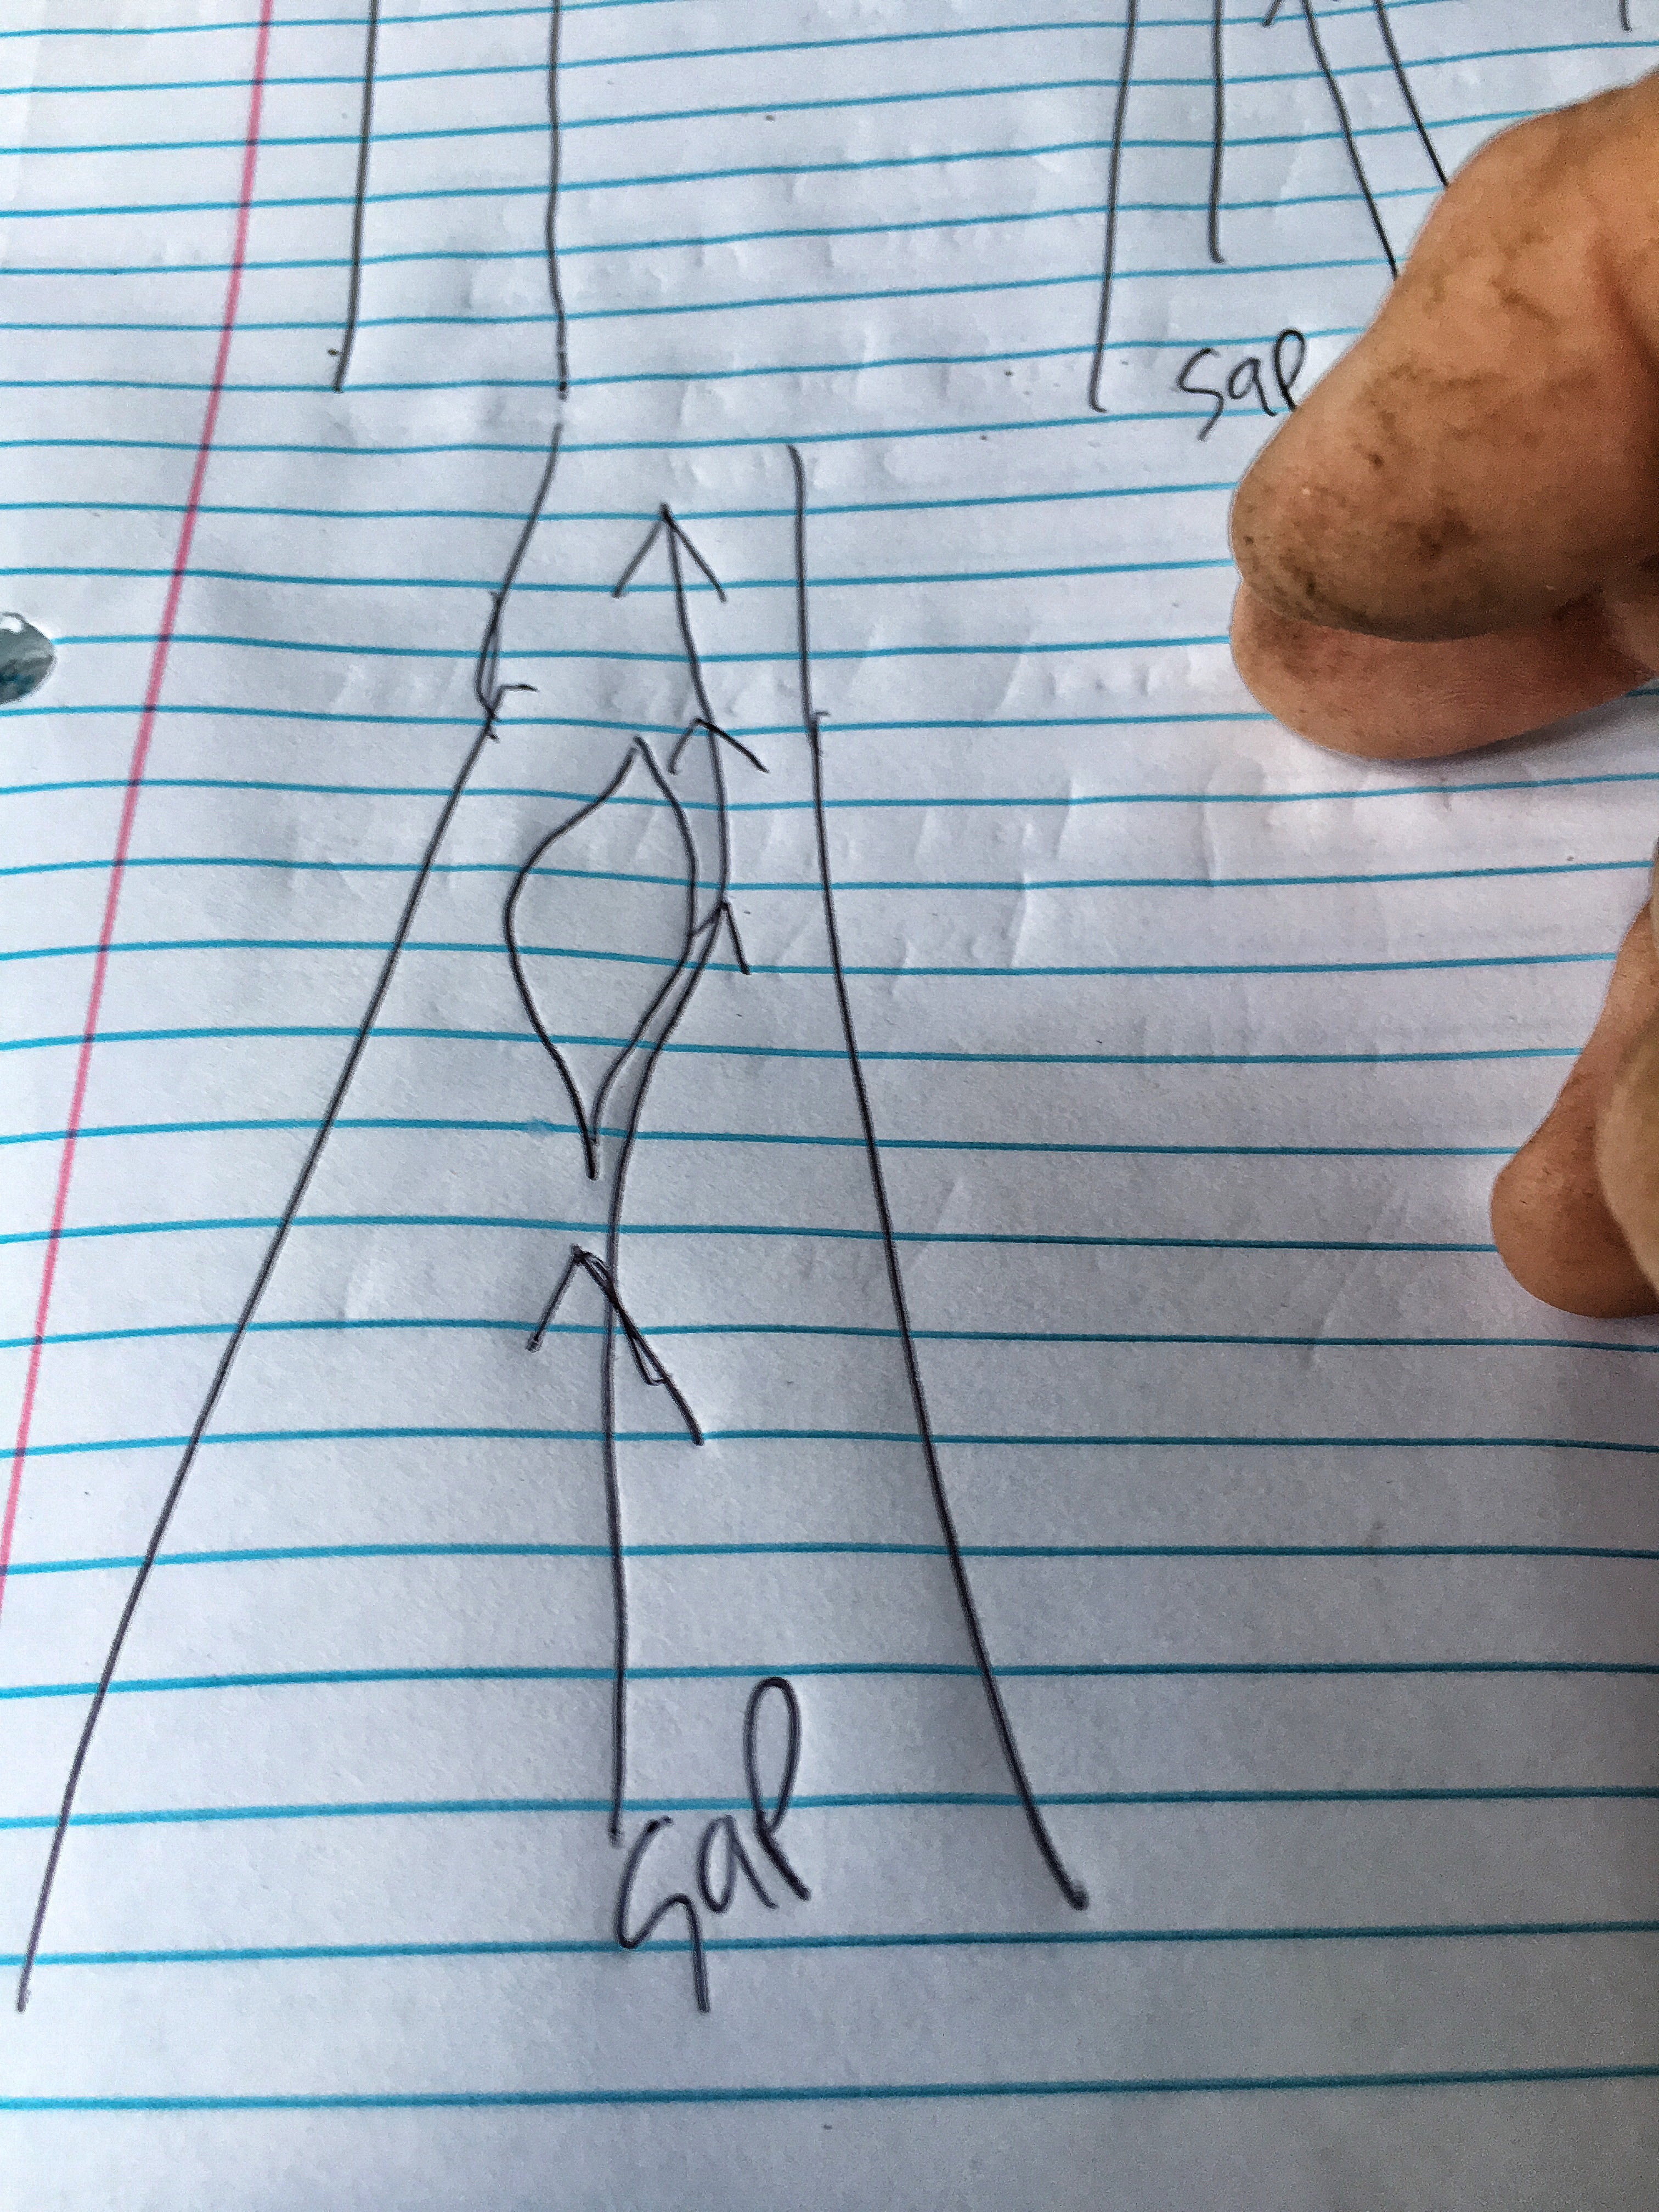 And heals faster. Learned that trick from Master Cheng of Taiwan.
Tools: a sharp knife. 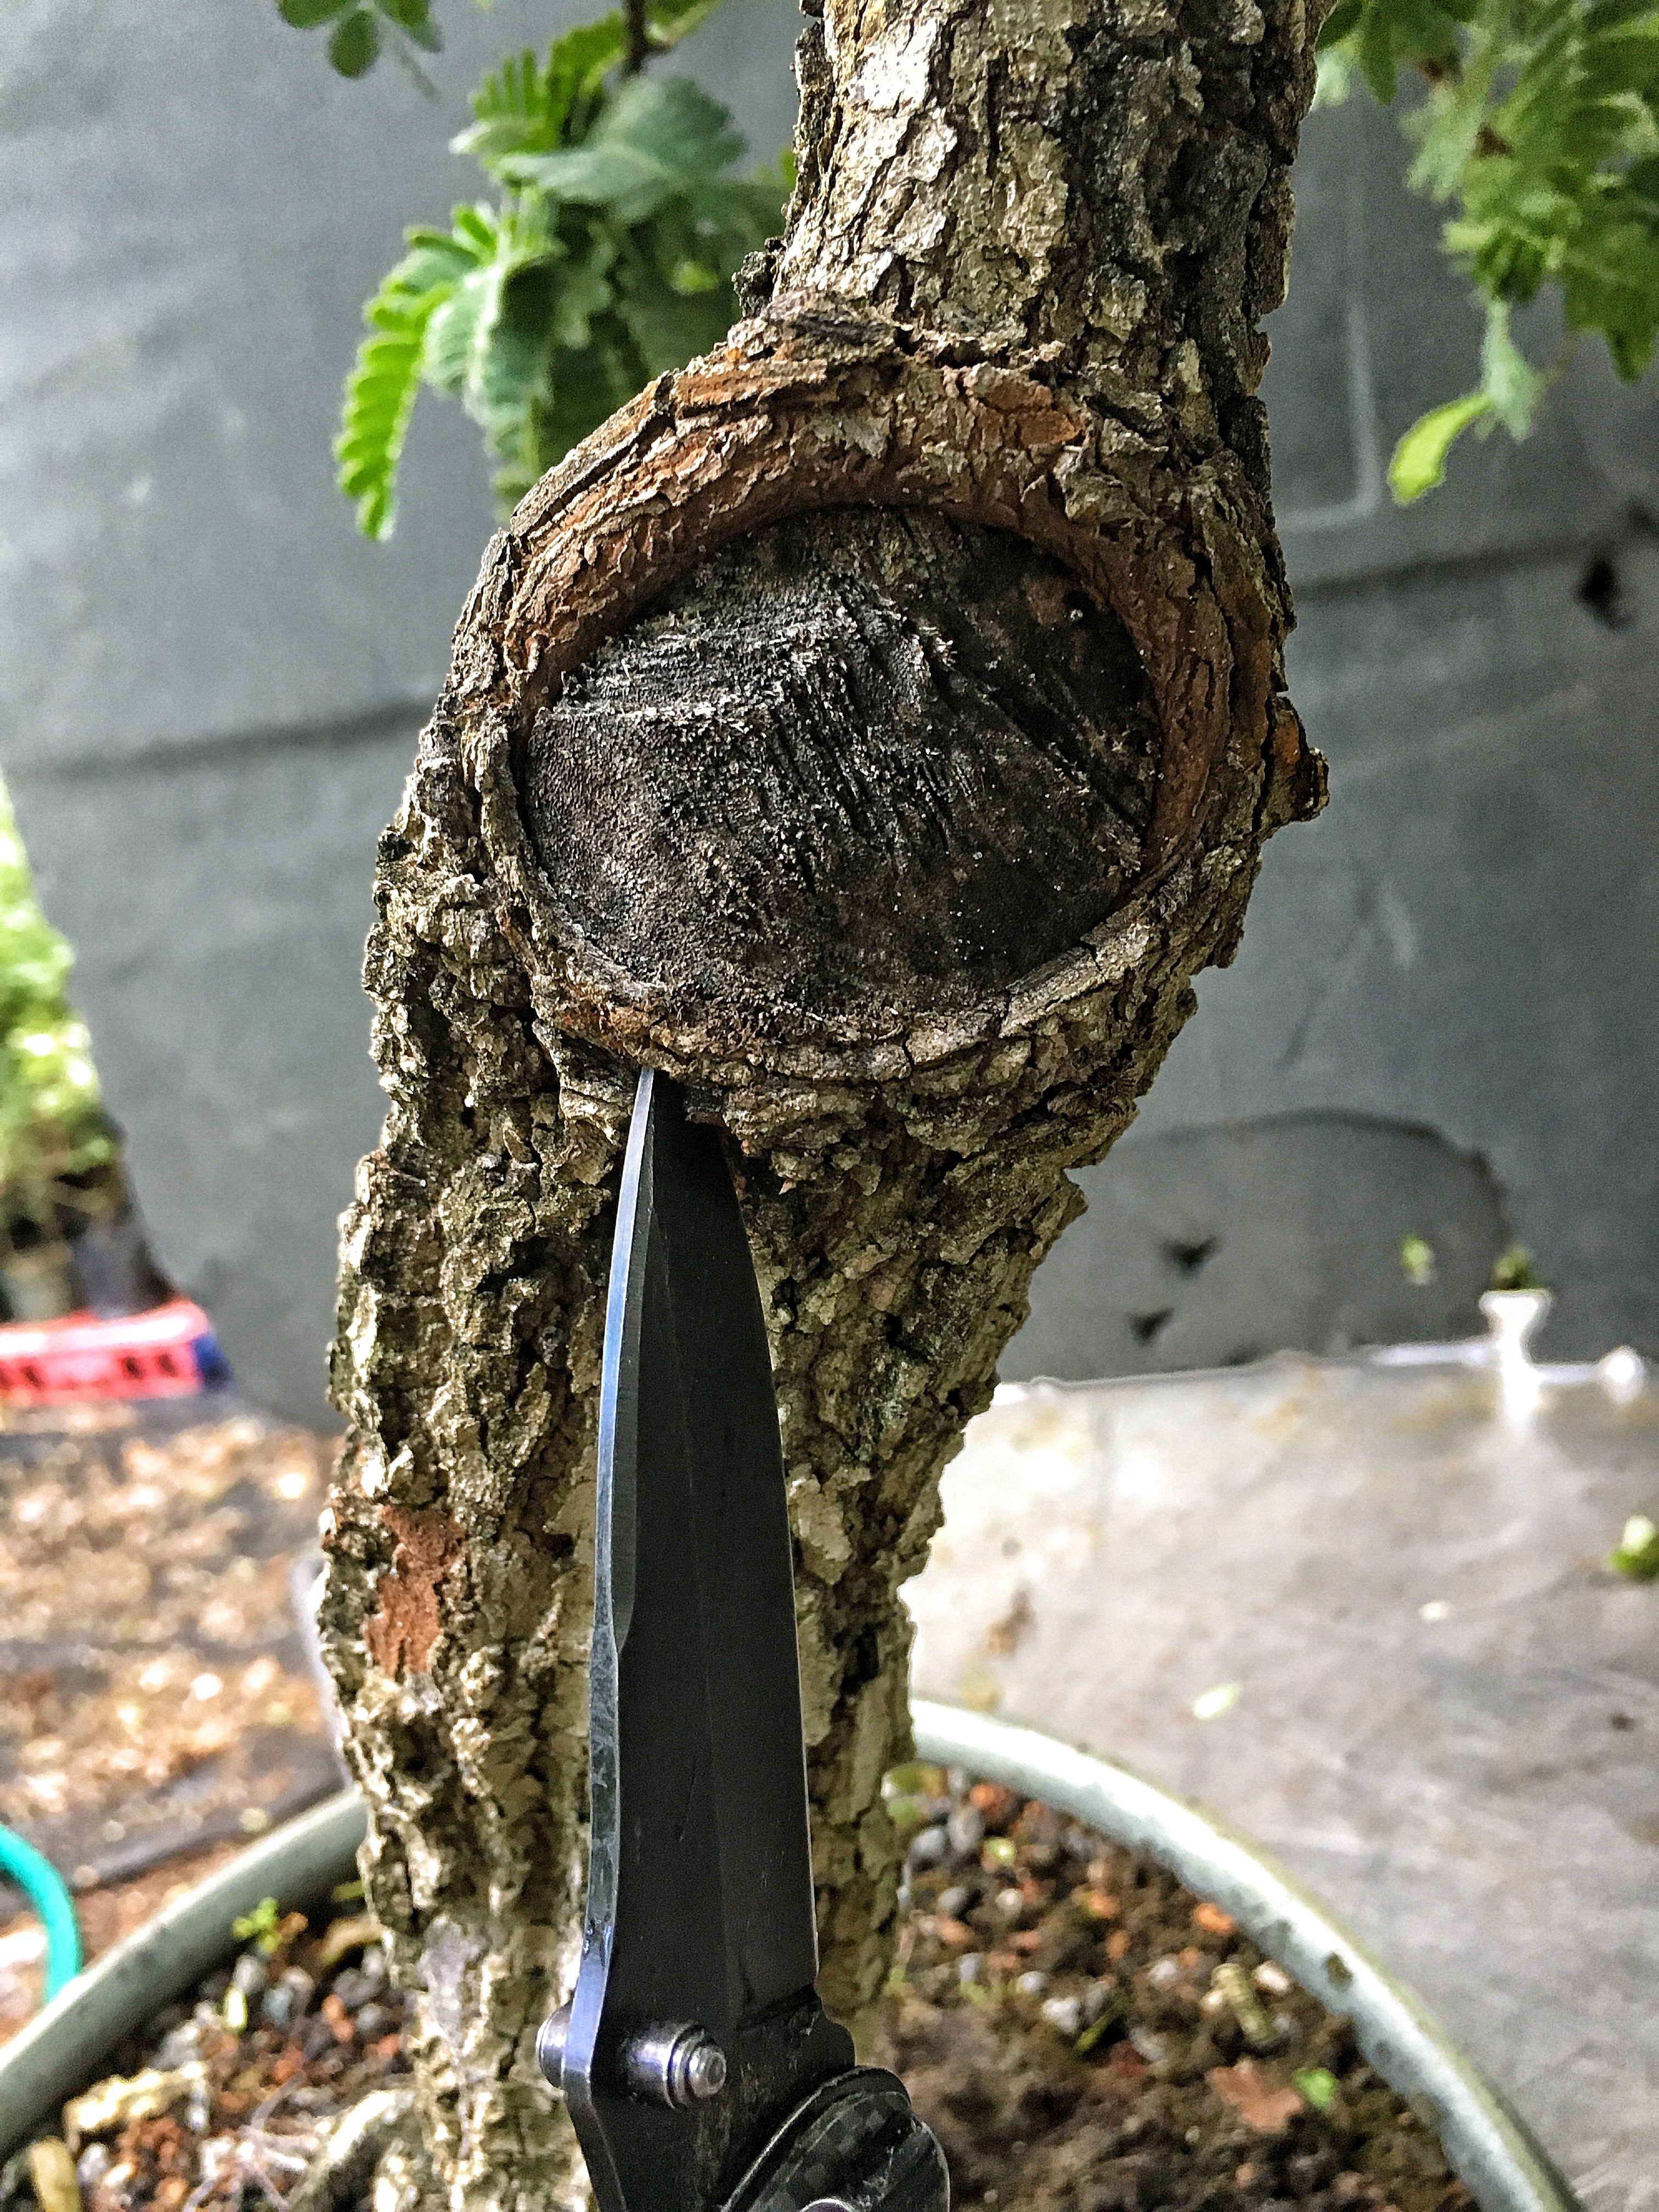
Some mechanized persuasion: a mini angle grinder. 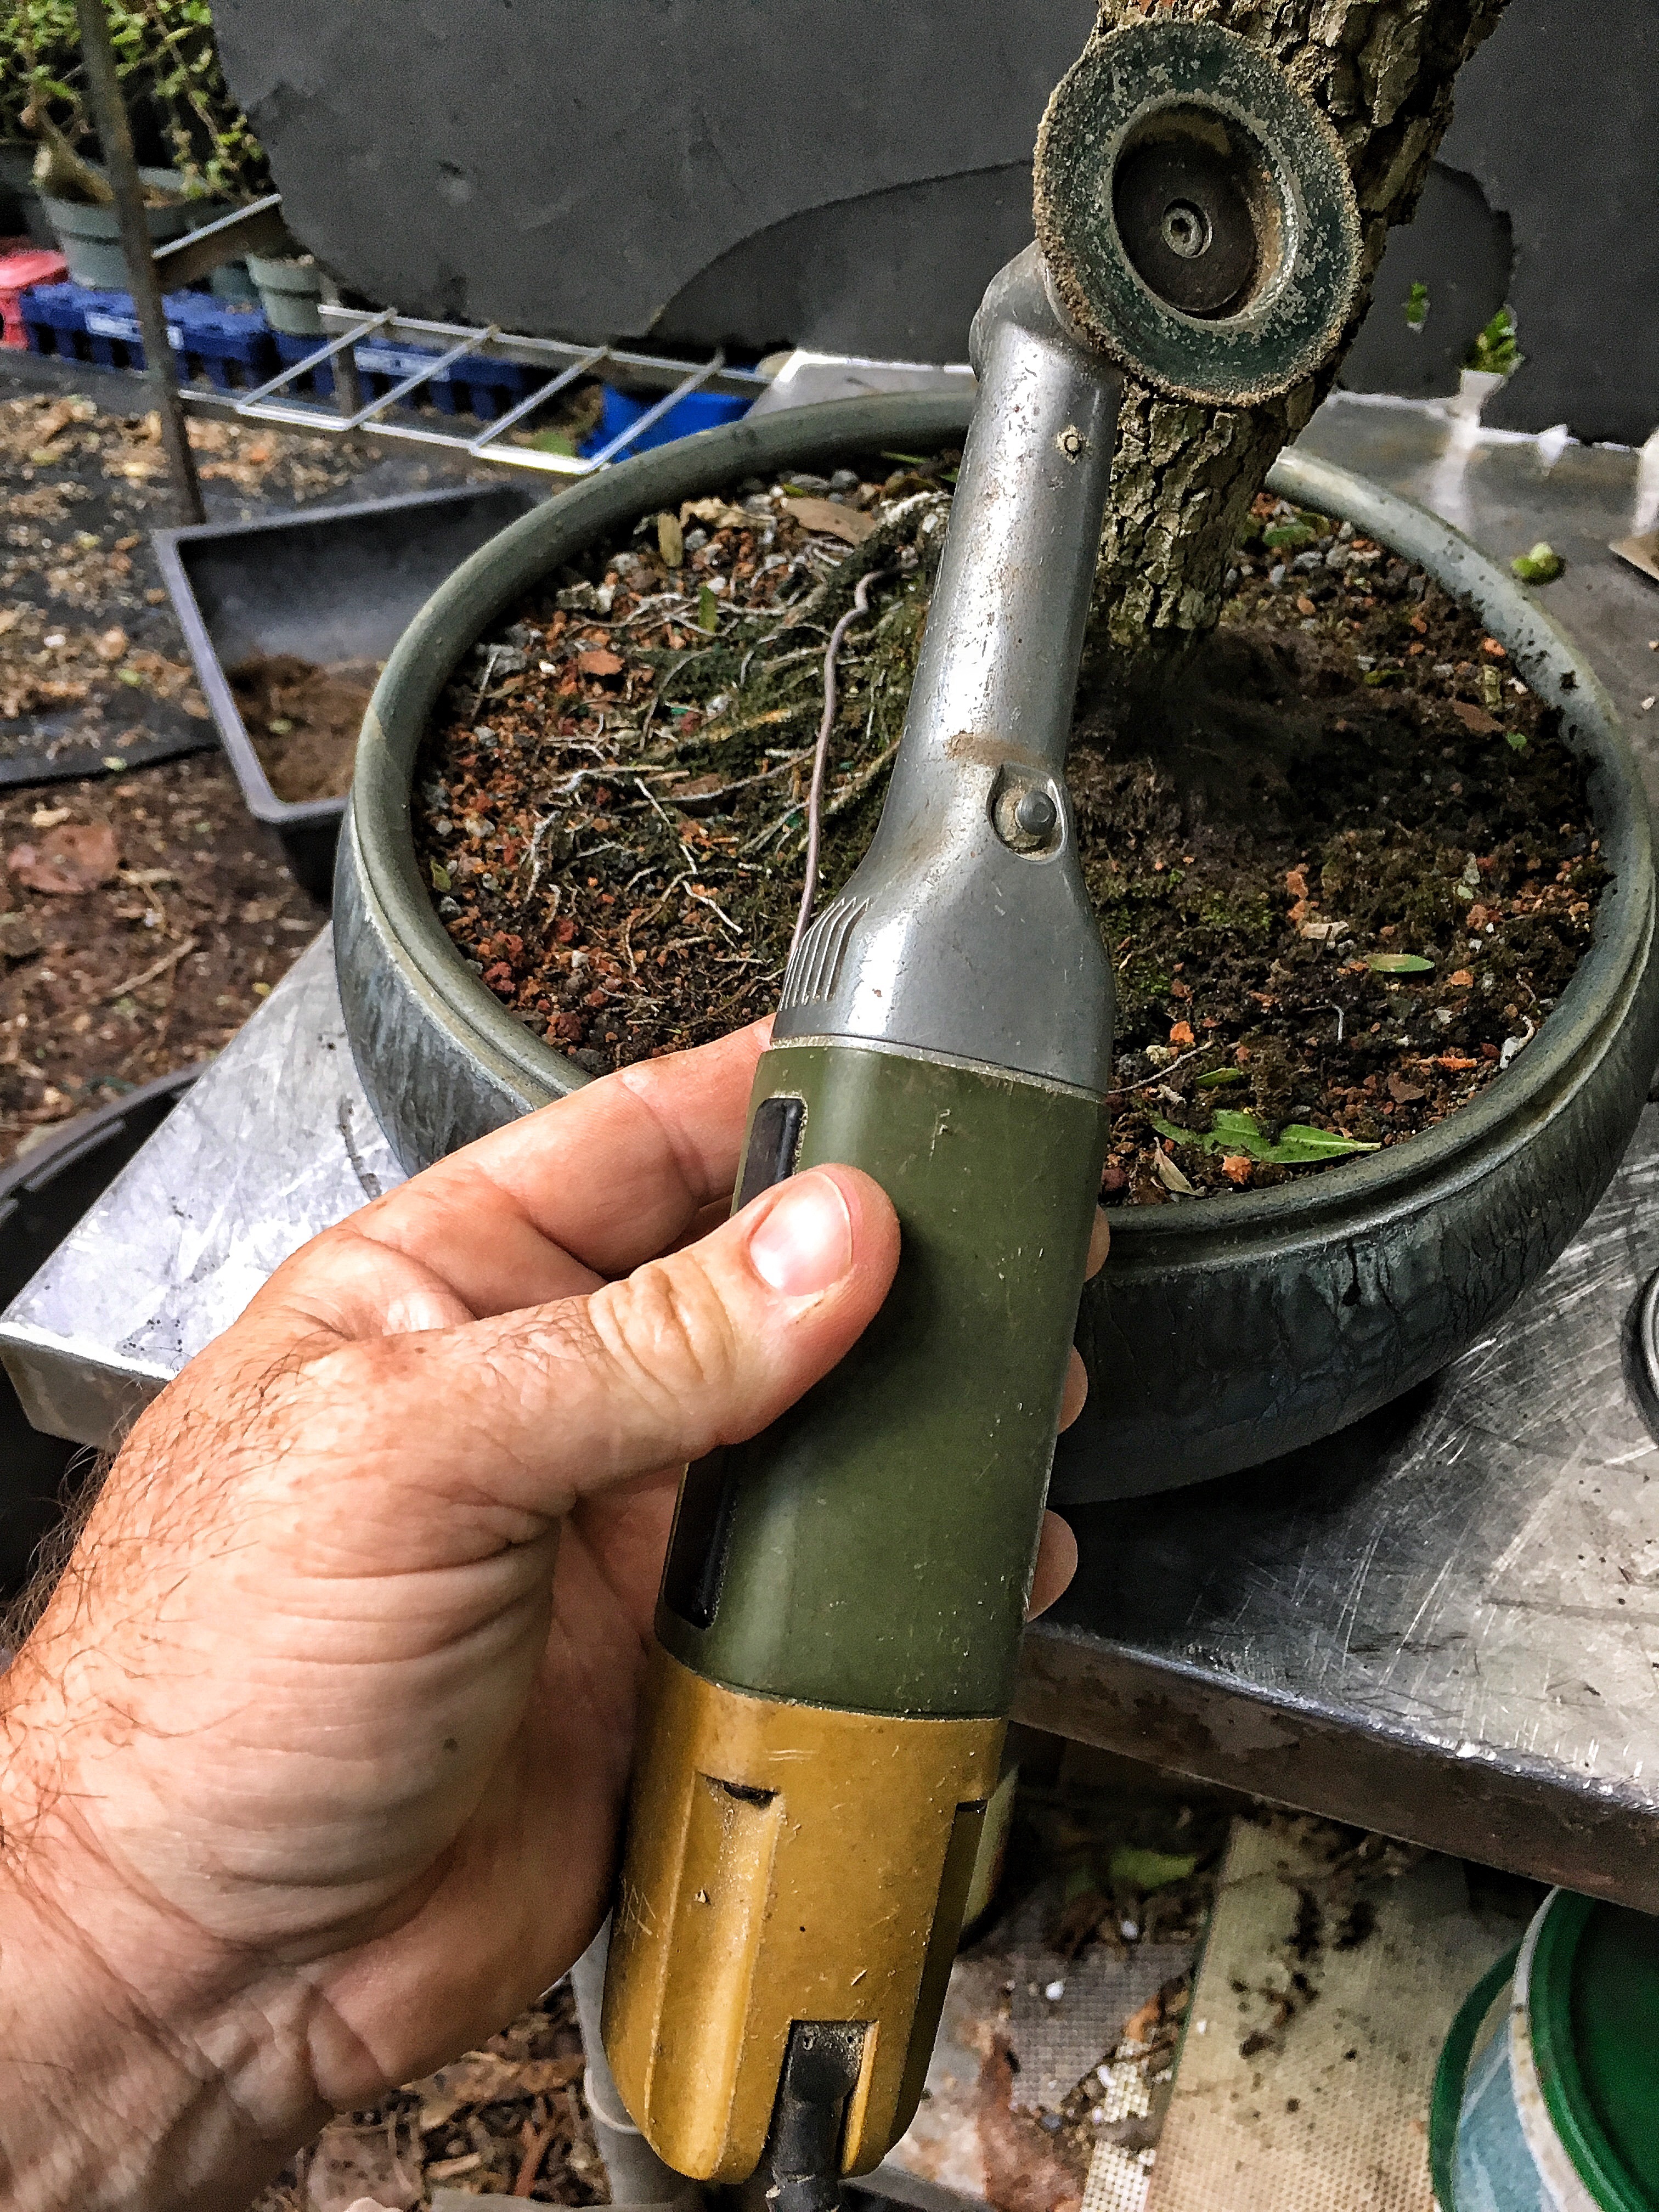 With a carbide burr wheel with only the outside edge covered with abrasive material.
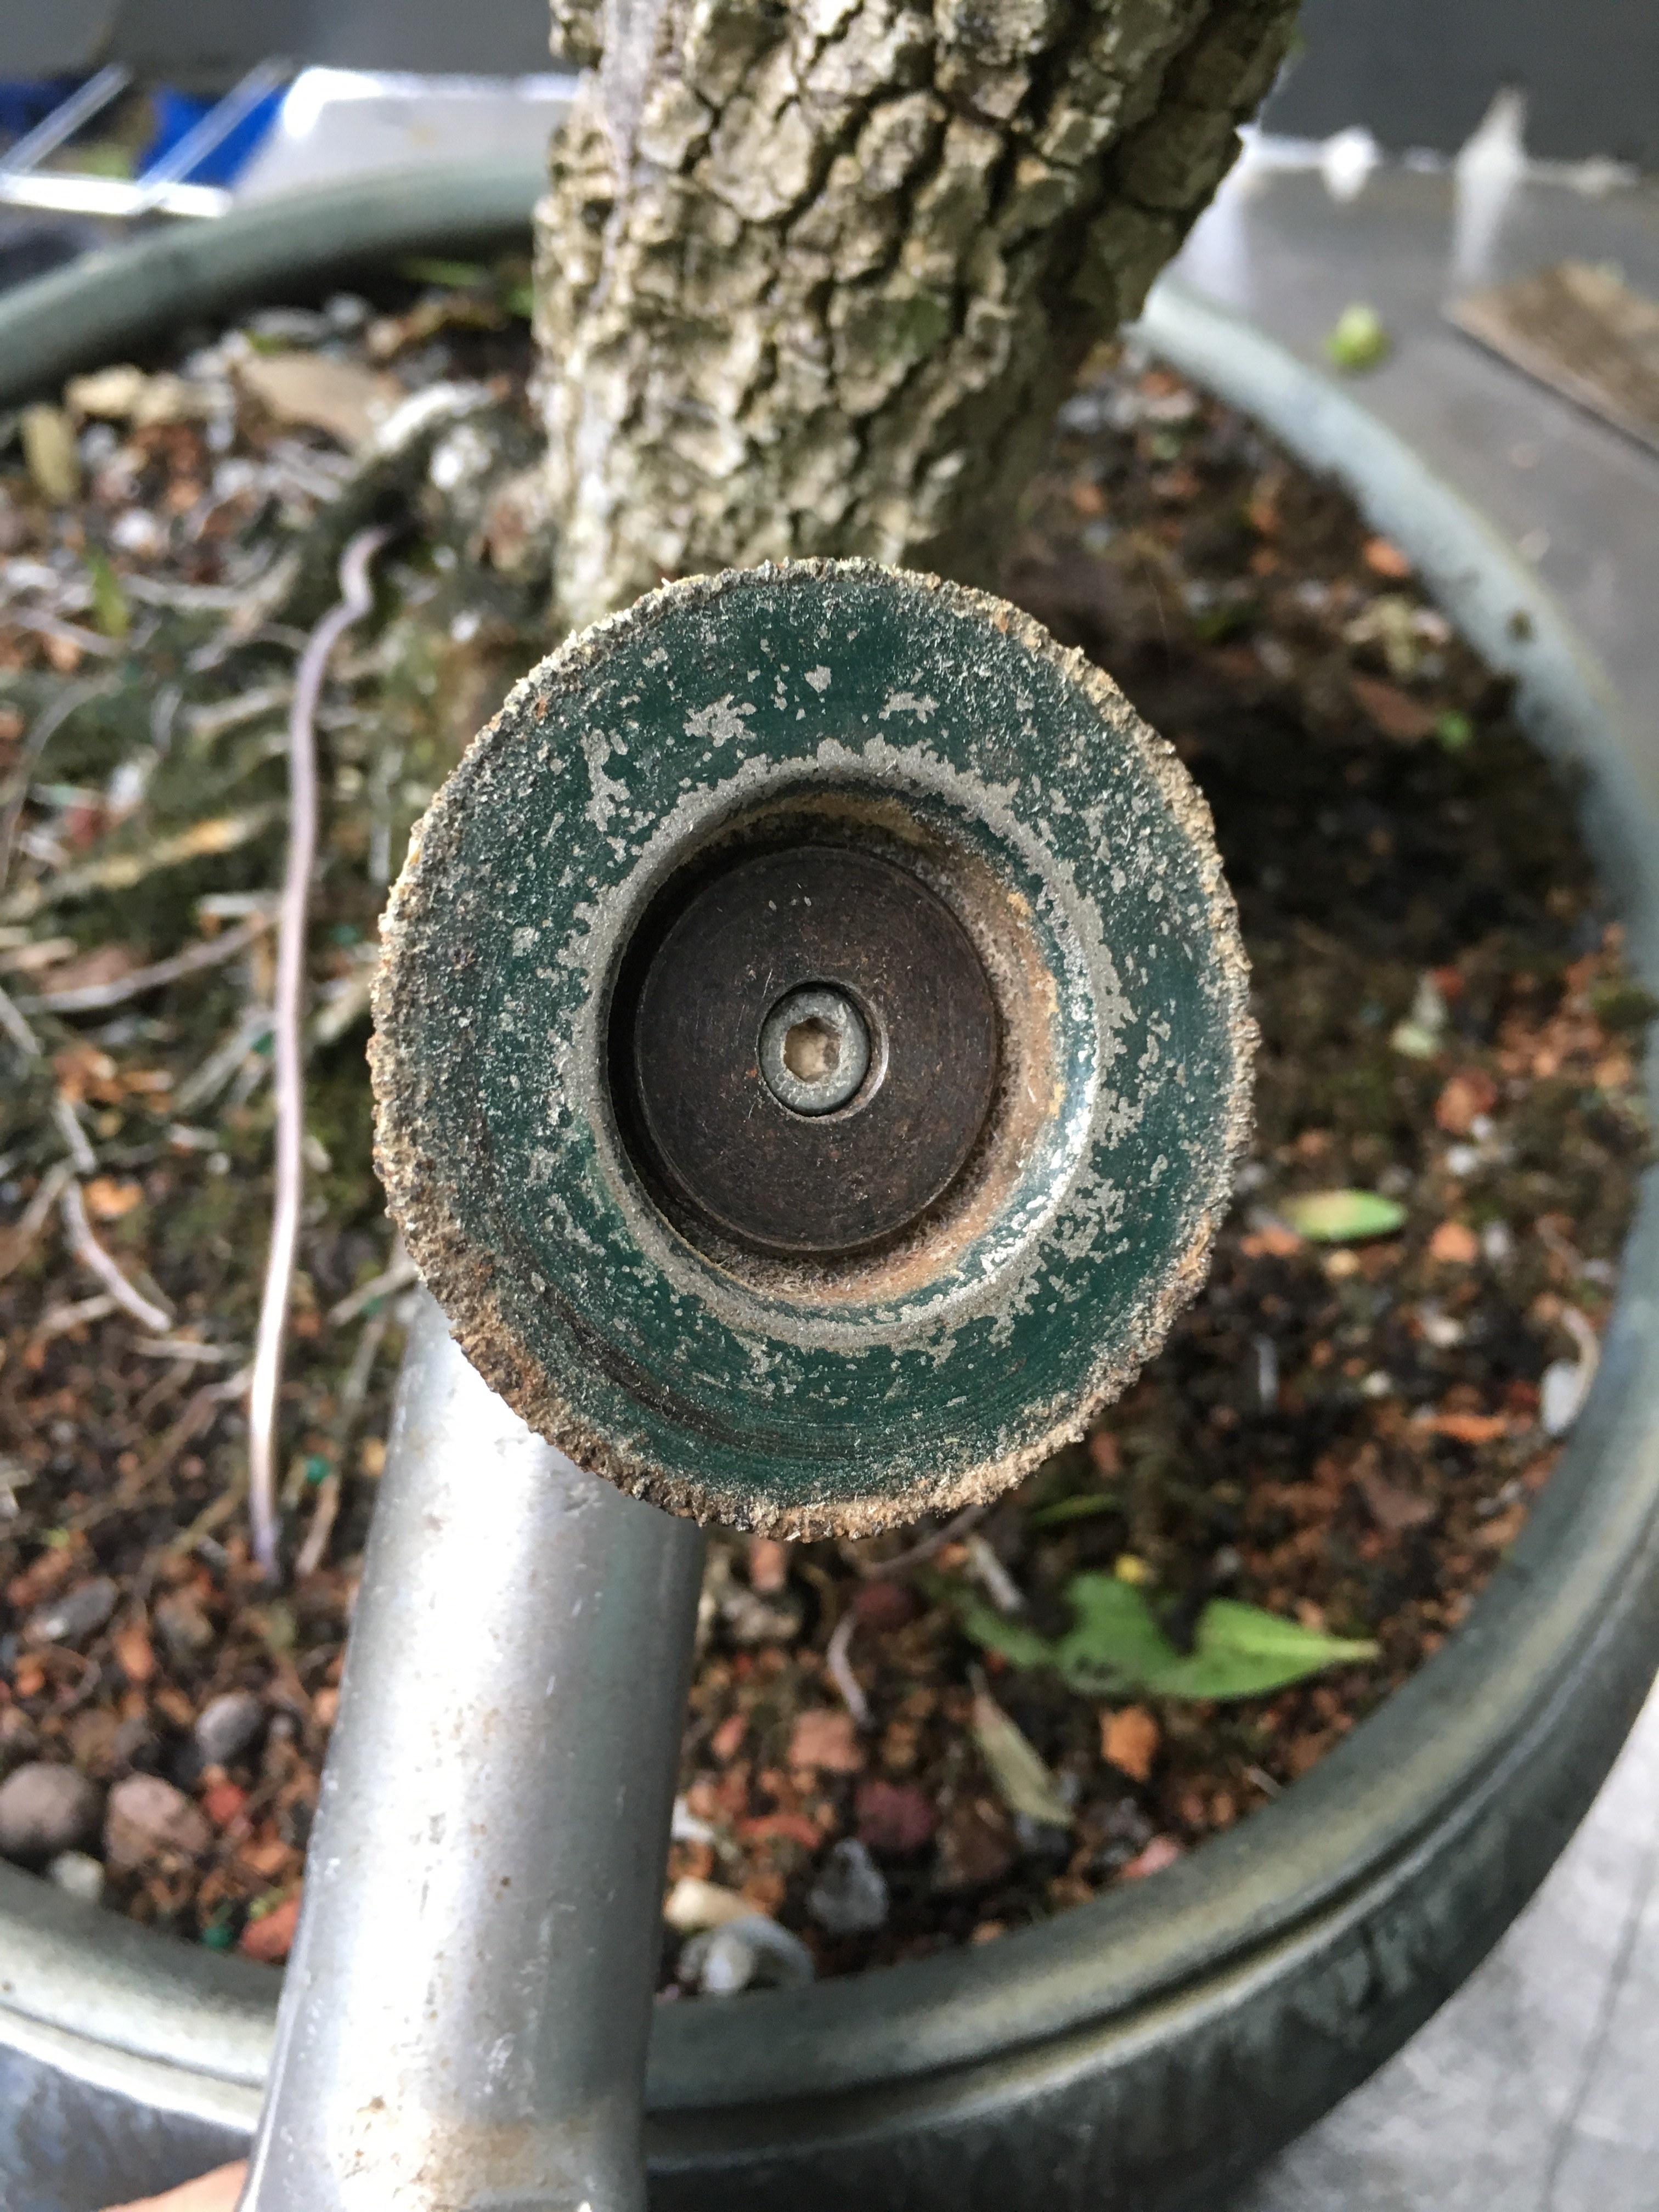
Make the wood just a little concave. 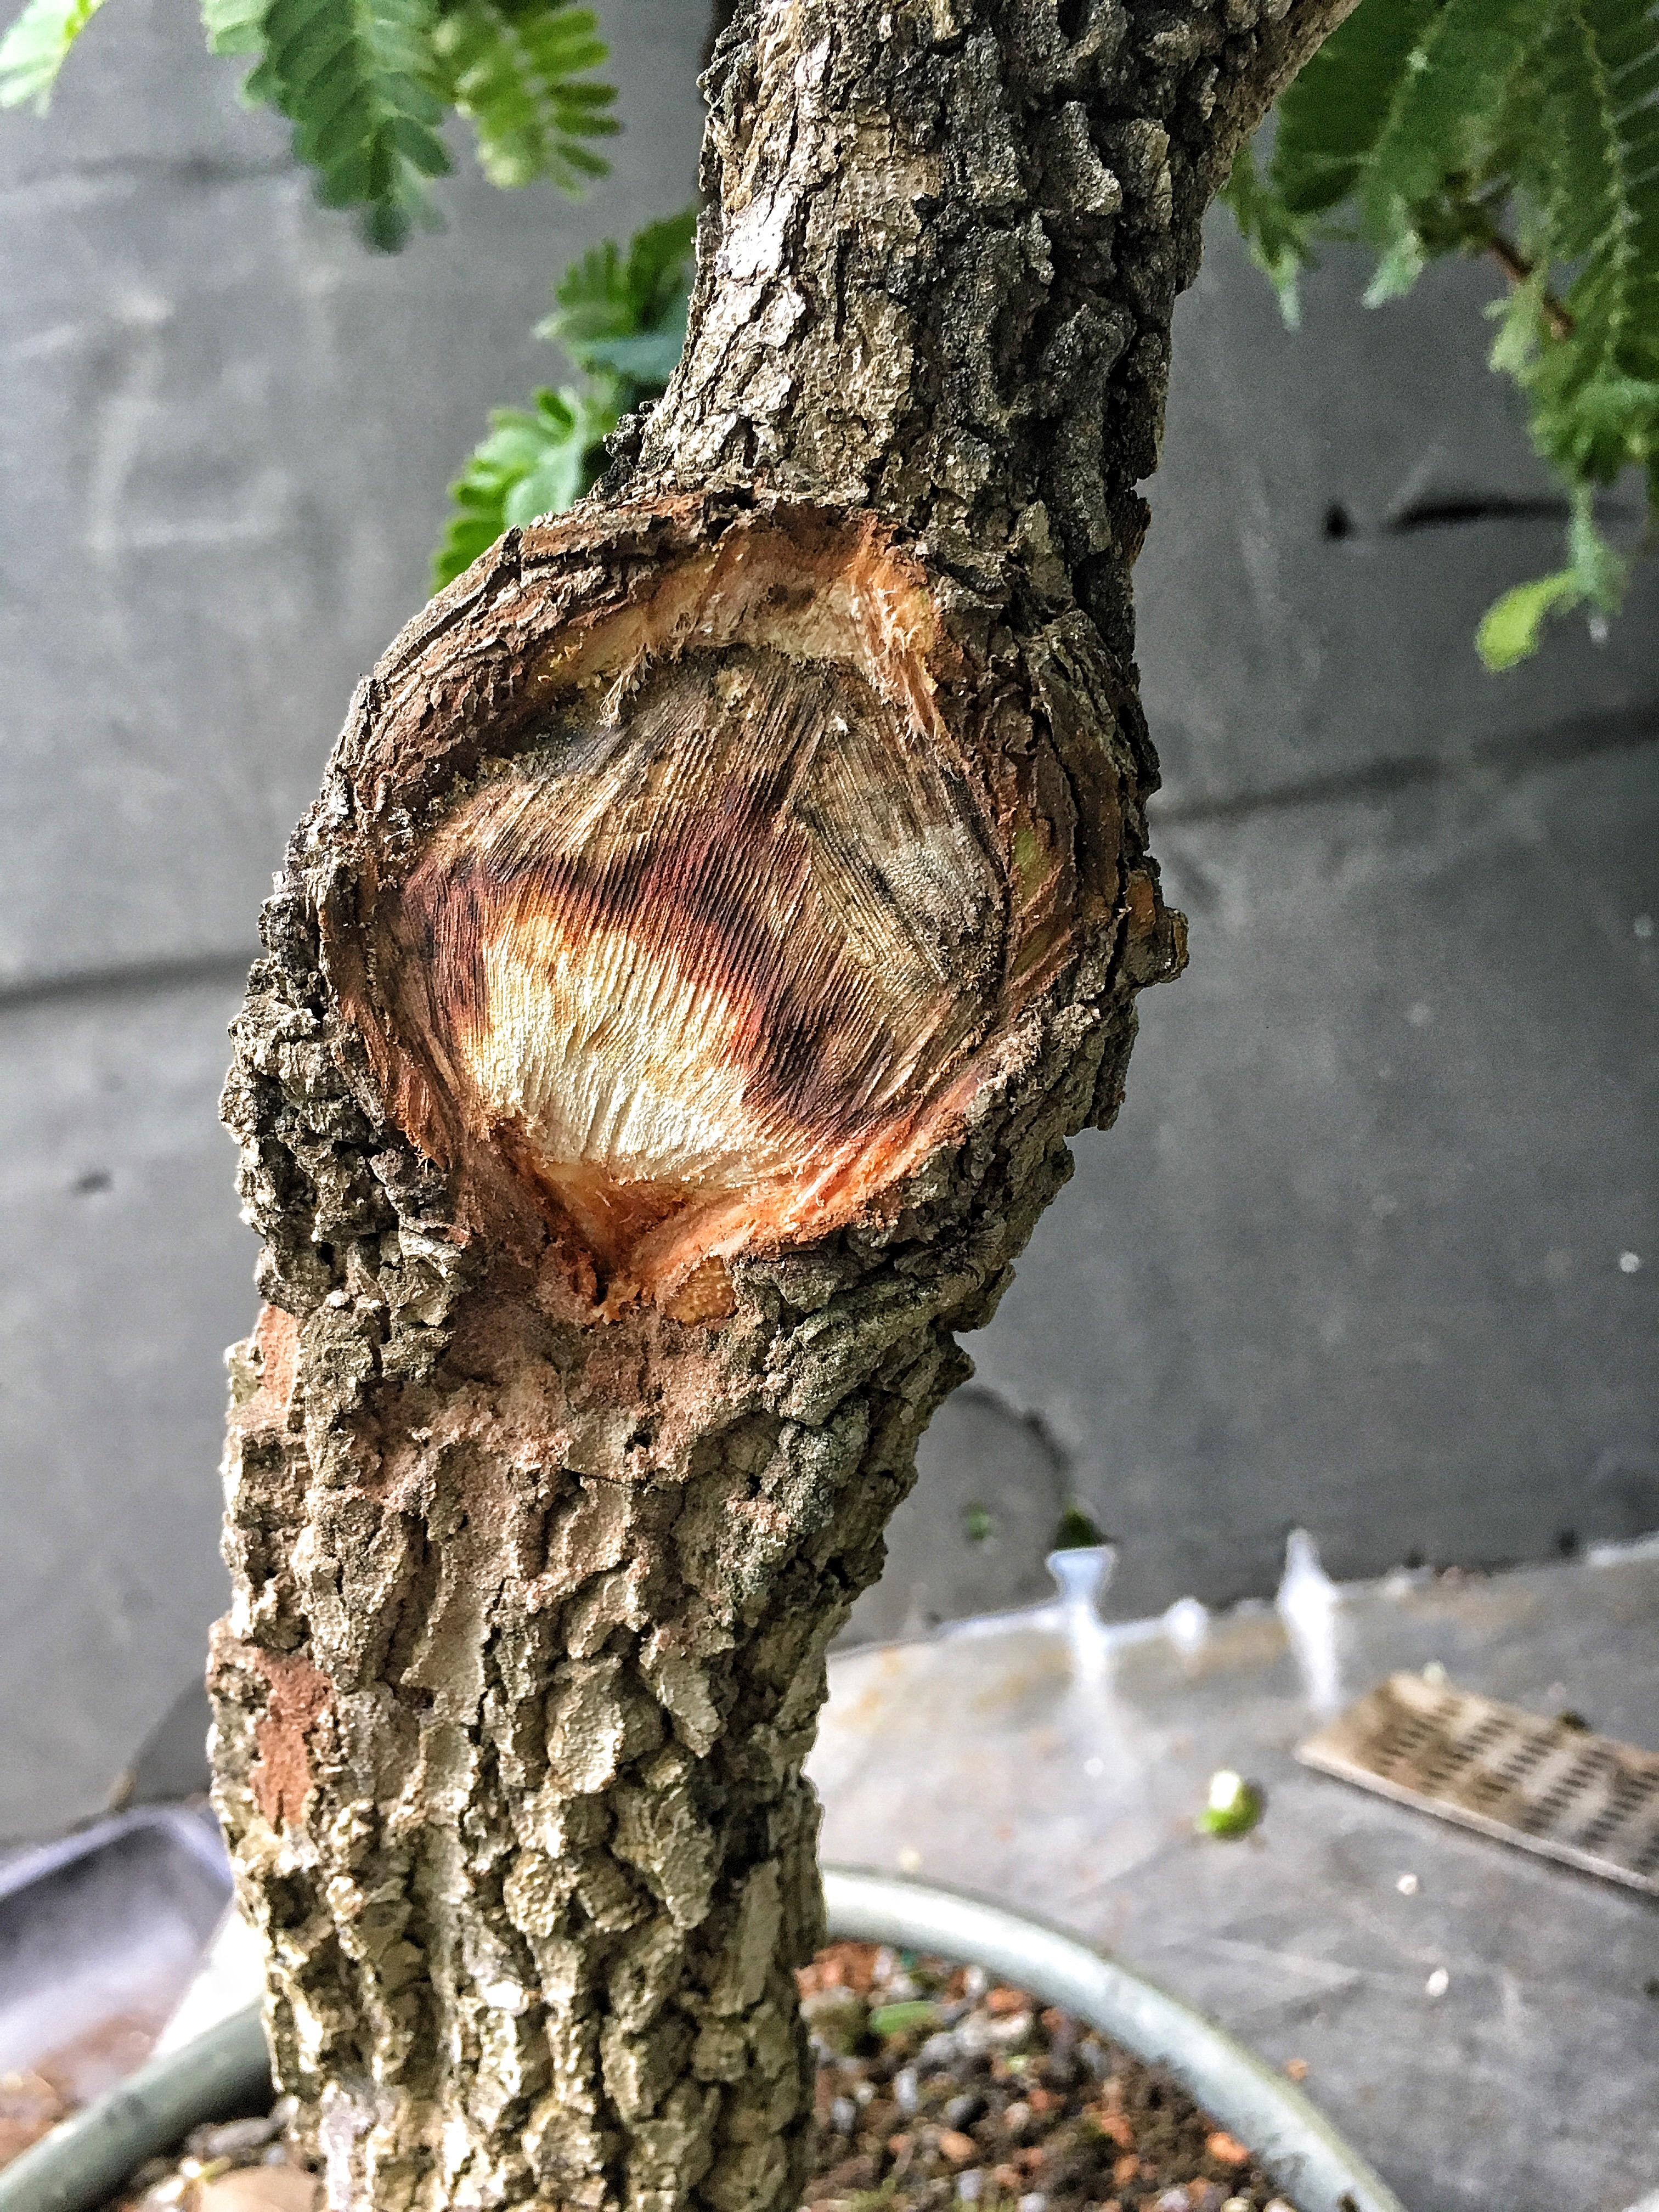
Then, to stimulate the cut again (if a scar doesn’t close in two years or so, just take a sharp blade and score the healed edge, this stimulates new growth) 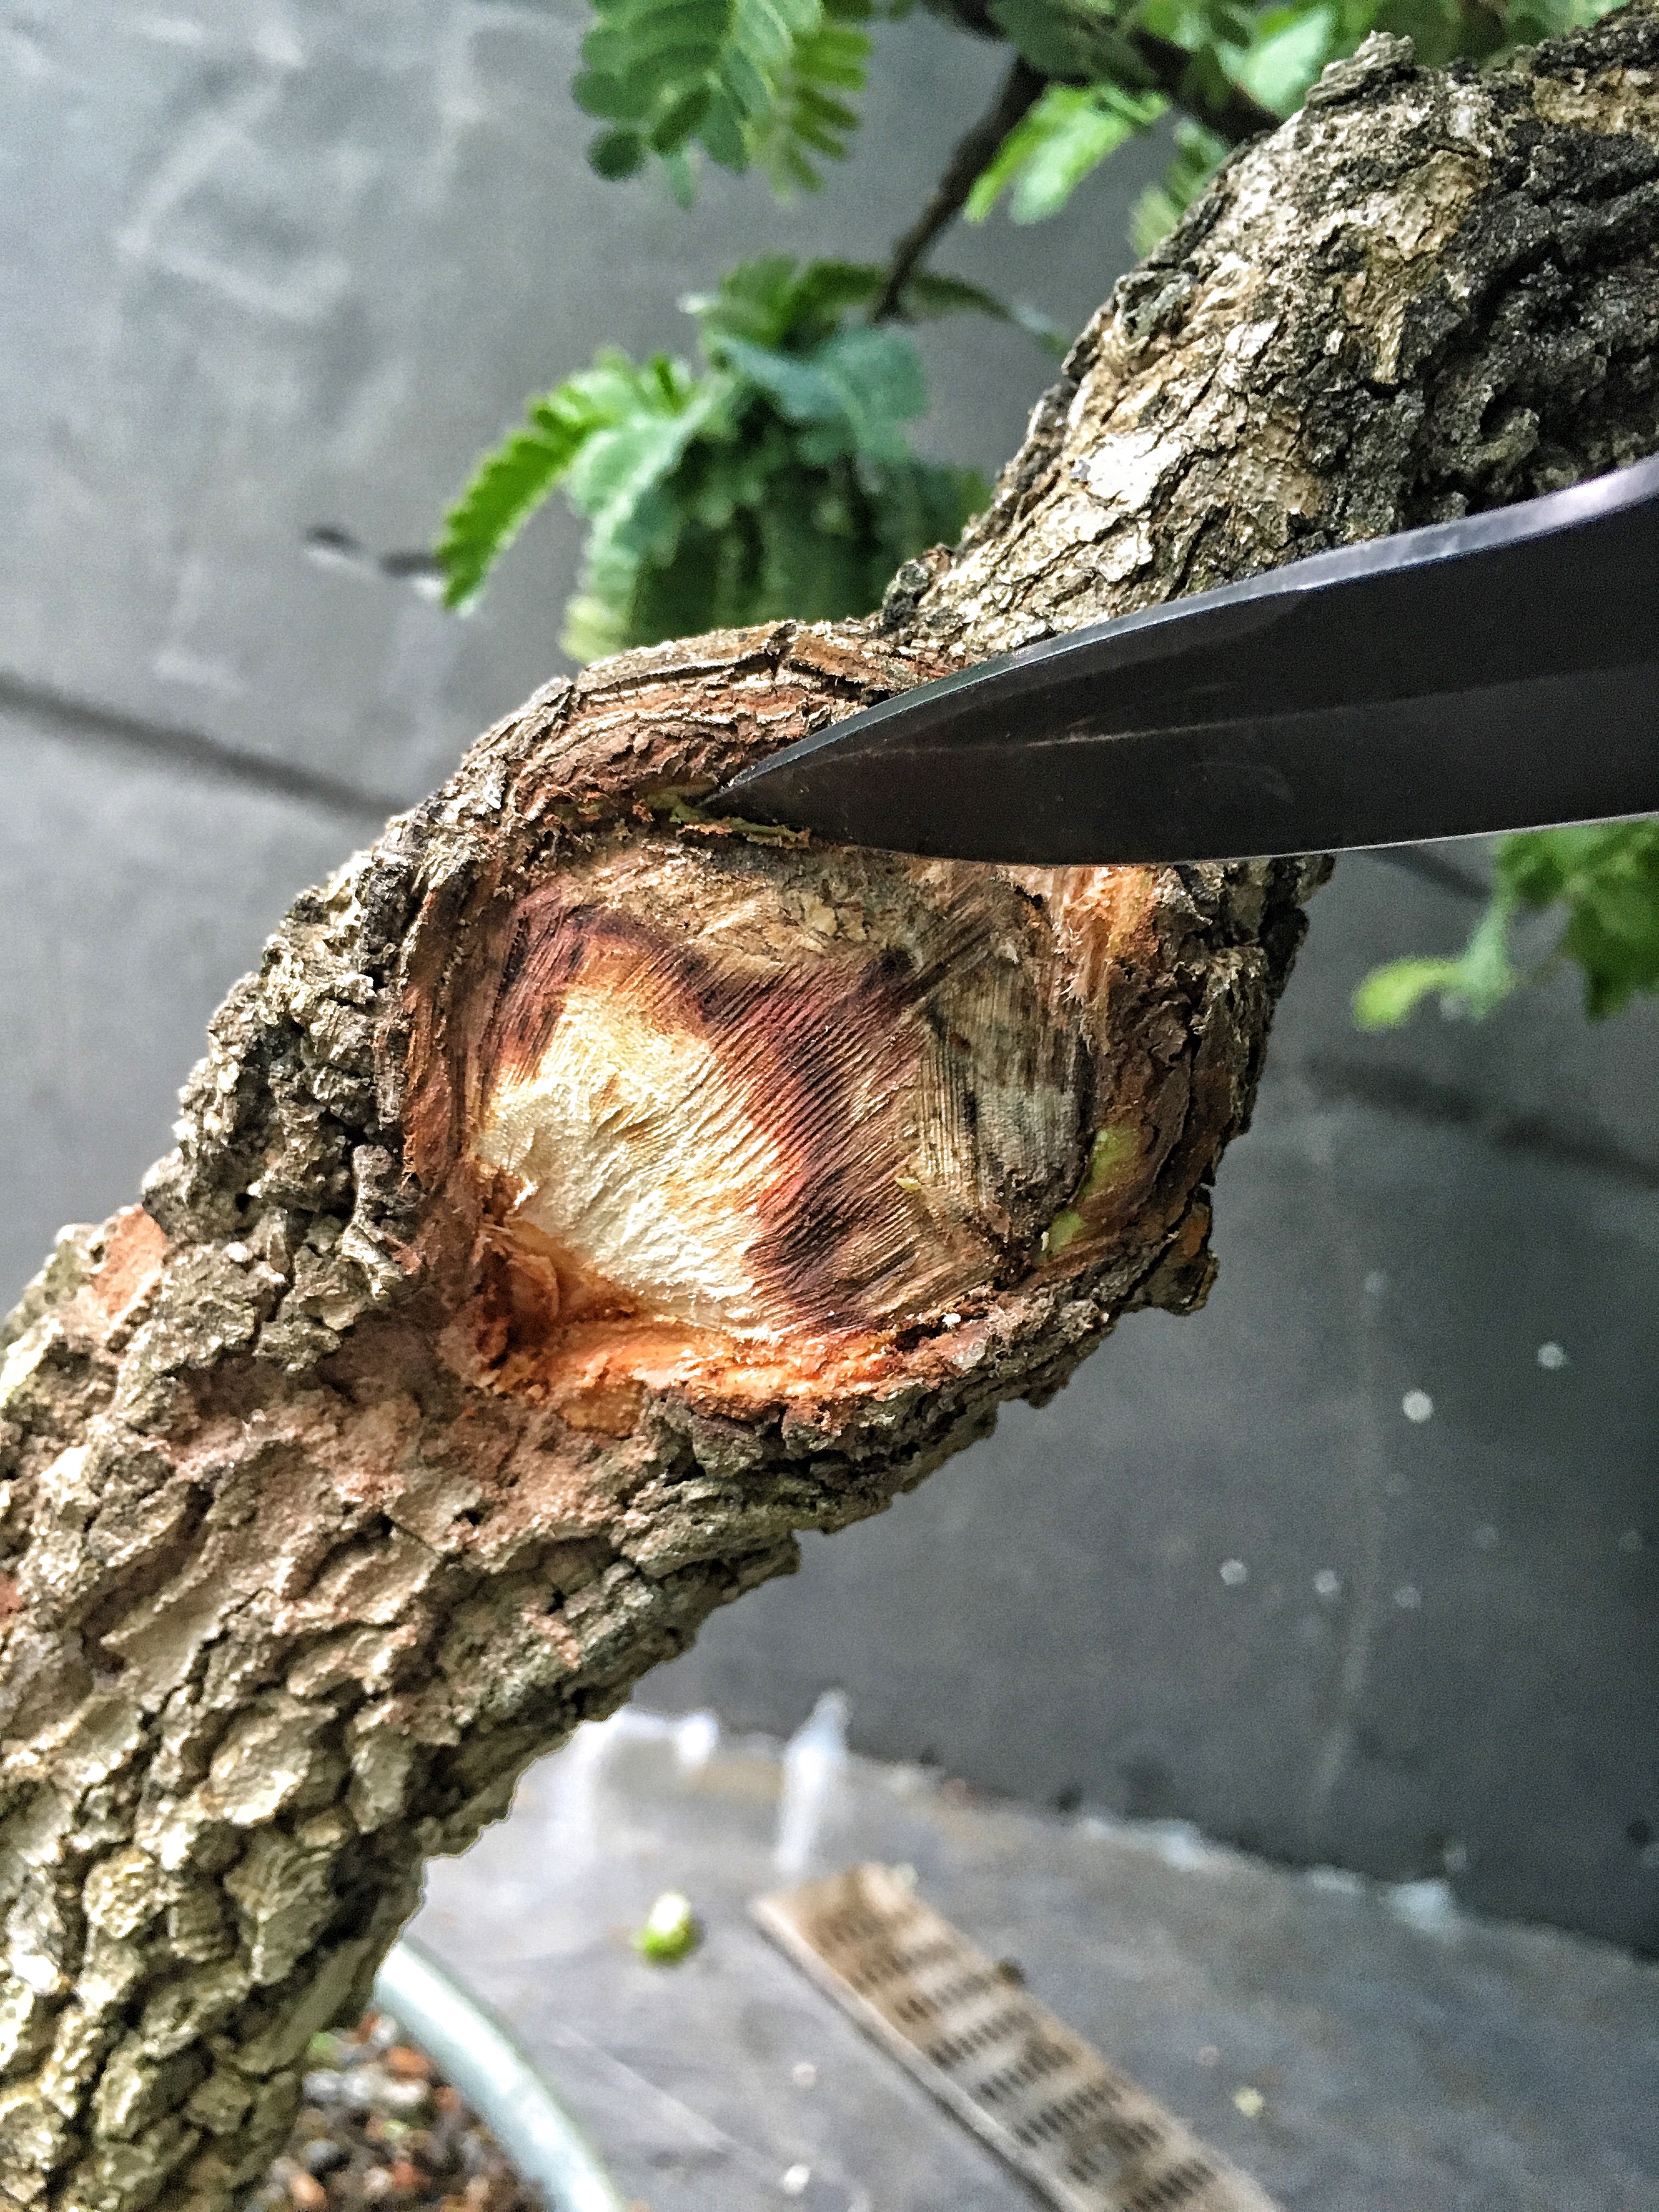
 And then some of that putty like cut paste.
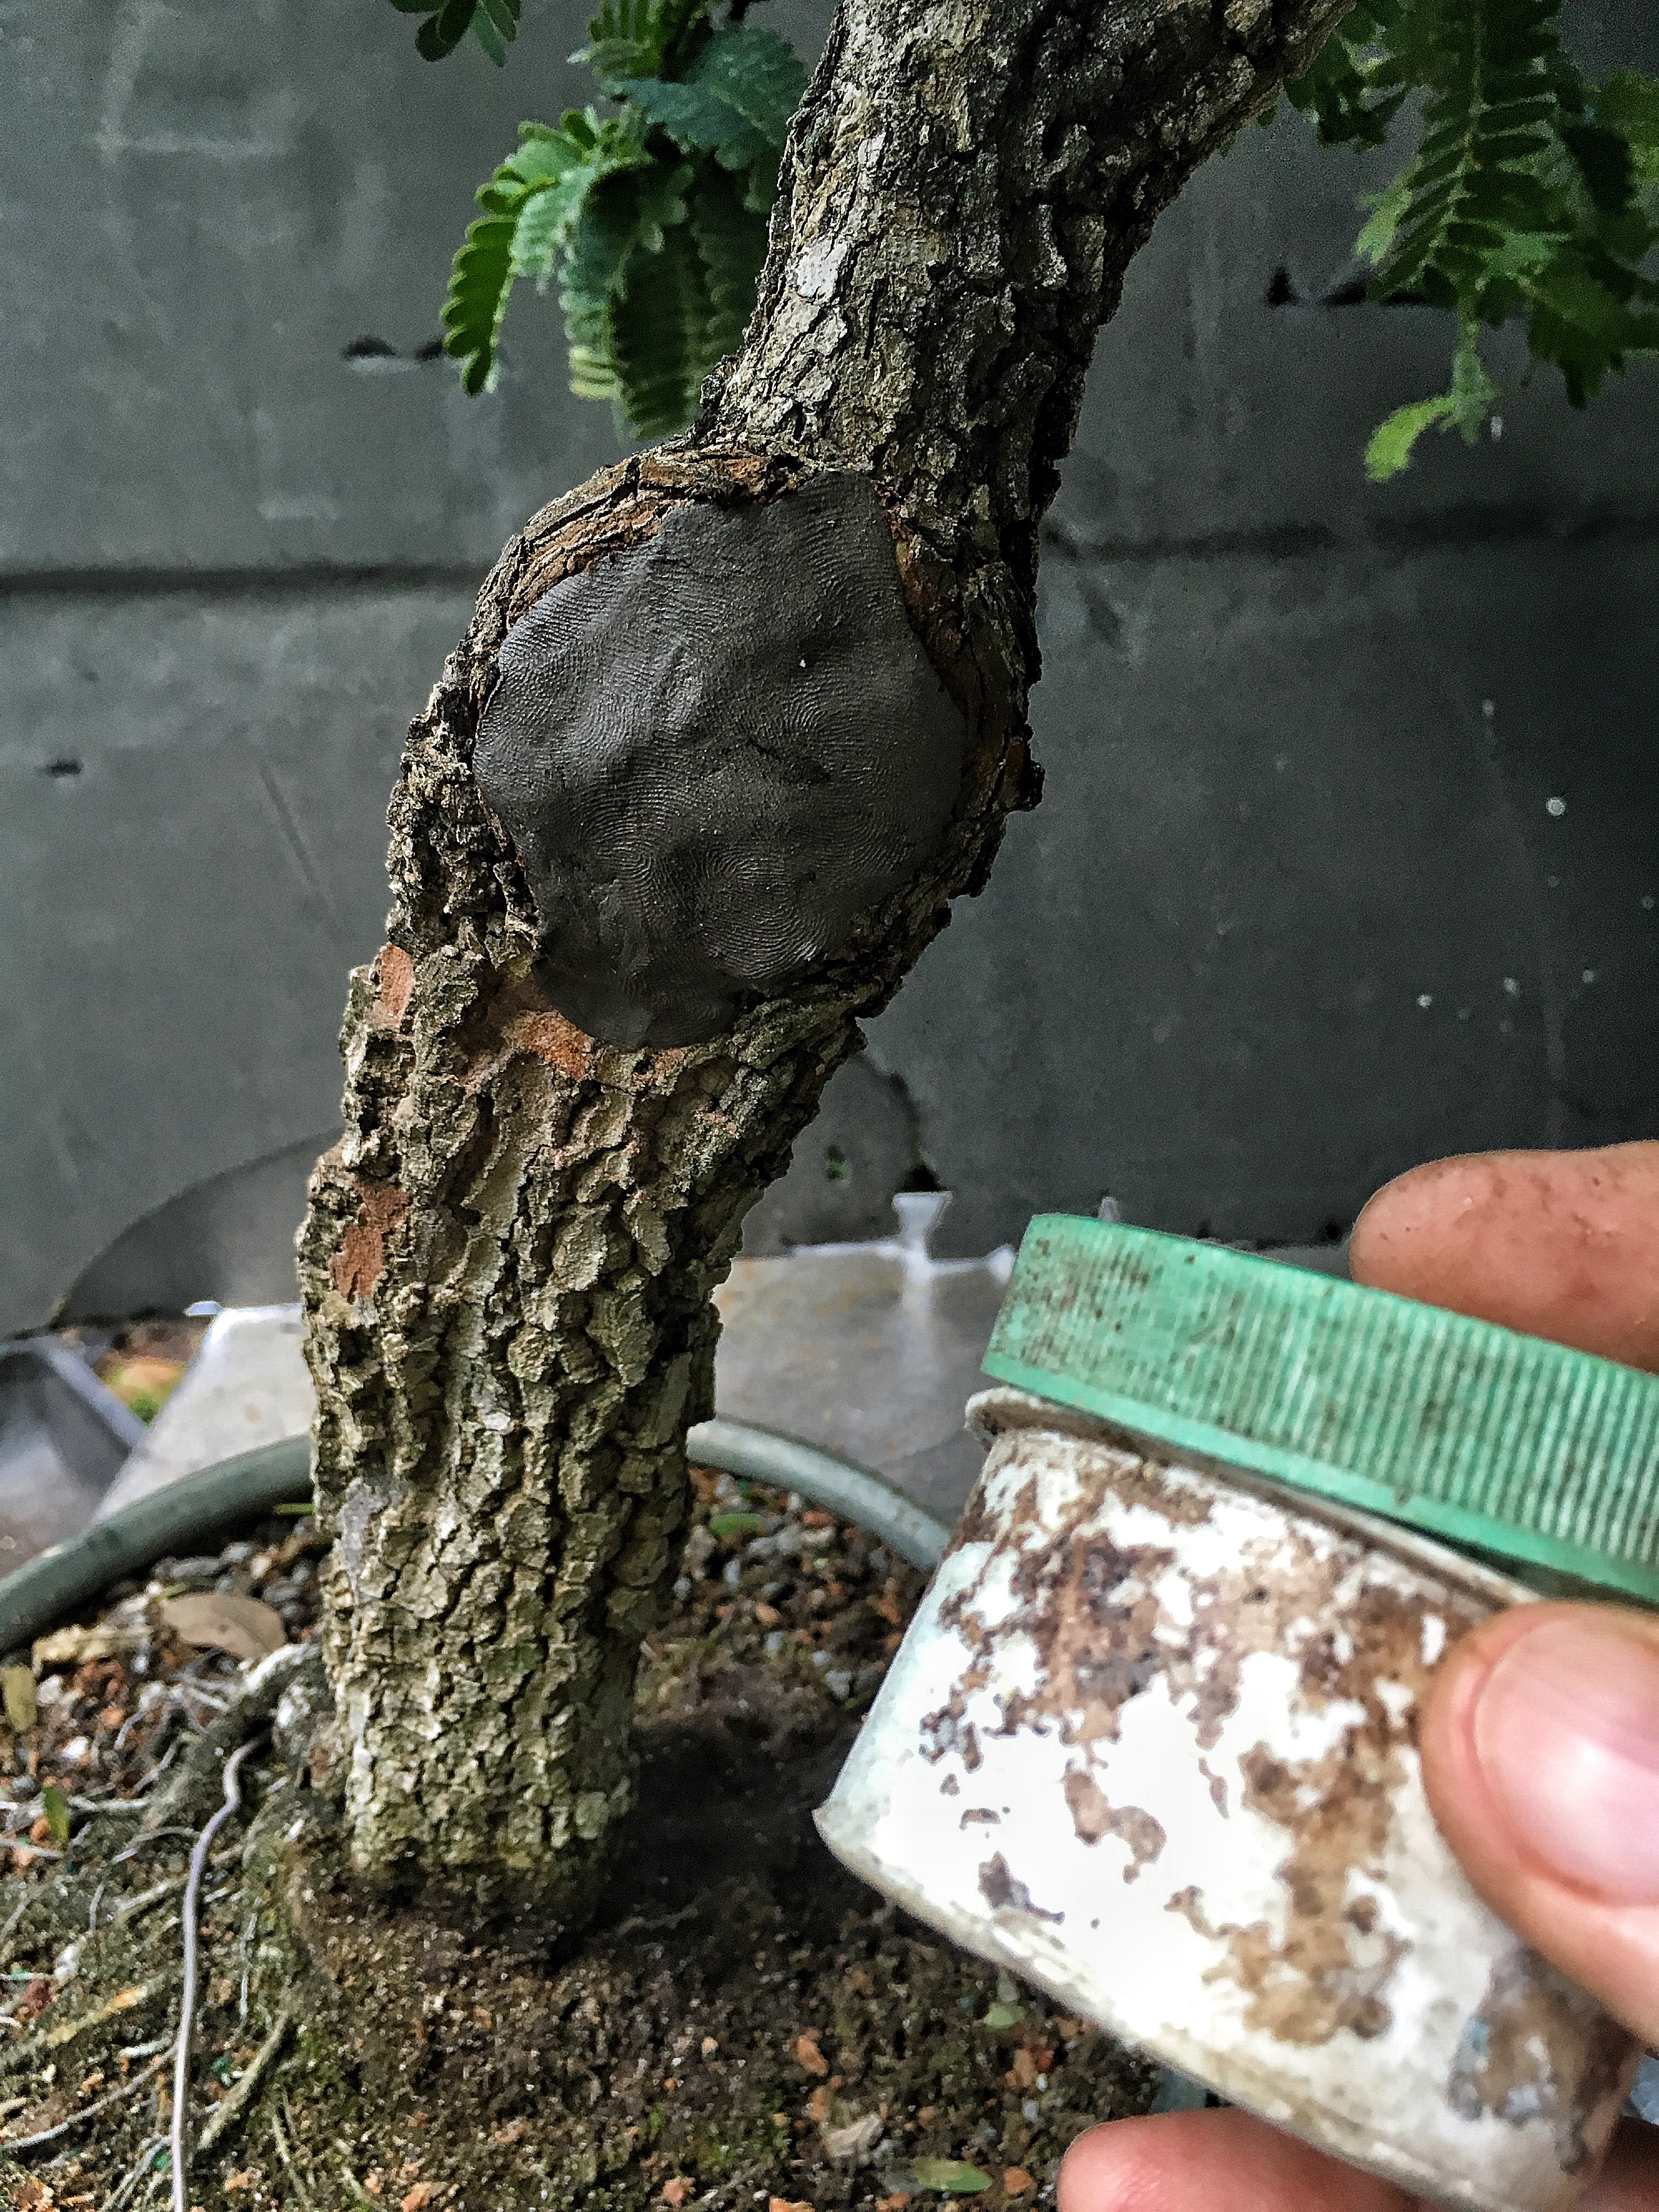
Now I’ll defoliate a little to see the structure. 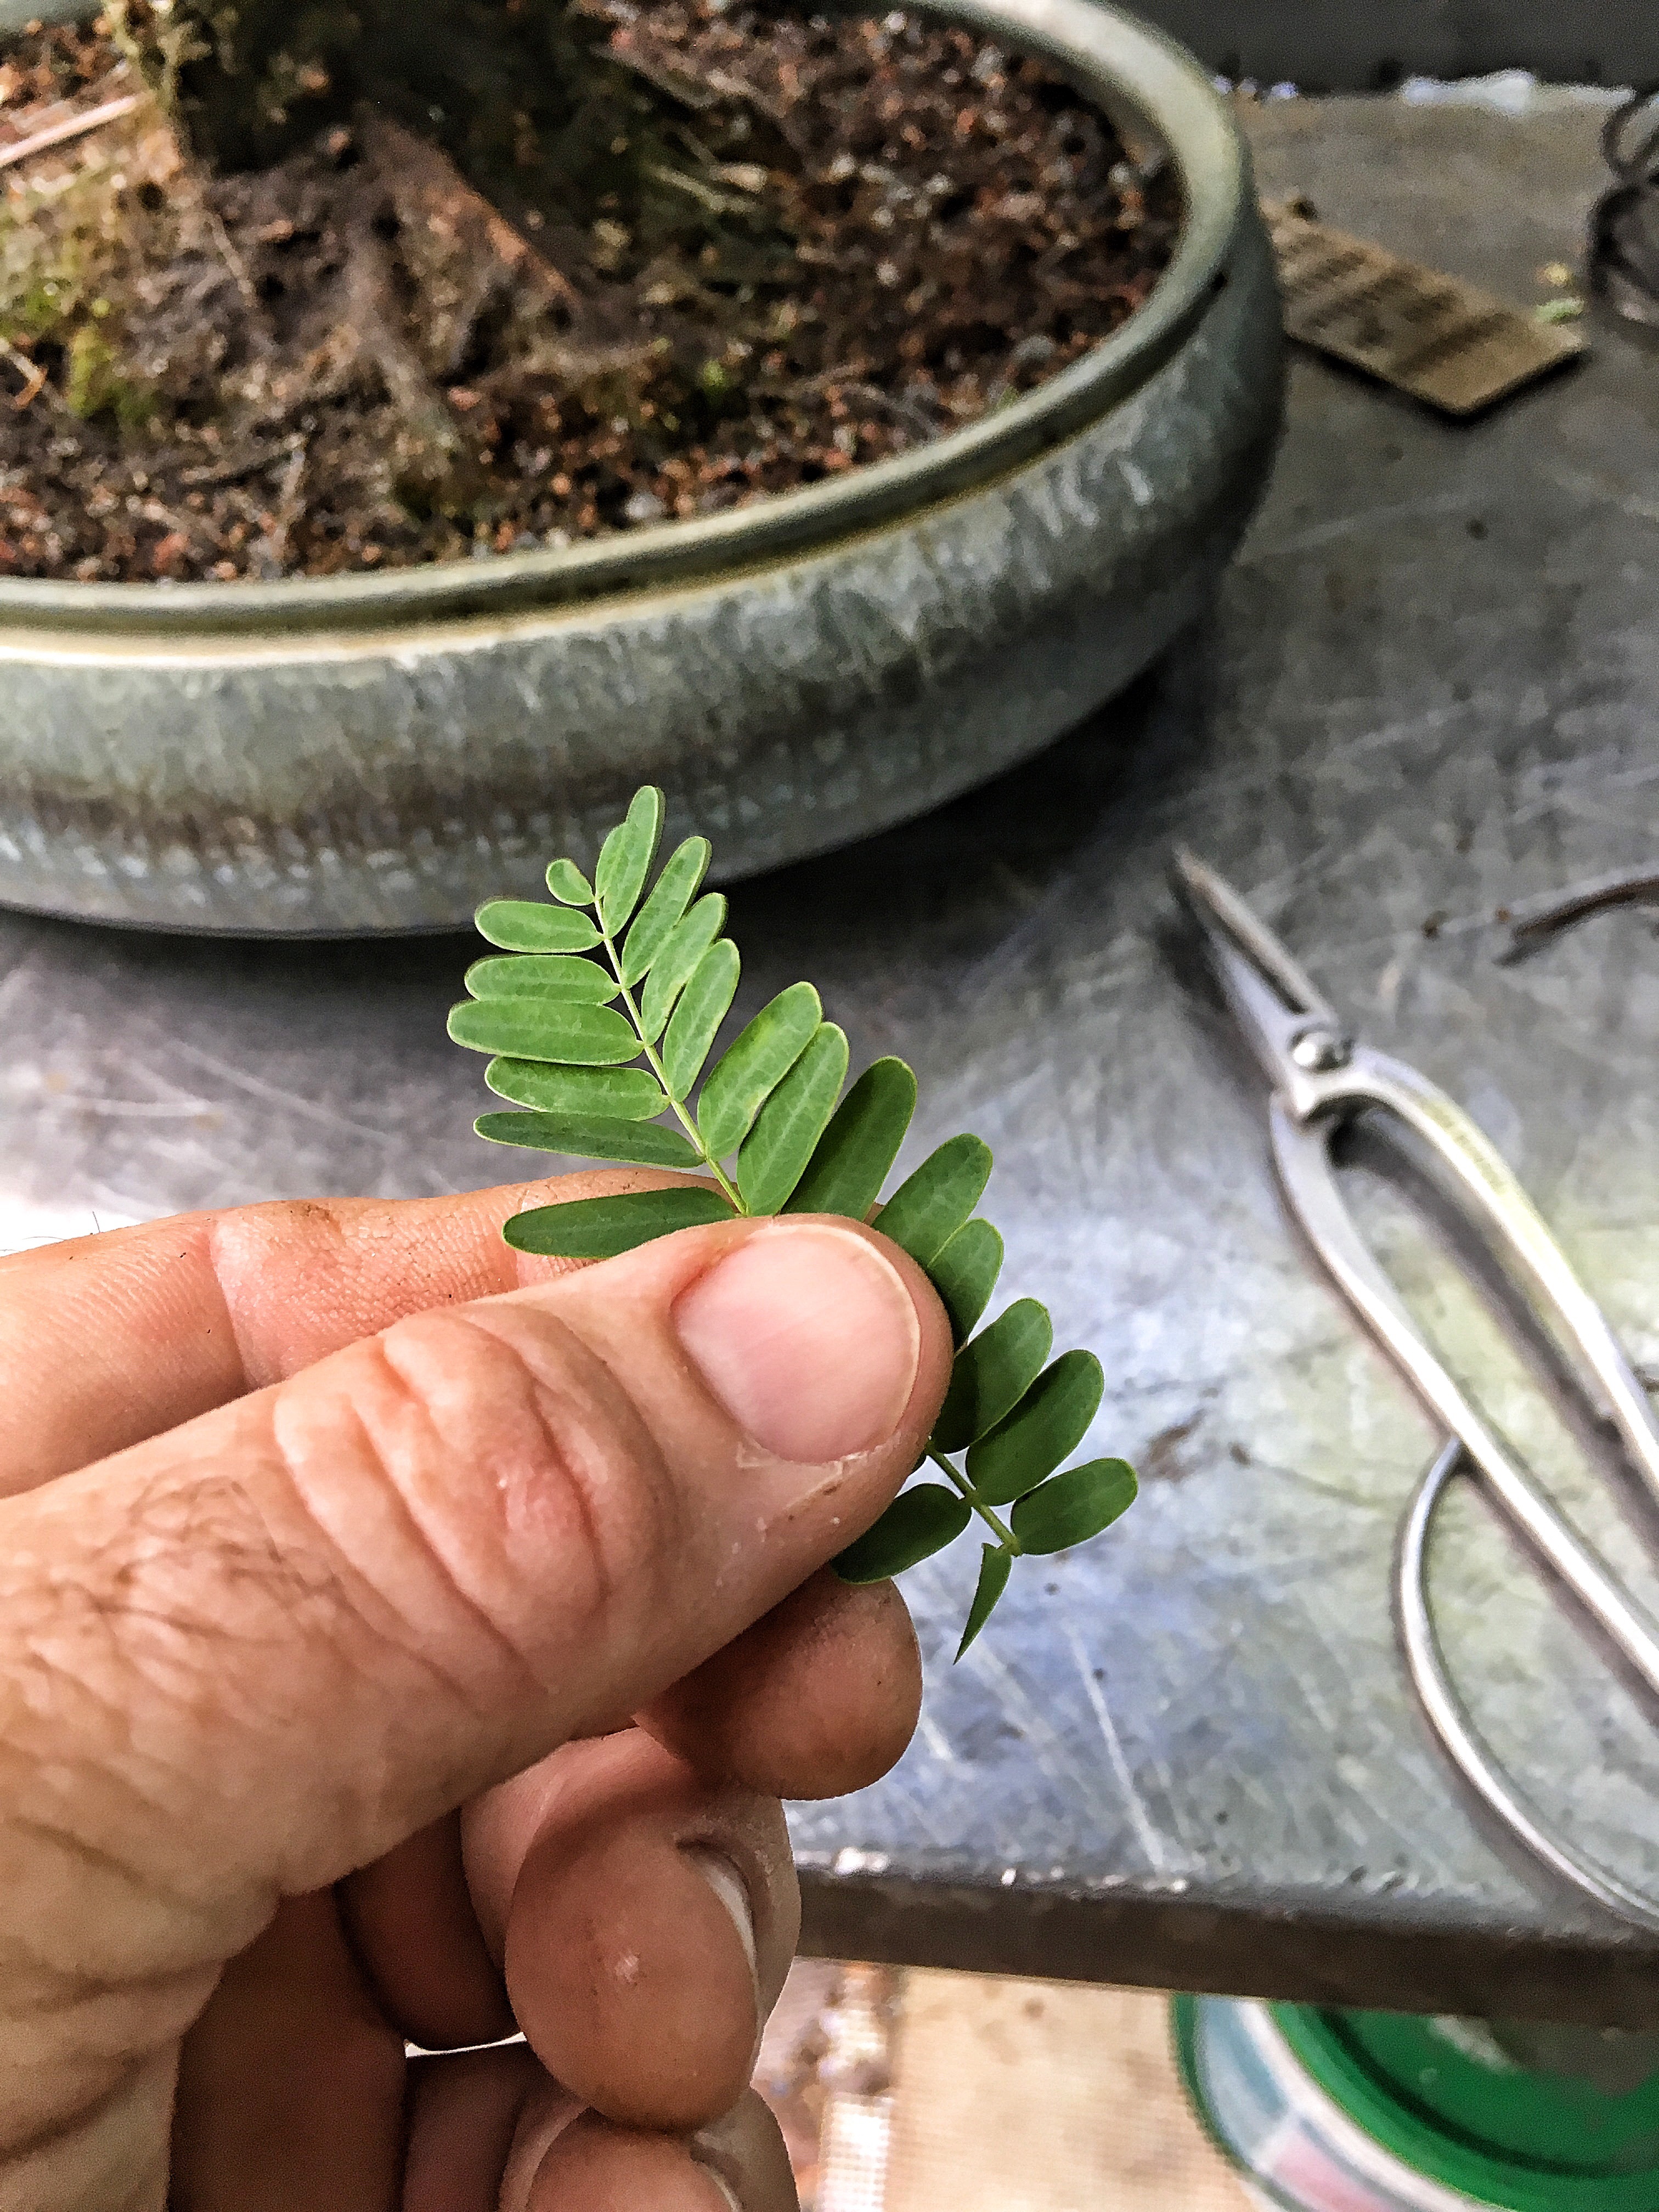
Of course, leave the petiole. 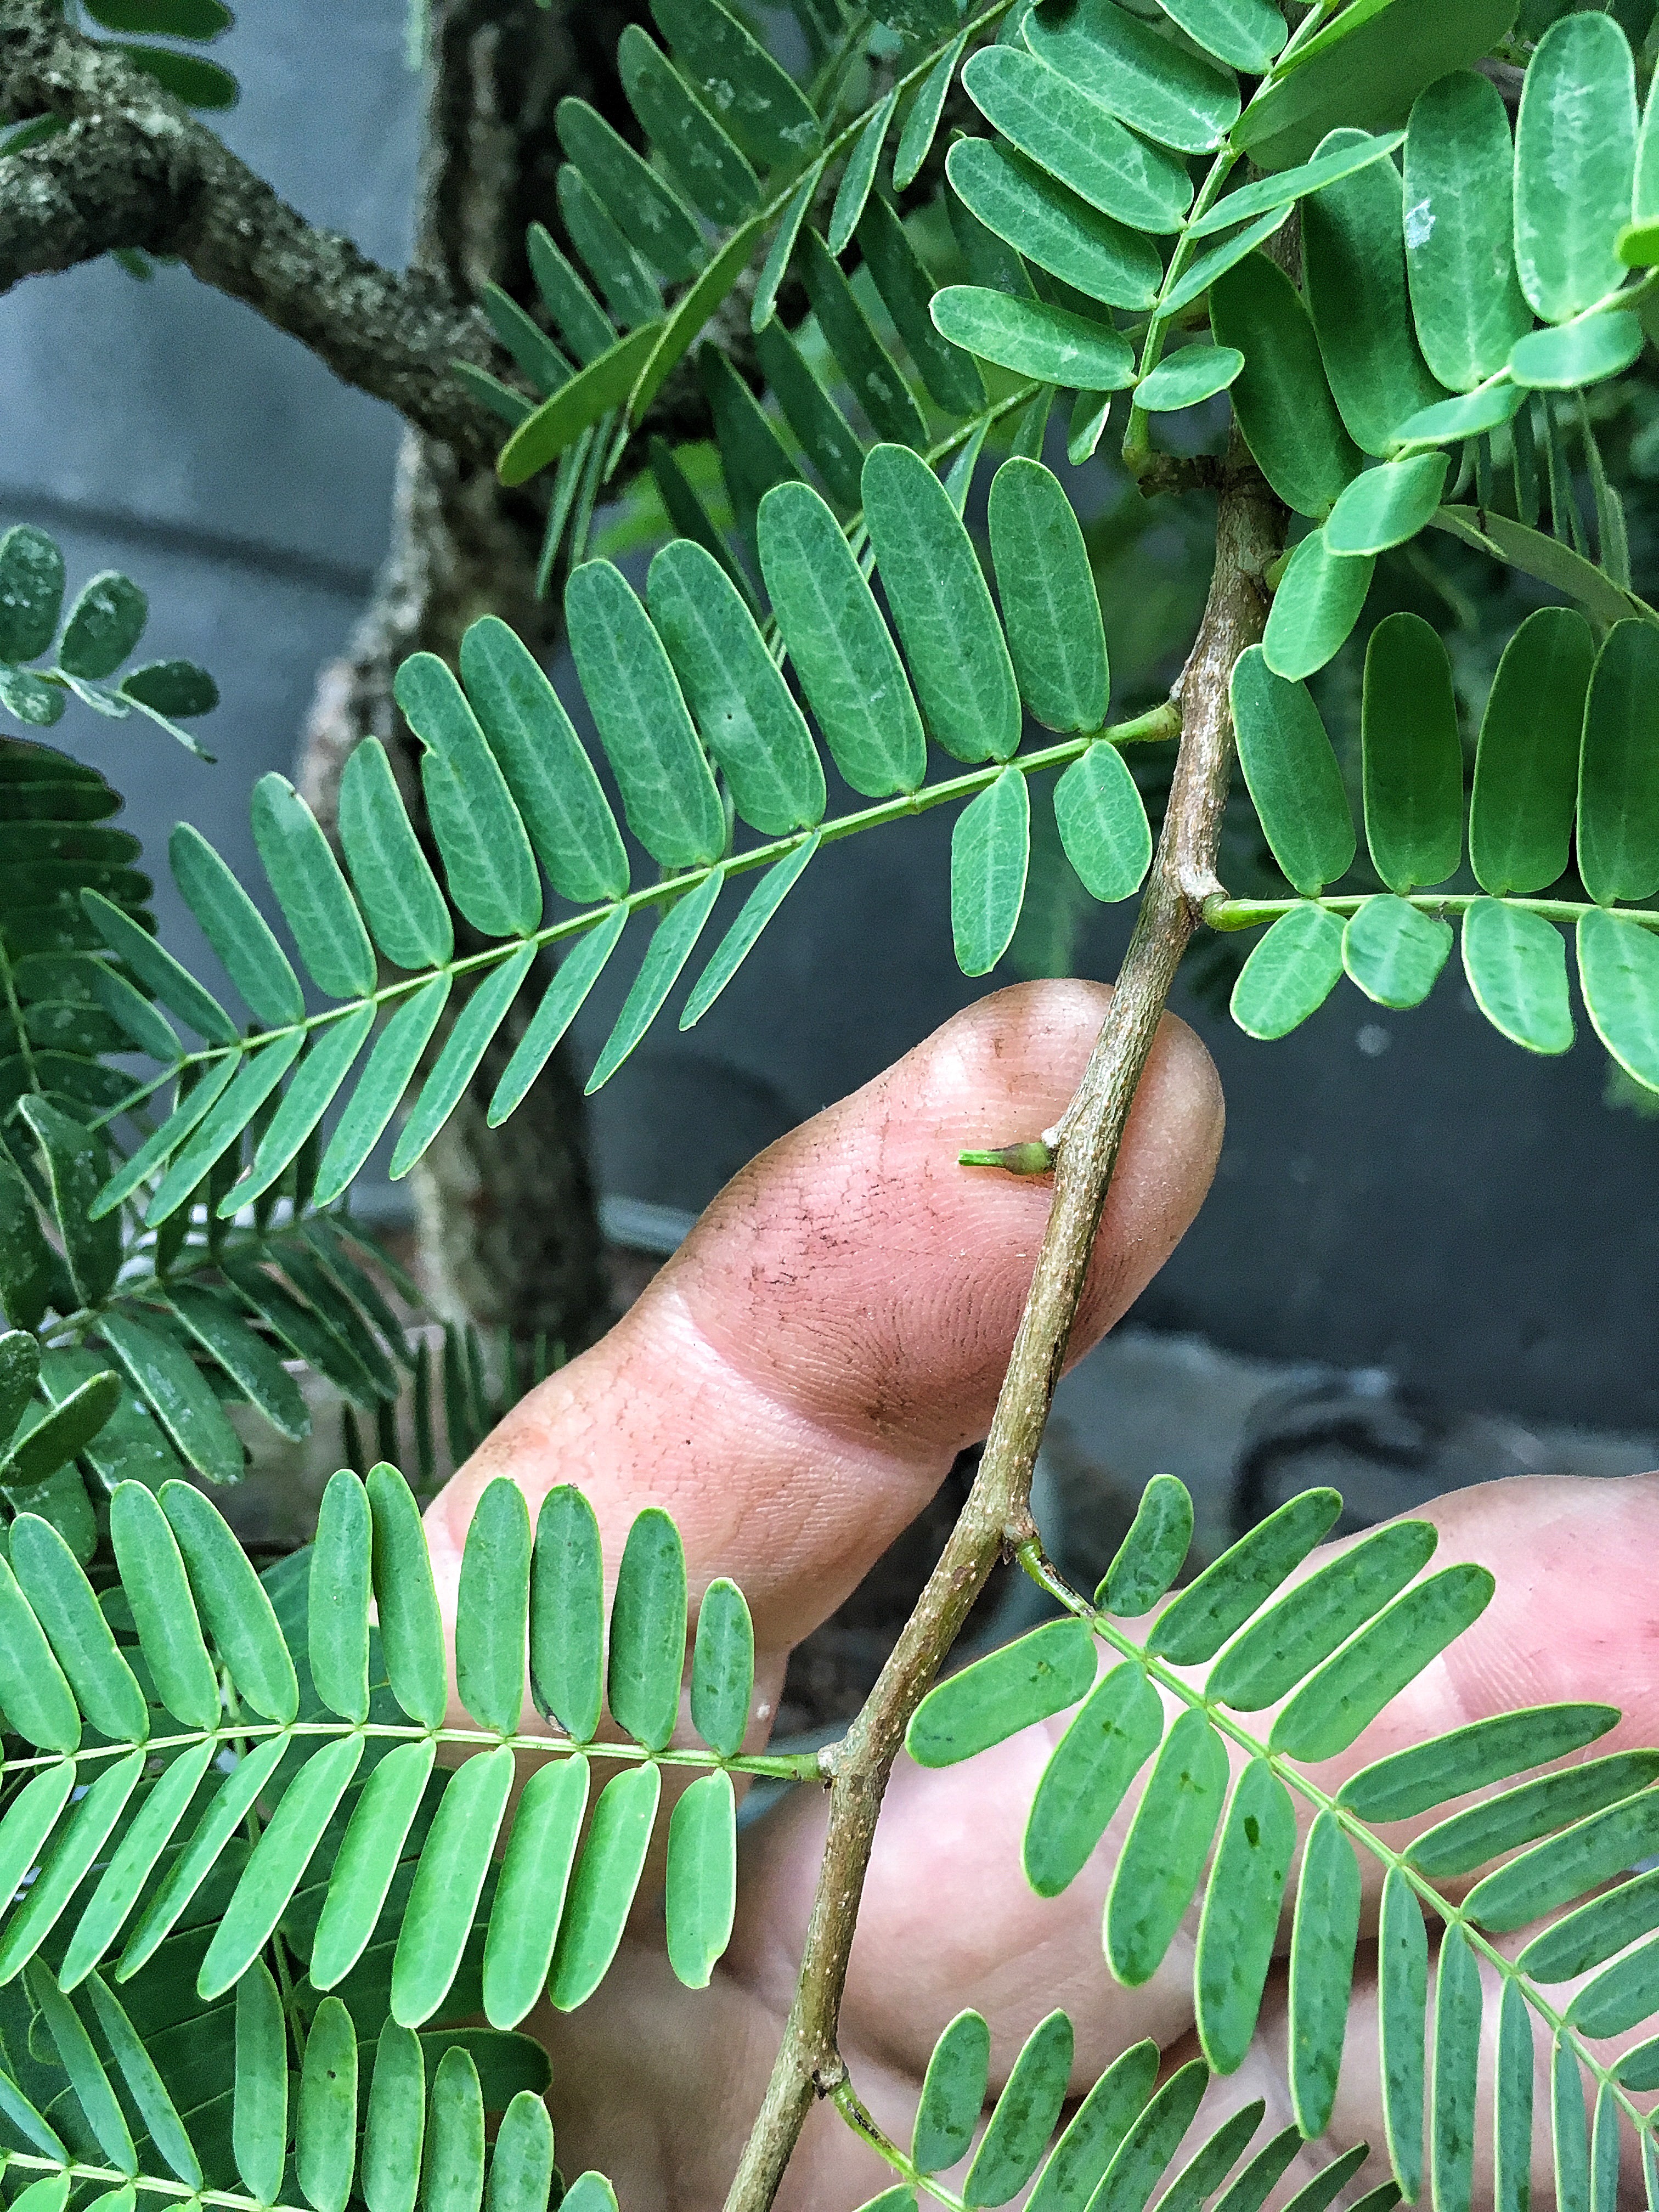
 There’re some crazy bends and turns on this tree already.
 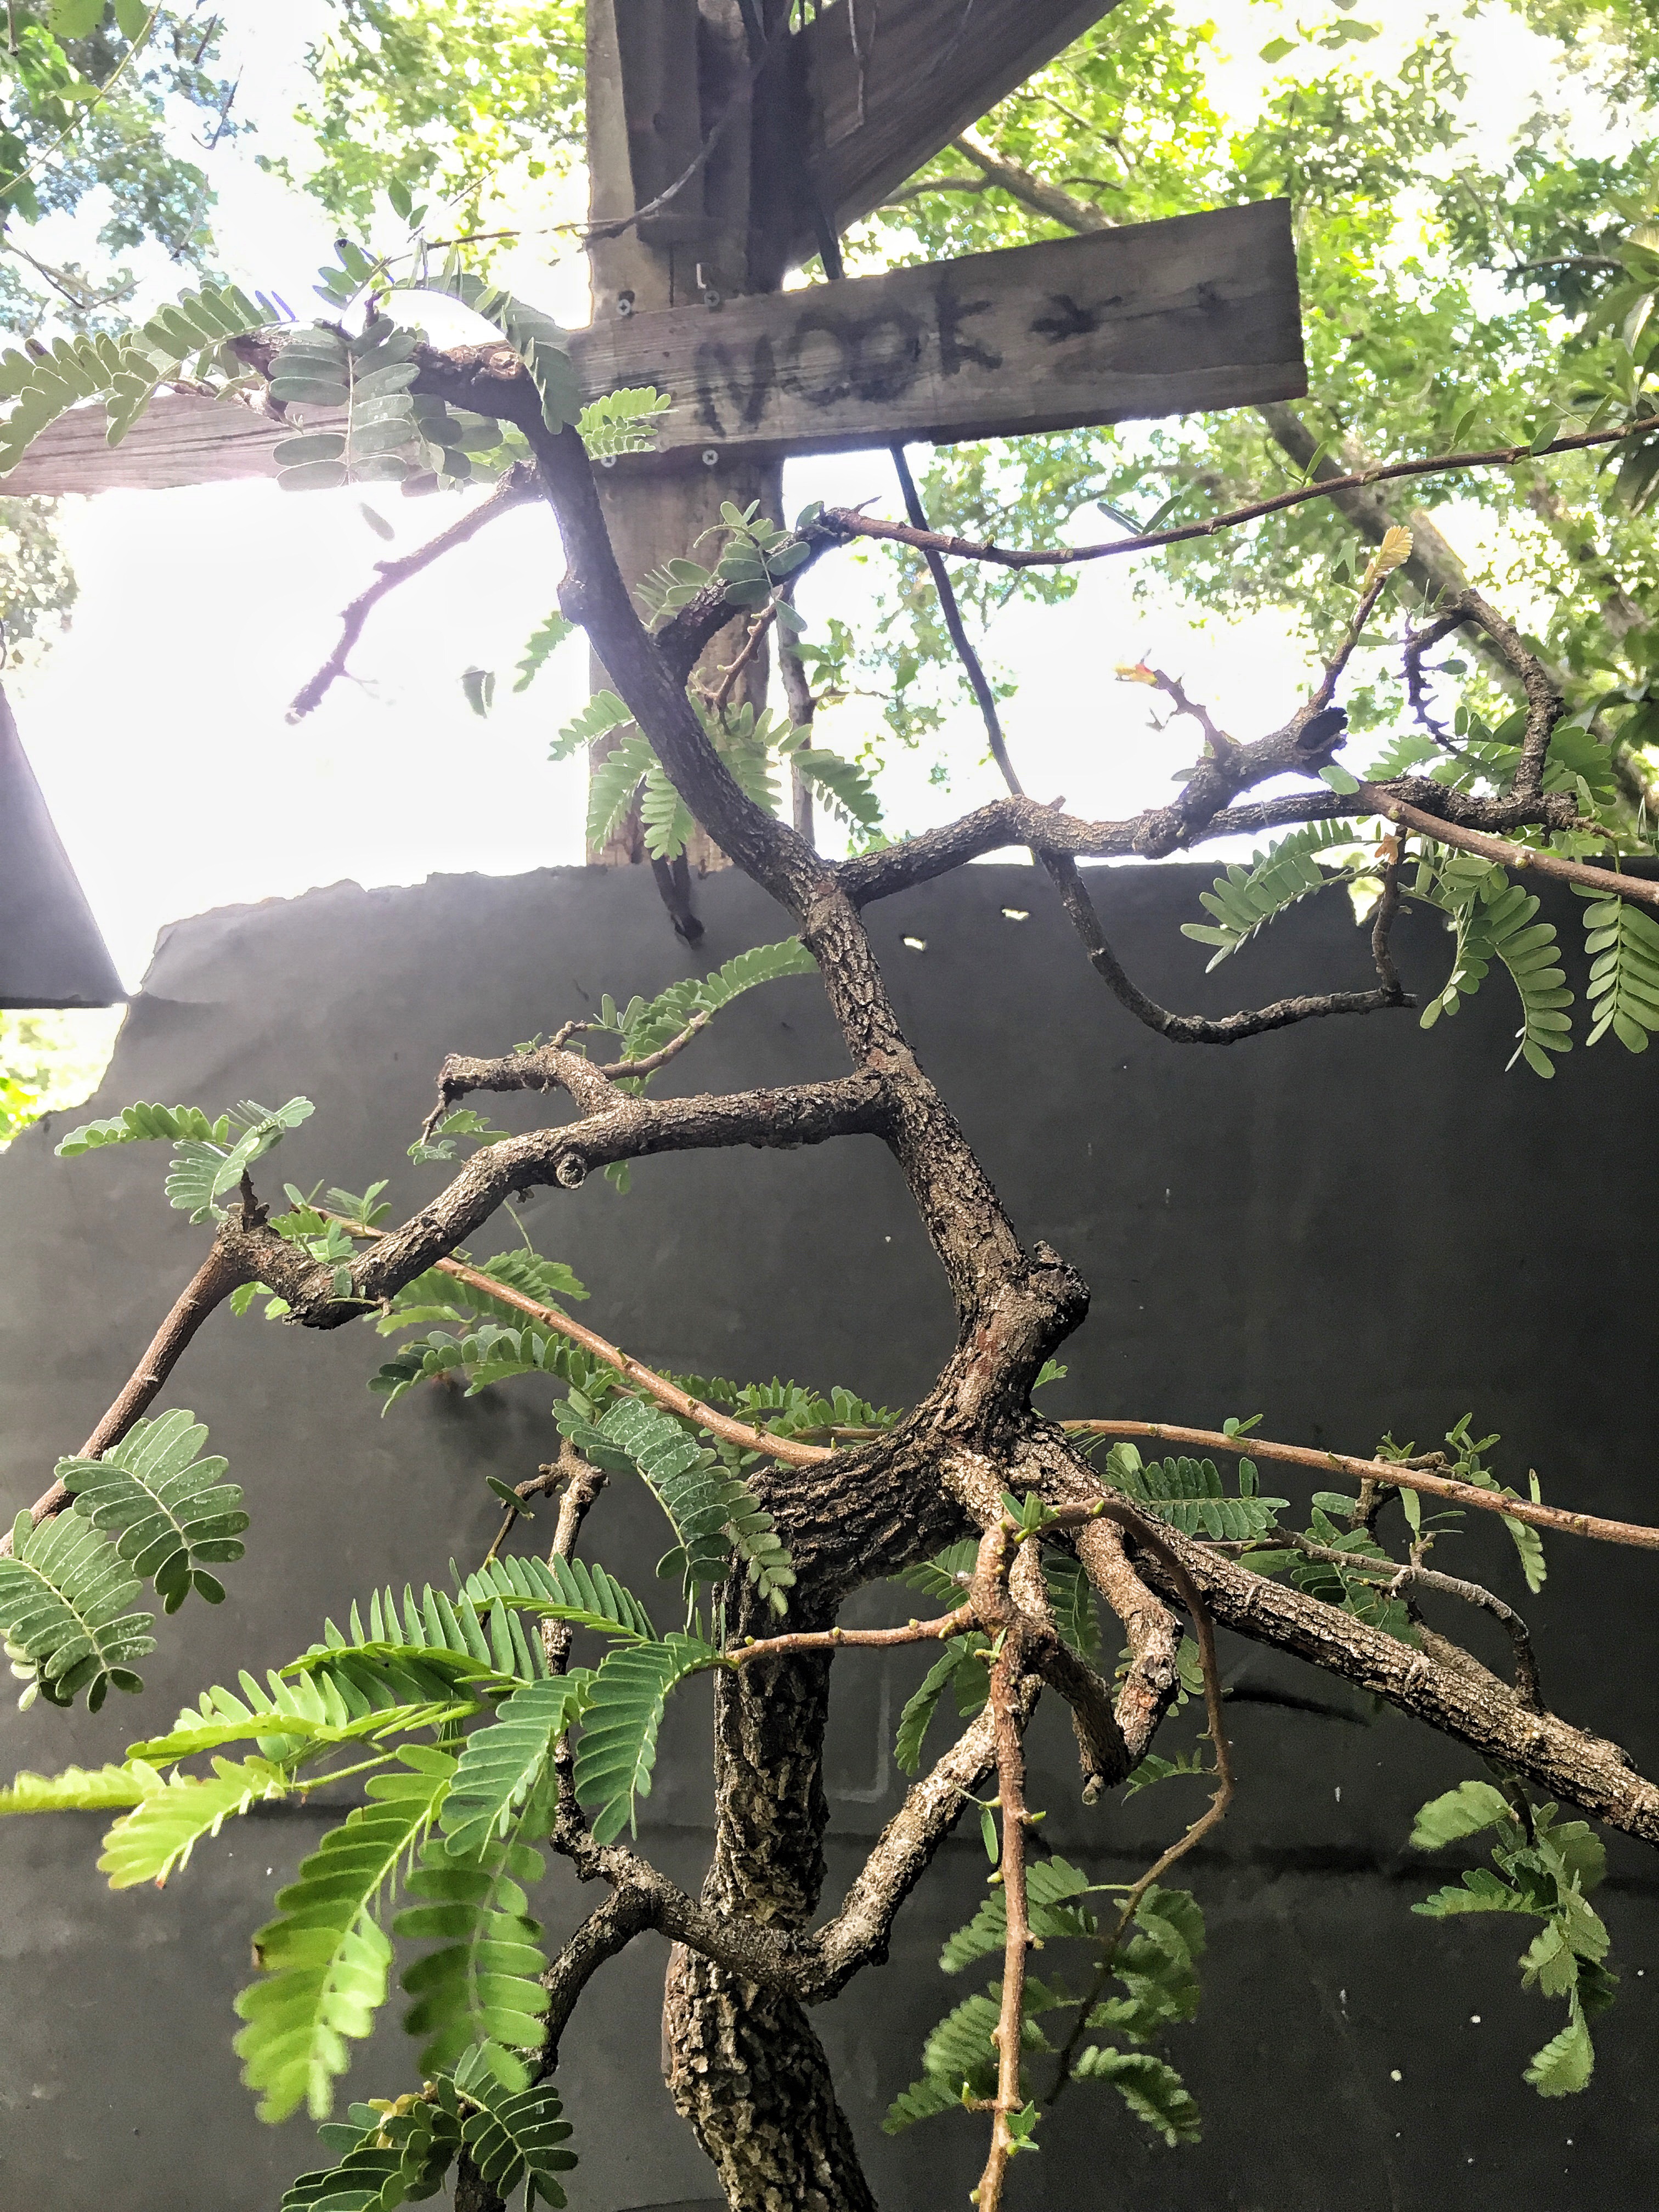 And some surprisingly straight sections too.
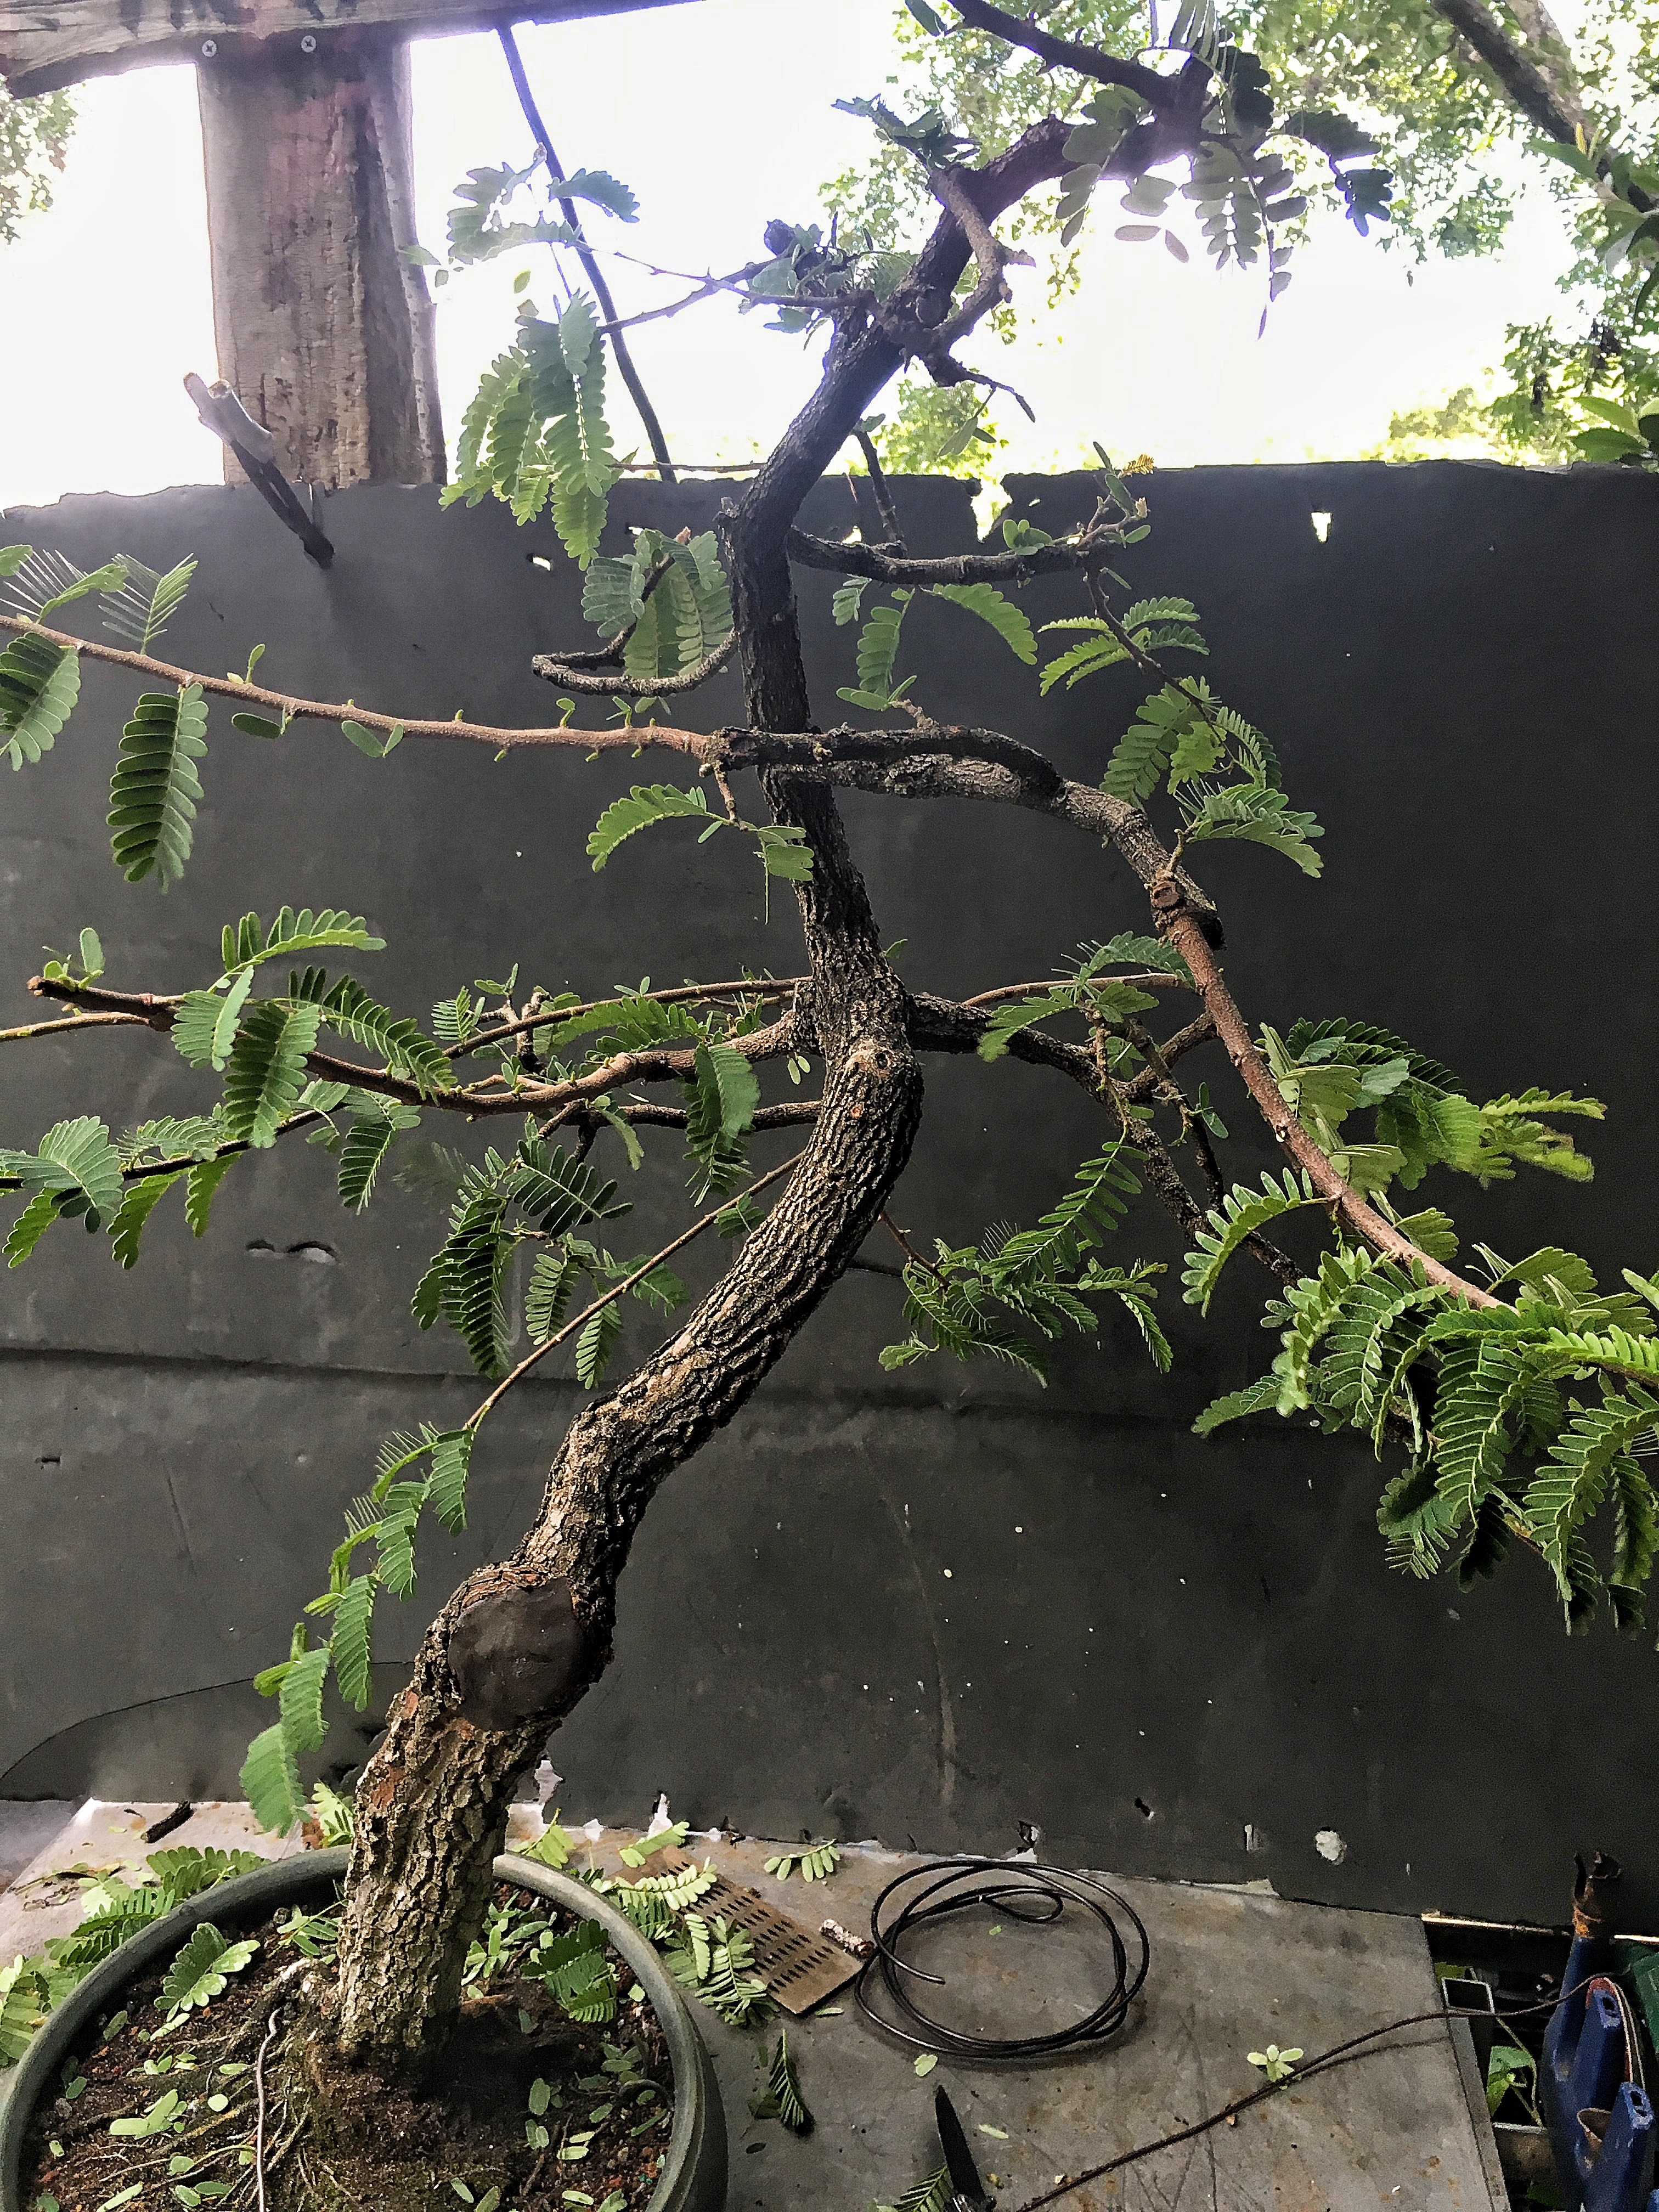
Here’s the before. 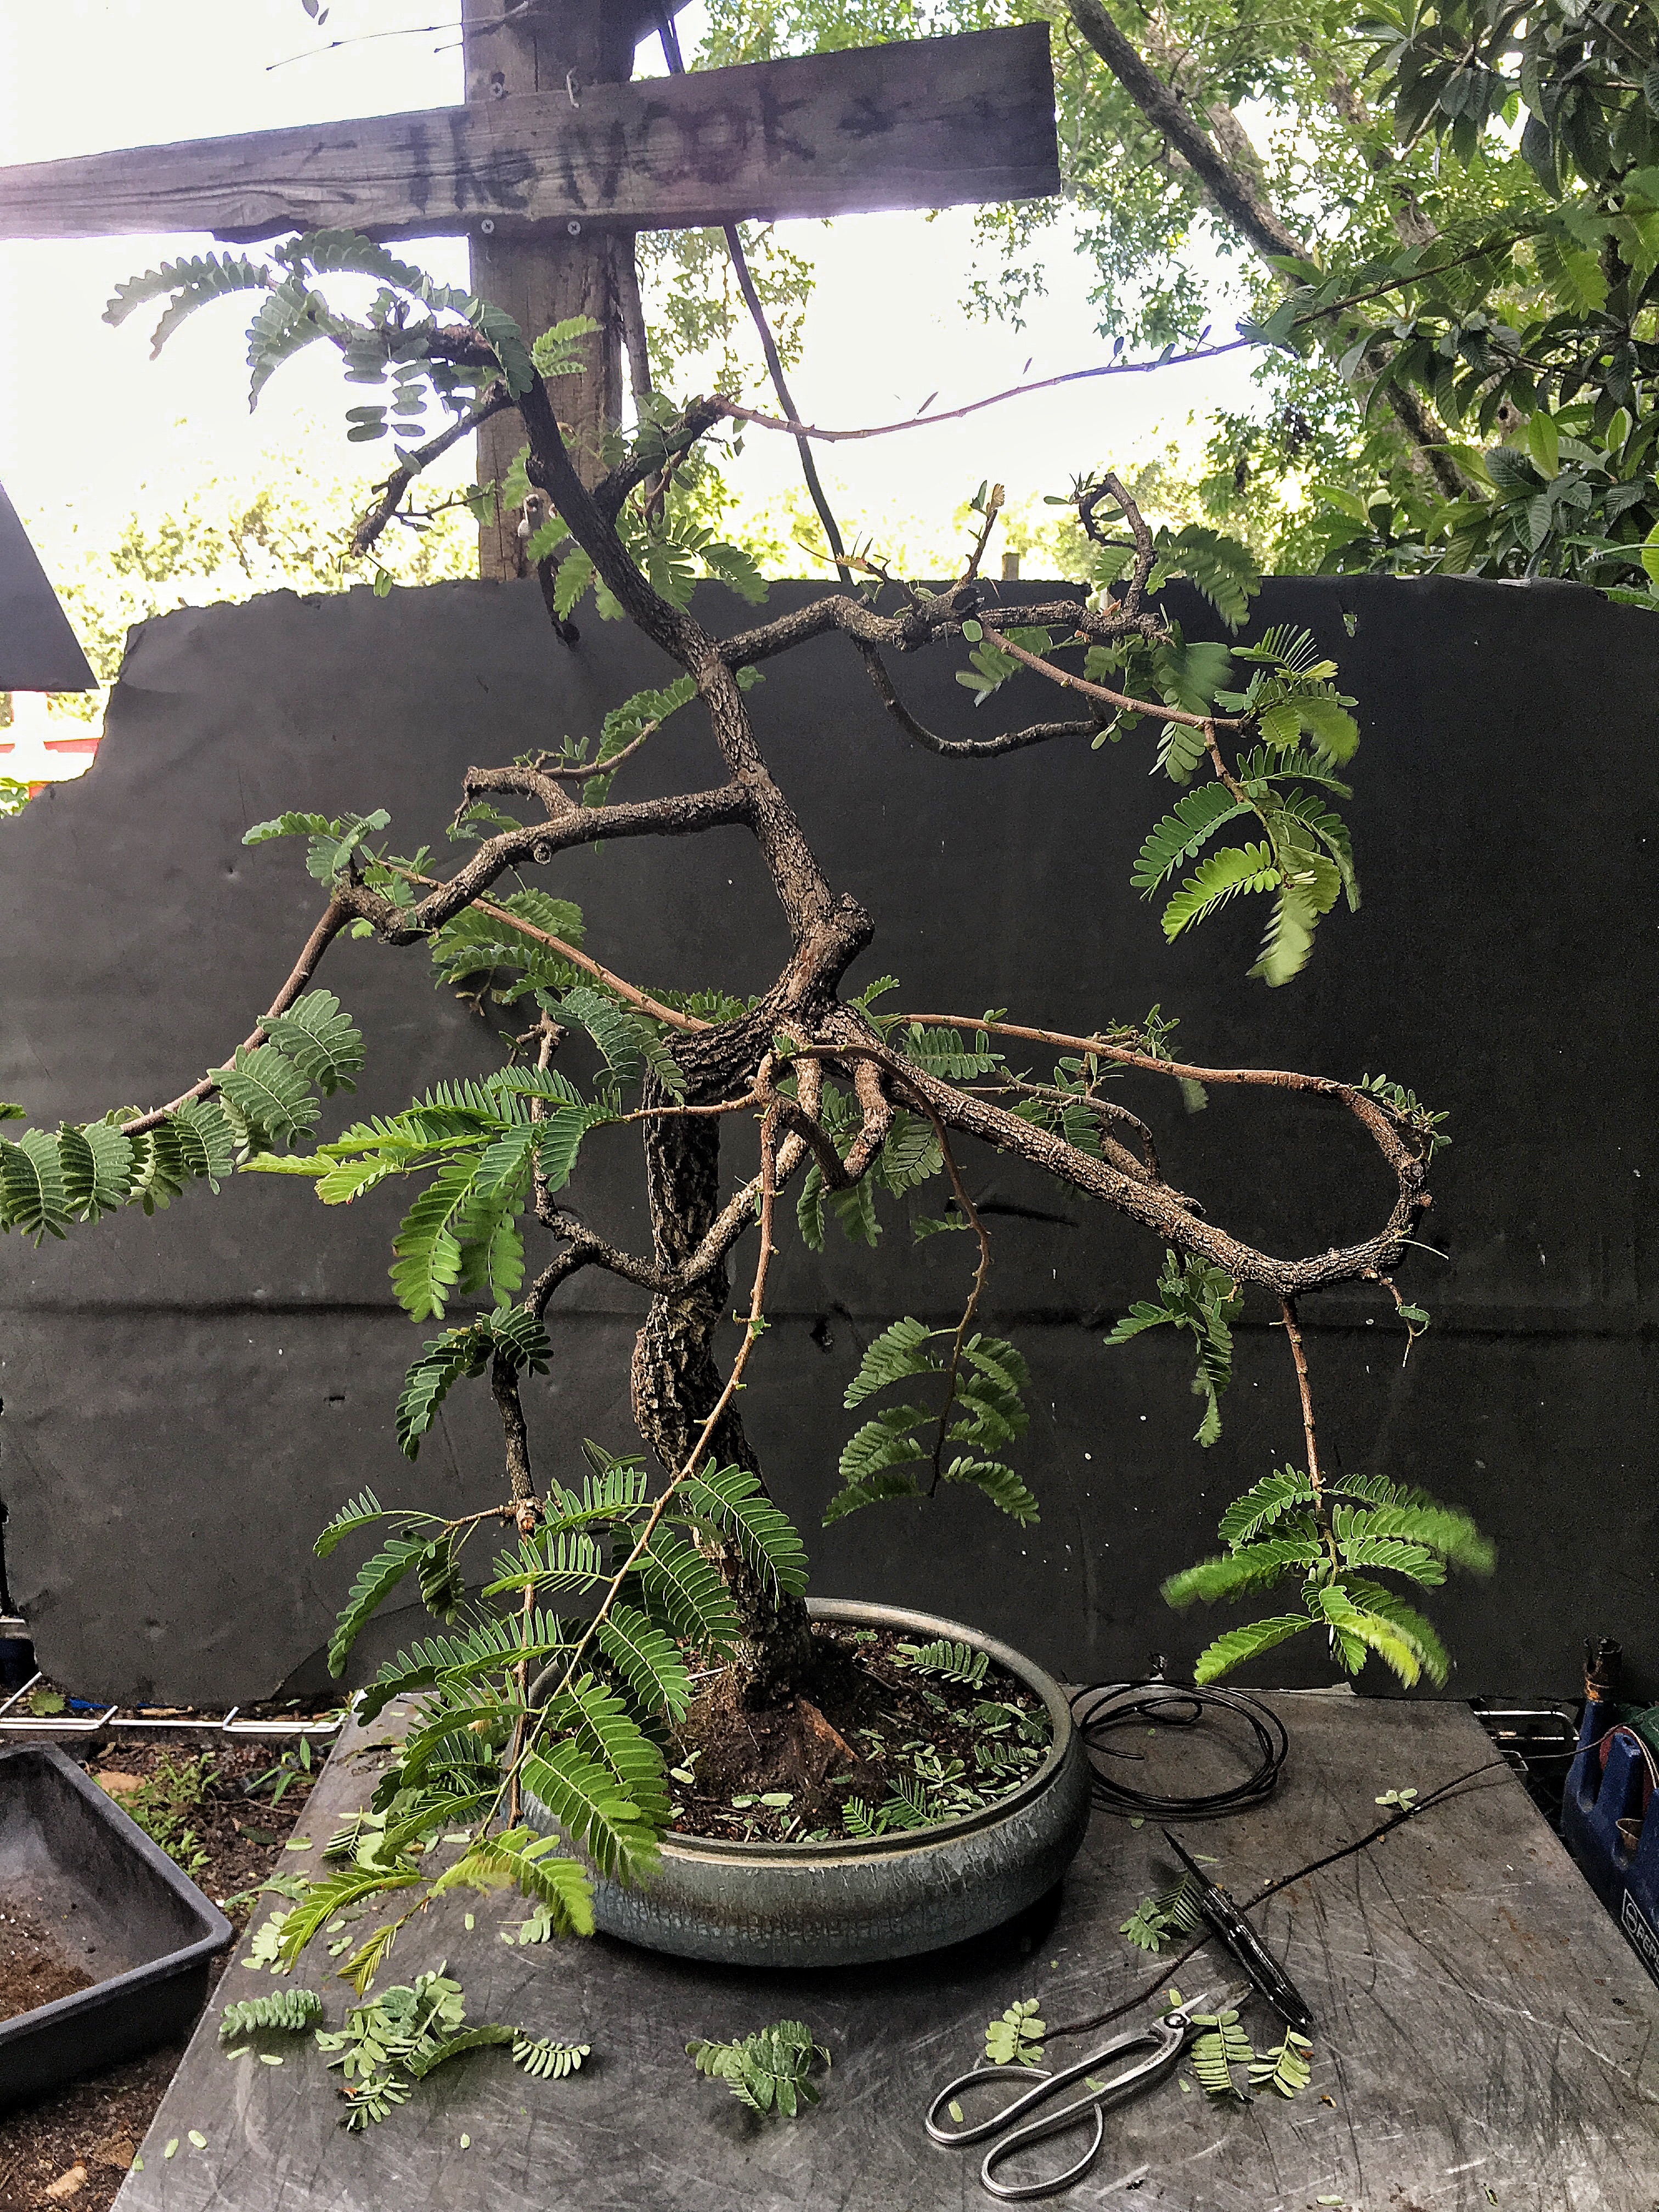 Refer back to it as I go.
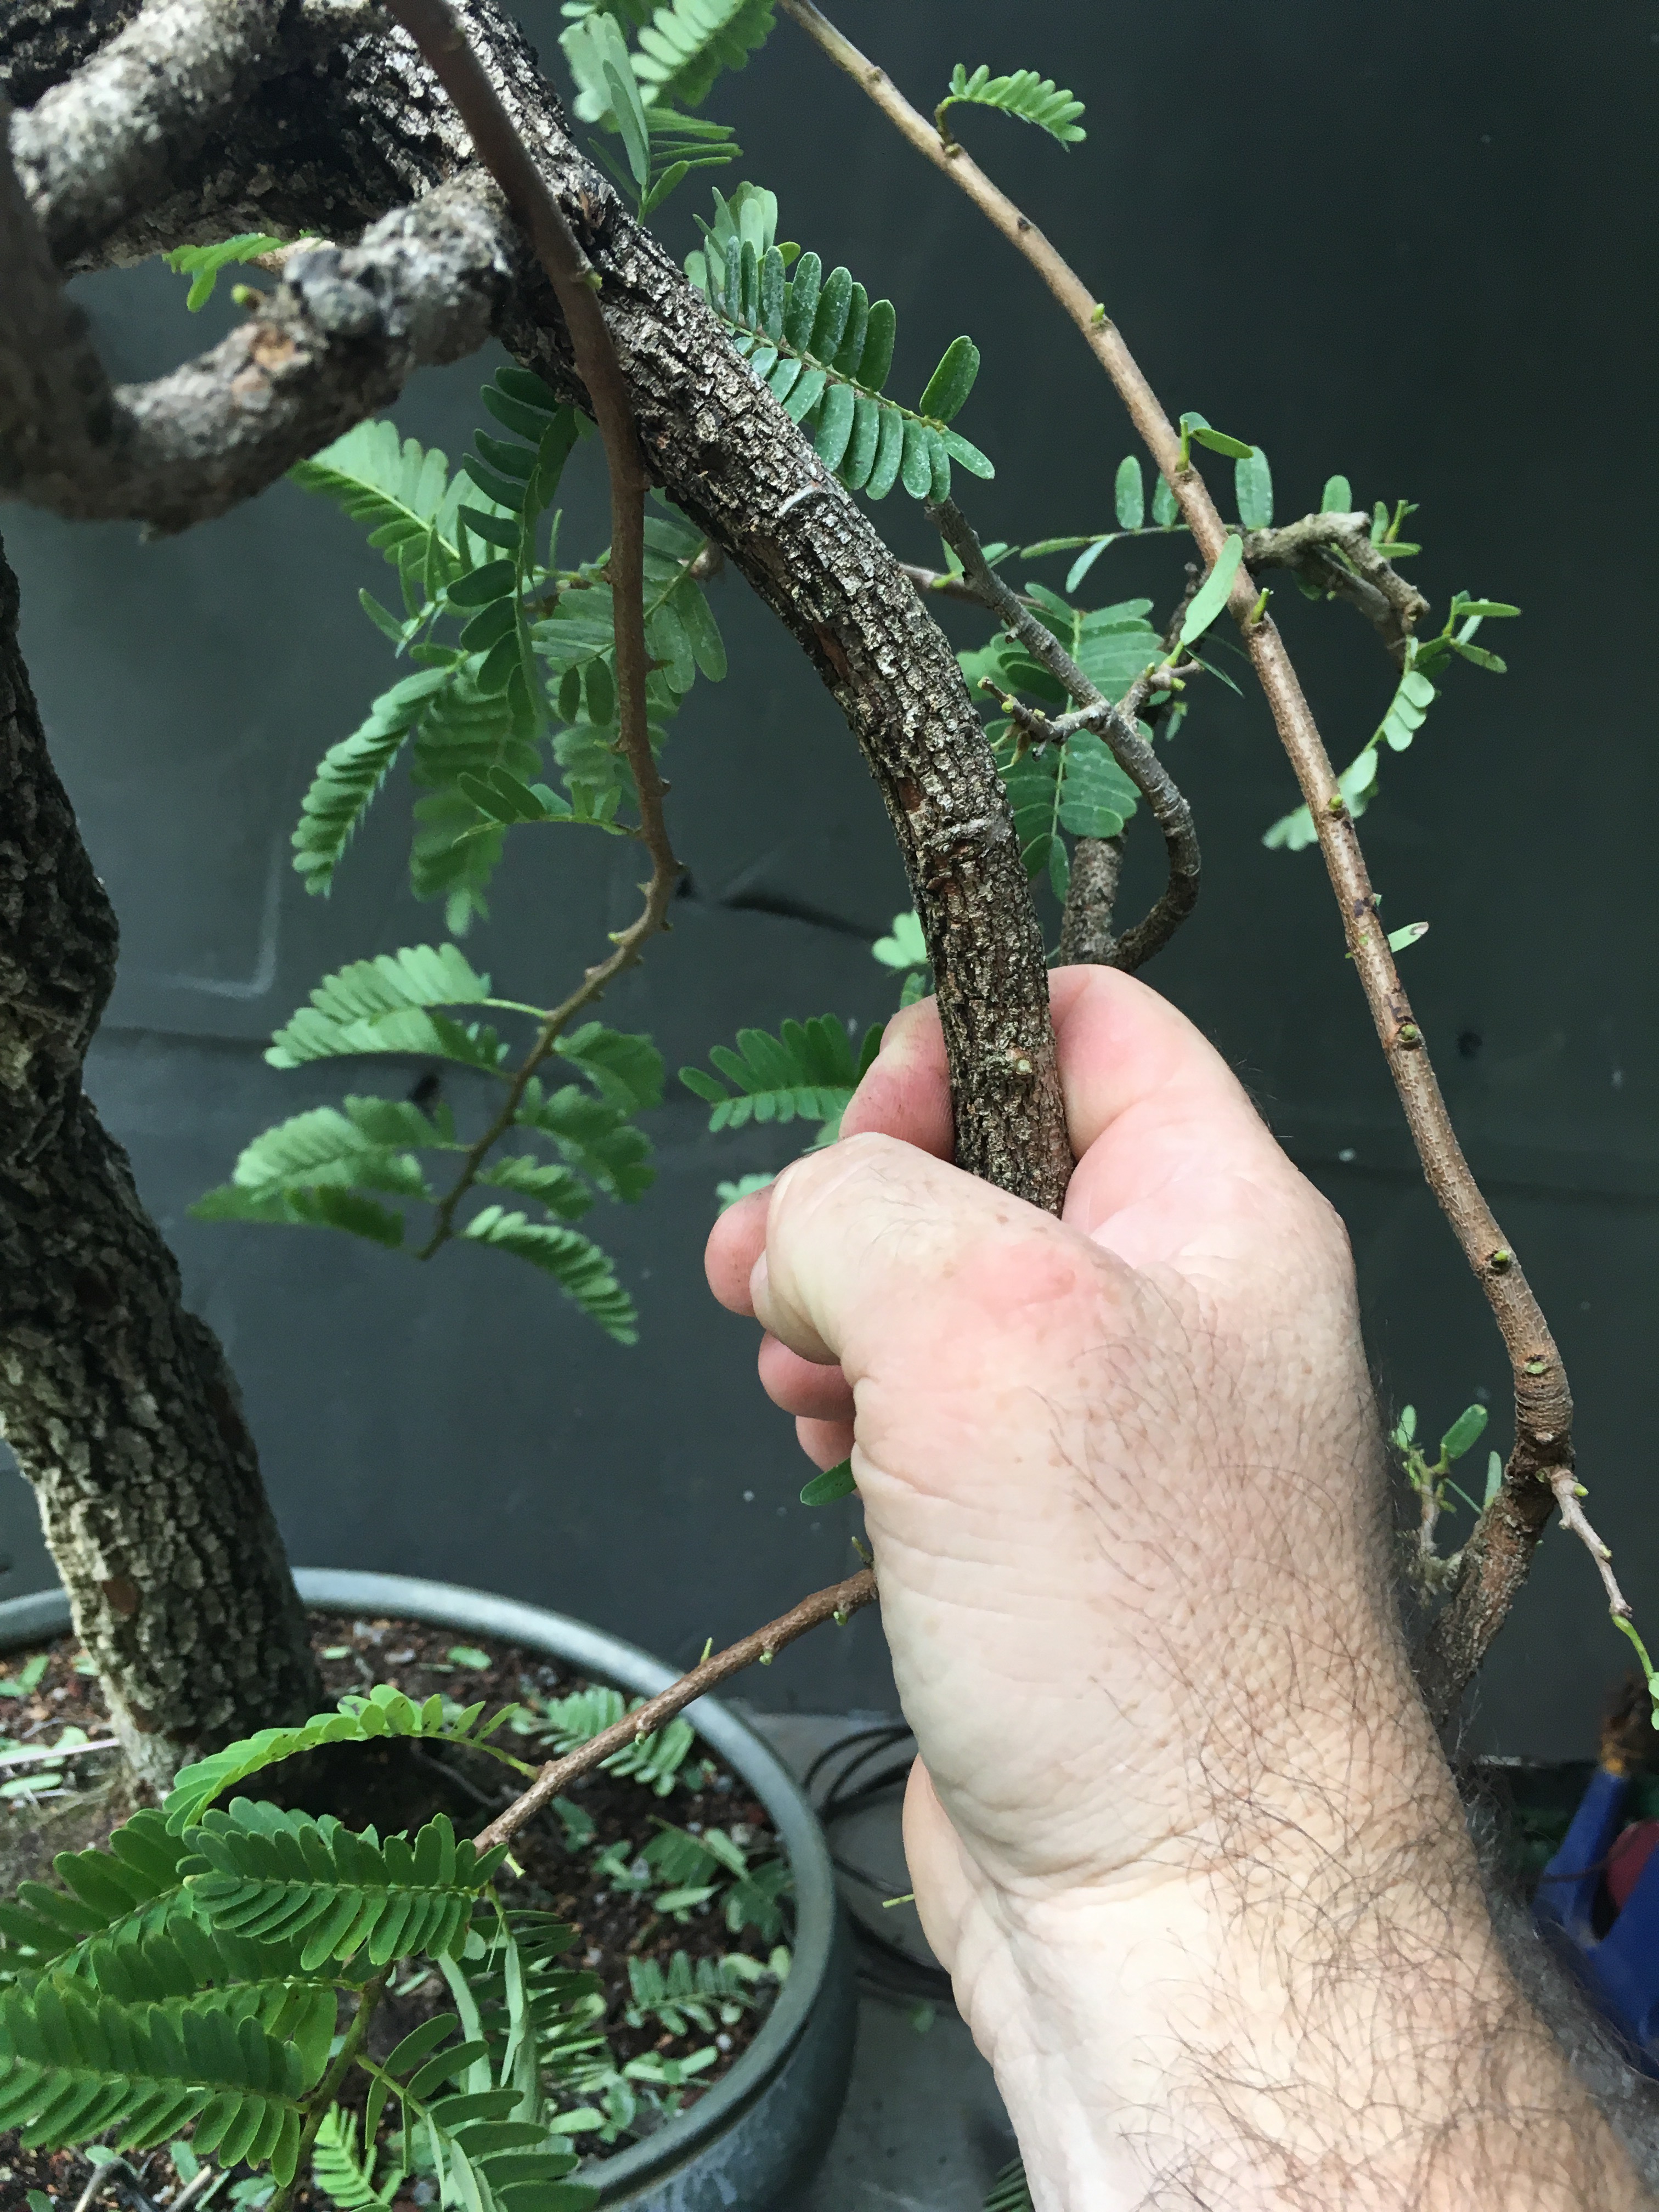
I’m going to make one cut before I get to the main lesson. Up top here. 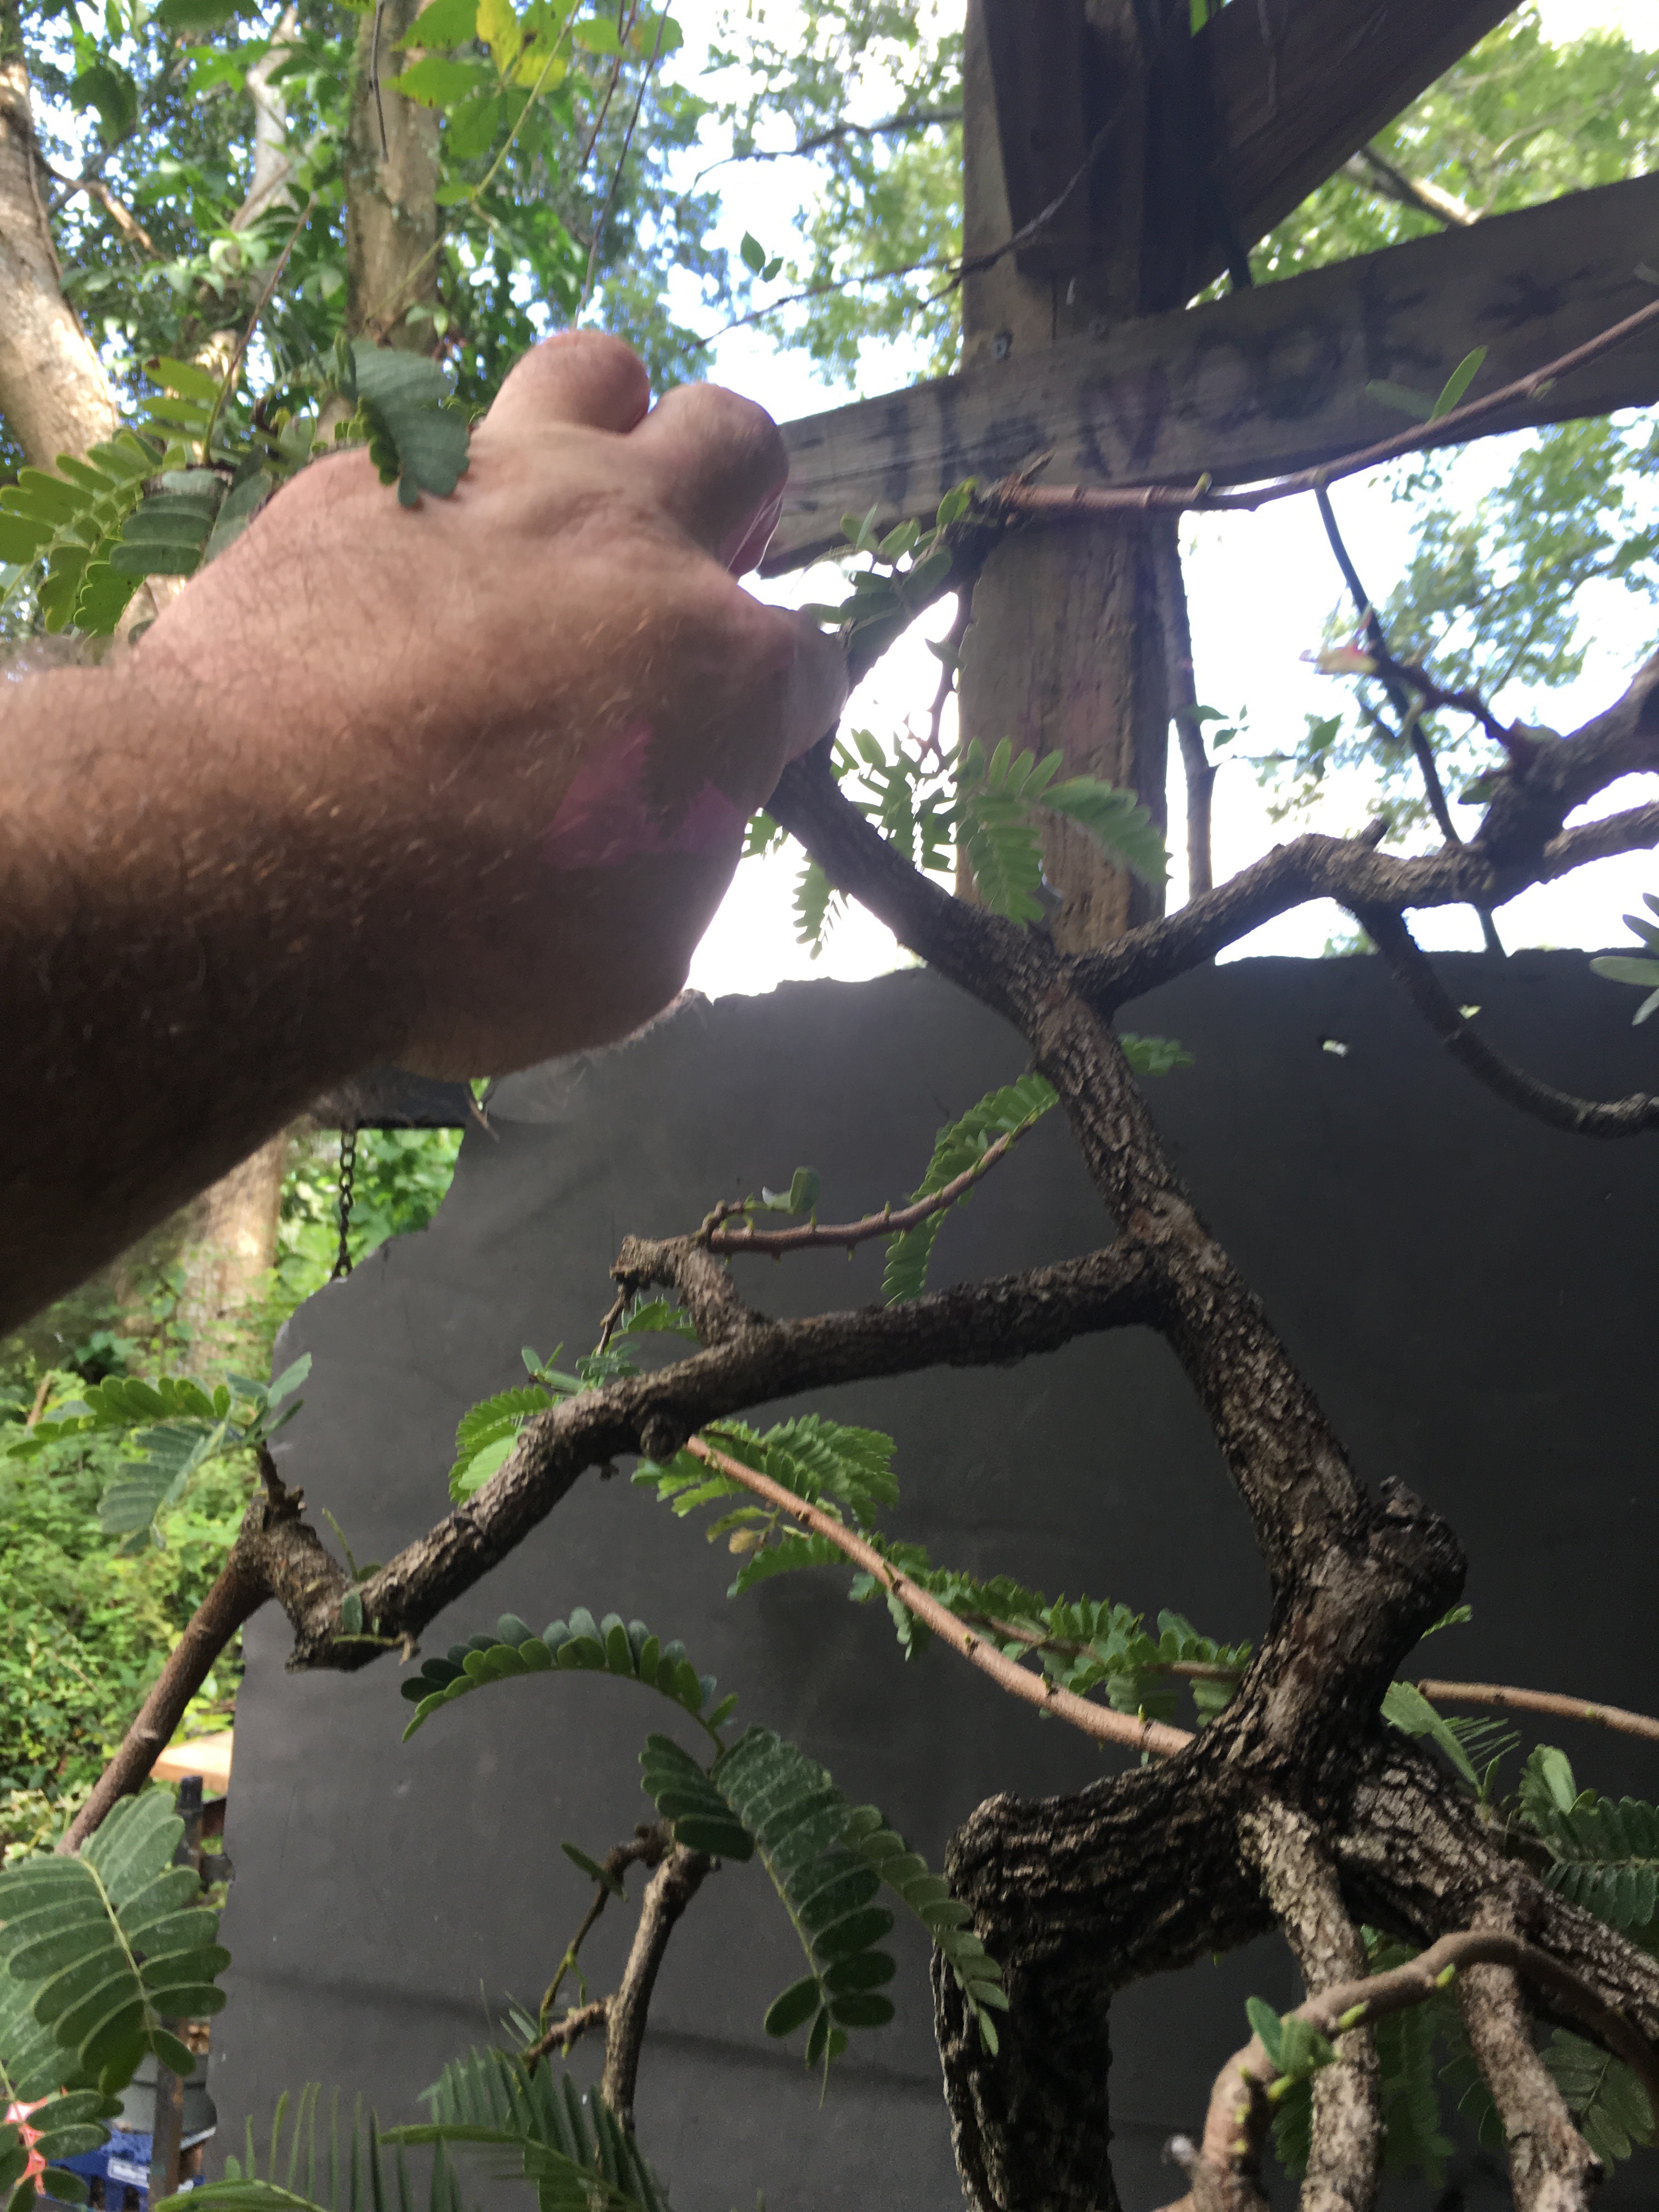 I’m losing the taper at that section so, orff wif its ‘edd!
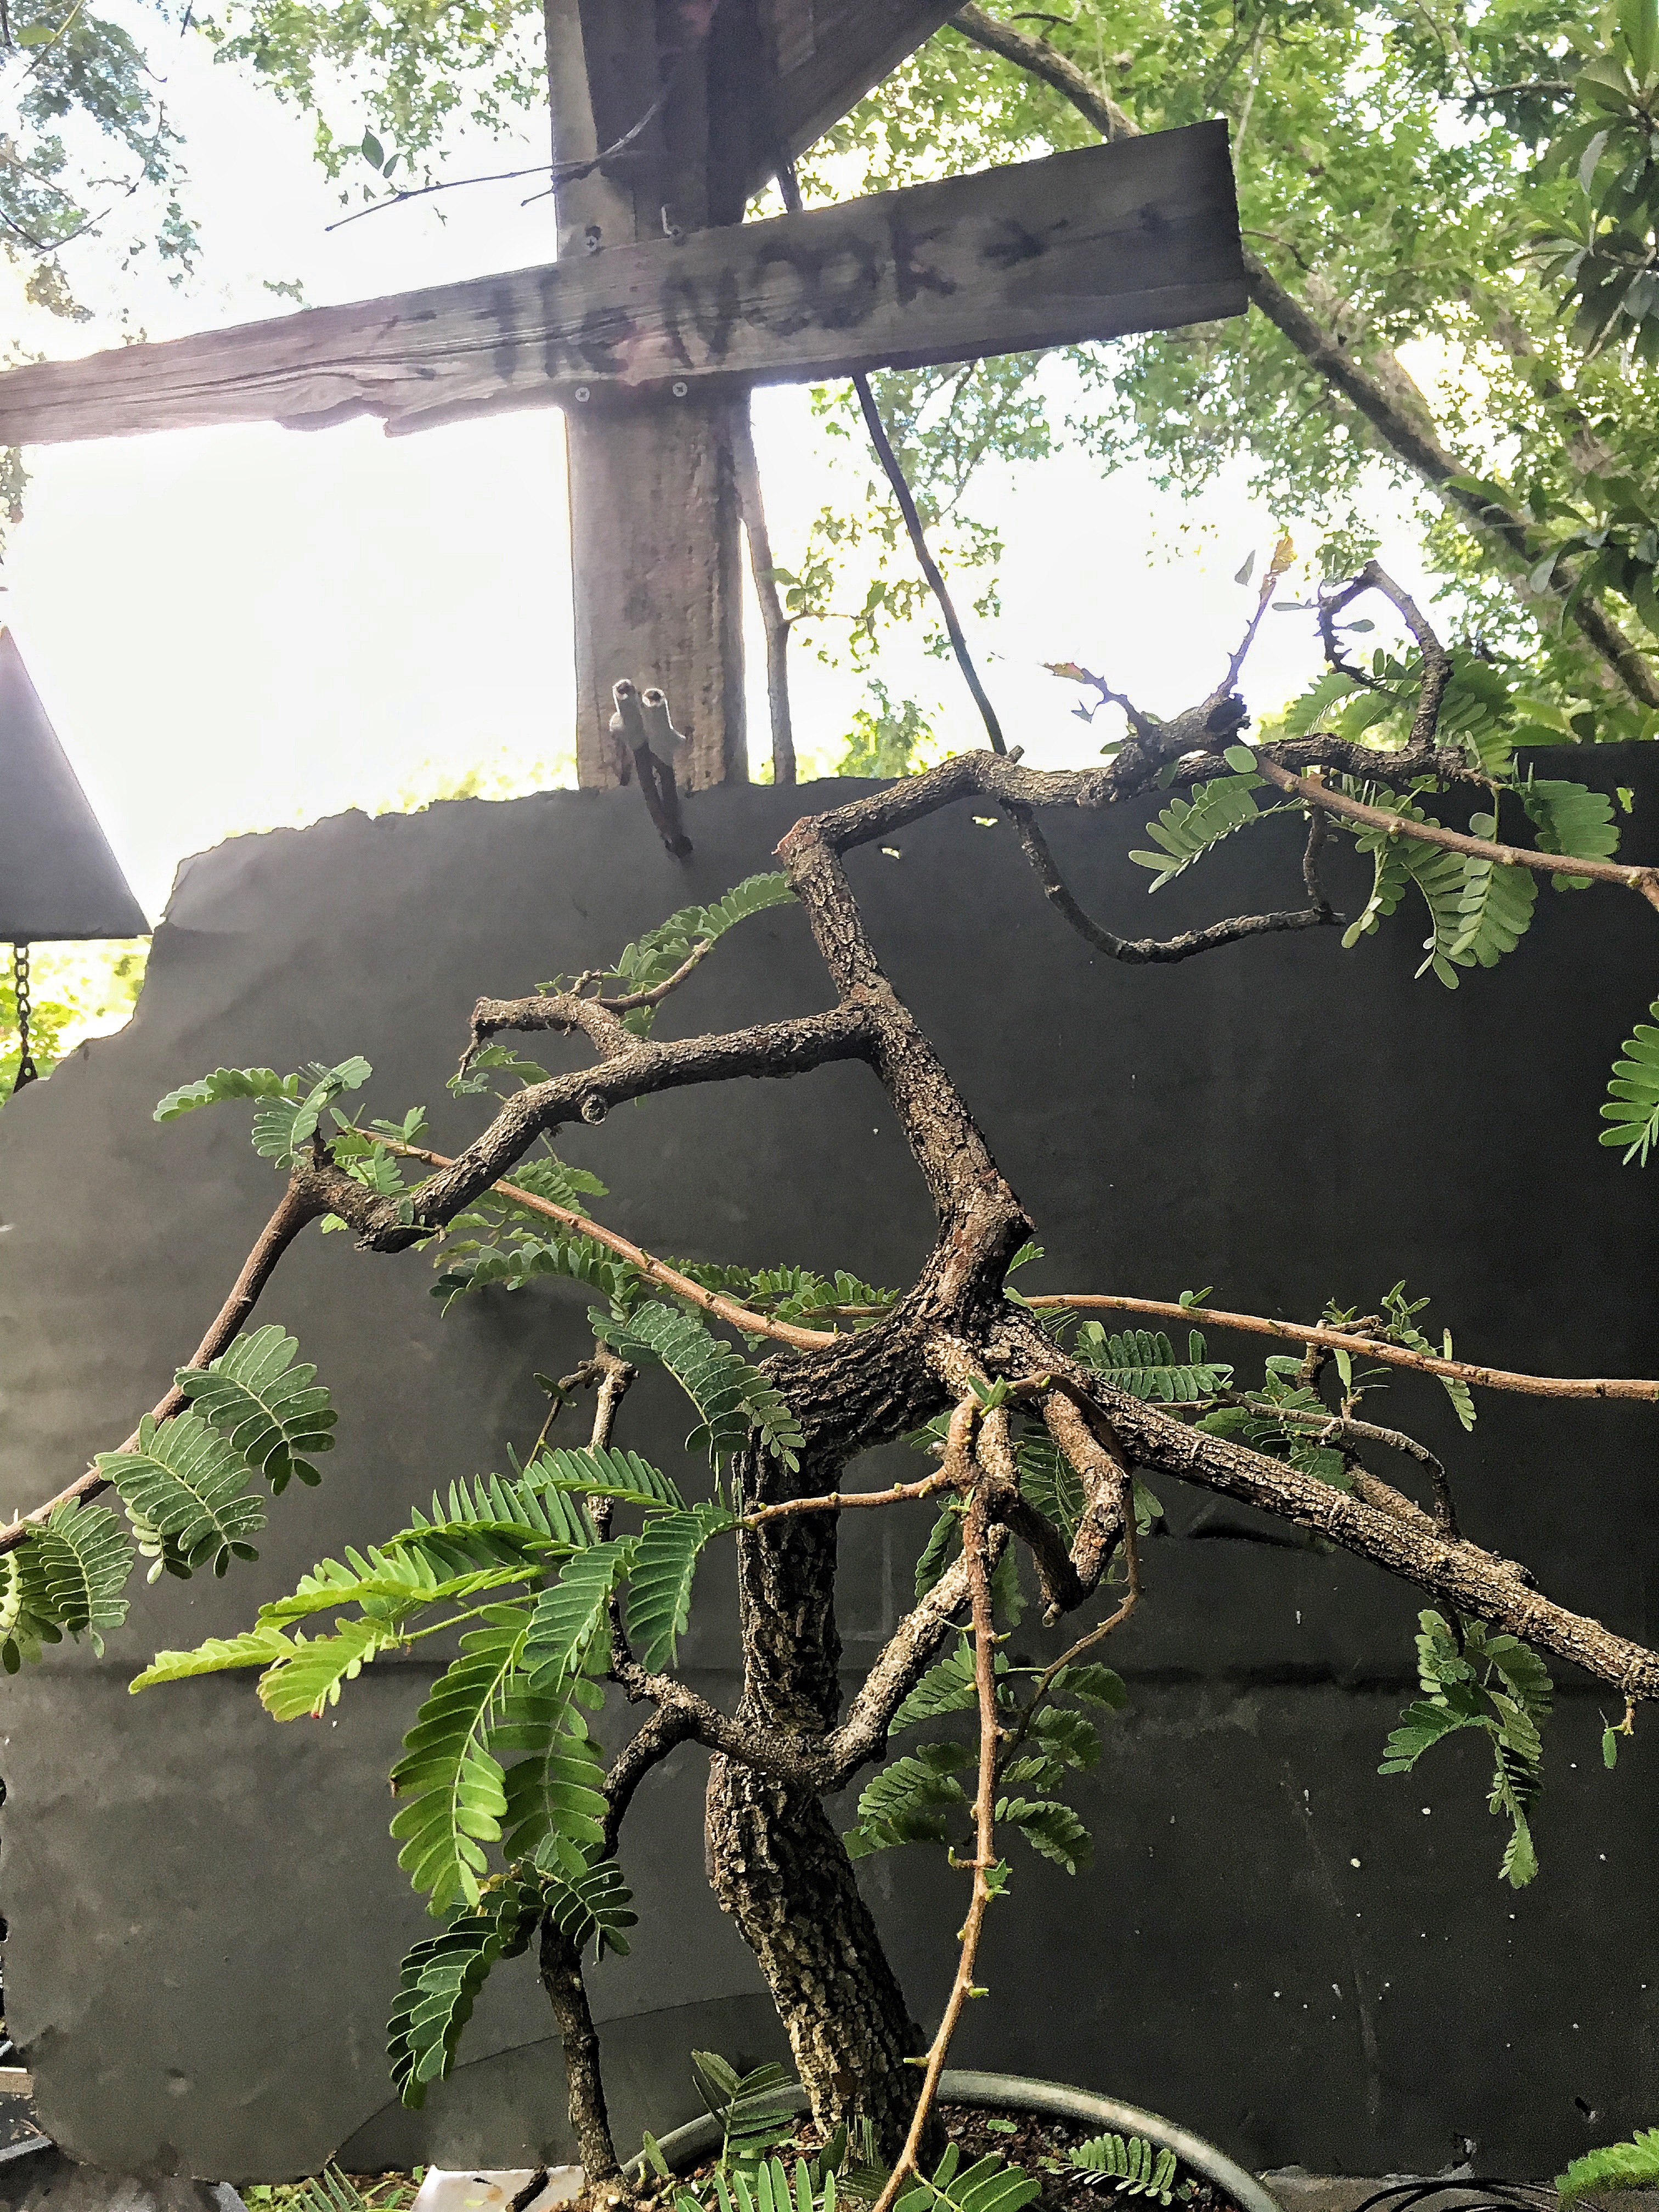
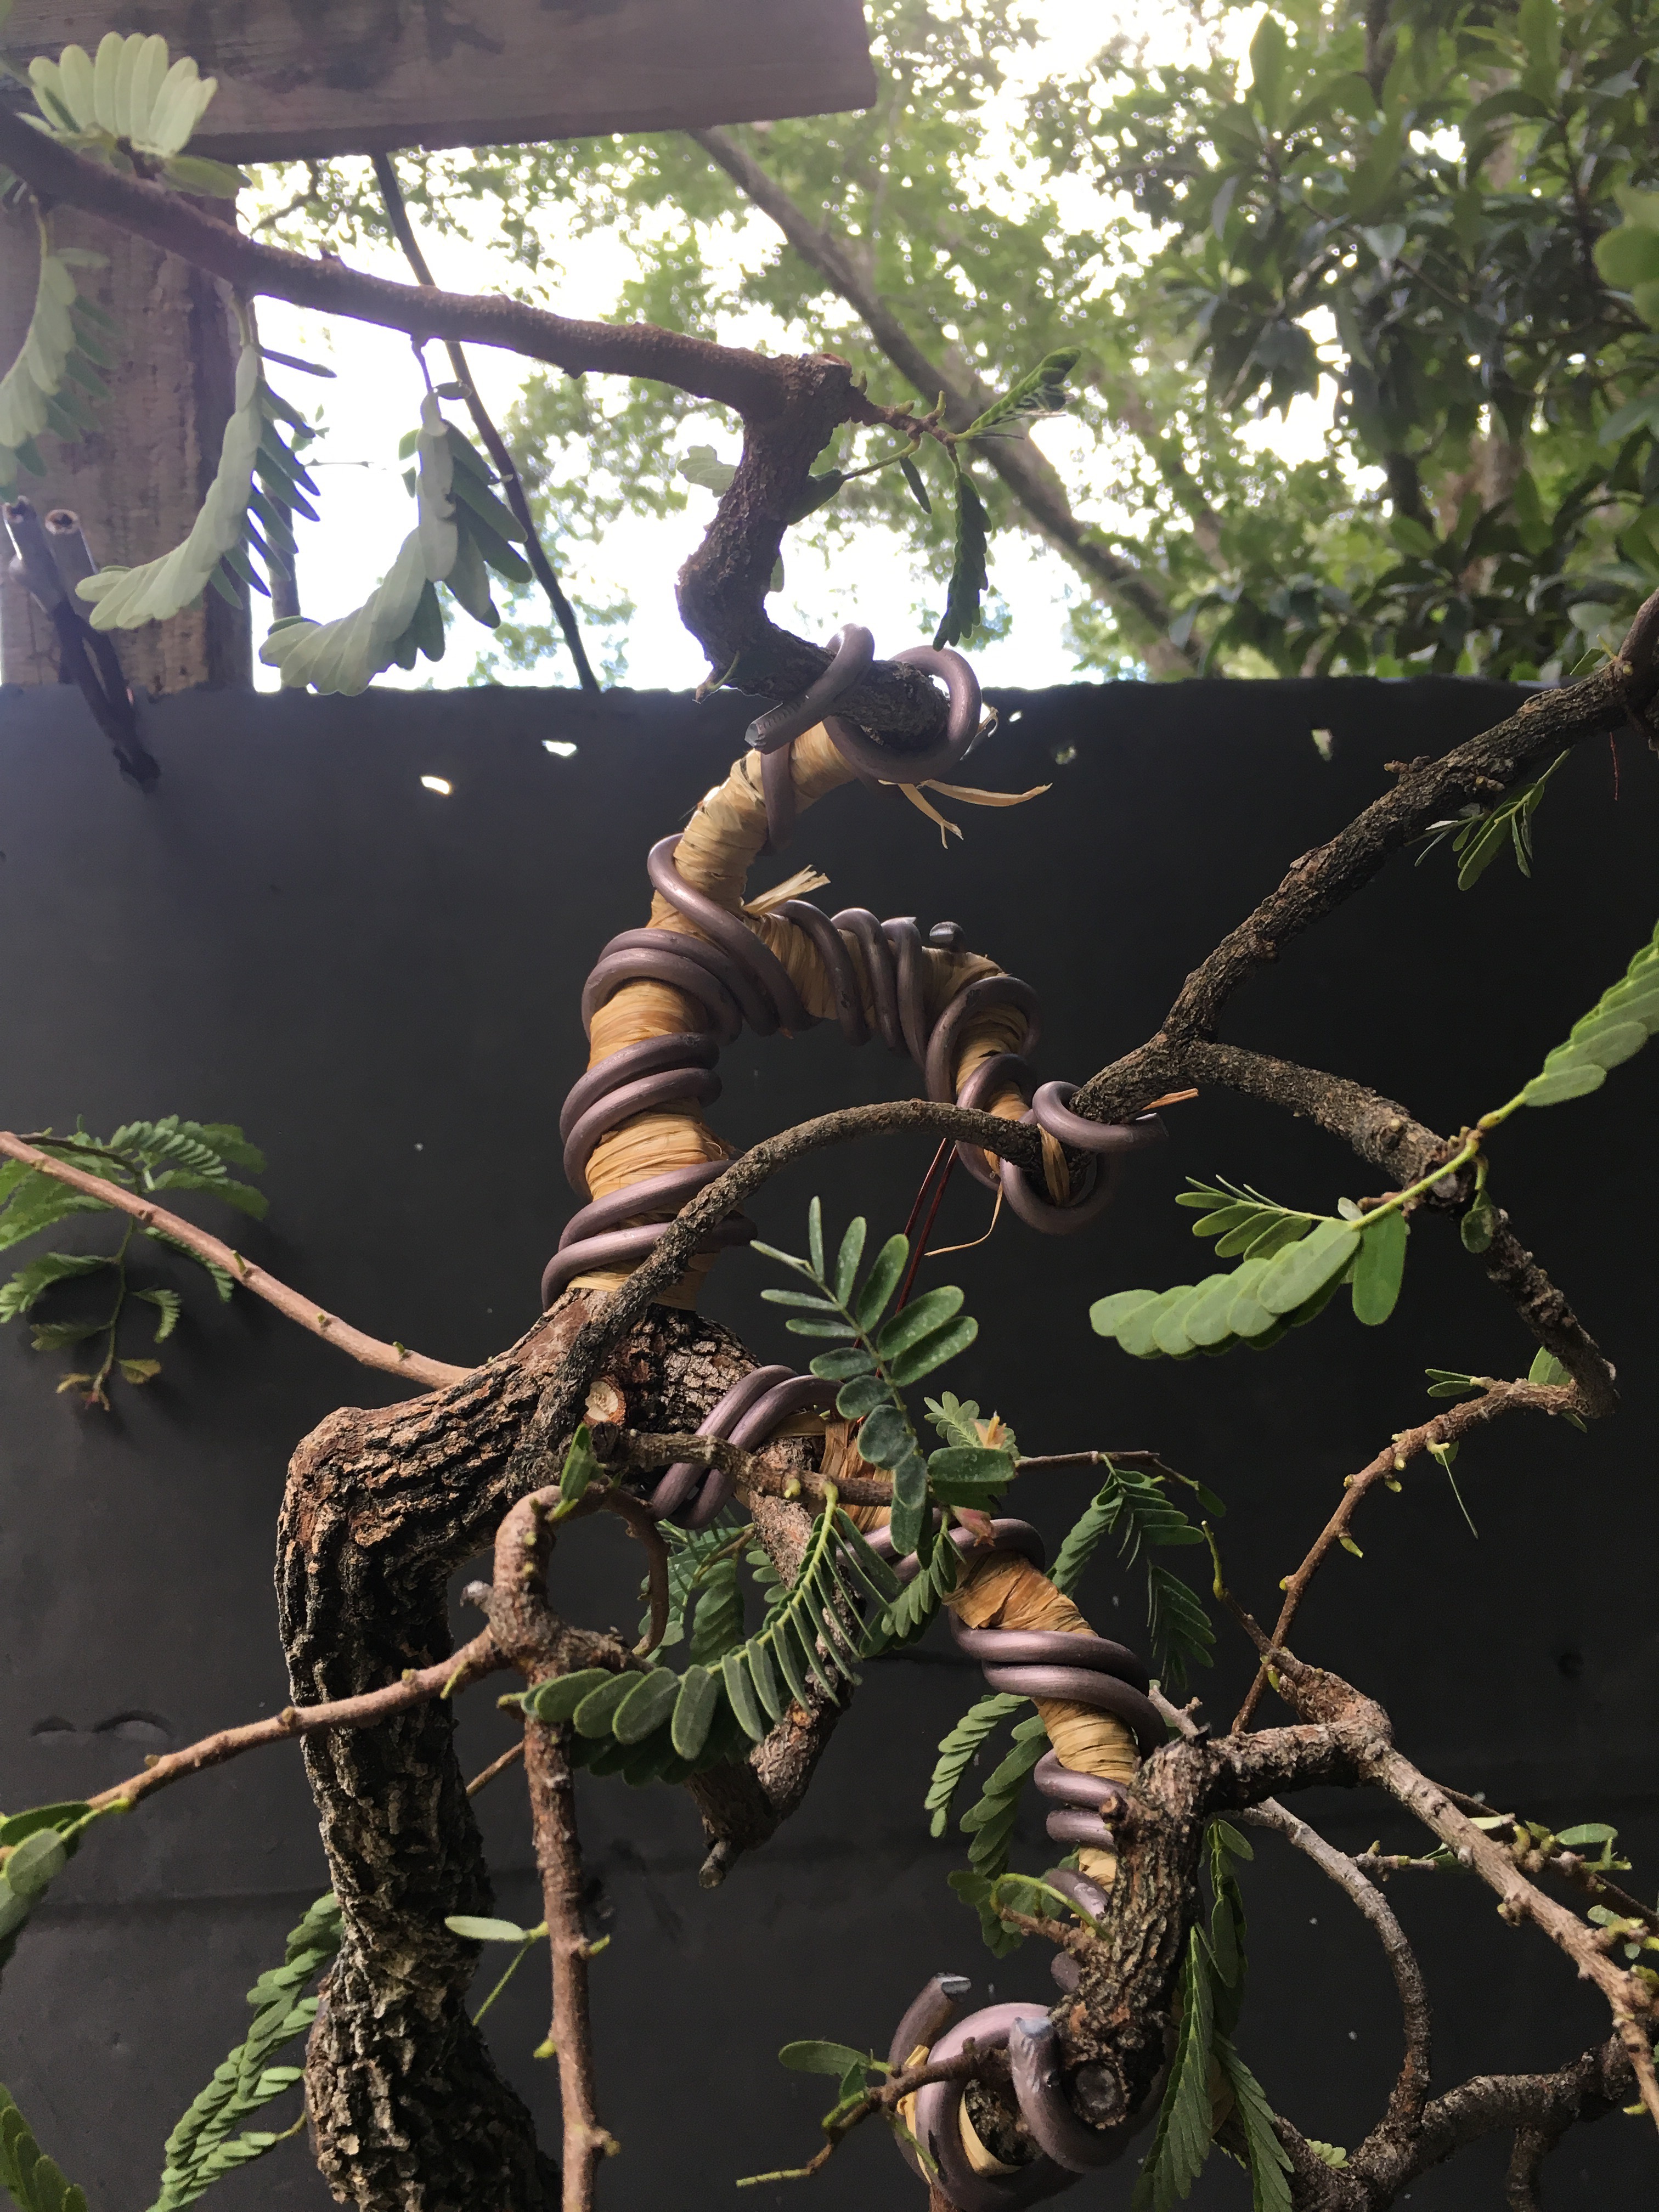
Now for some physics. I need to bend some pretty heavy branches. 
 In order to do it without breaking, I’ll have to wrap them with something so they don’t crack.
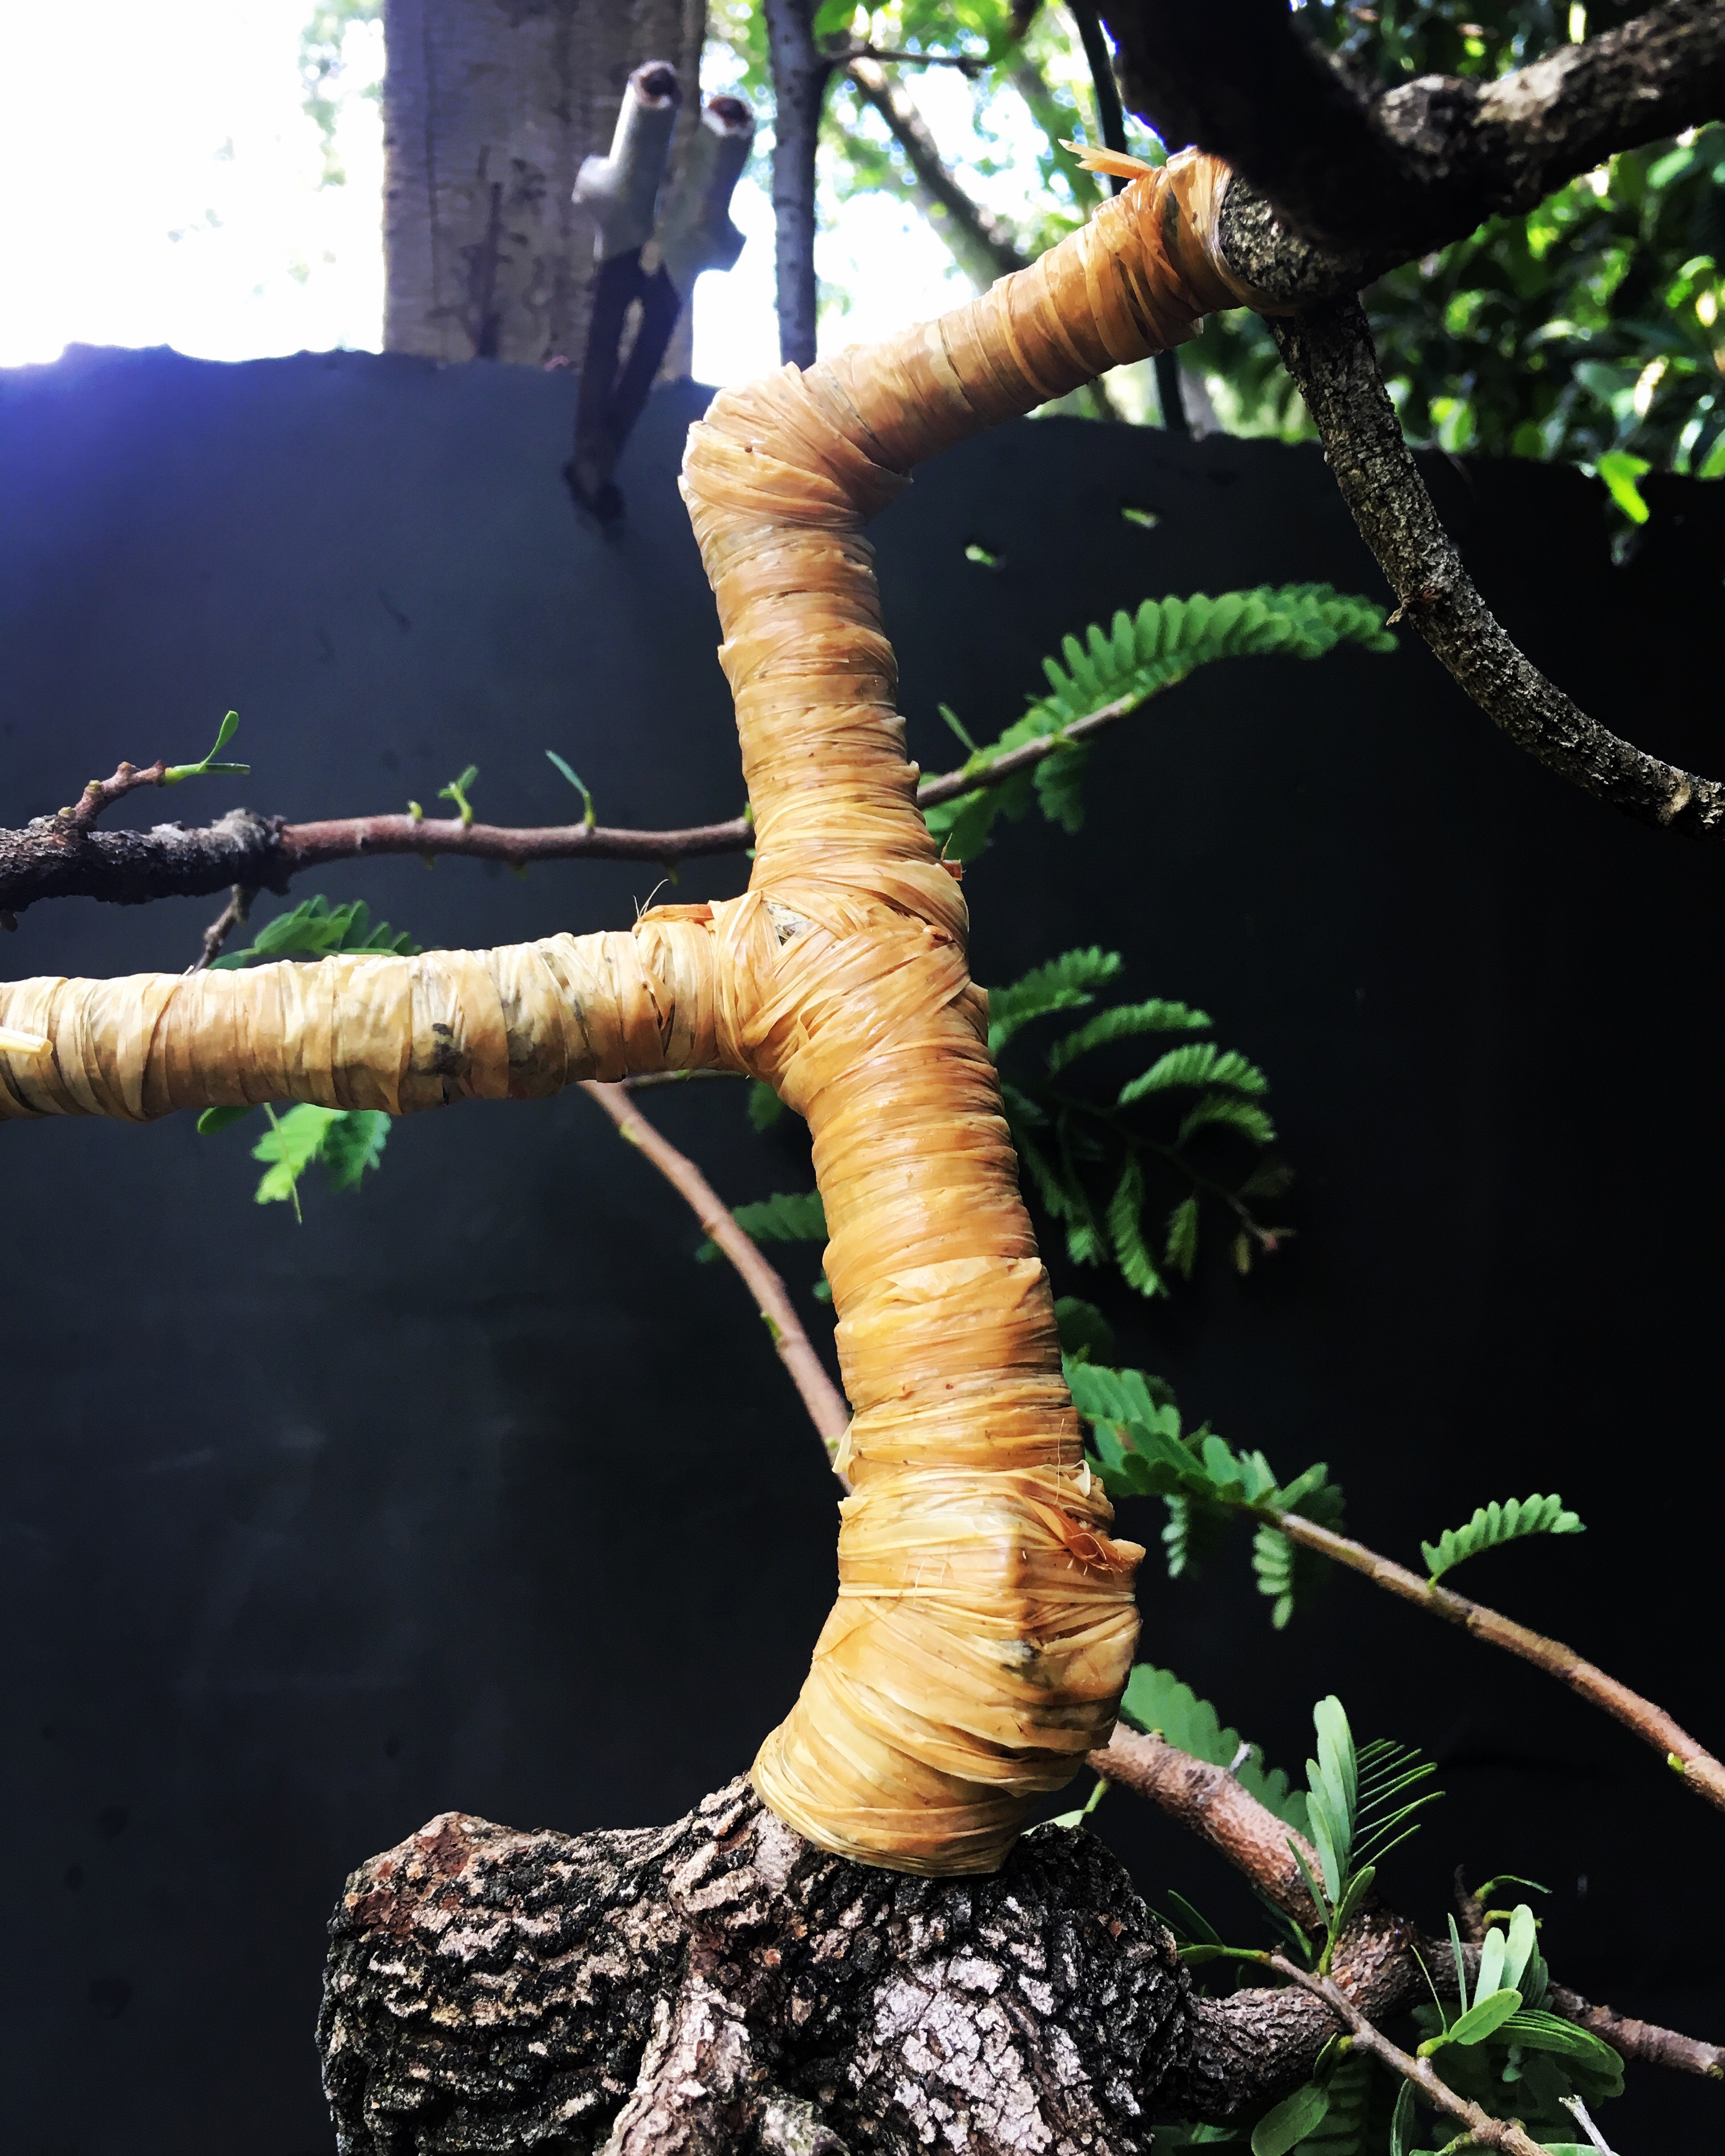
Today I’ll be using wet raffia. 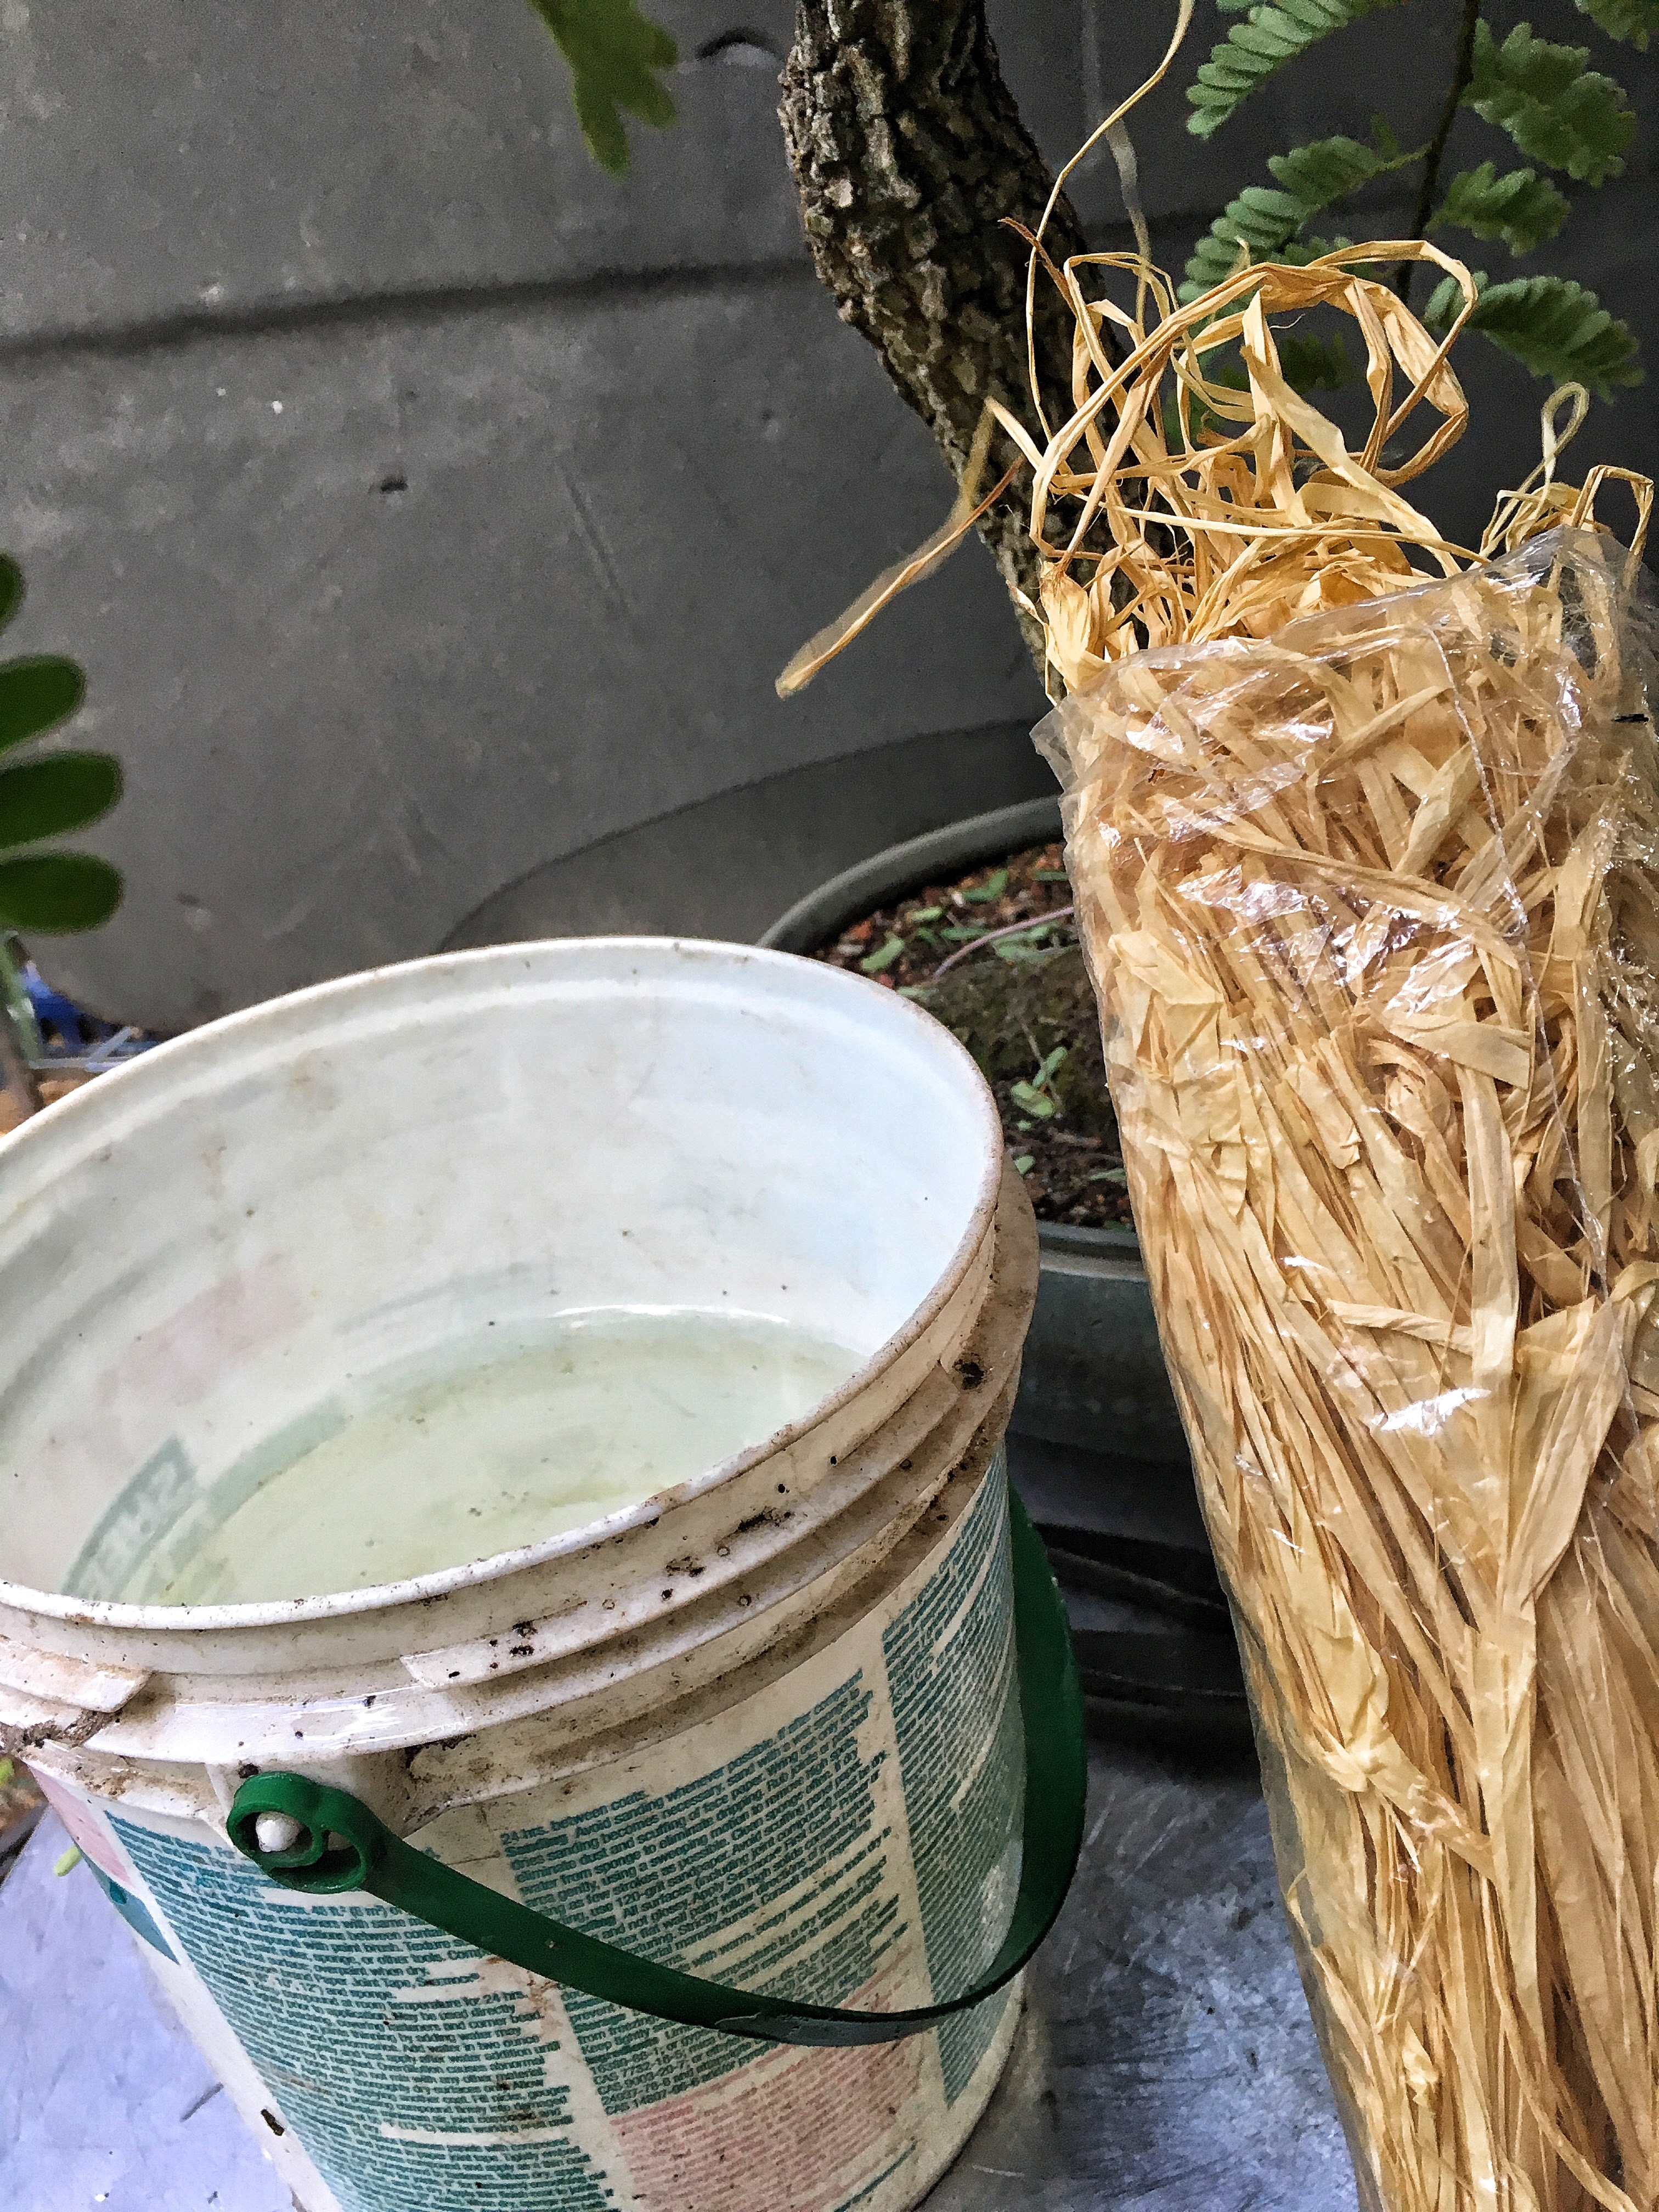
Let me put some in water to soak and while we wait, I’ll give you the reason why I’m doing this. 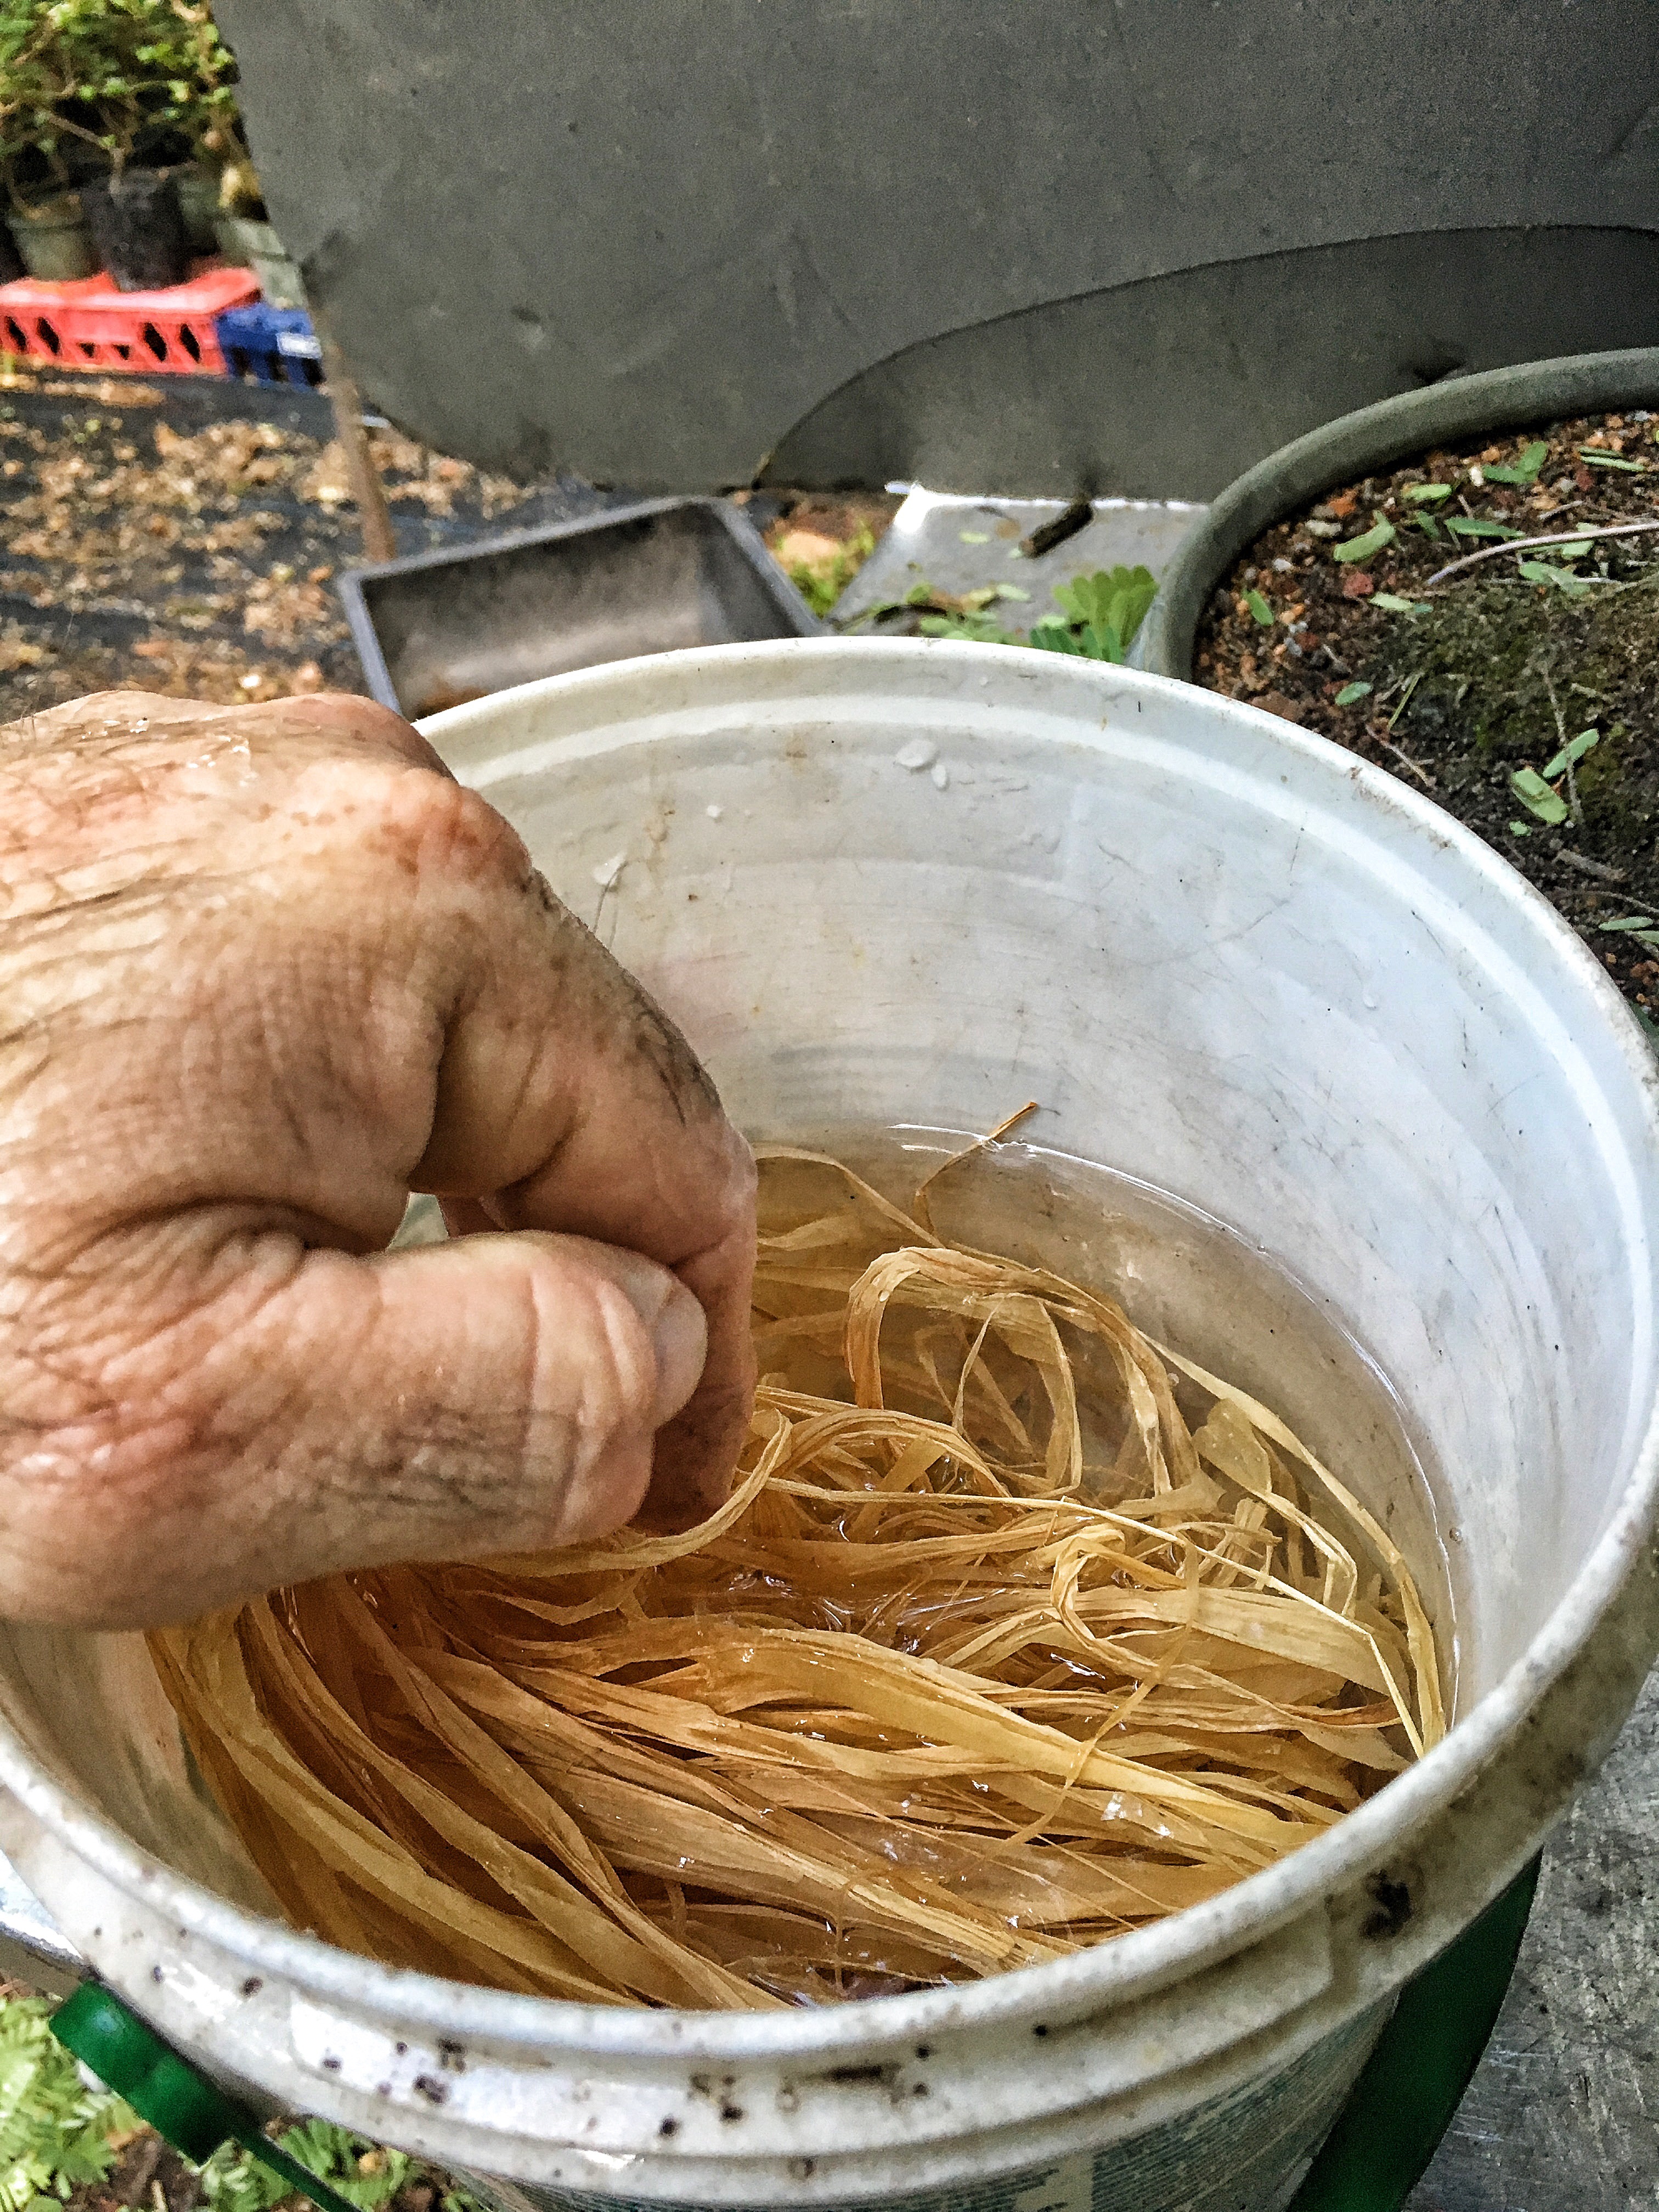
When we bend a branch (think of it as a cylinder with consecutively smaller cylinders inside it, basically the growth rings)……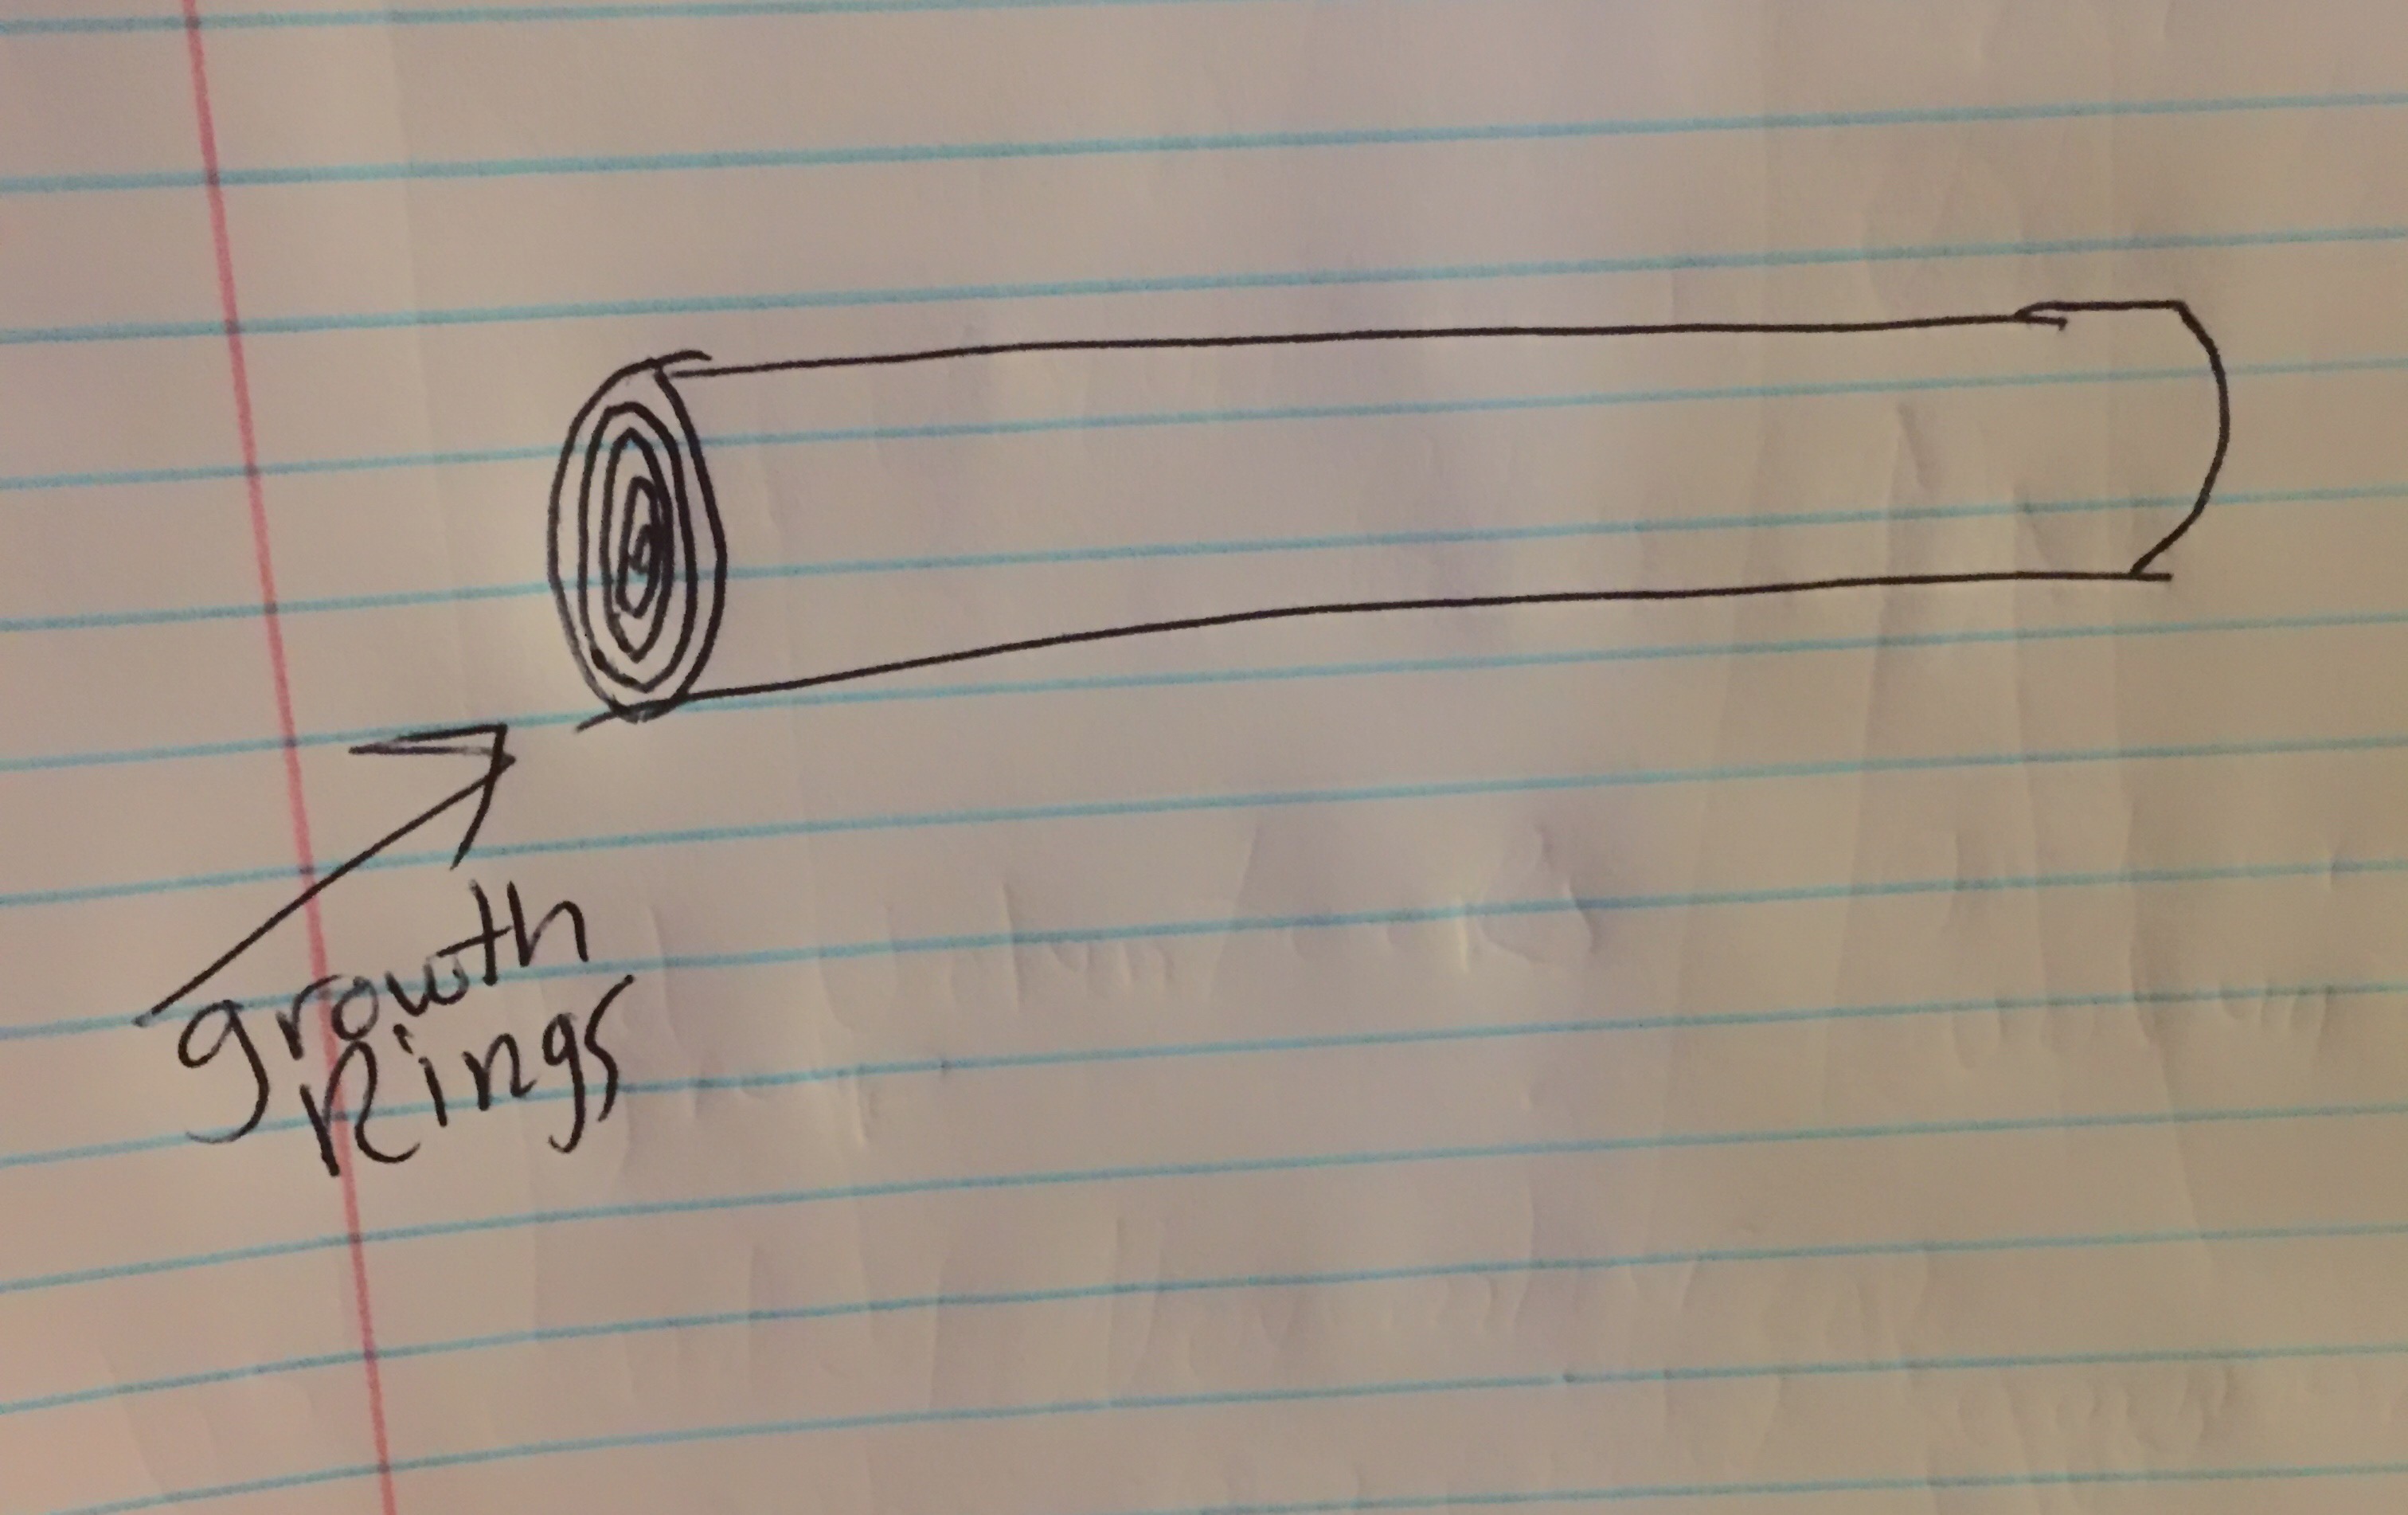 ….there are at least two forces acting upon it (the third might be torsion)….
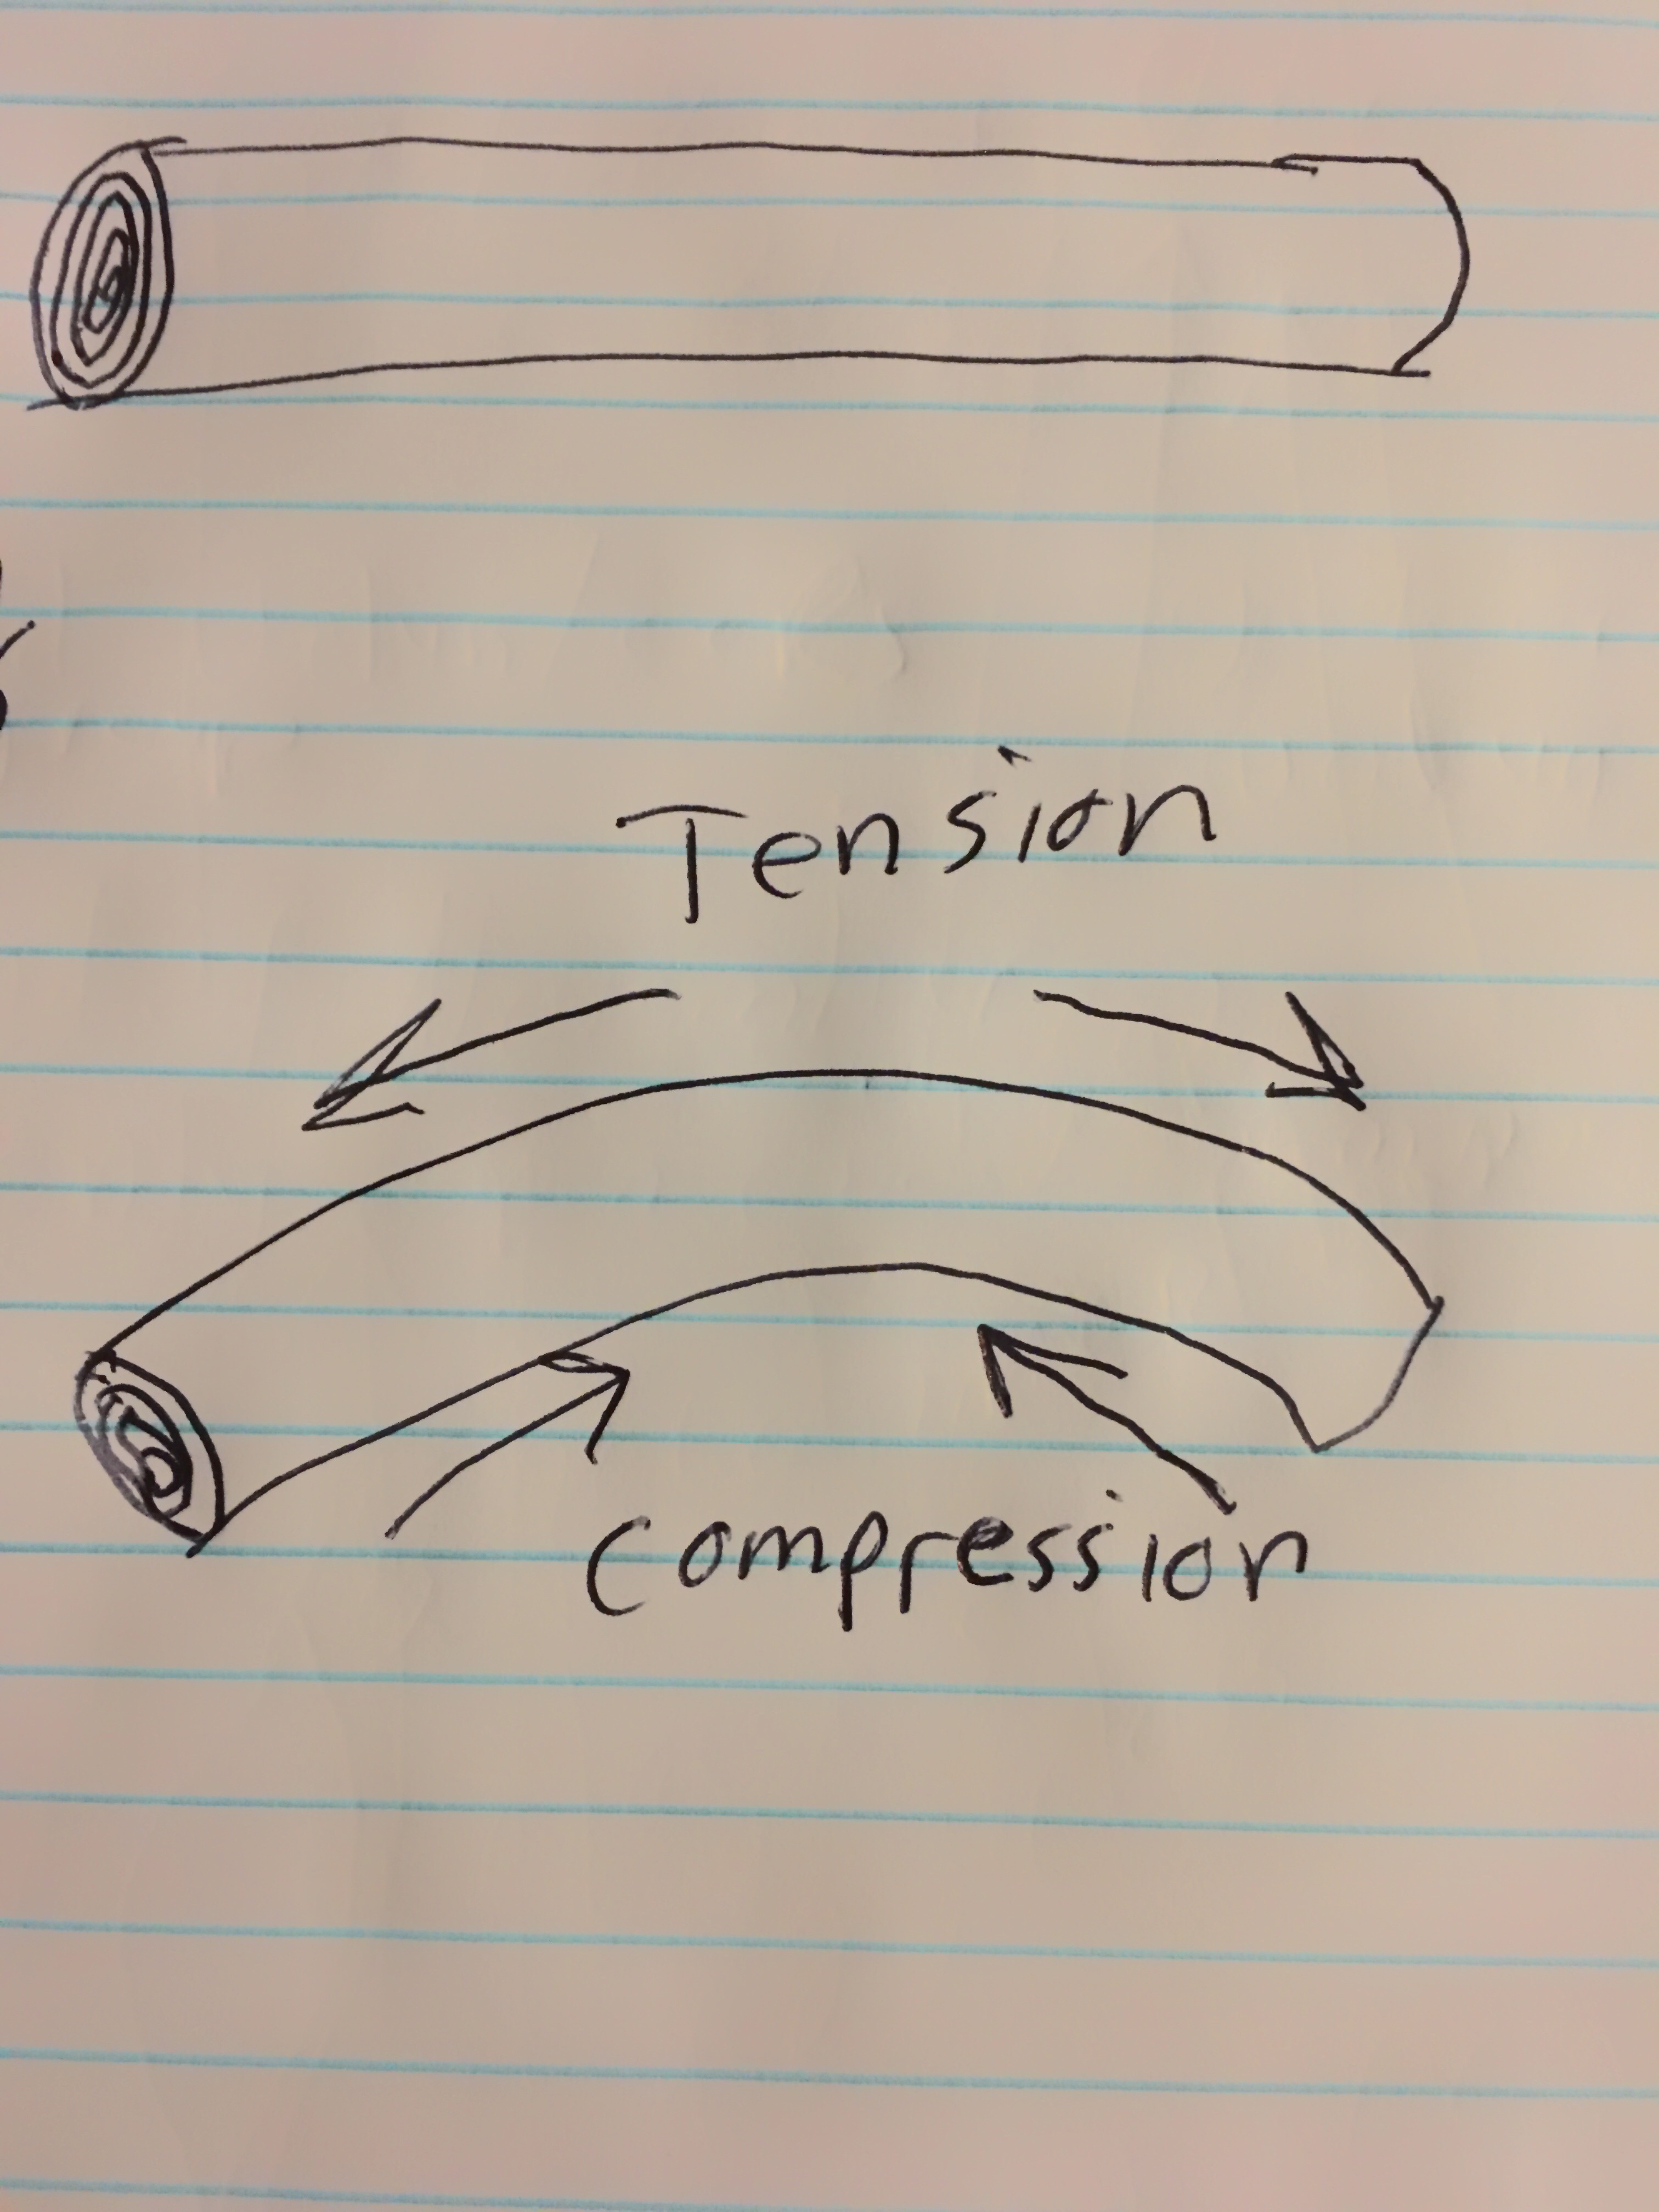 tension is pulling the fibers on the outside of the bend, compression is pushing those fibers together. This is why a branch will snap….
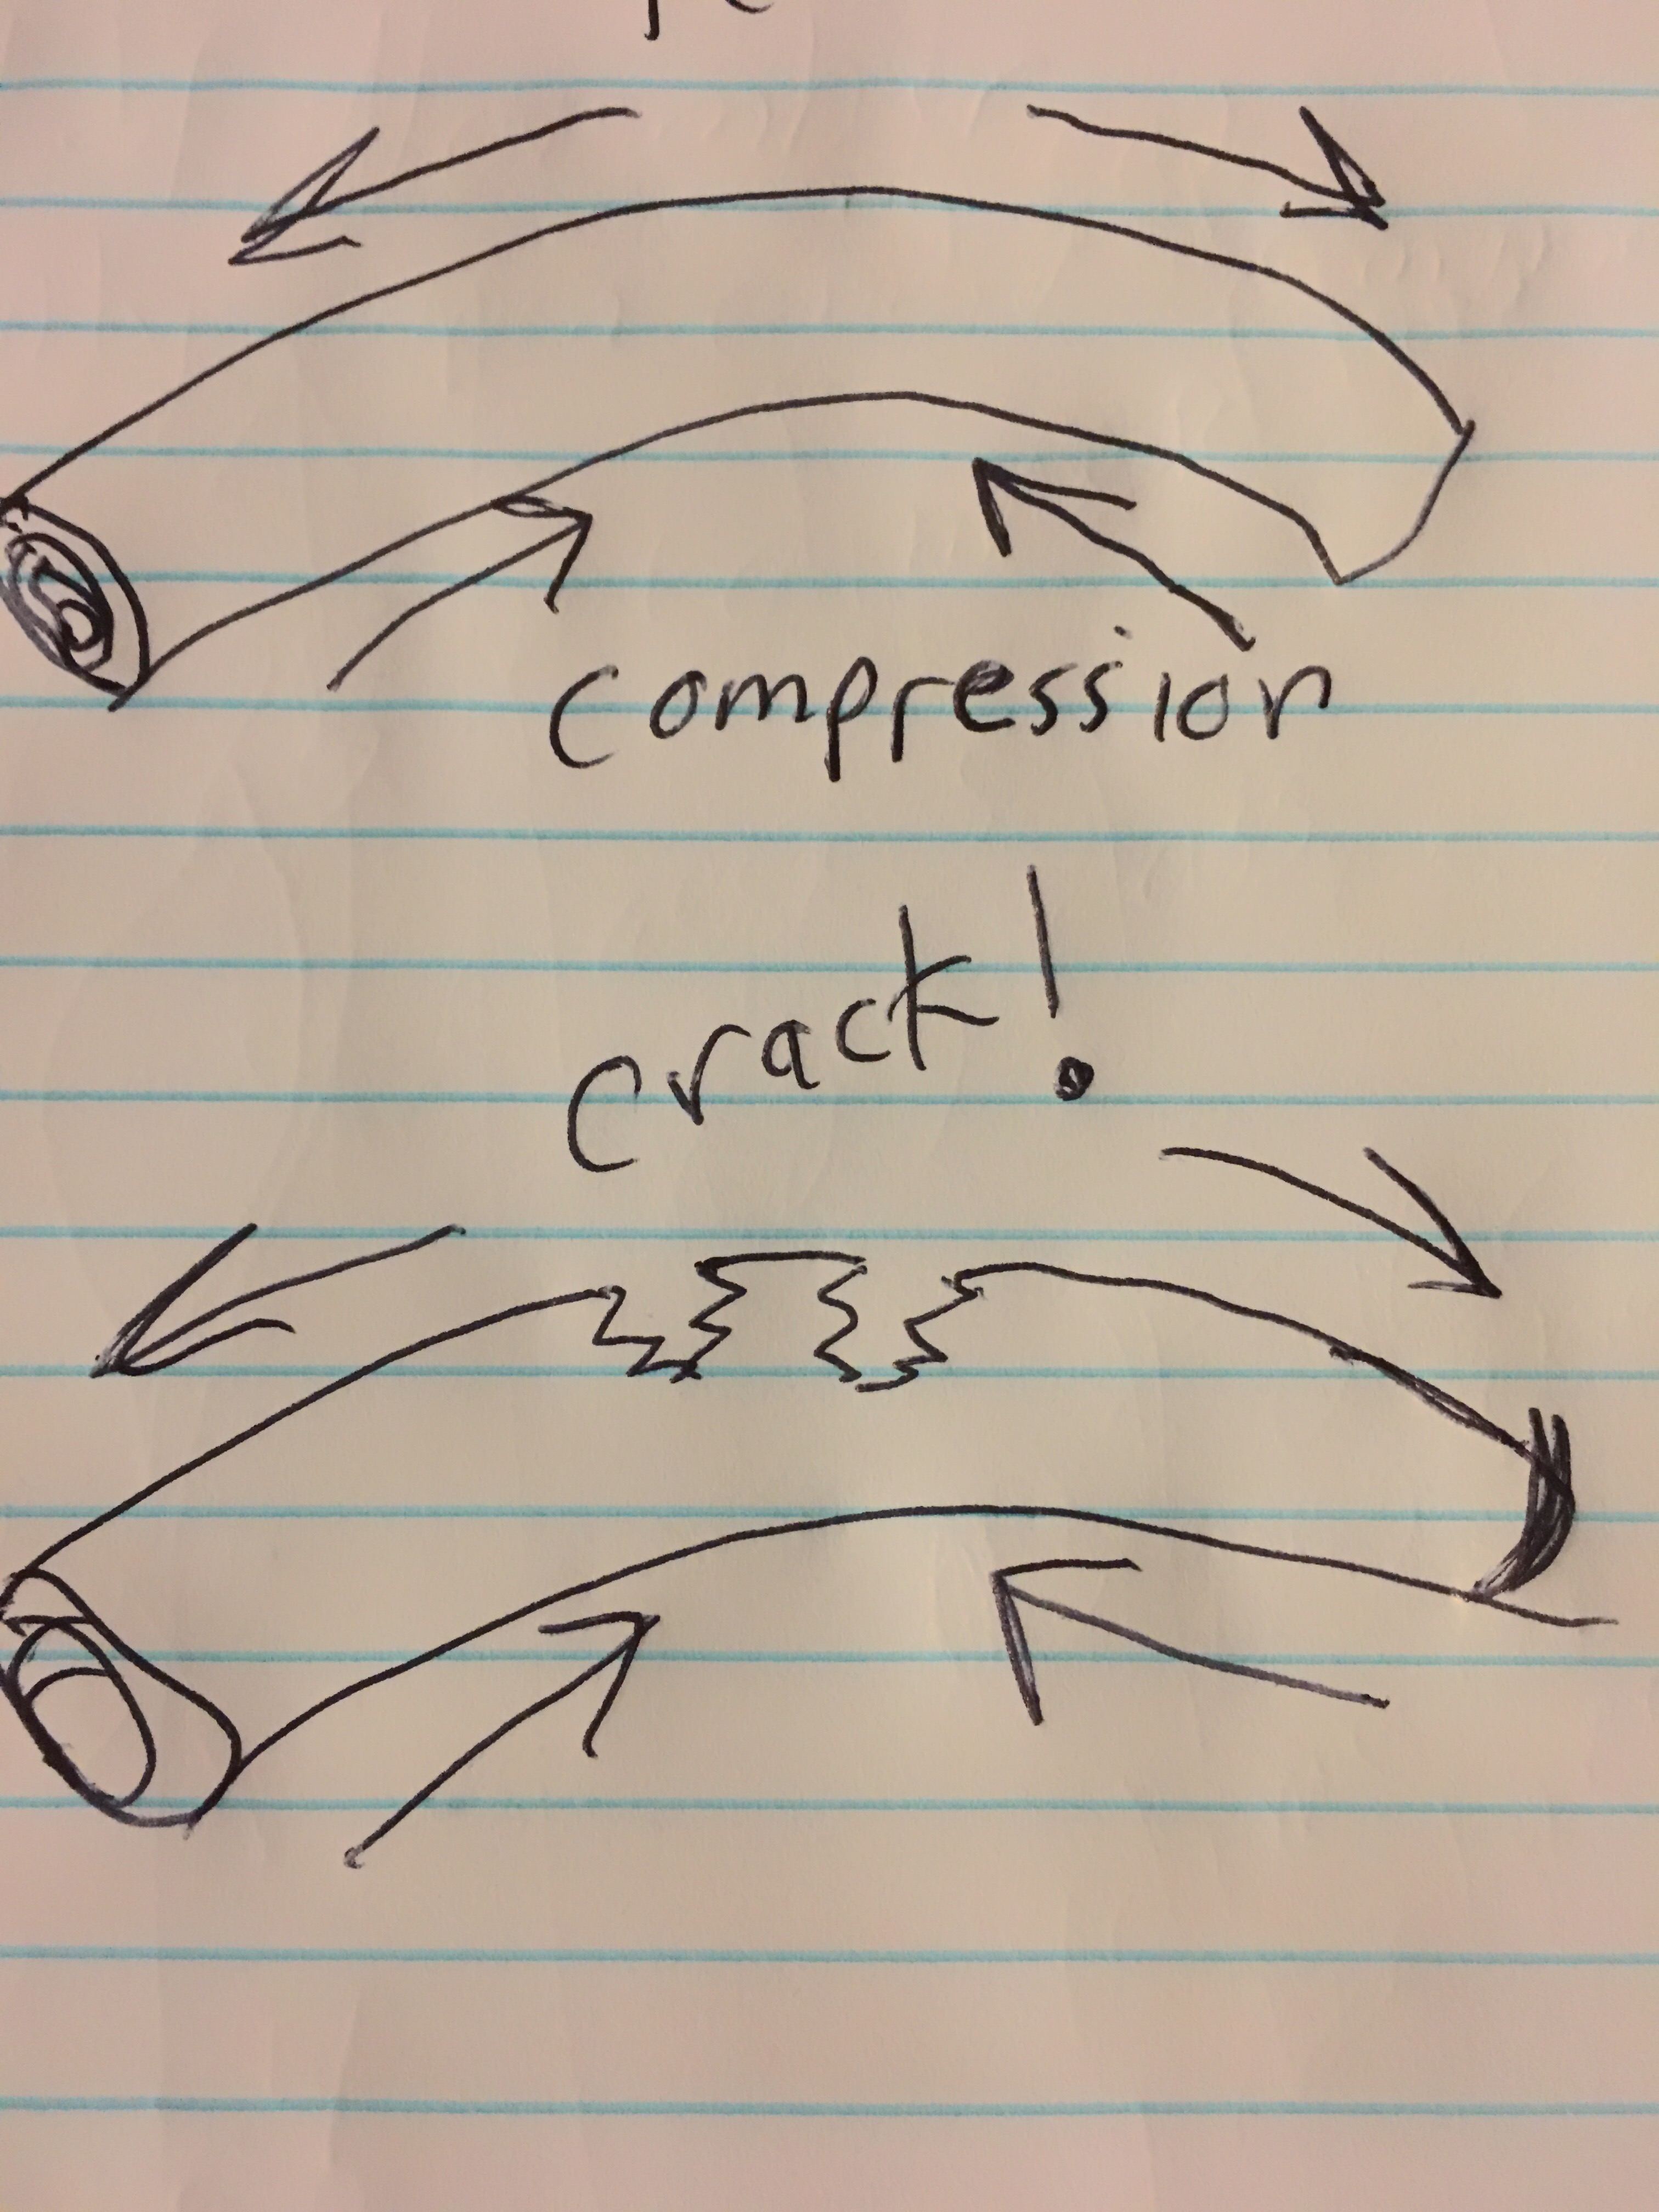 But, by applying another layer (more plastic or flexible) on the outside of the branch….
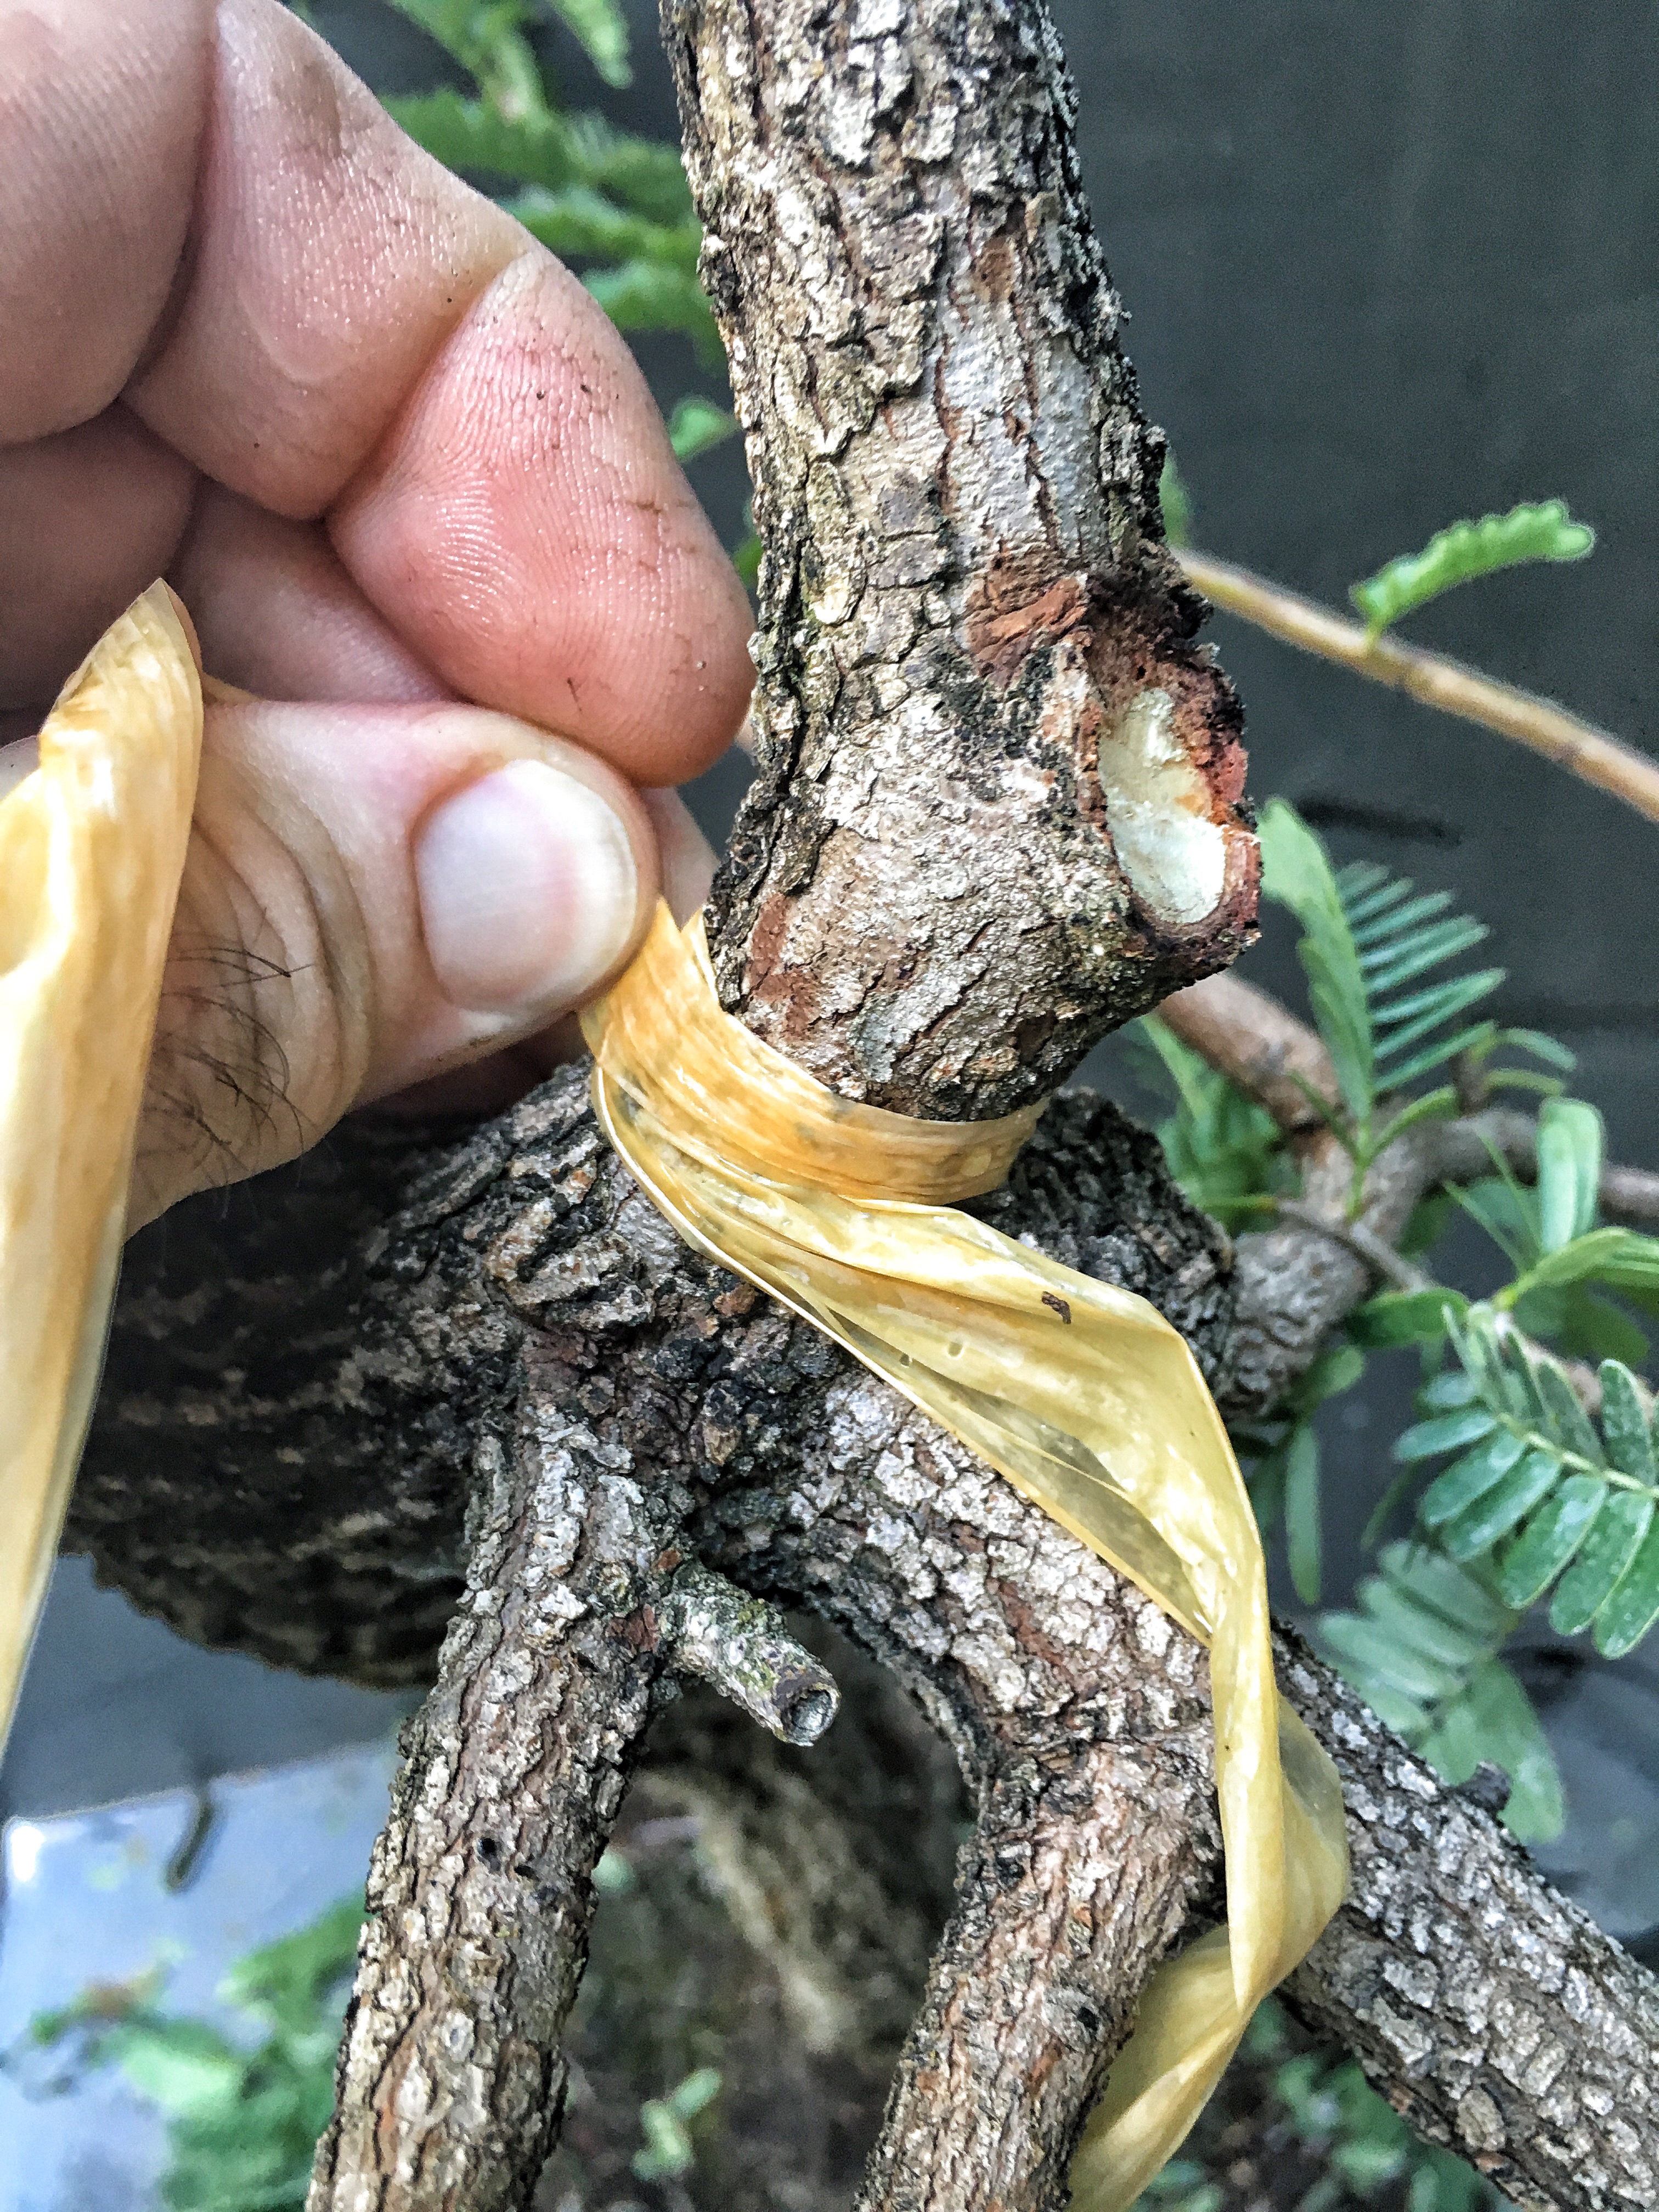
 that outside layer is now being compressed and won’t crack. Hopefully.
 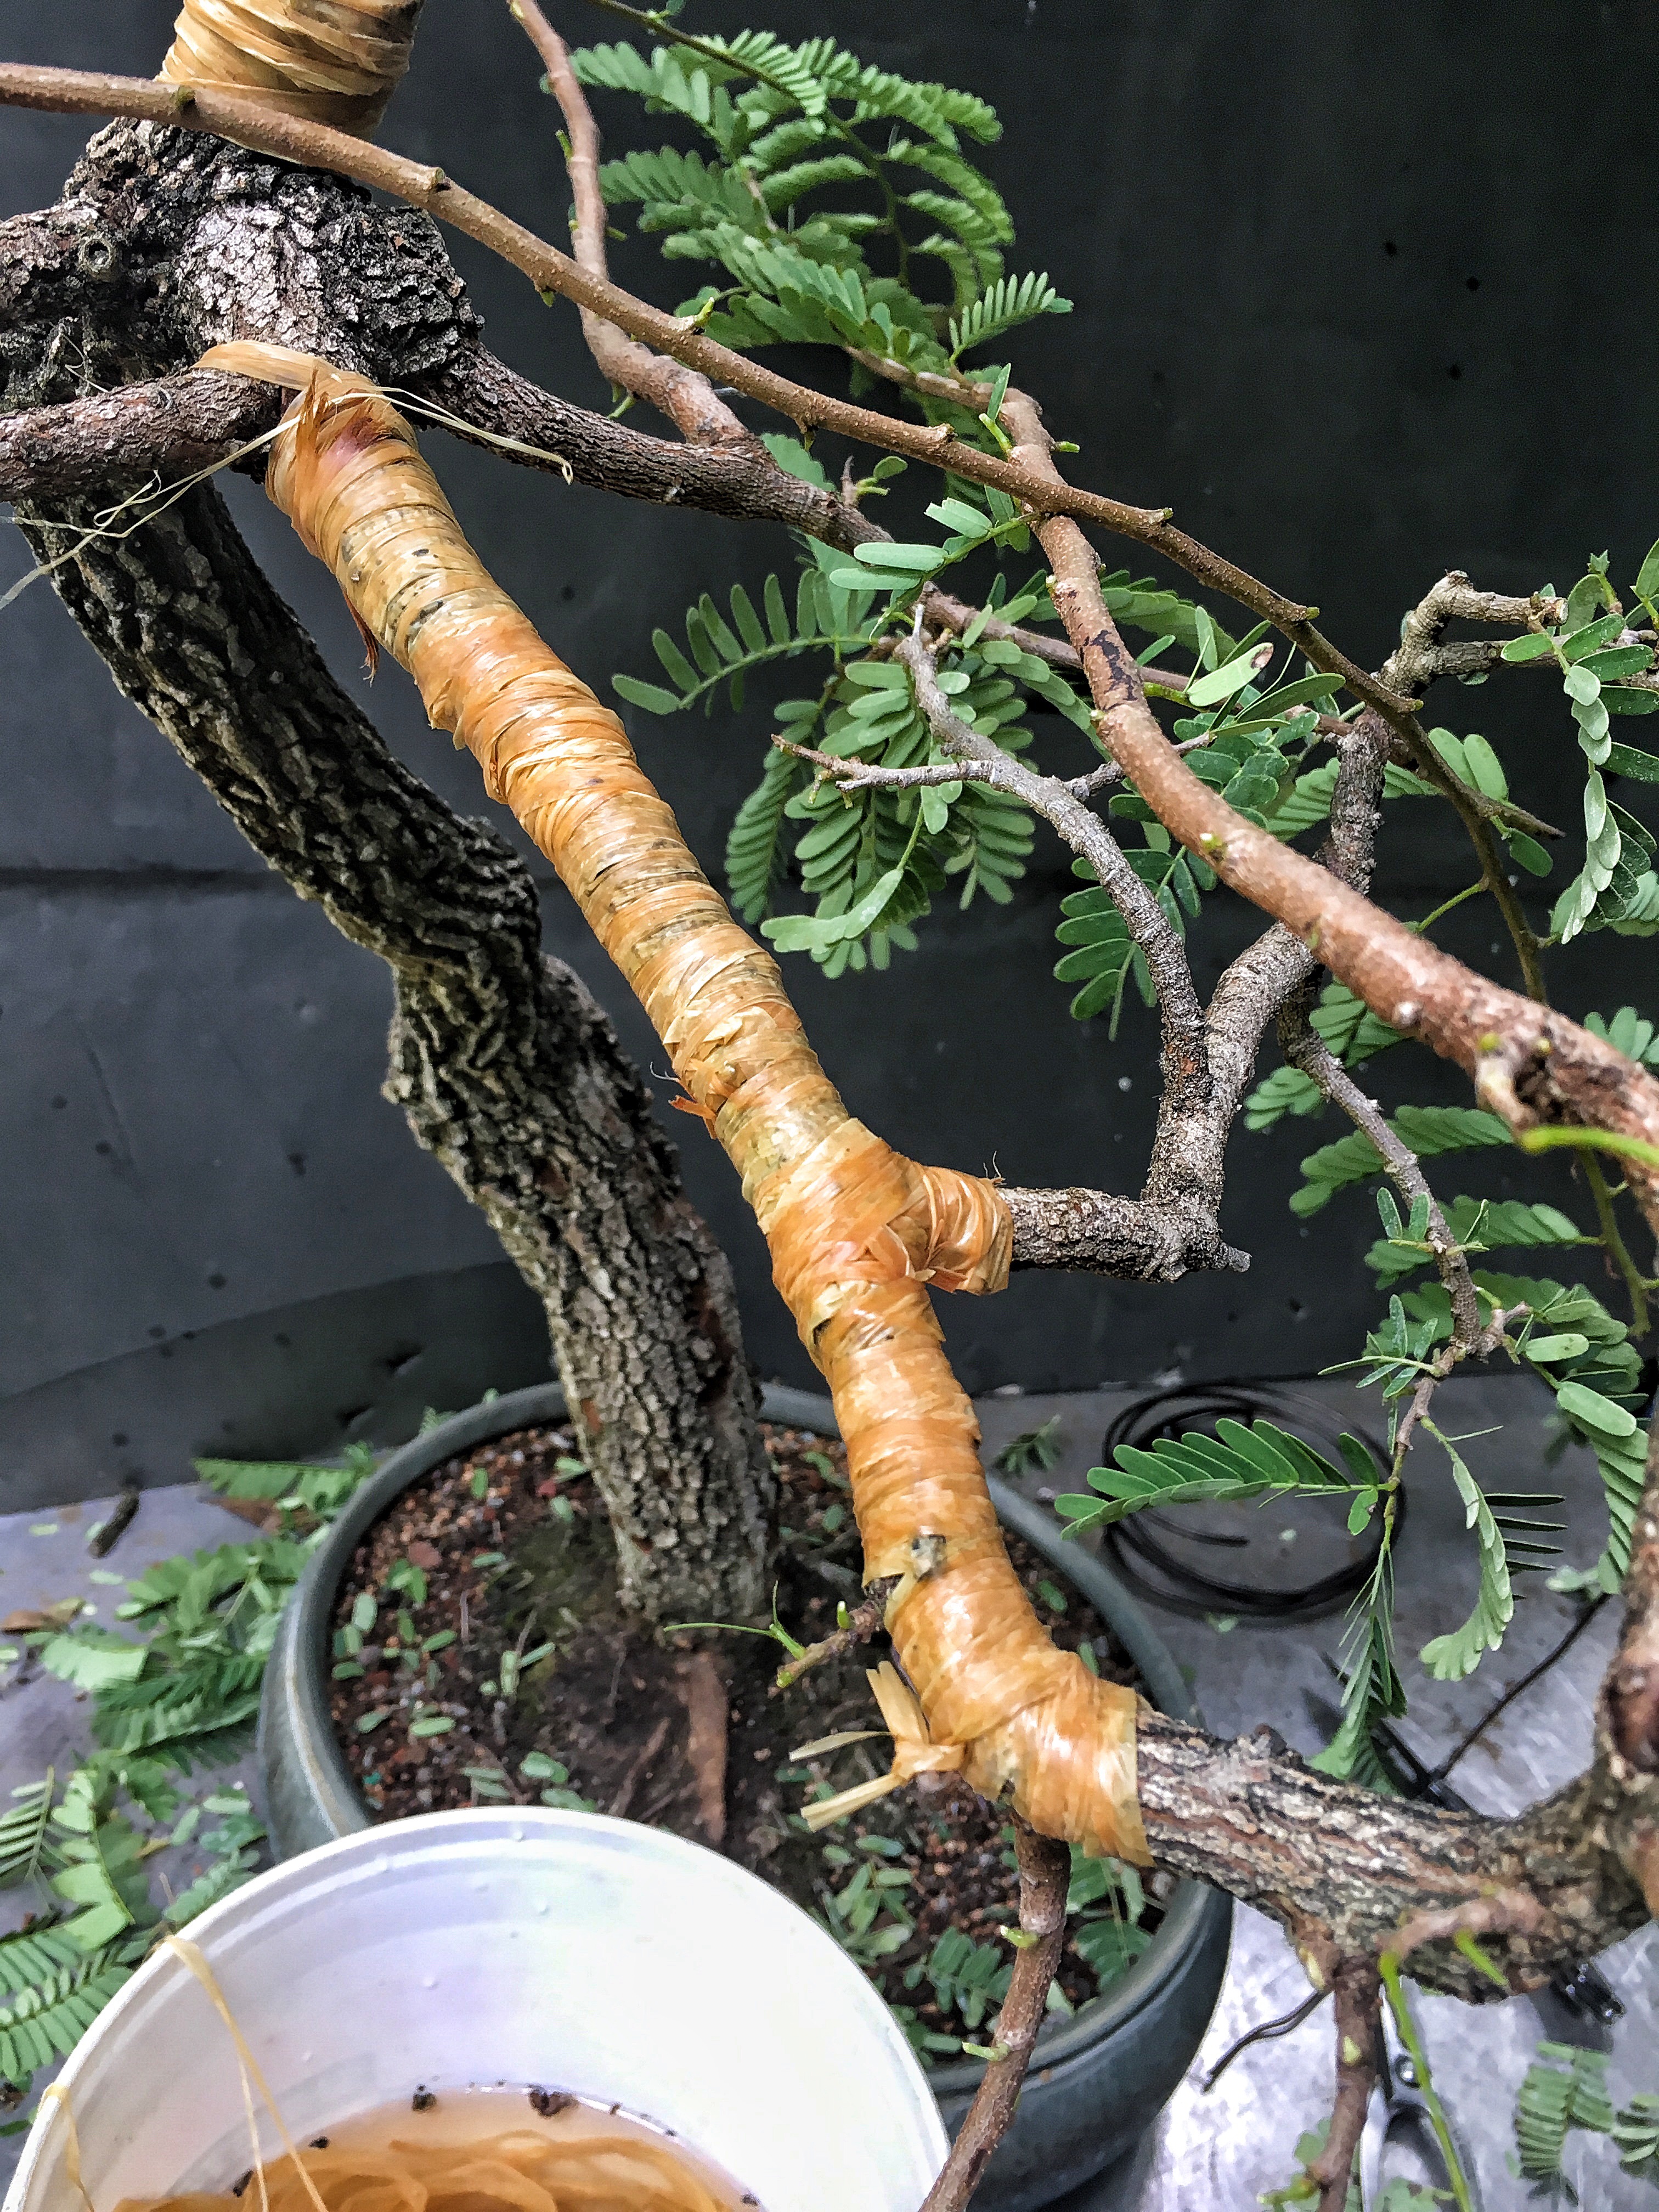 I feel so very bonsai-ish when I use raffia. There is a thing about using modern science and traditional material to accomplish an artistic endeavour. It’s kinda hipster.
I also get to use the biggest wire I have, 6 mm aluminium. 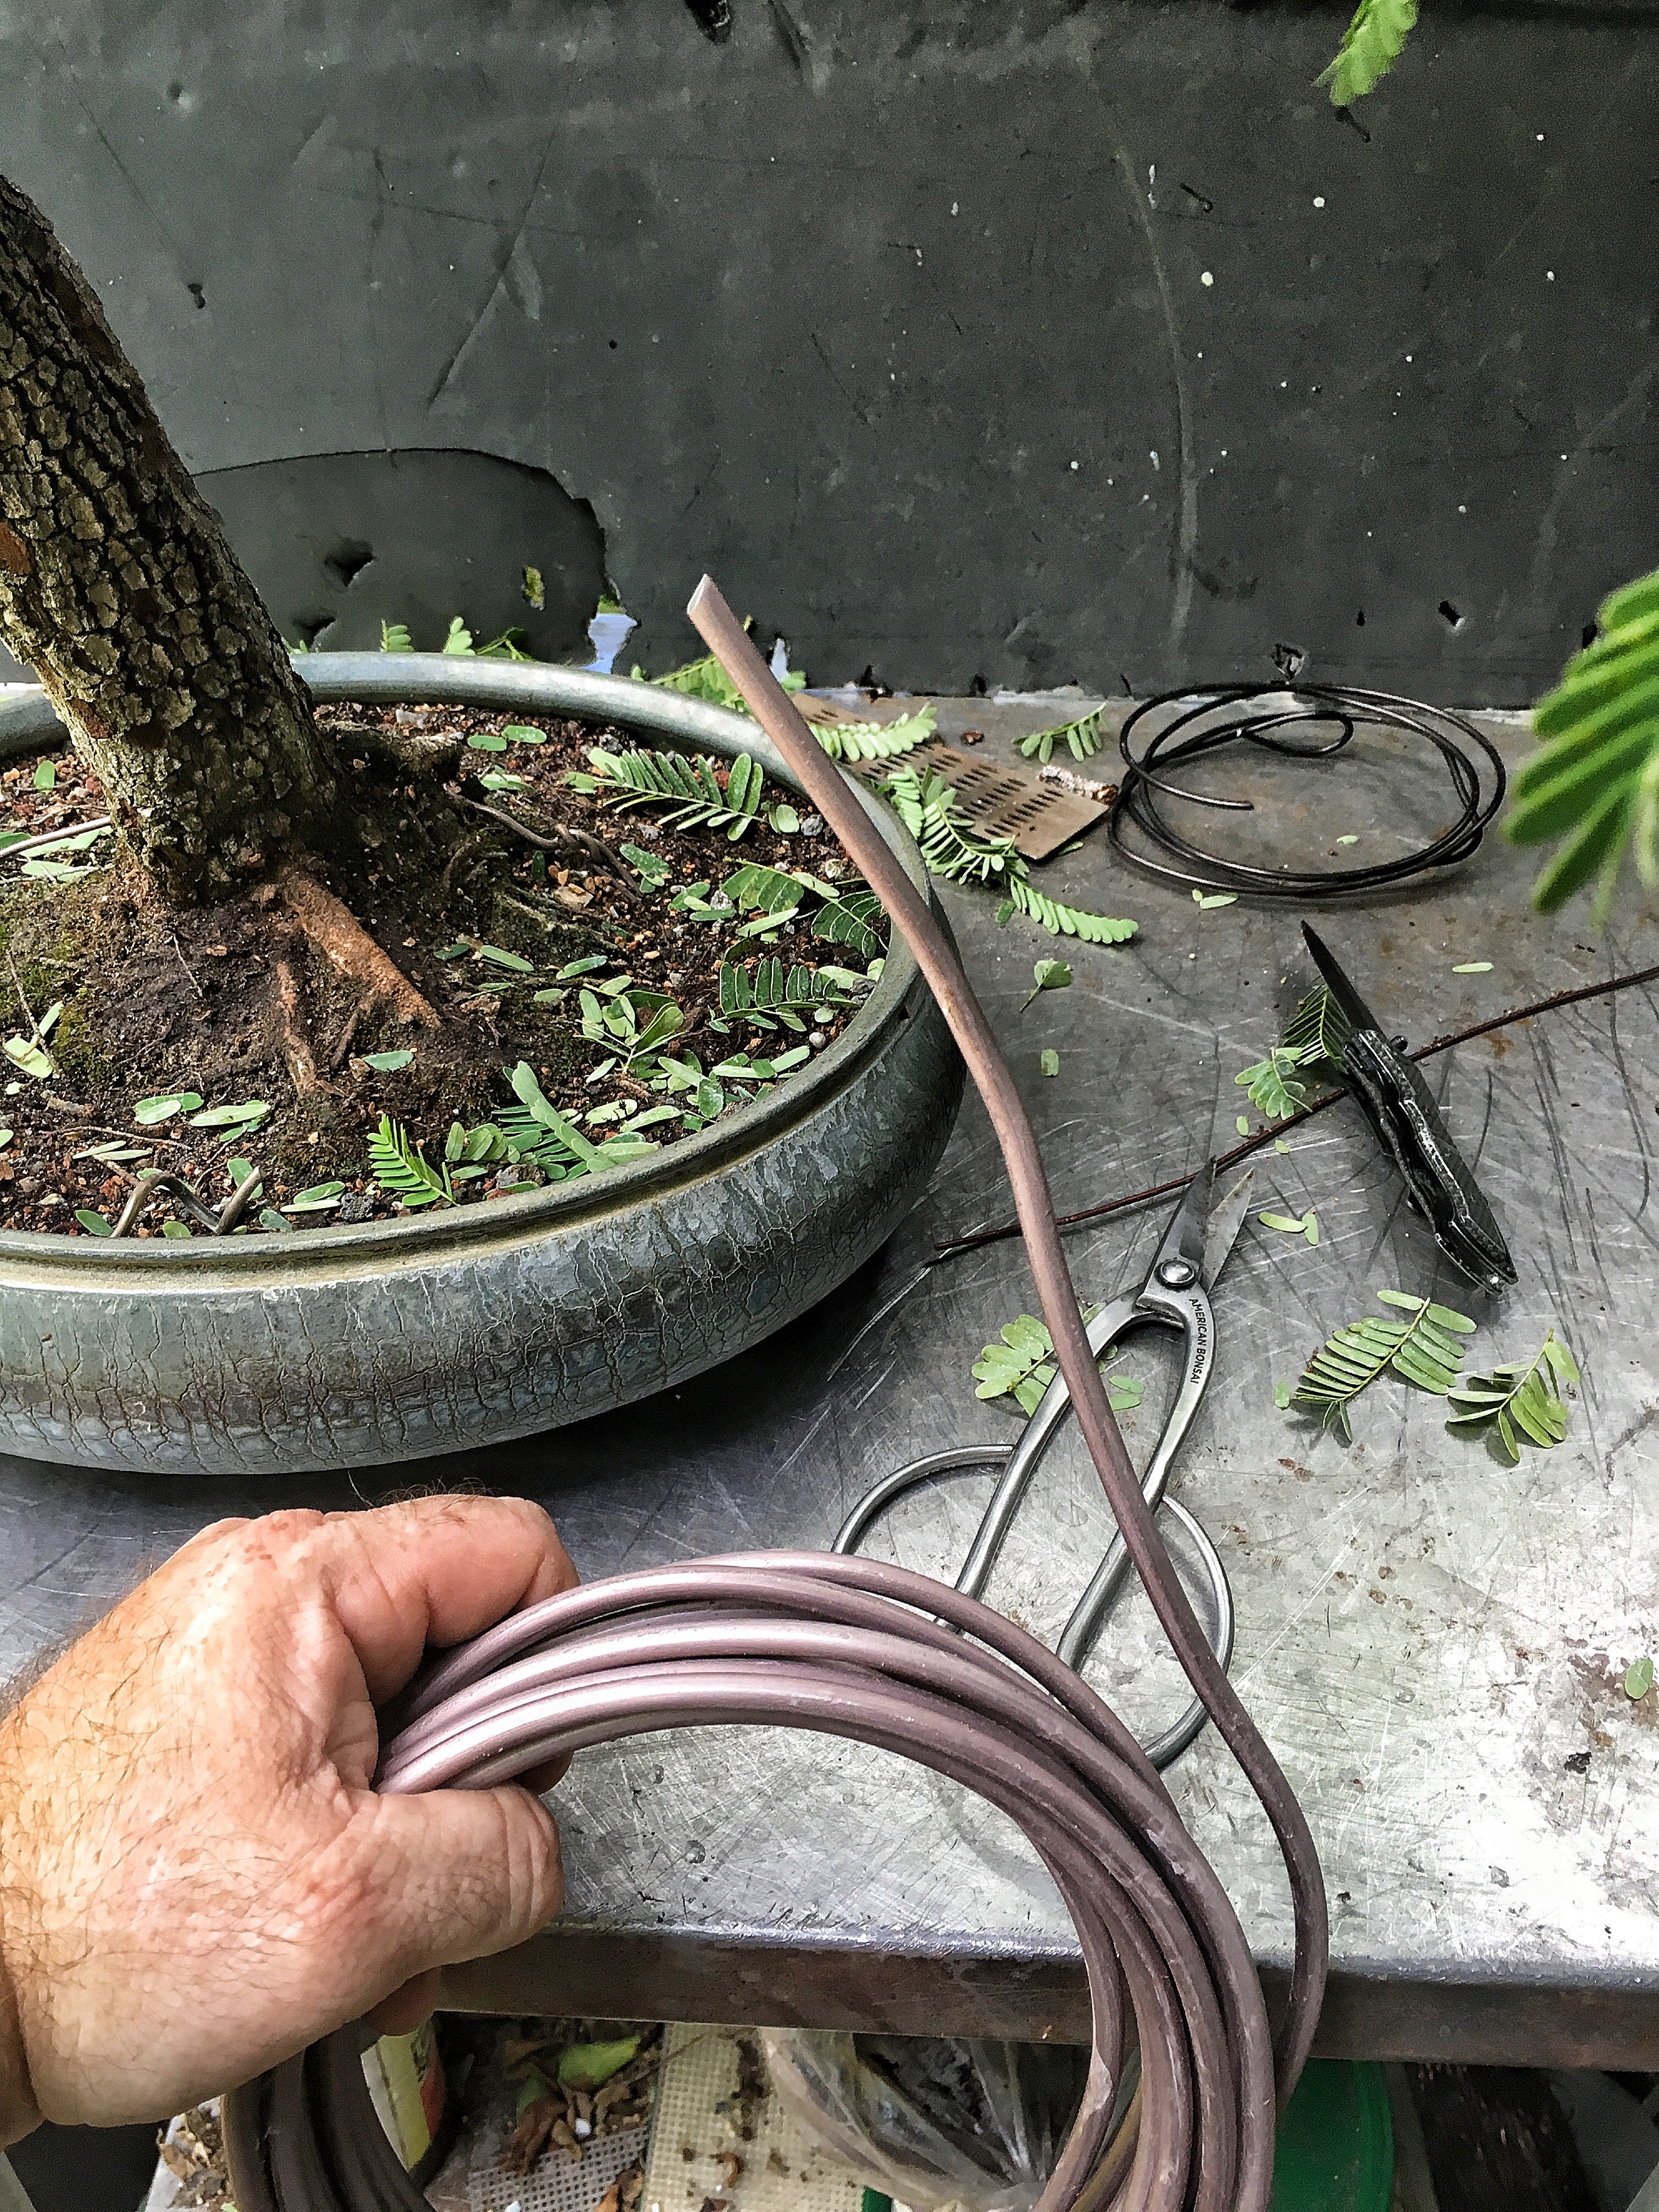
Doubled up even!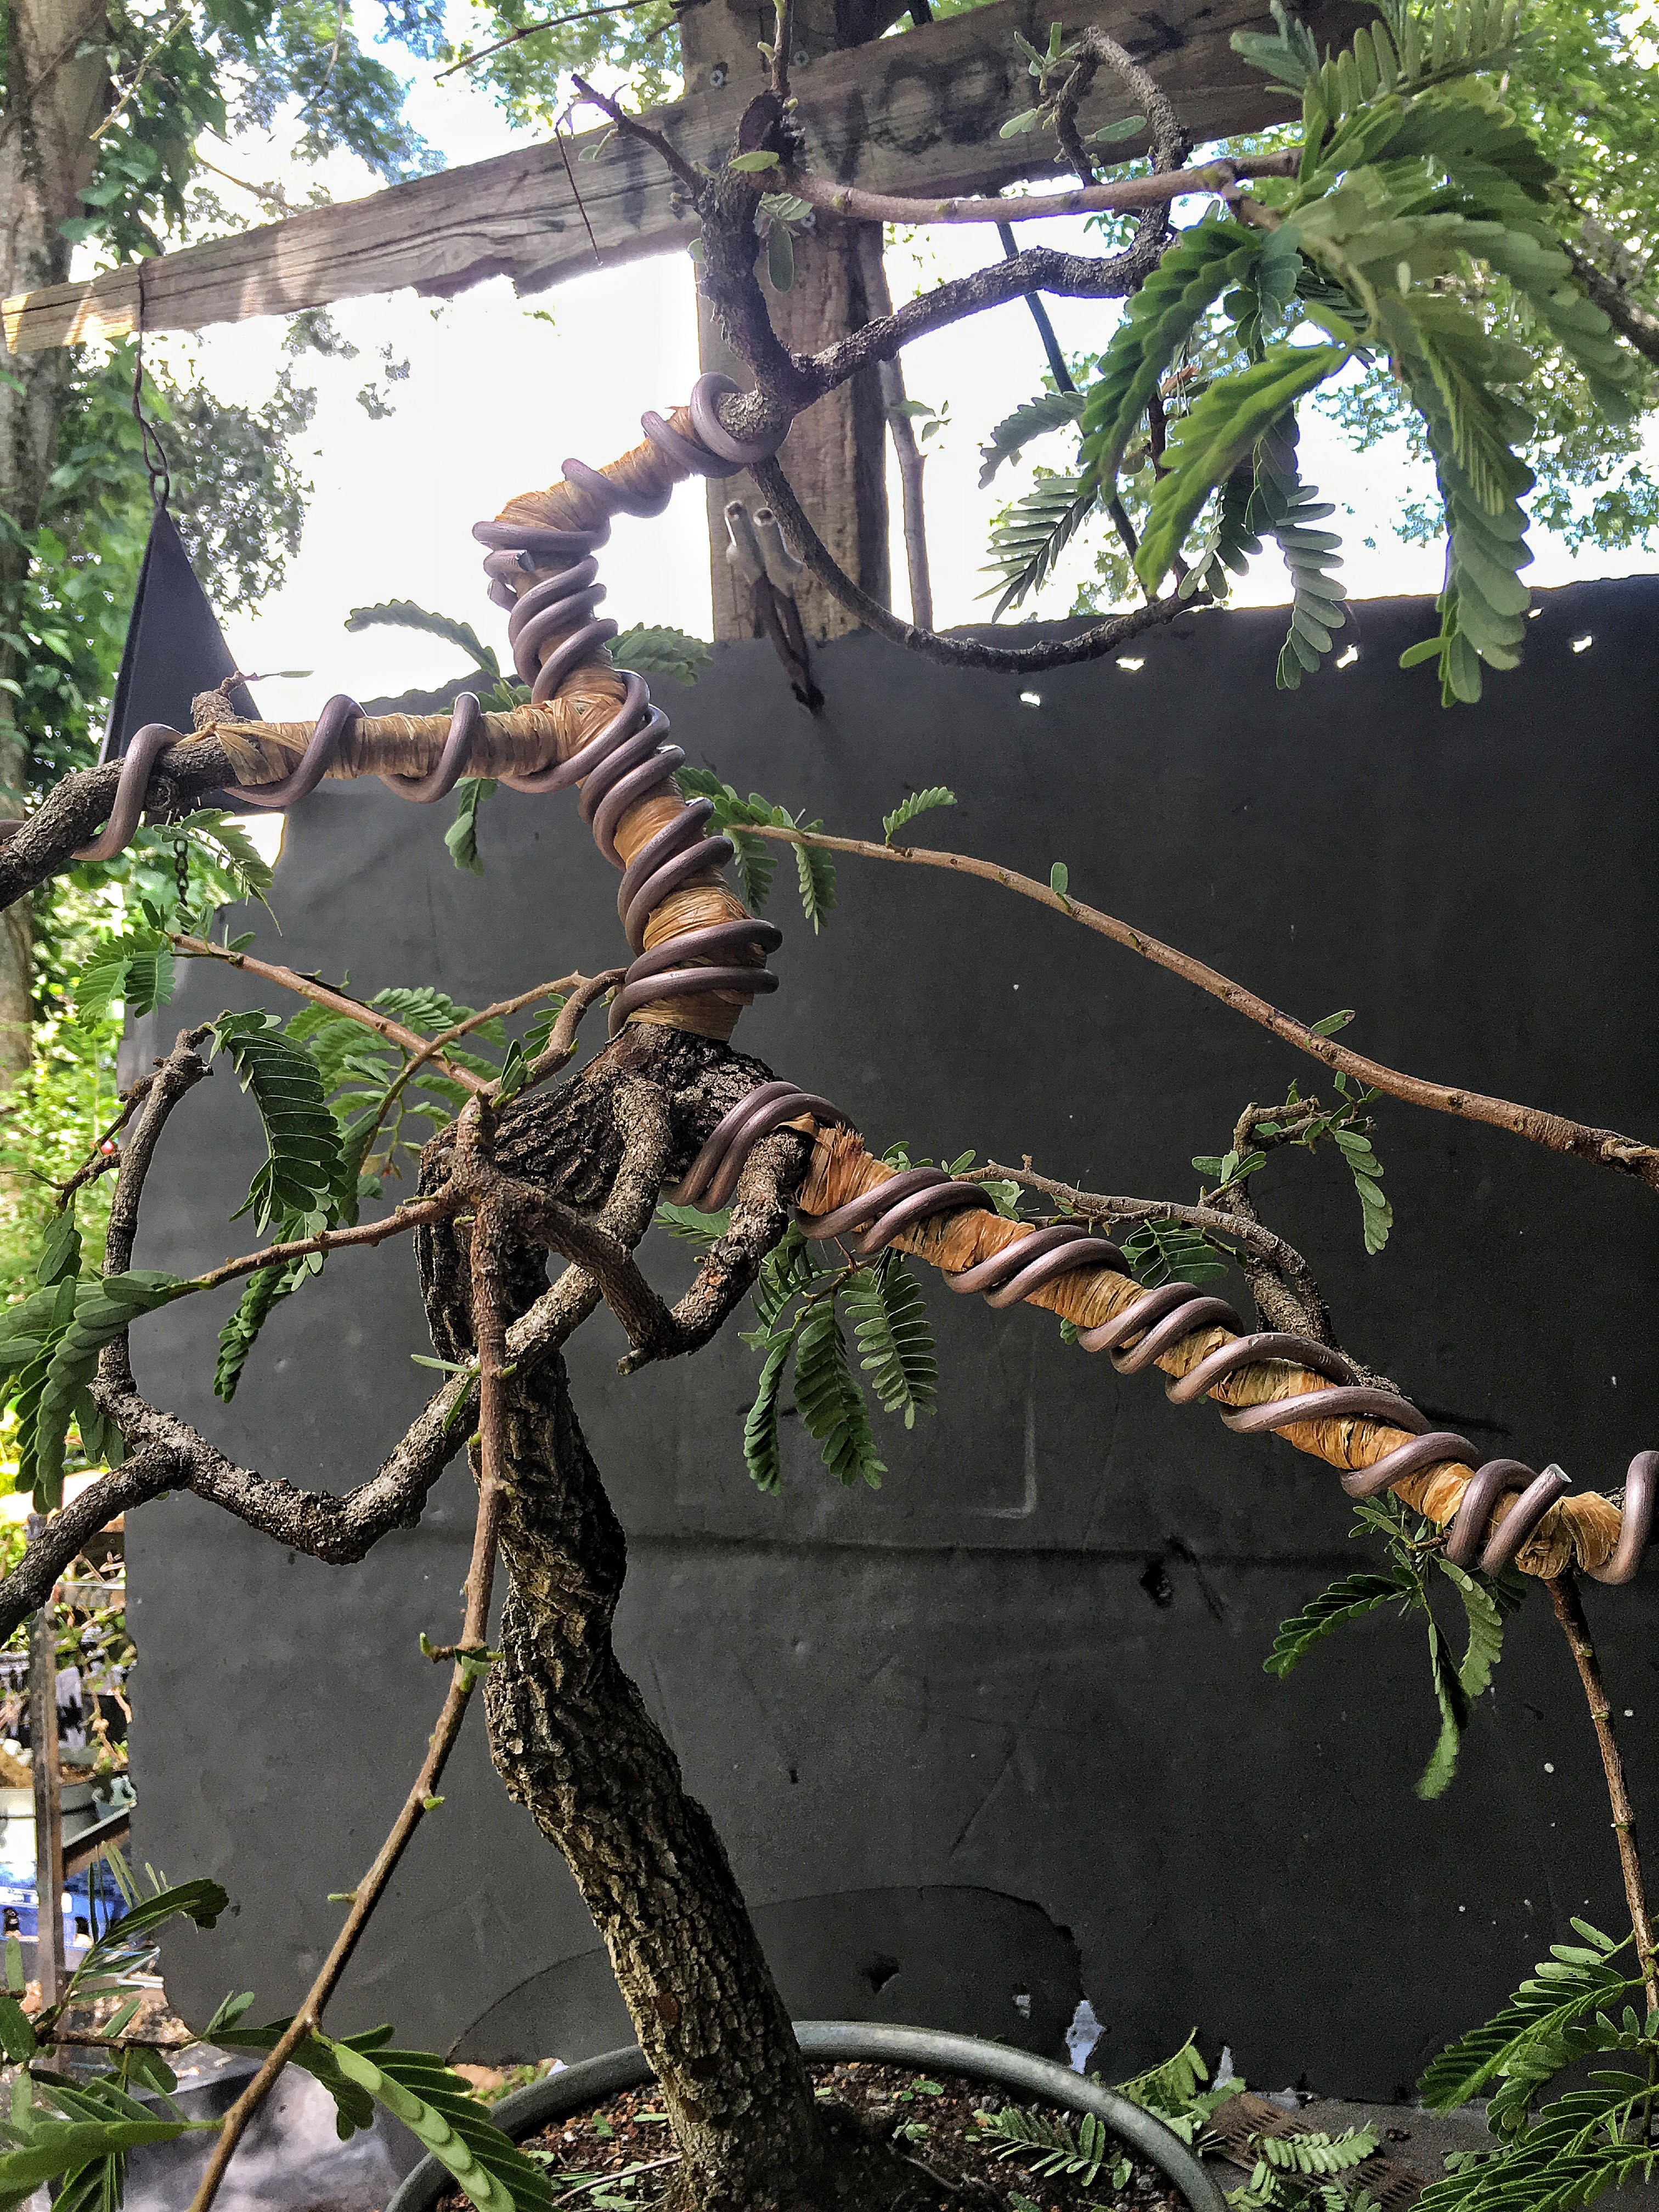
I think I’m going to need my trusty (rusty) branch benders too. 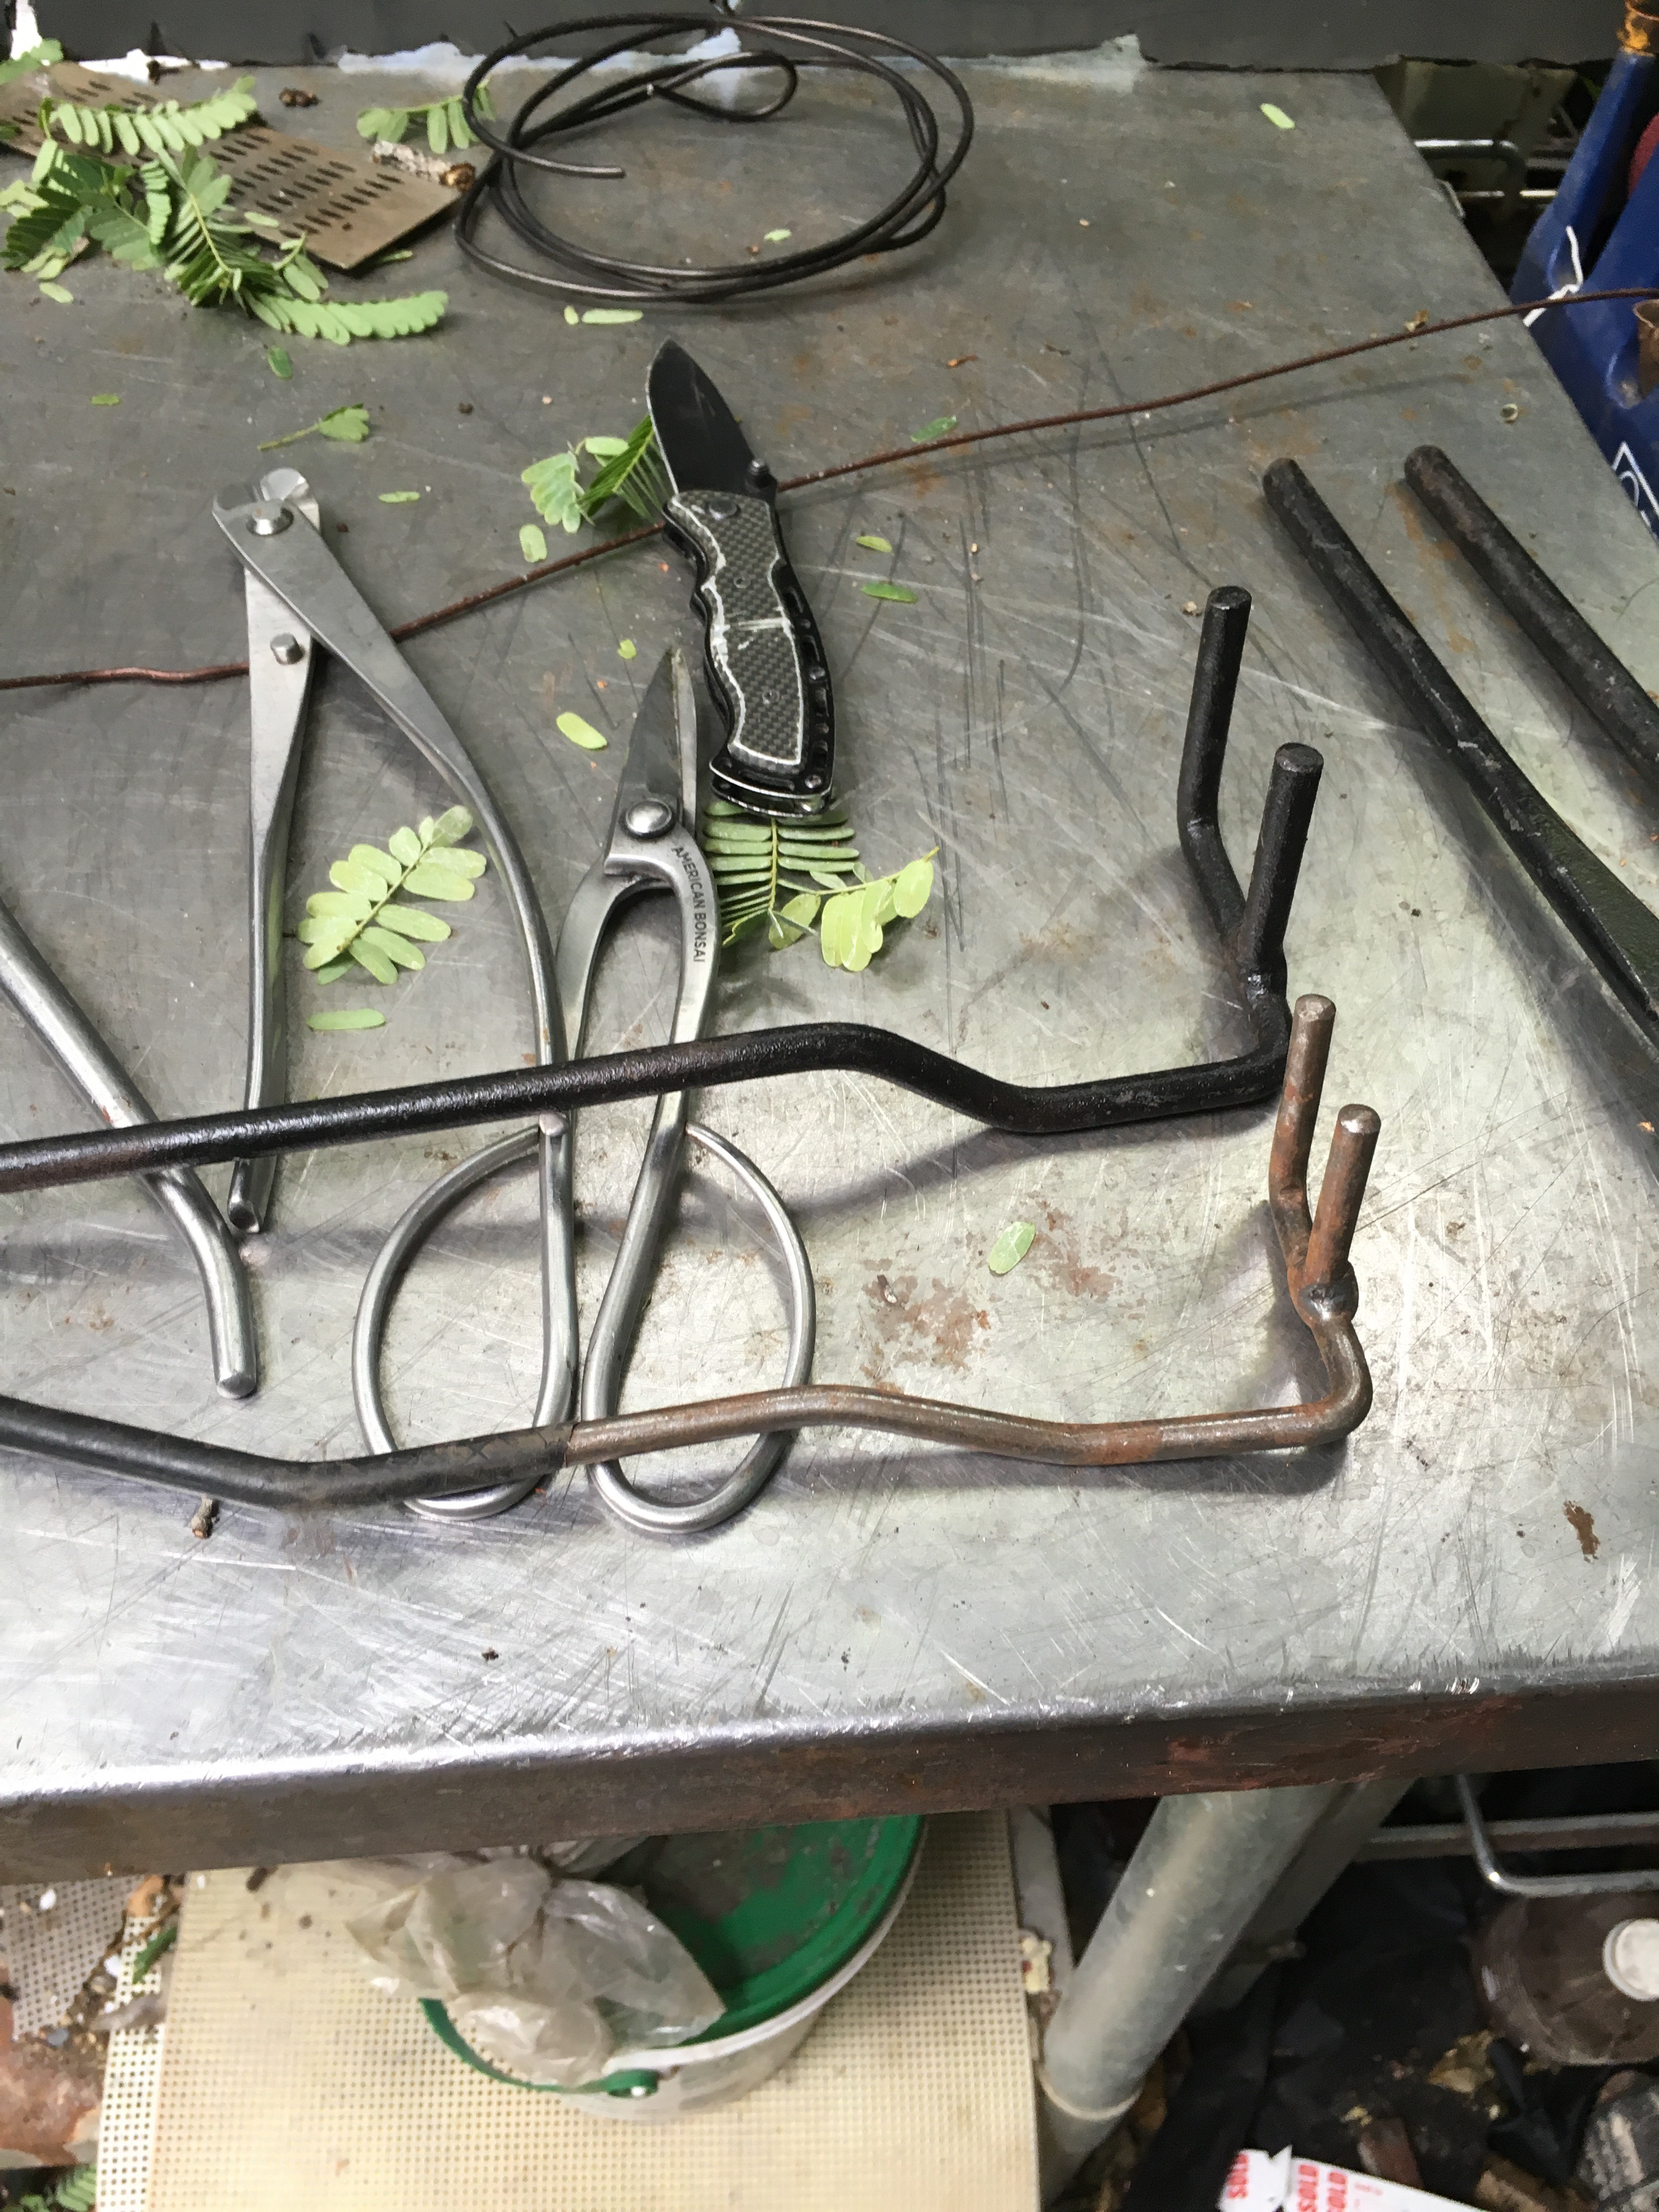
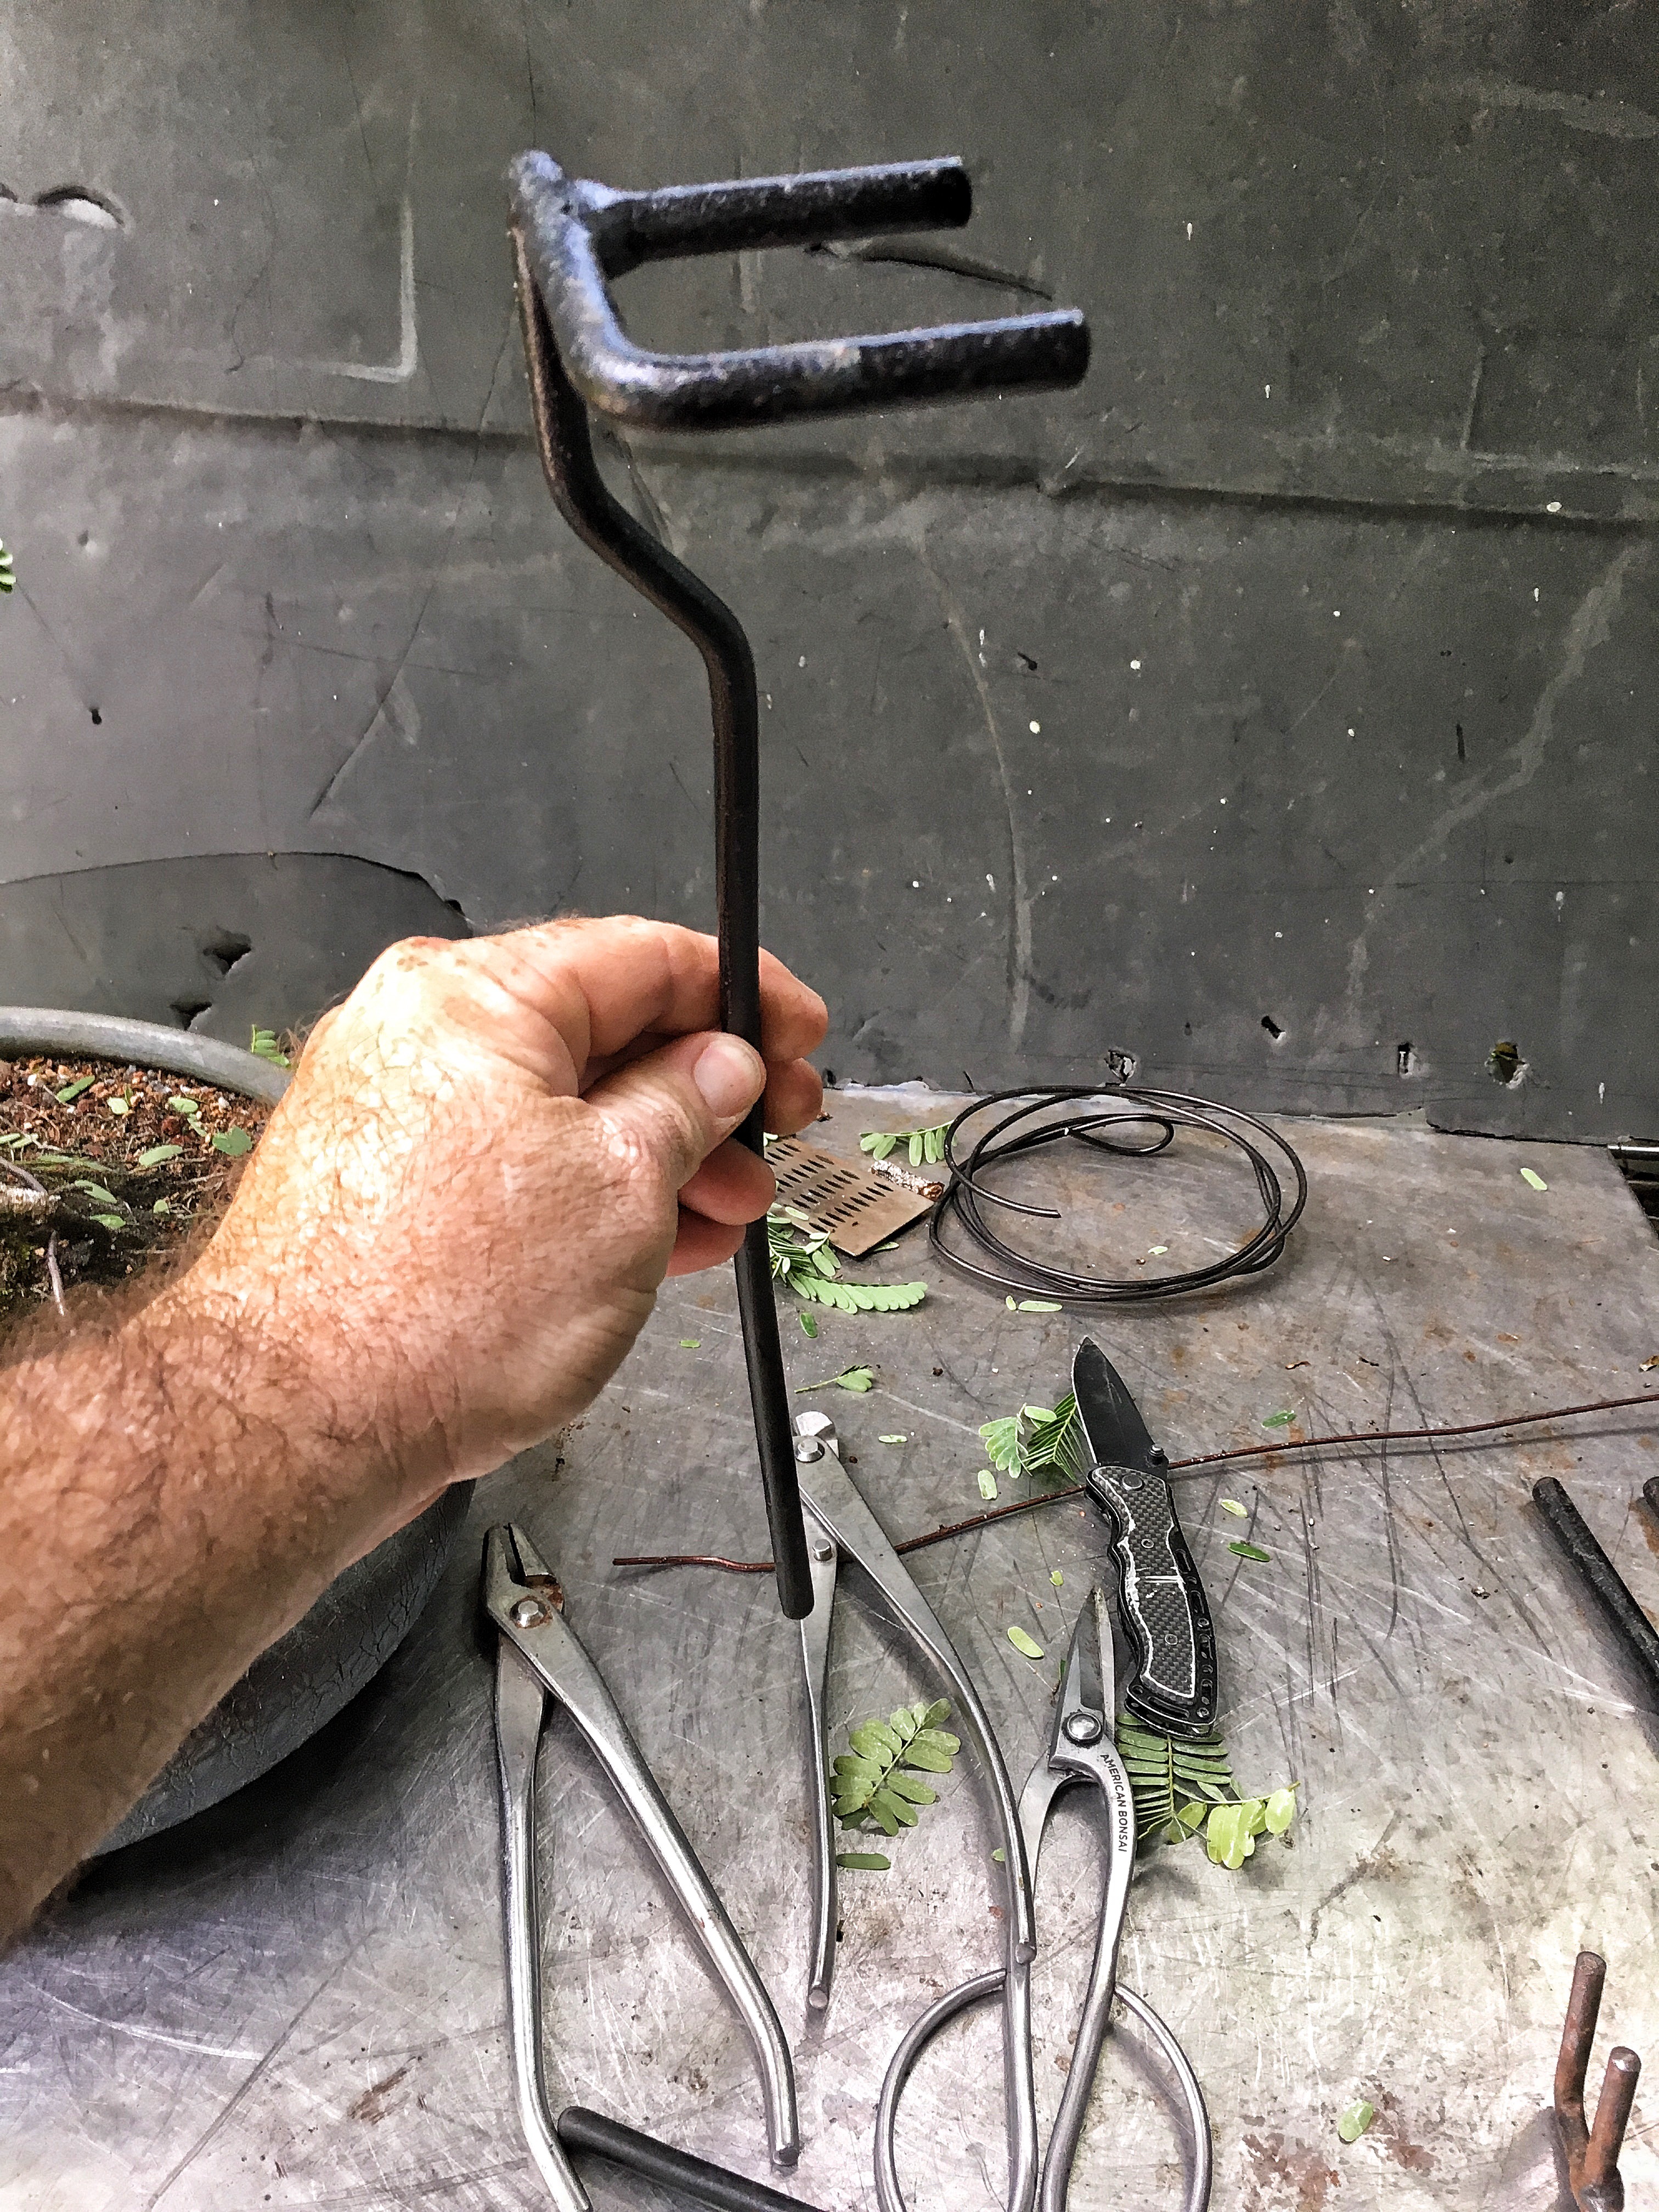 I made them myself.
That’s pretty good but I need more. 
A copper guy wire……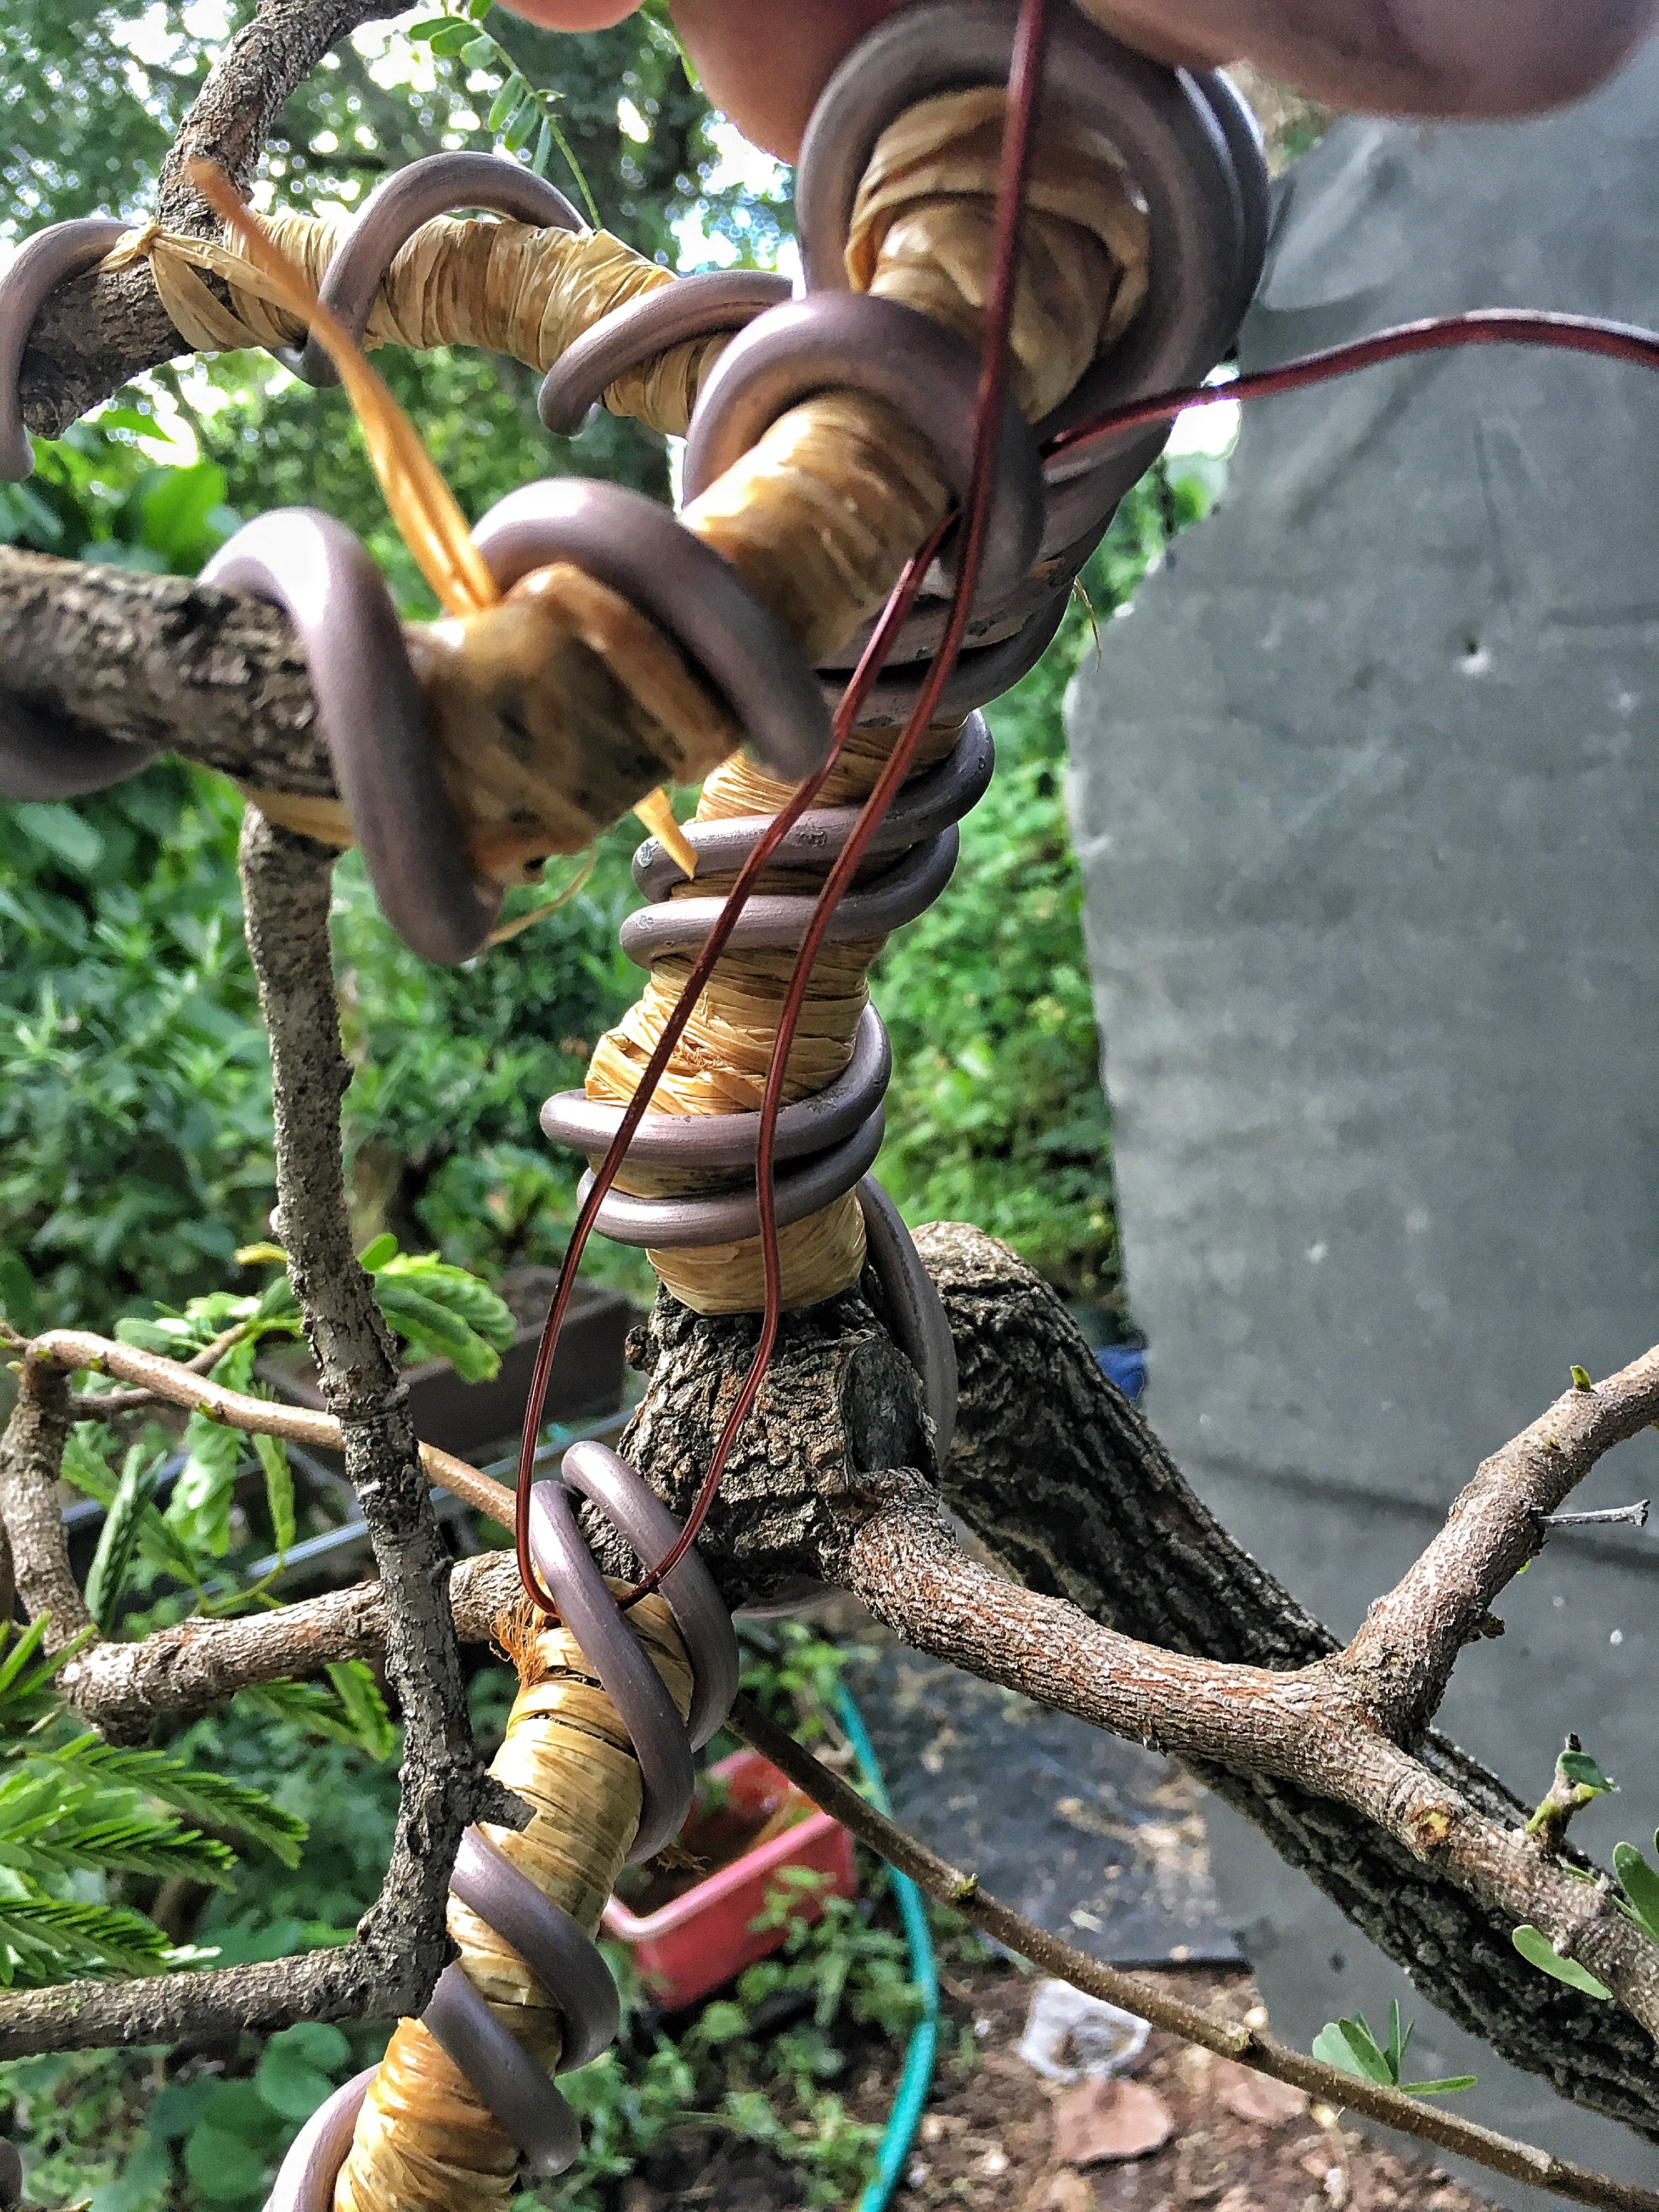
Two more hands…..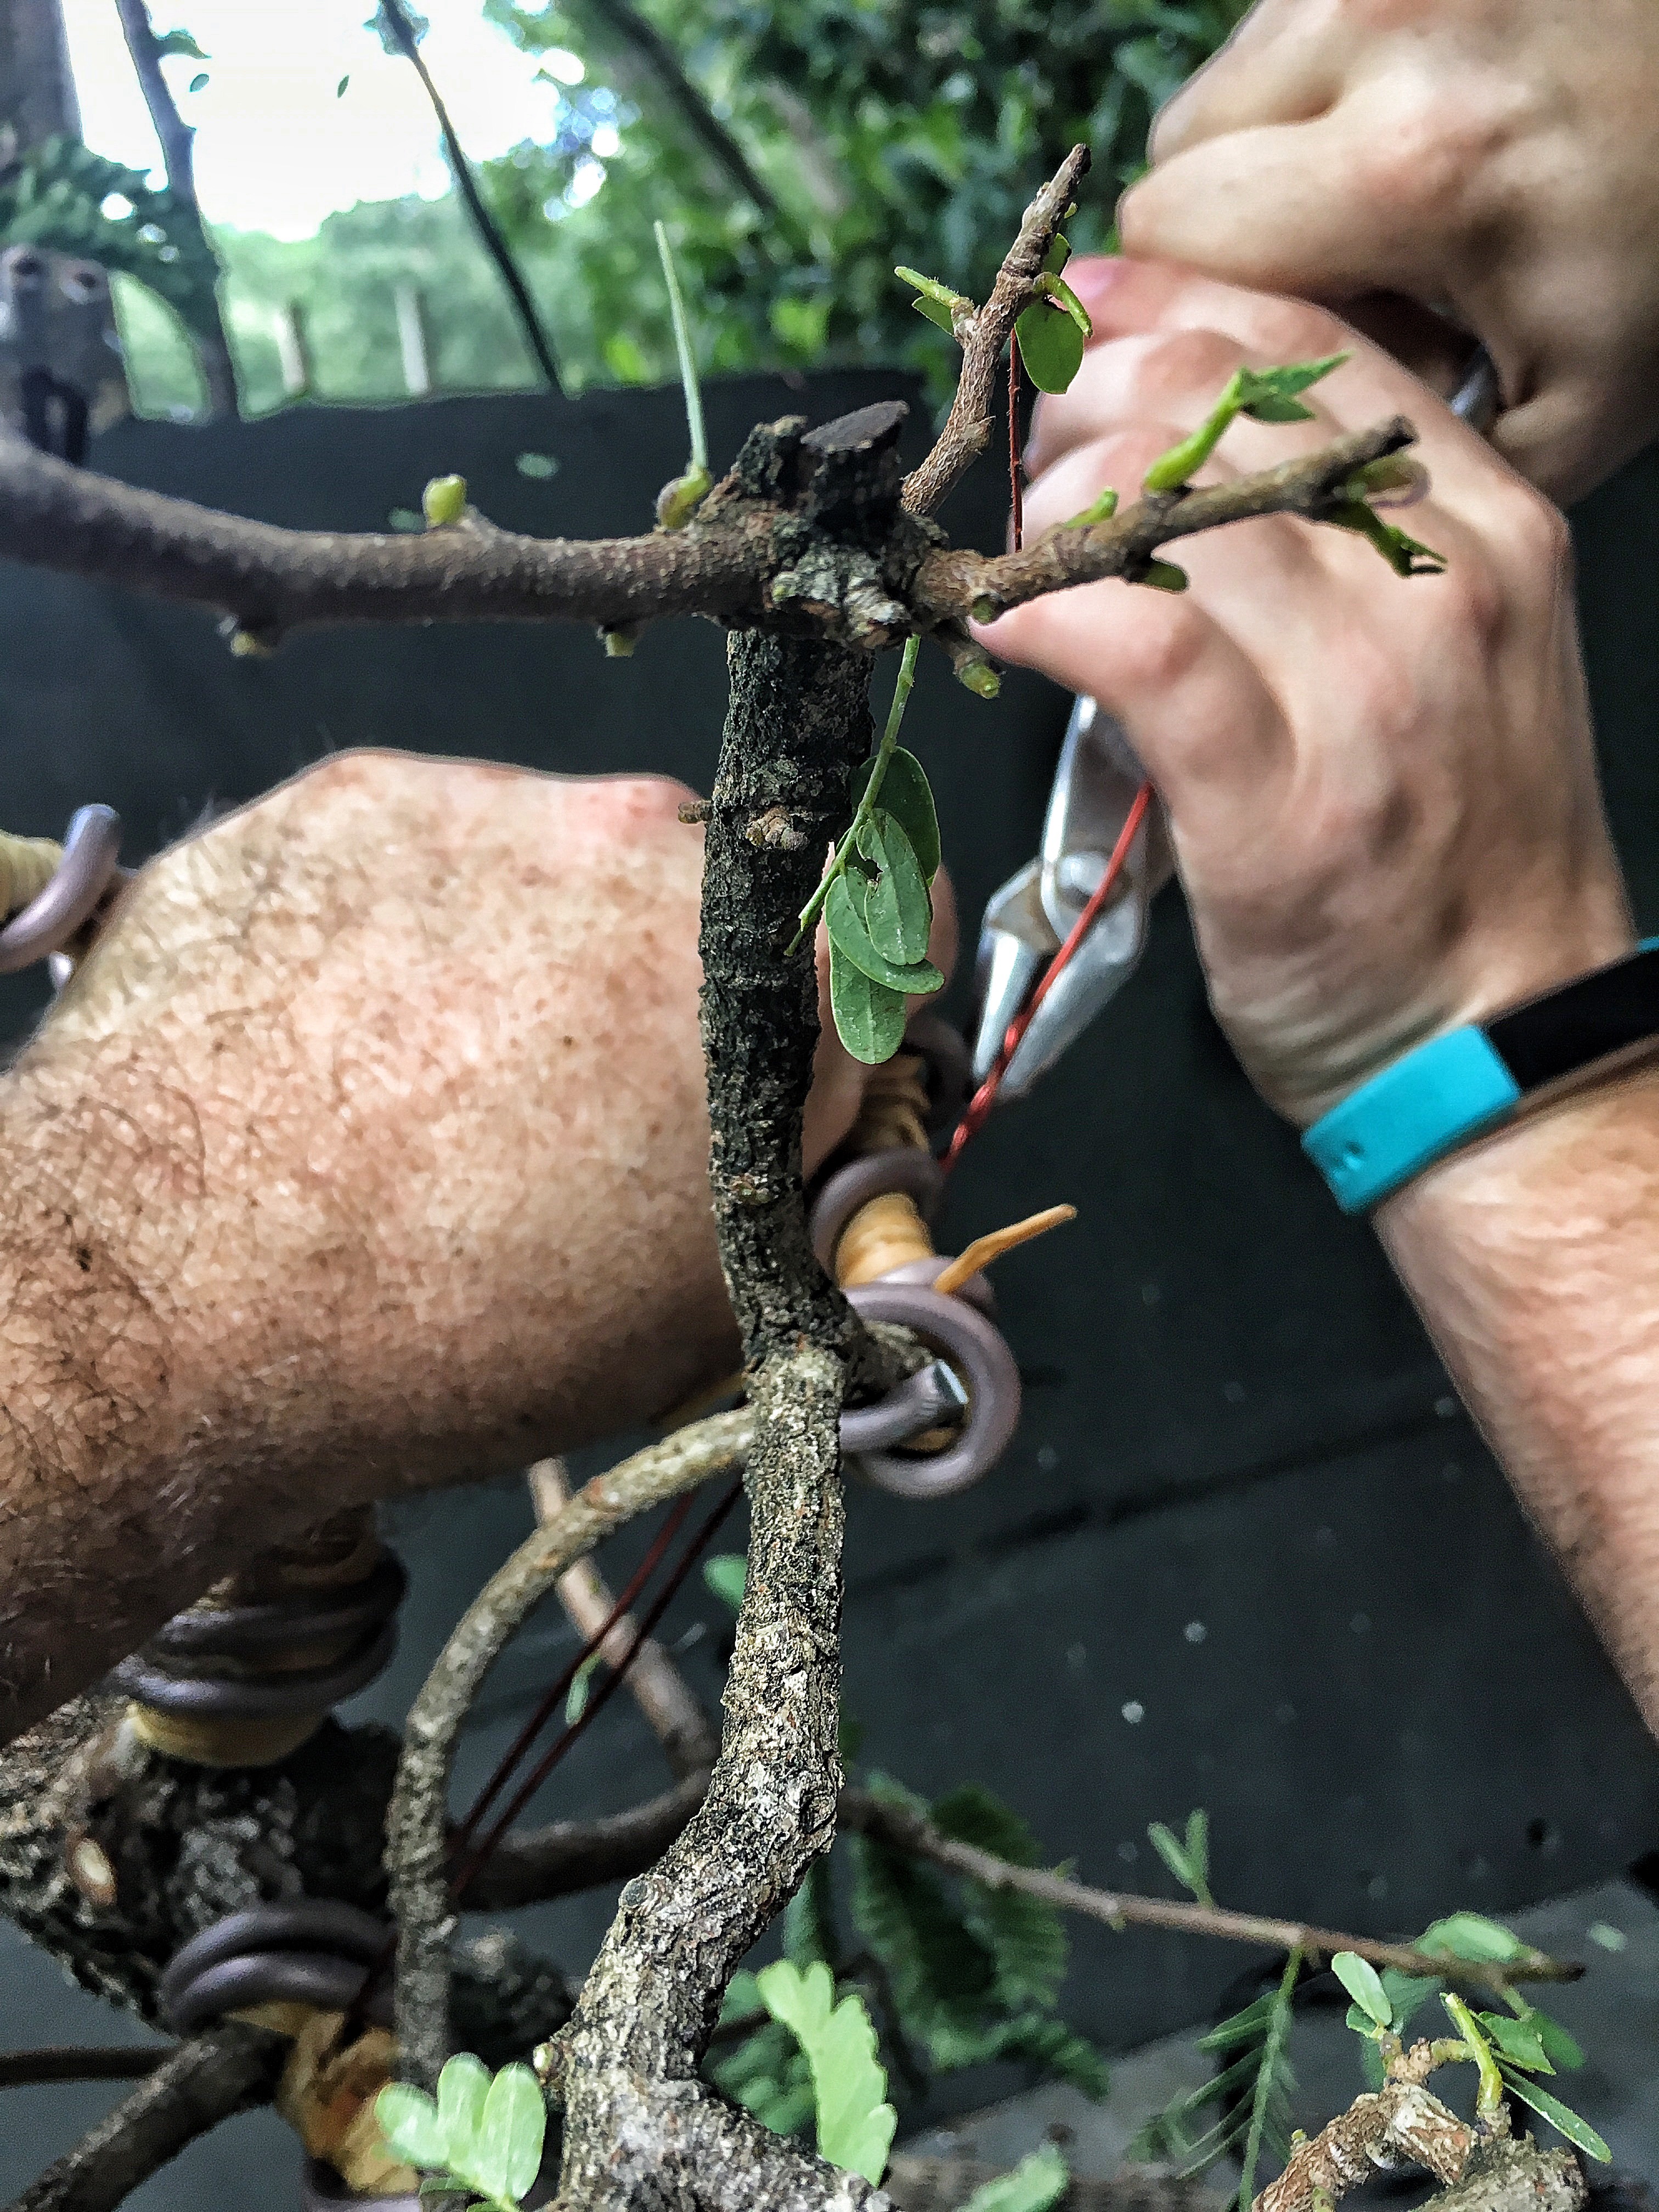
And I think we have success!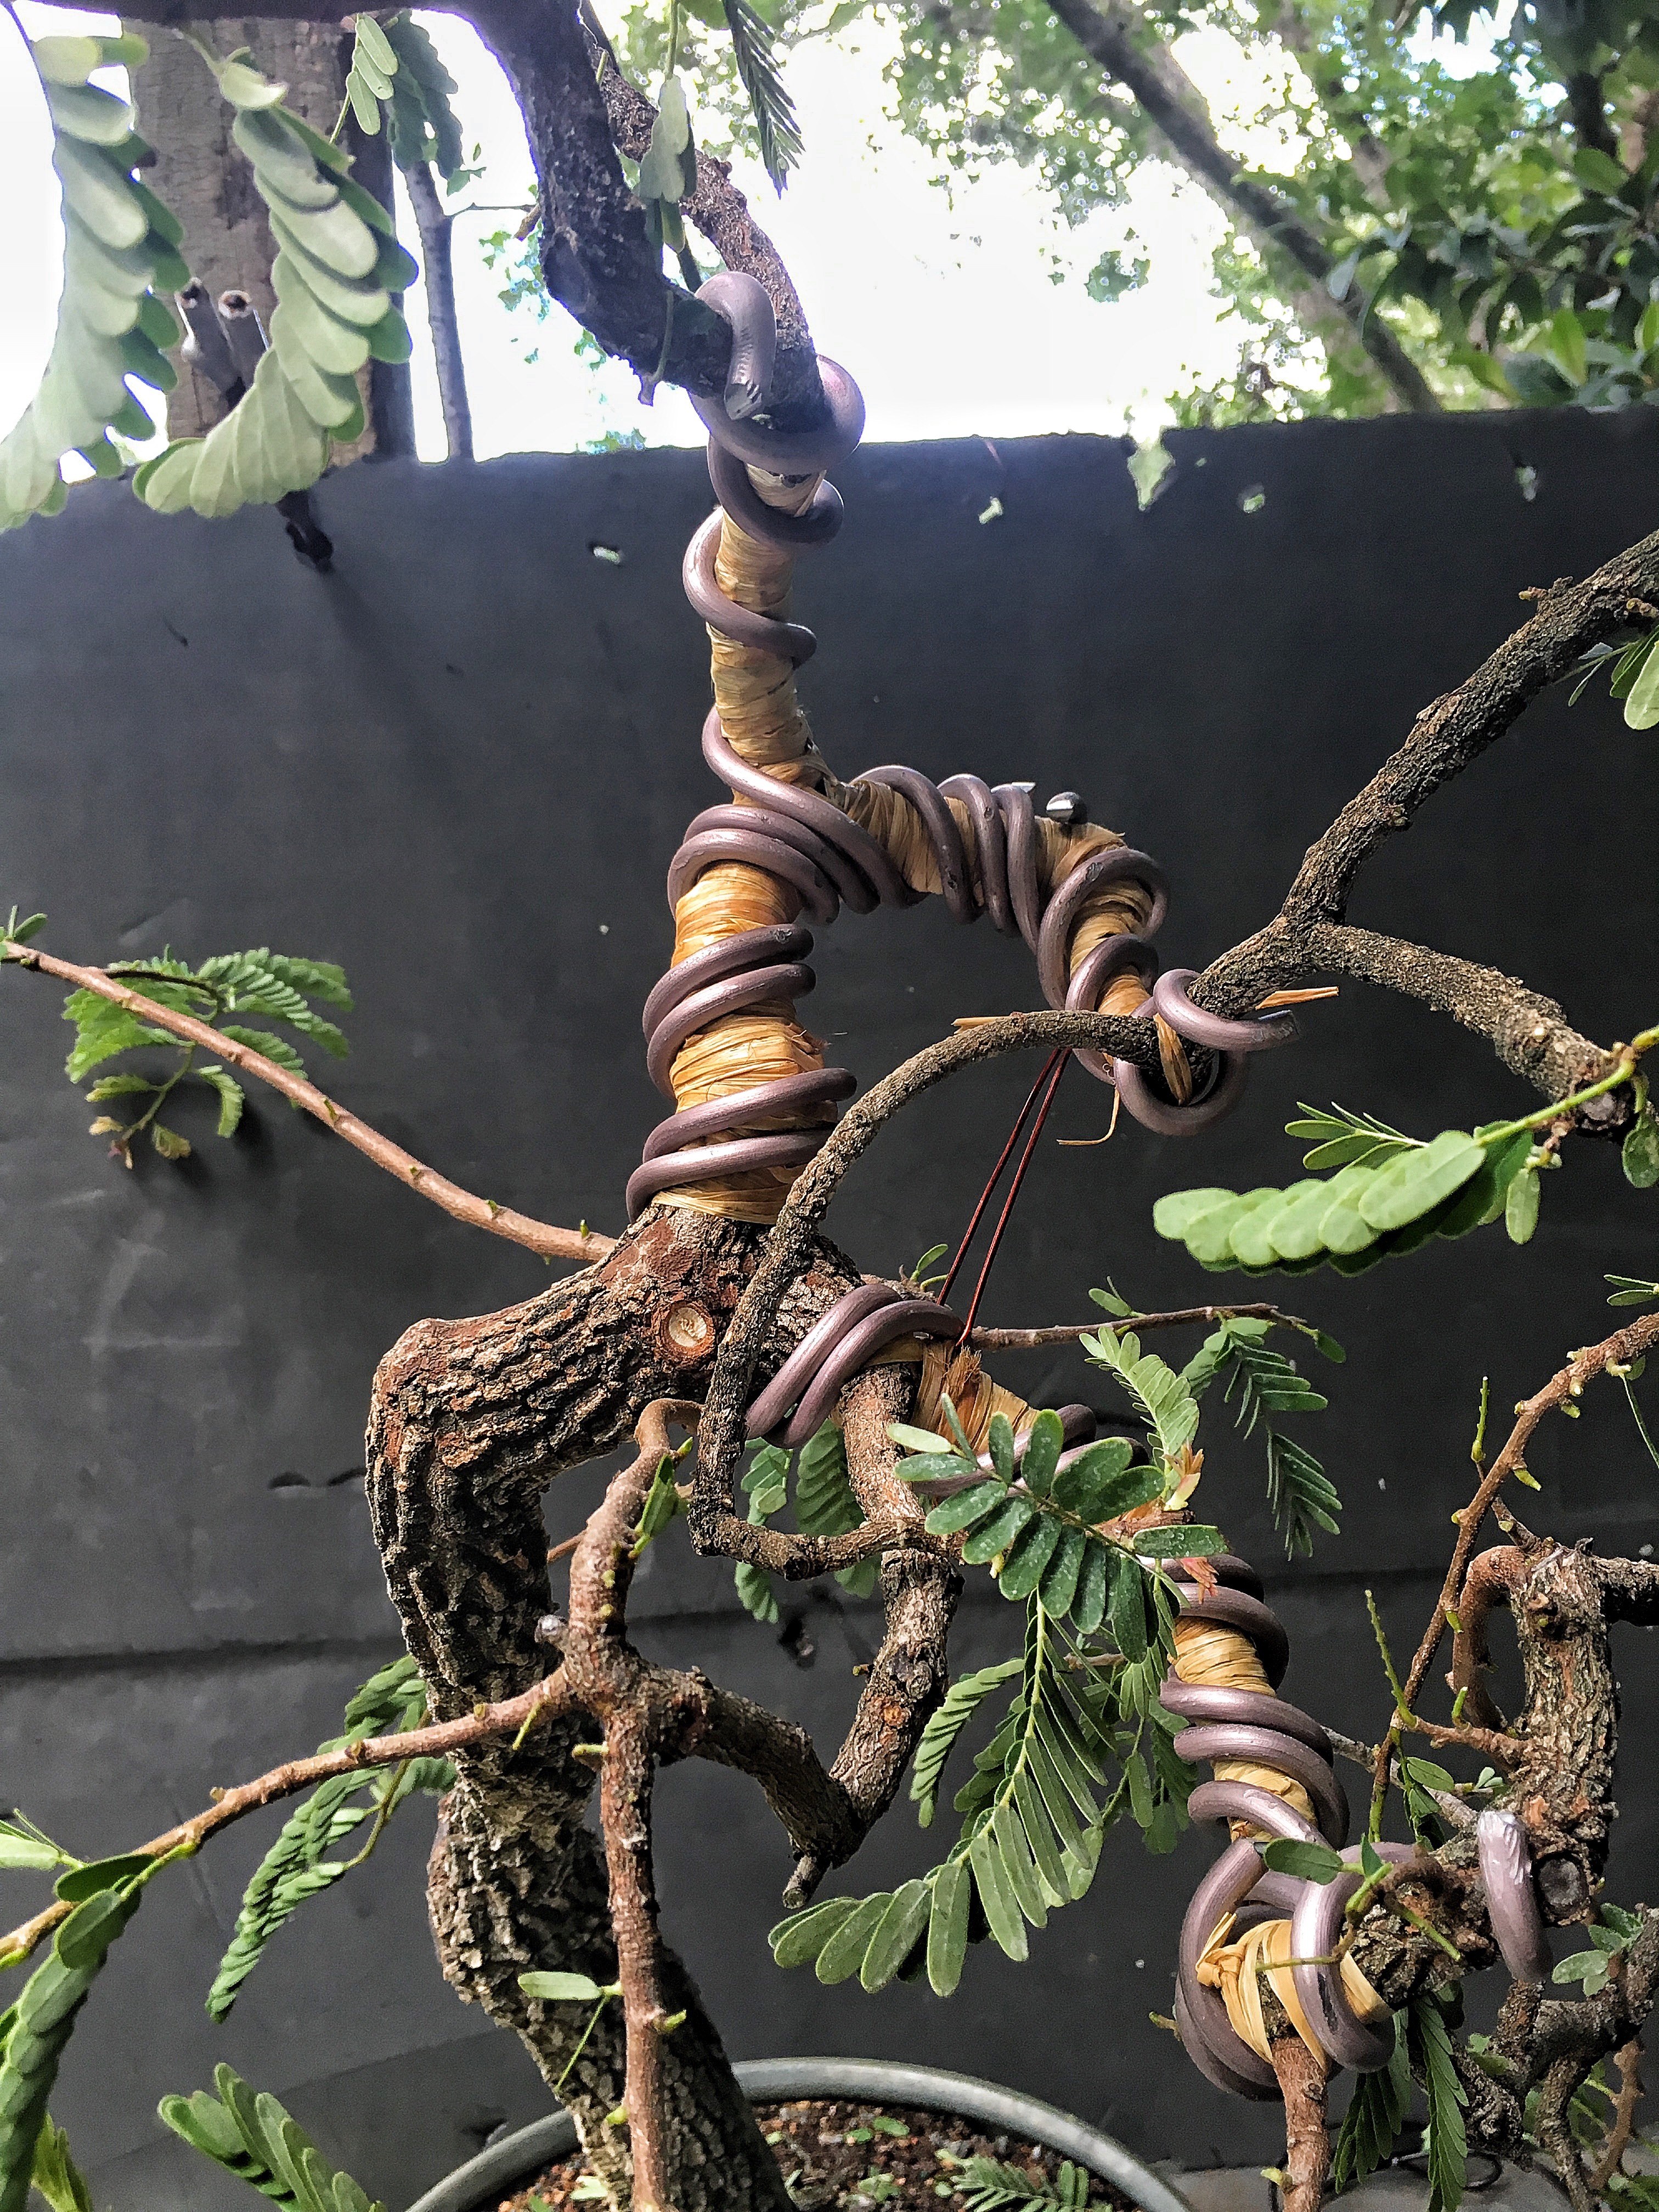
You can see how much those other hands (my son Andrew) tightened the guy wire. 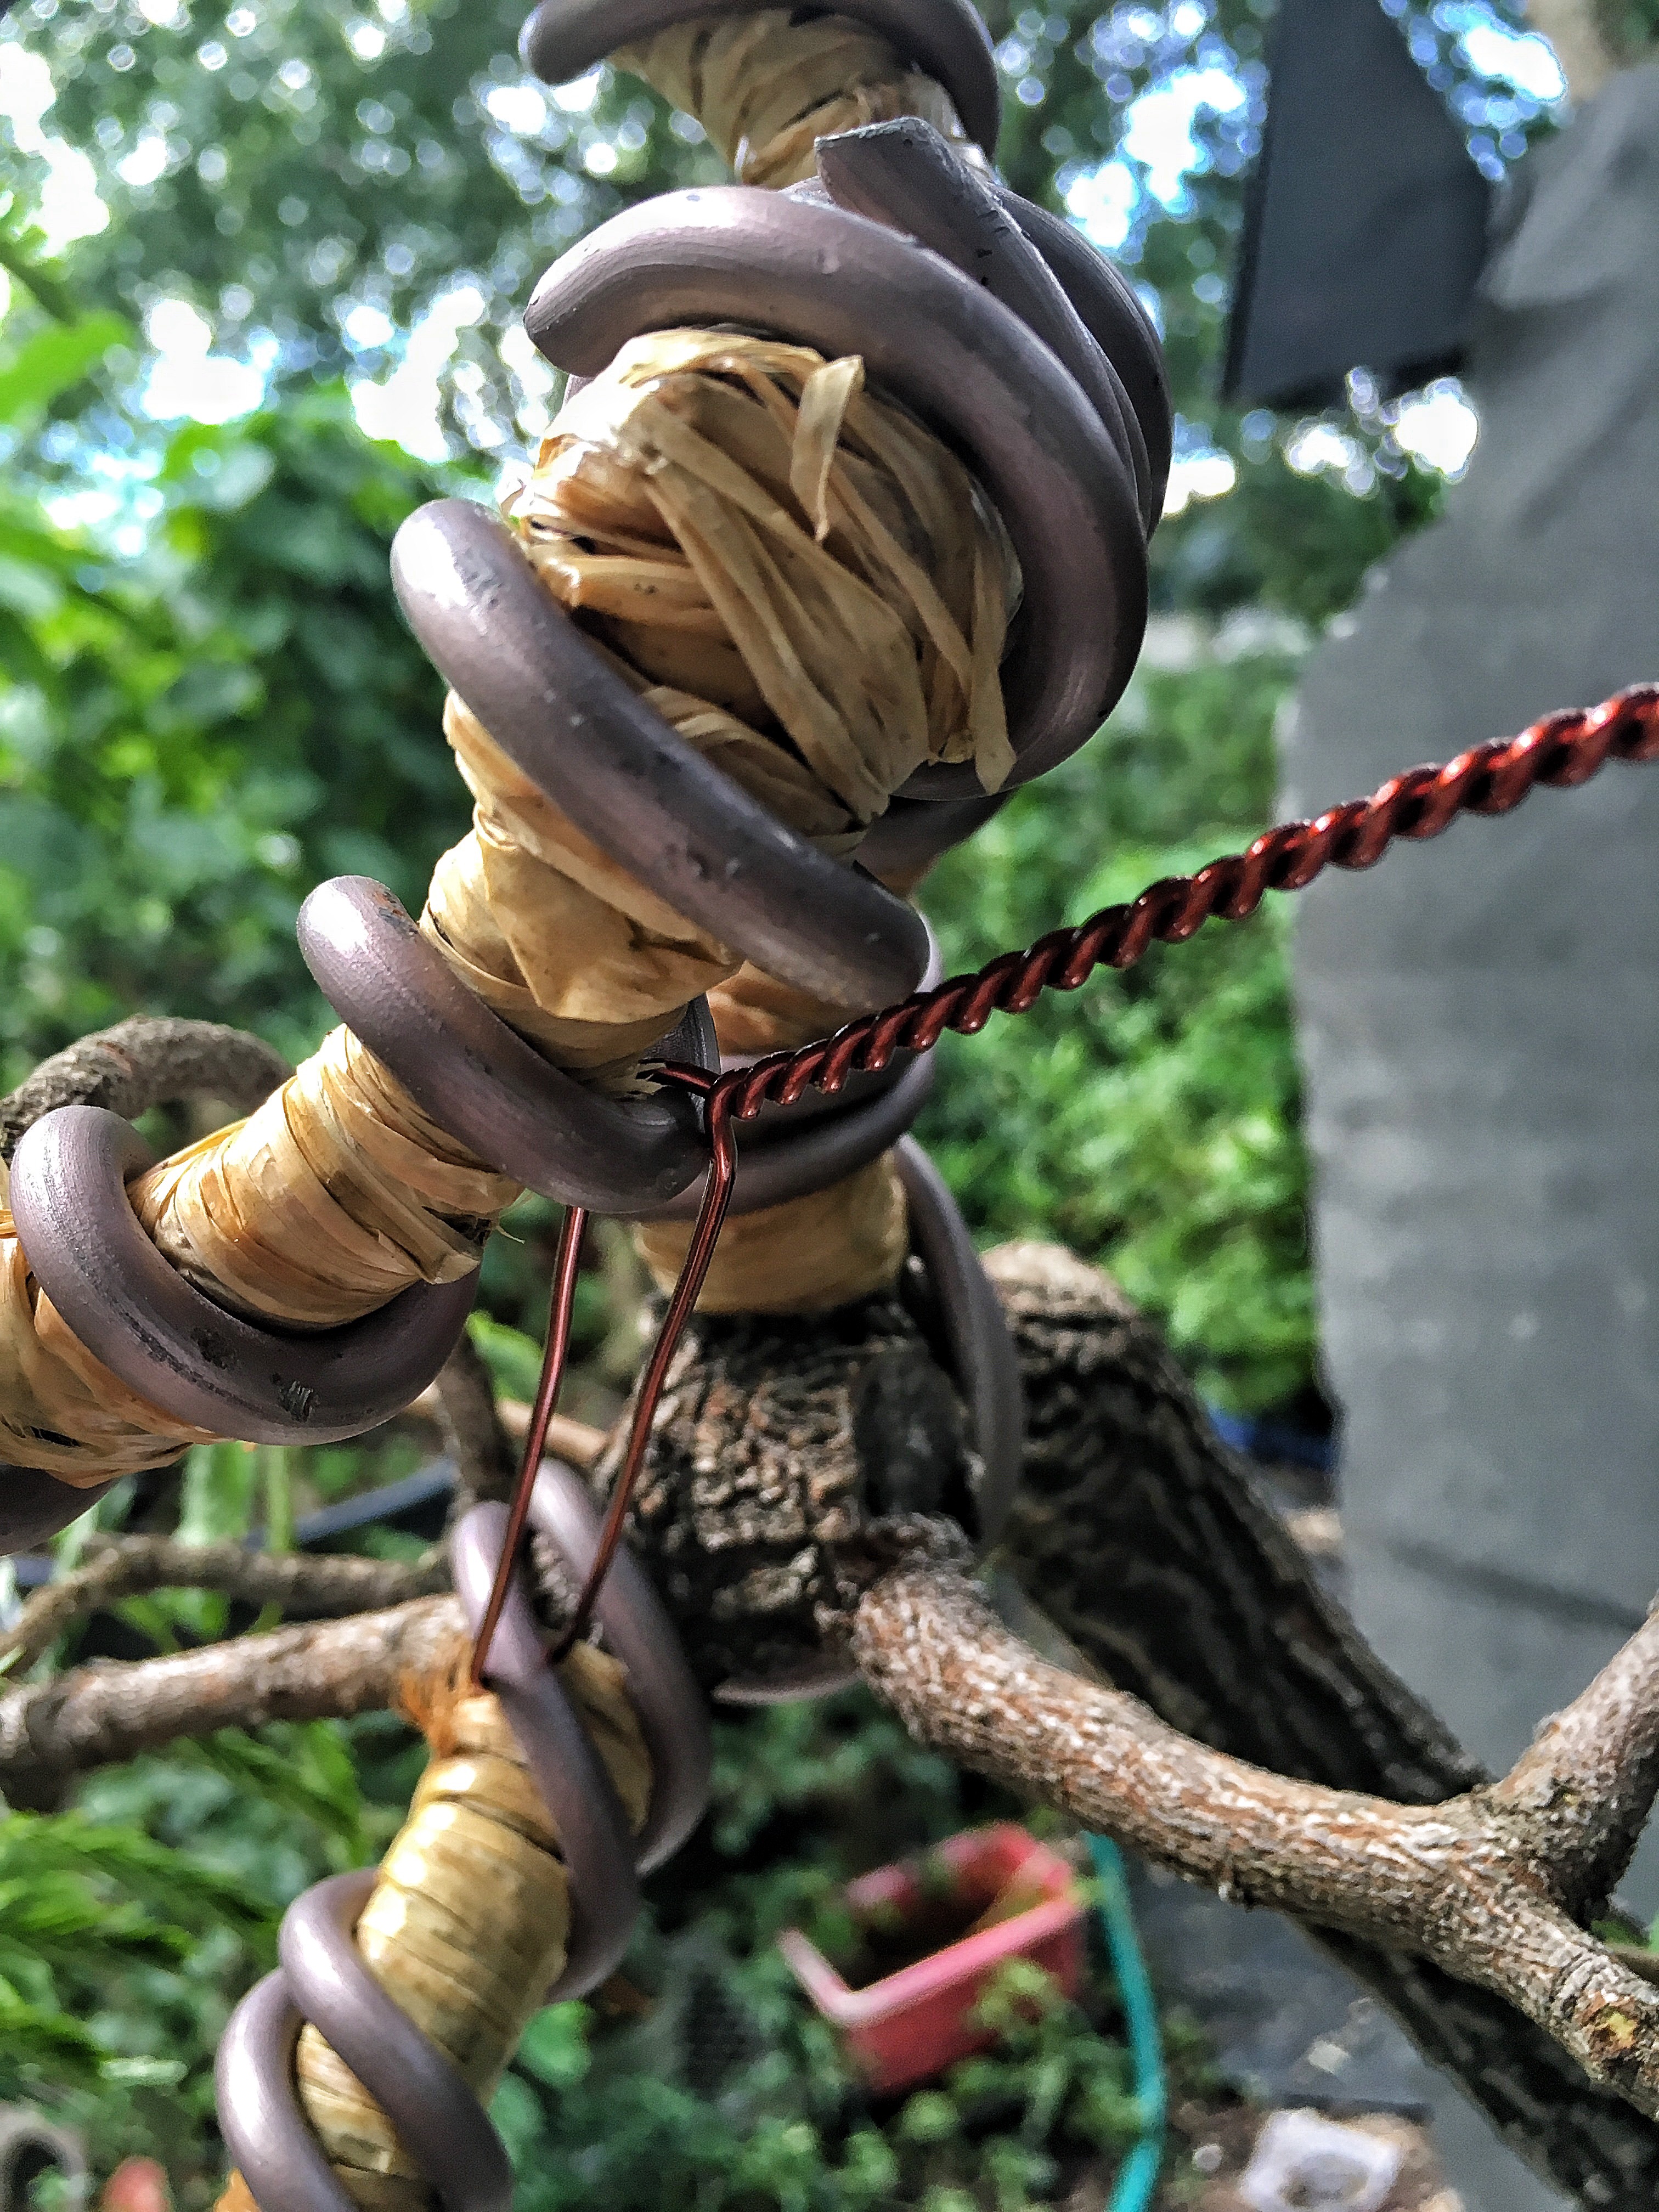 Notice that I looped it around the wire and not over the branch. Learned that from Sergio Luciani just last weekend.
Now, for full disclosure, I did break this branch…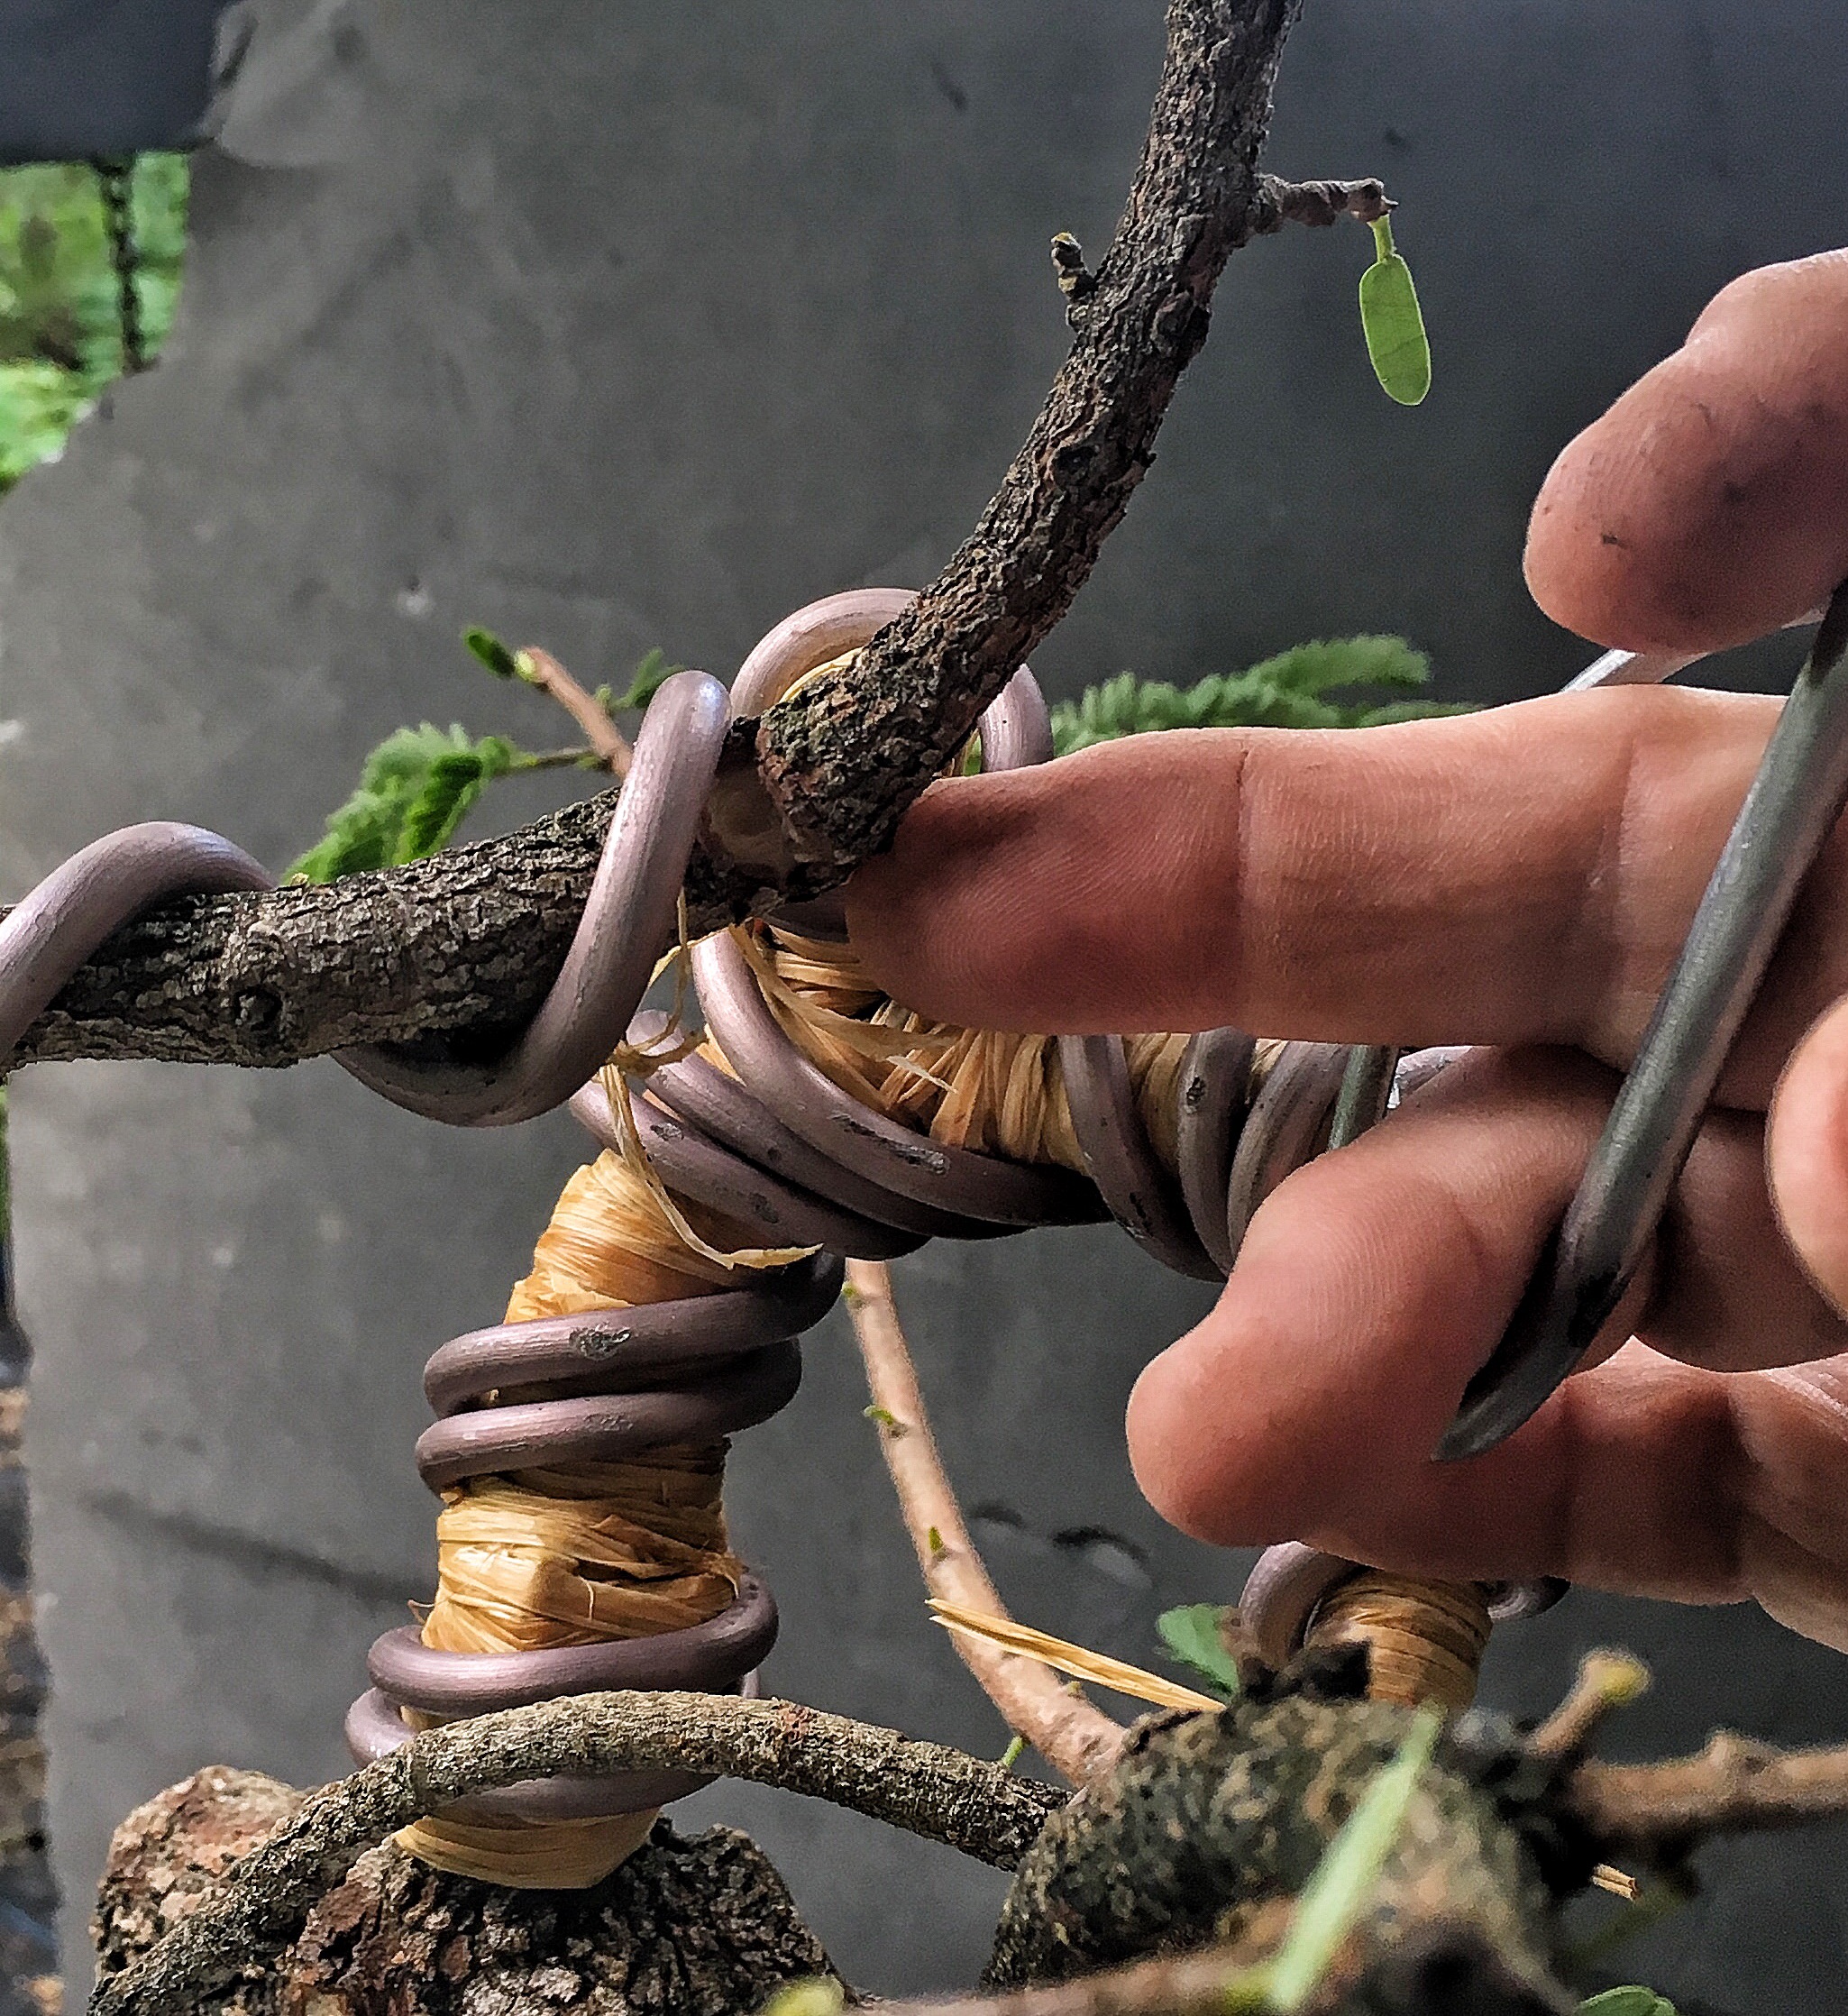 But that was from me banging it with my clumsy ham fists. We don’t need it any way….
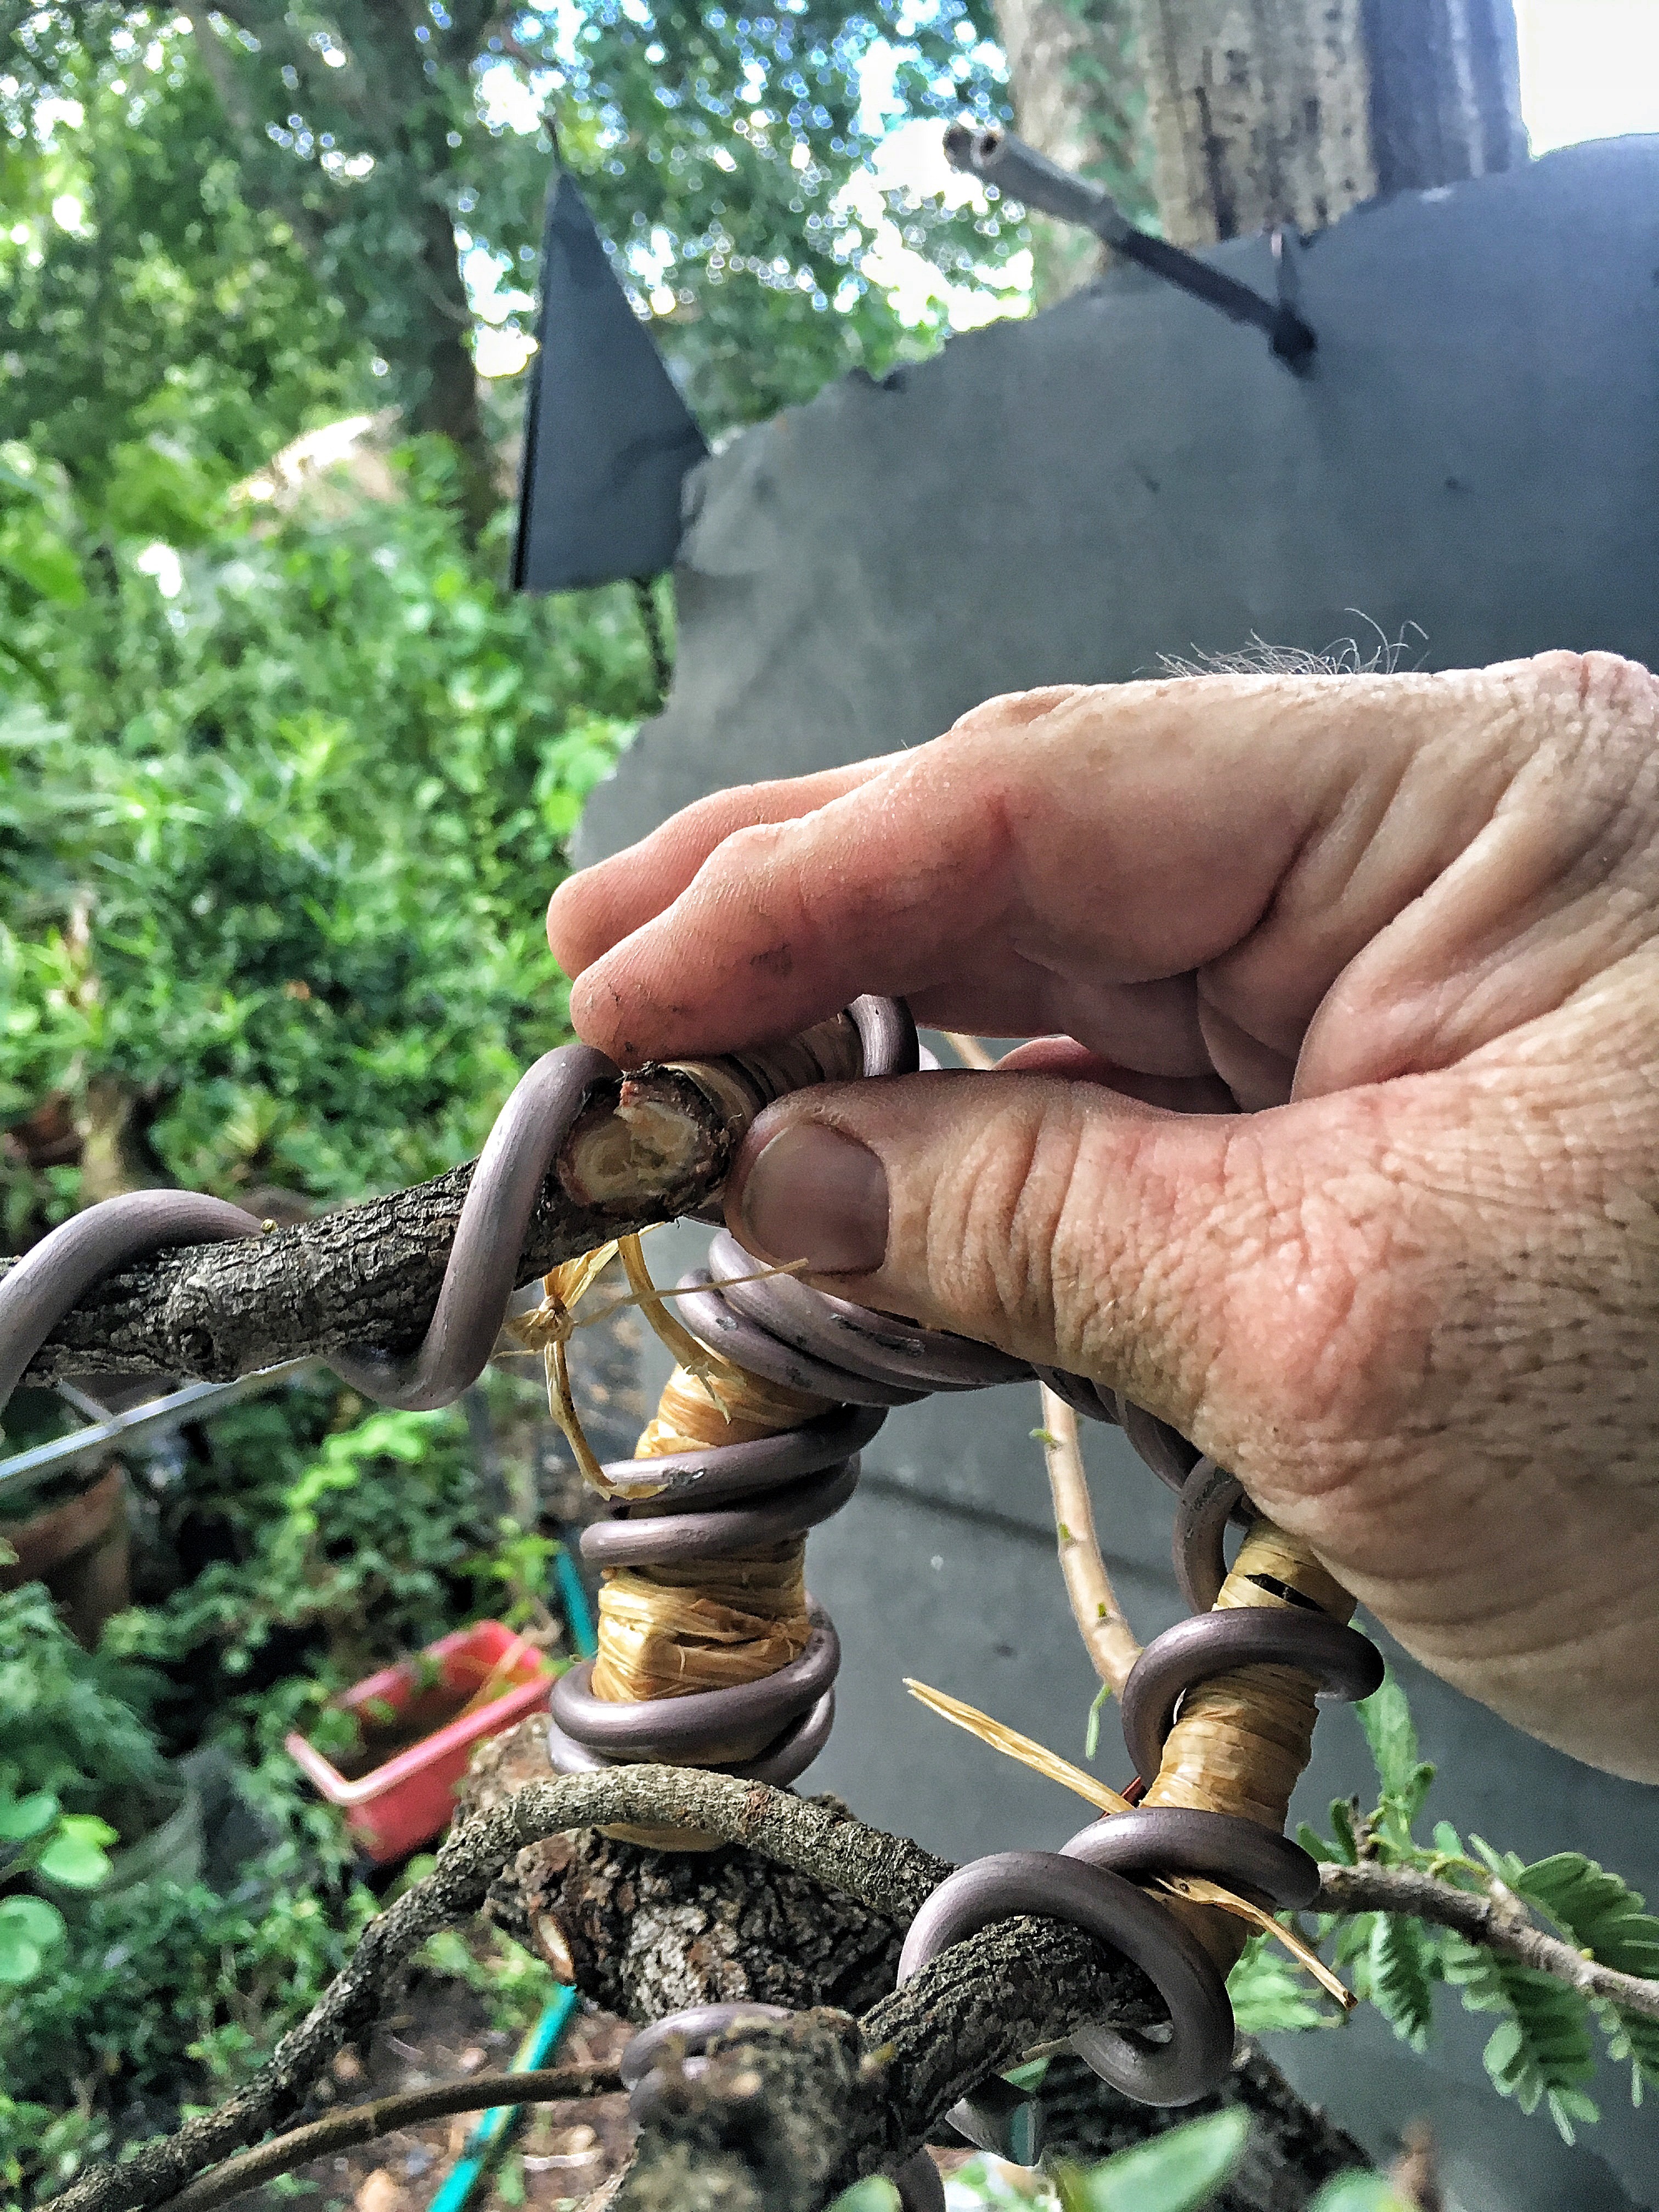
And the main trunk cracked here, at the branch union. 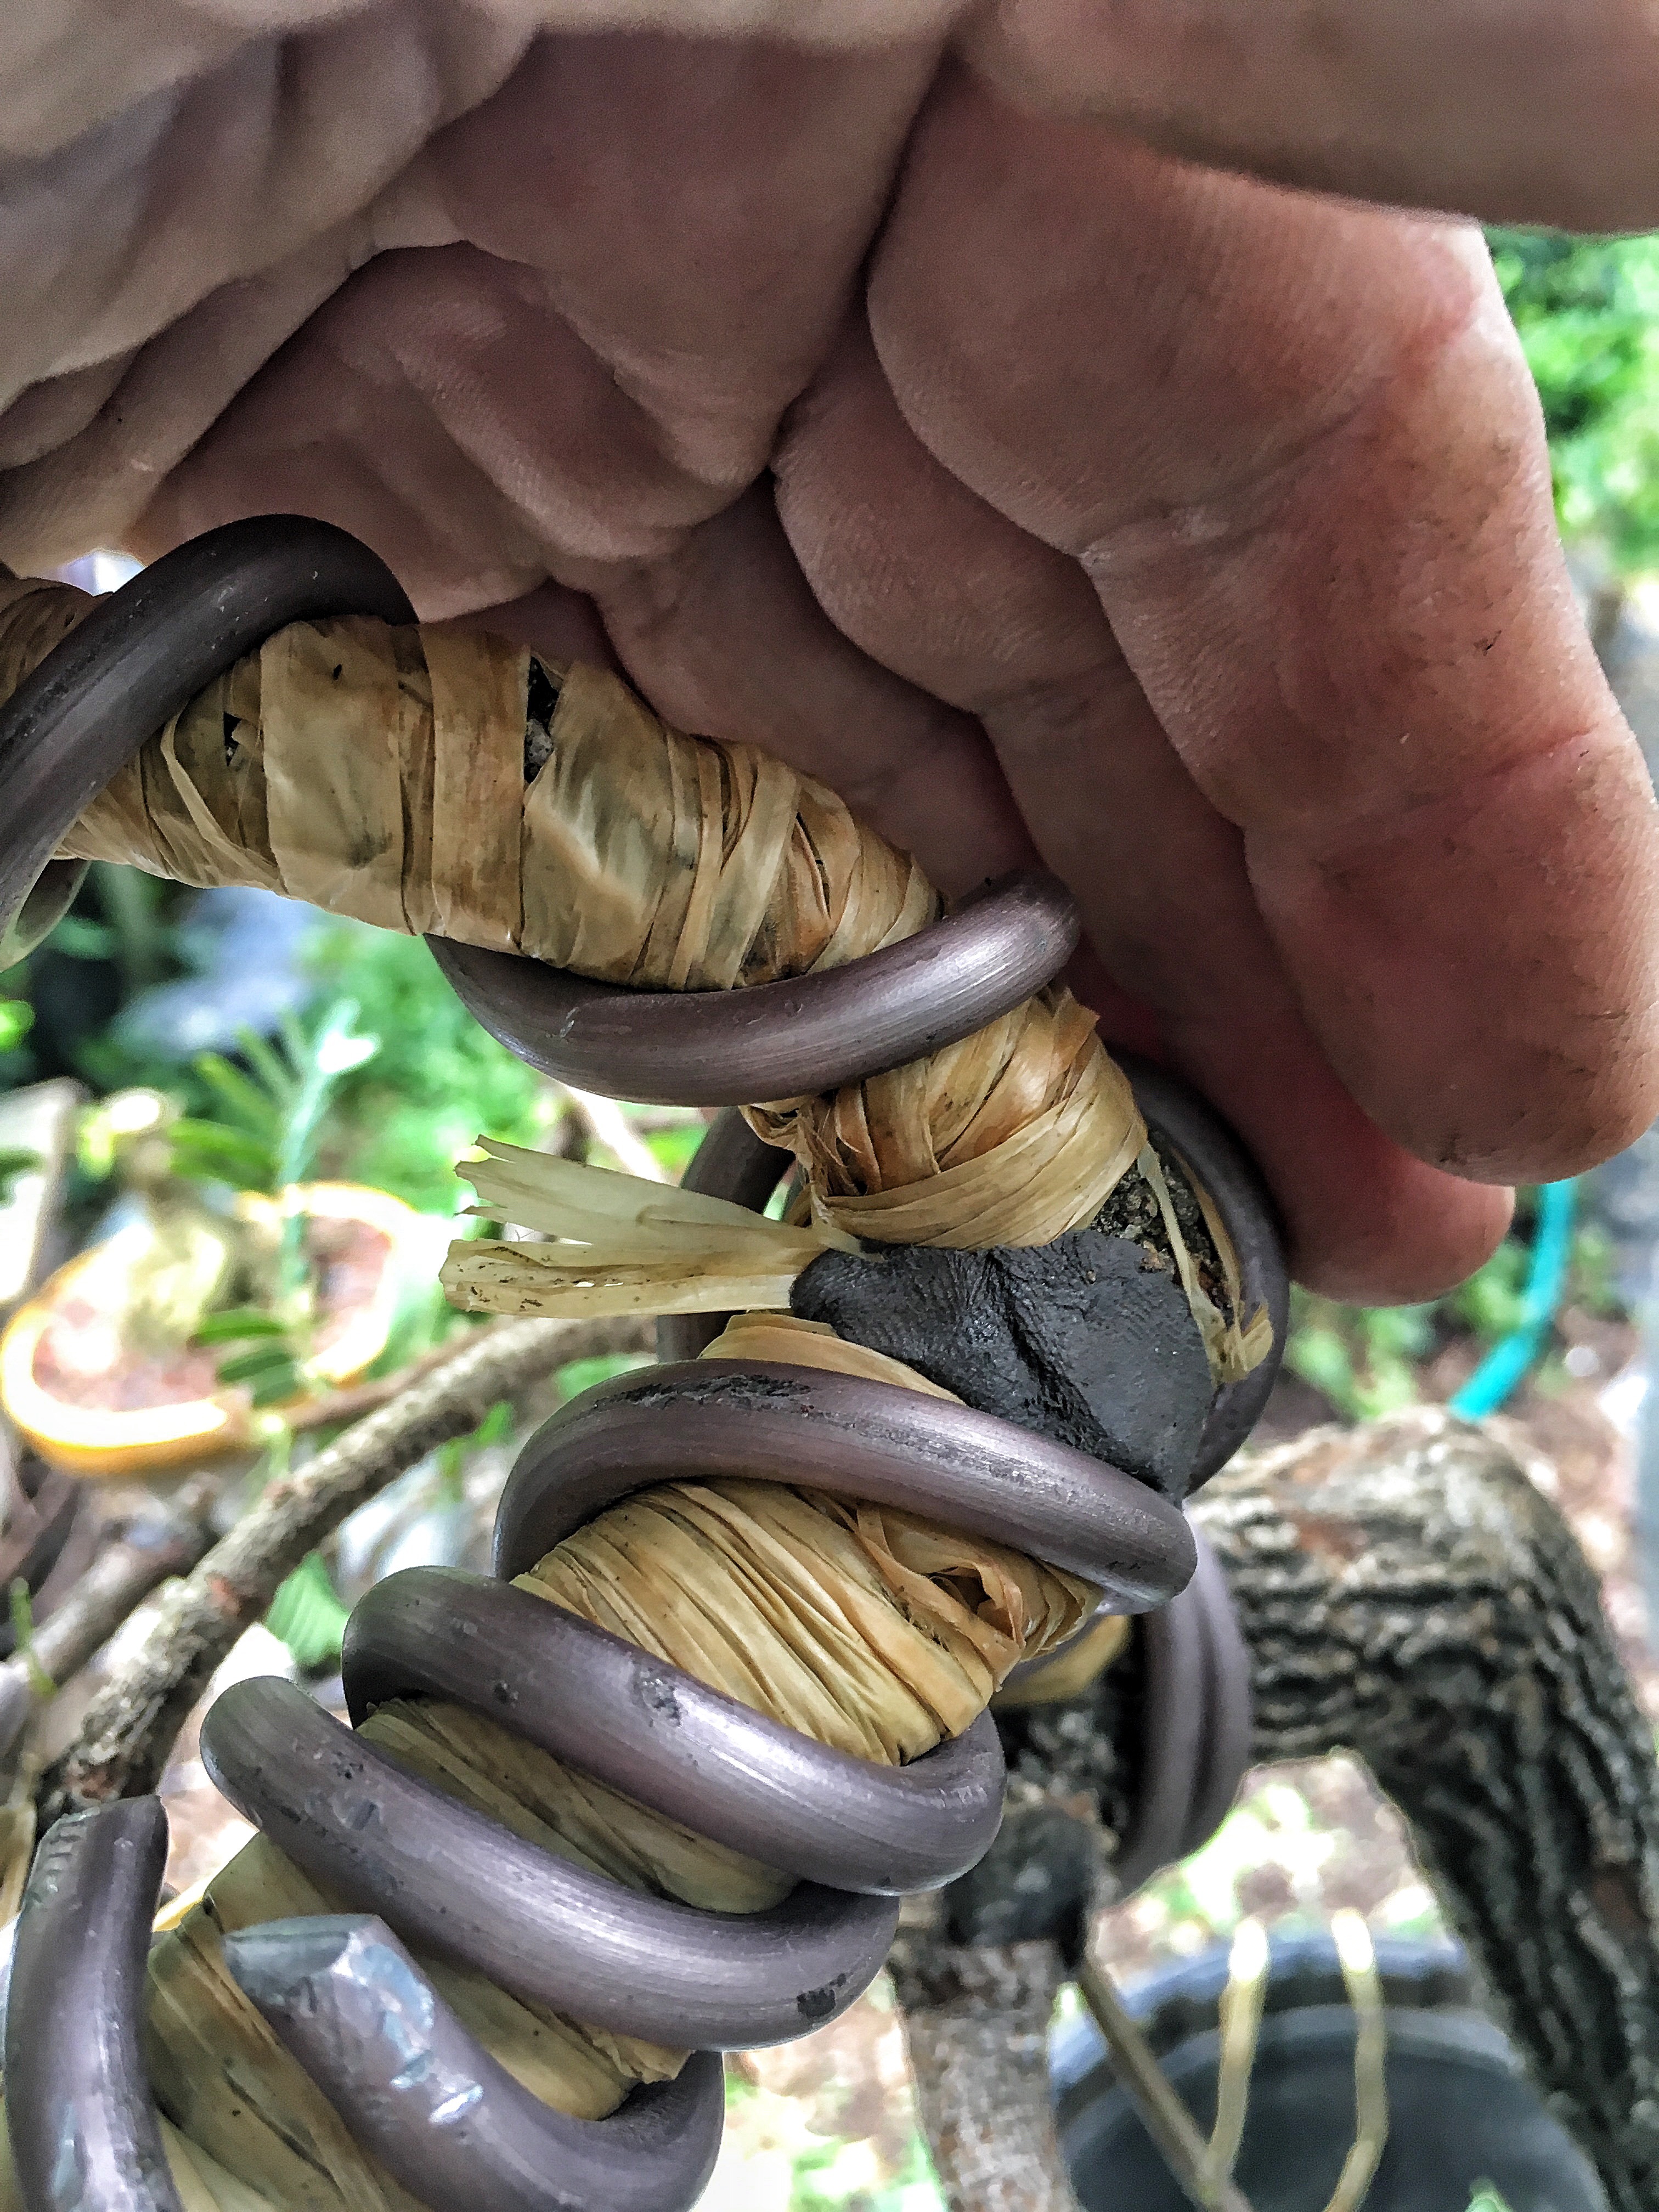 I added some putty to keep it sealed.
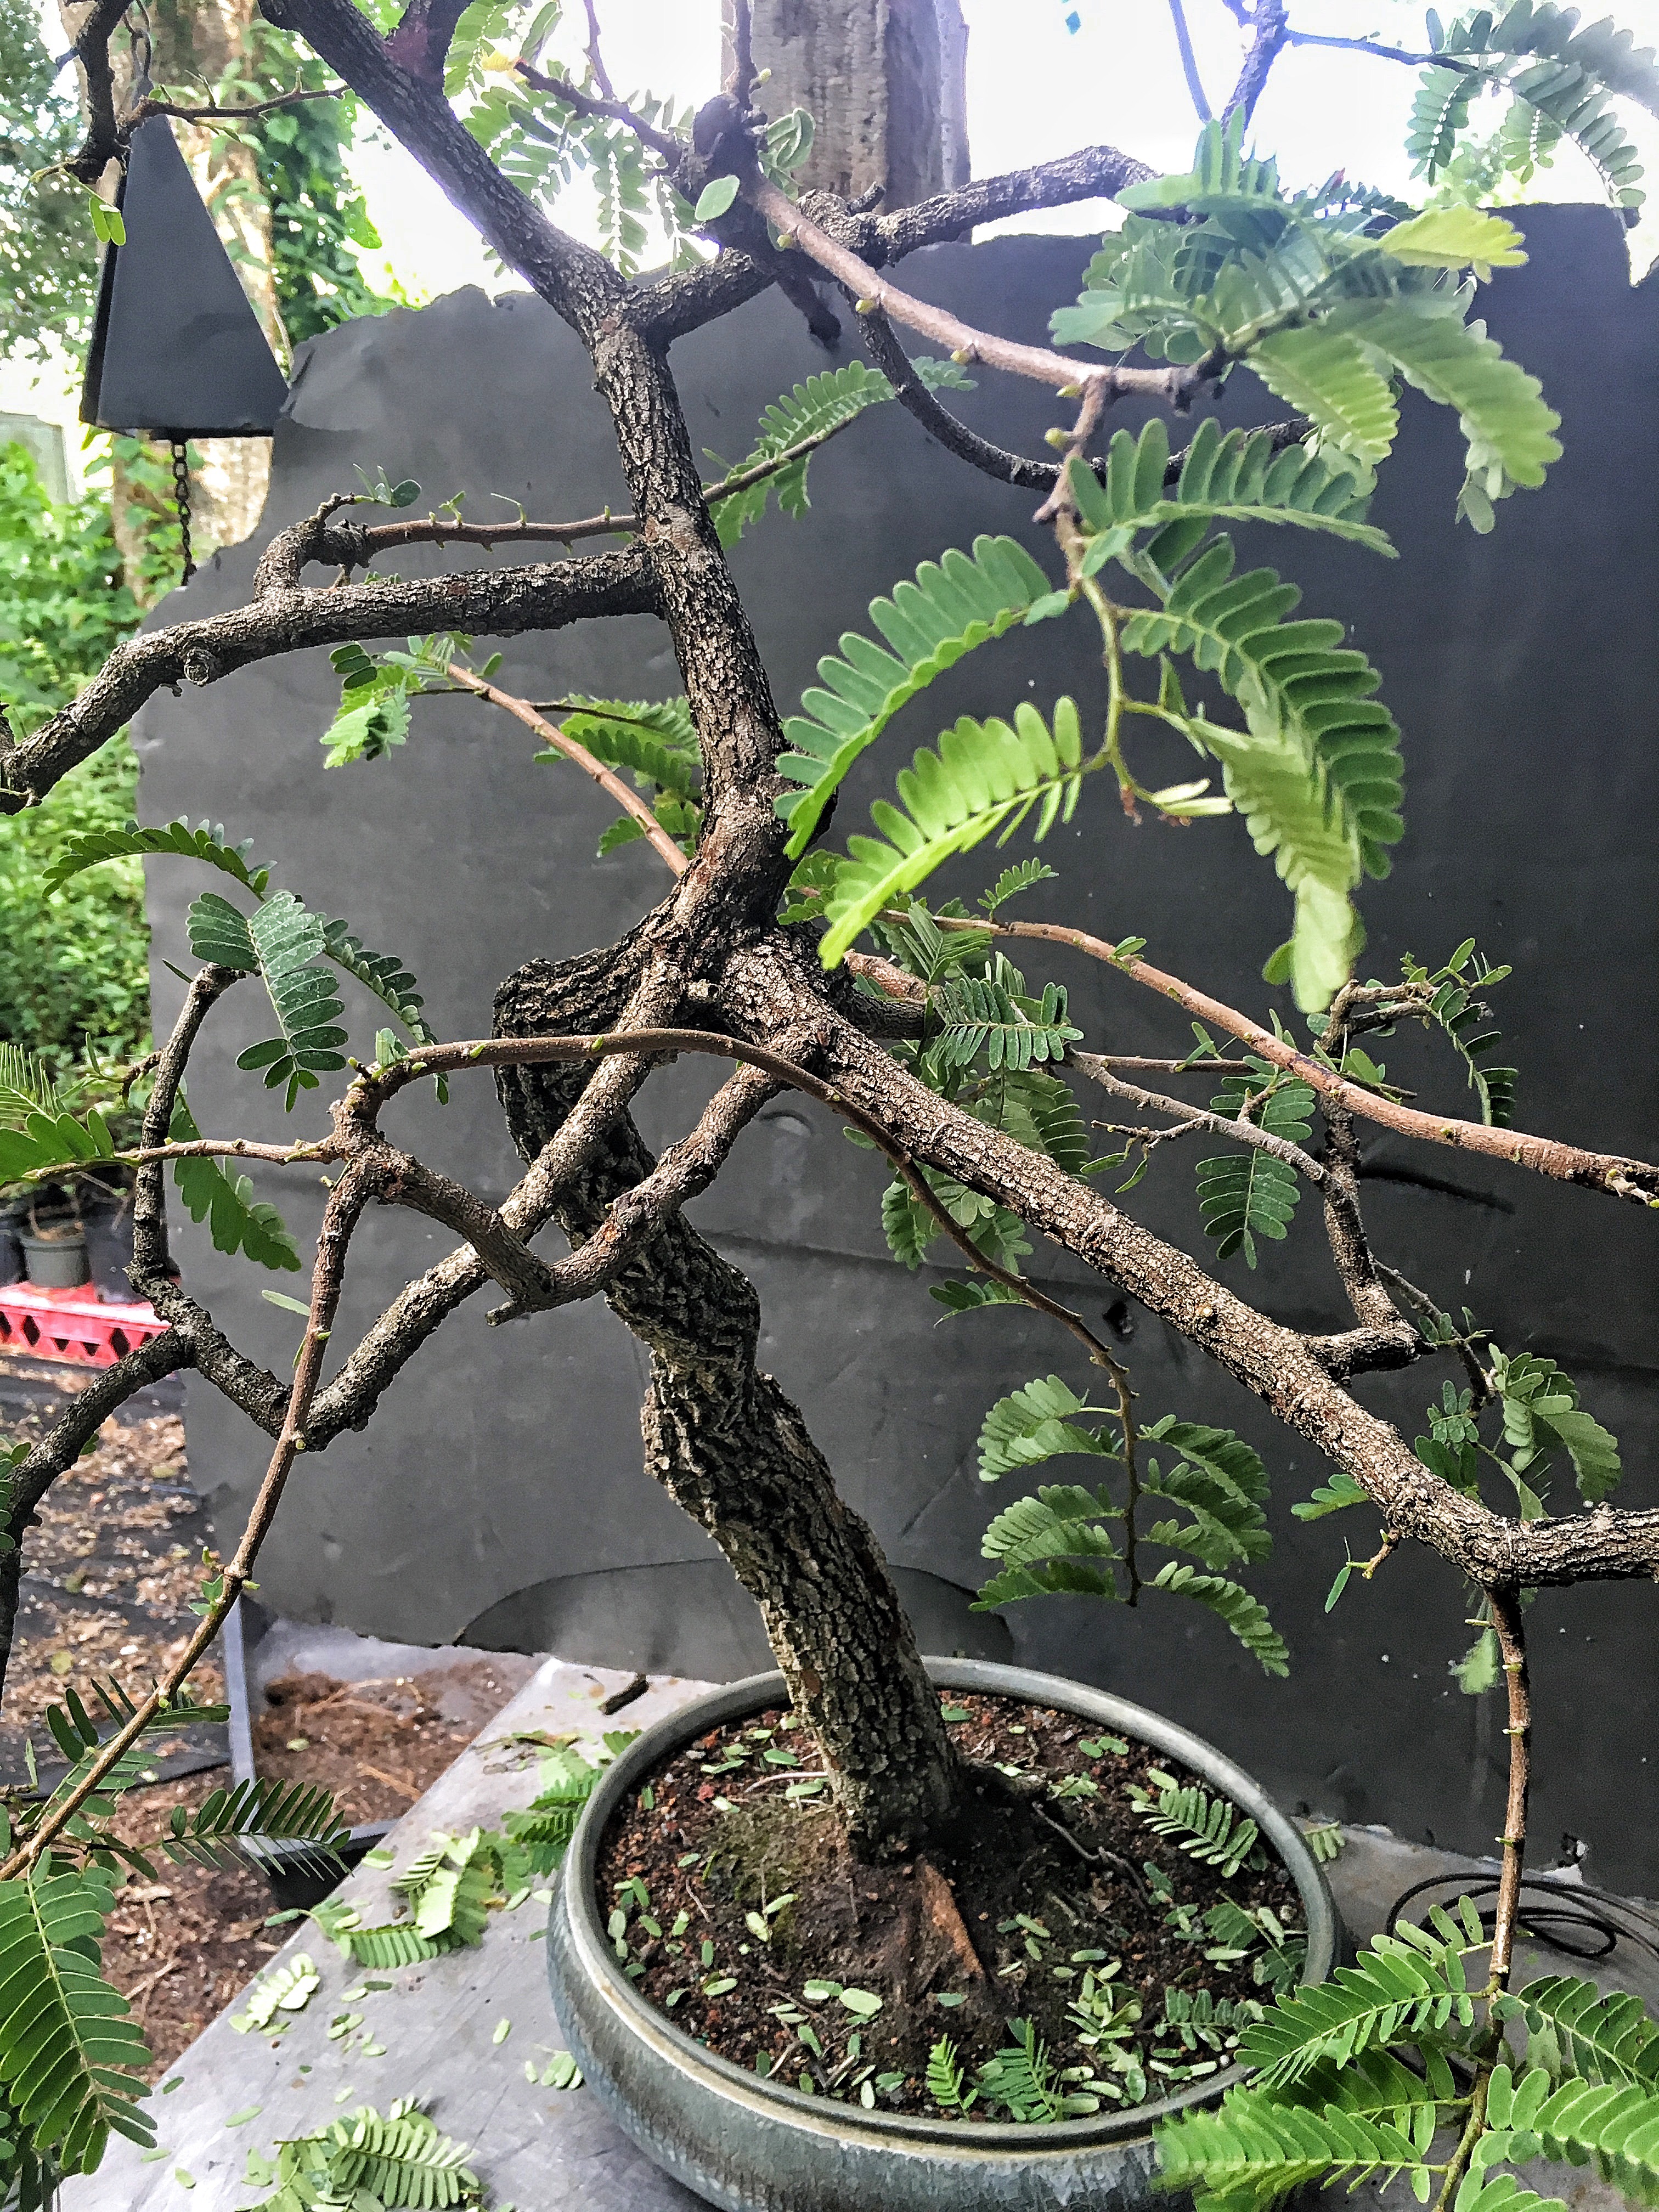
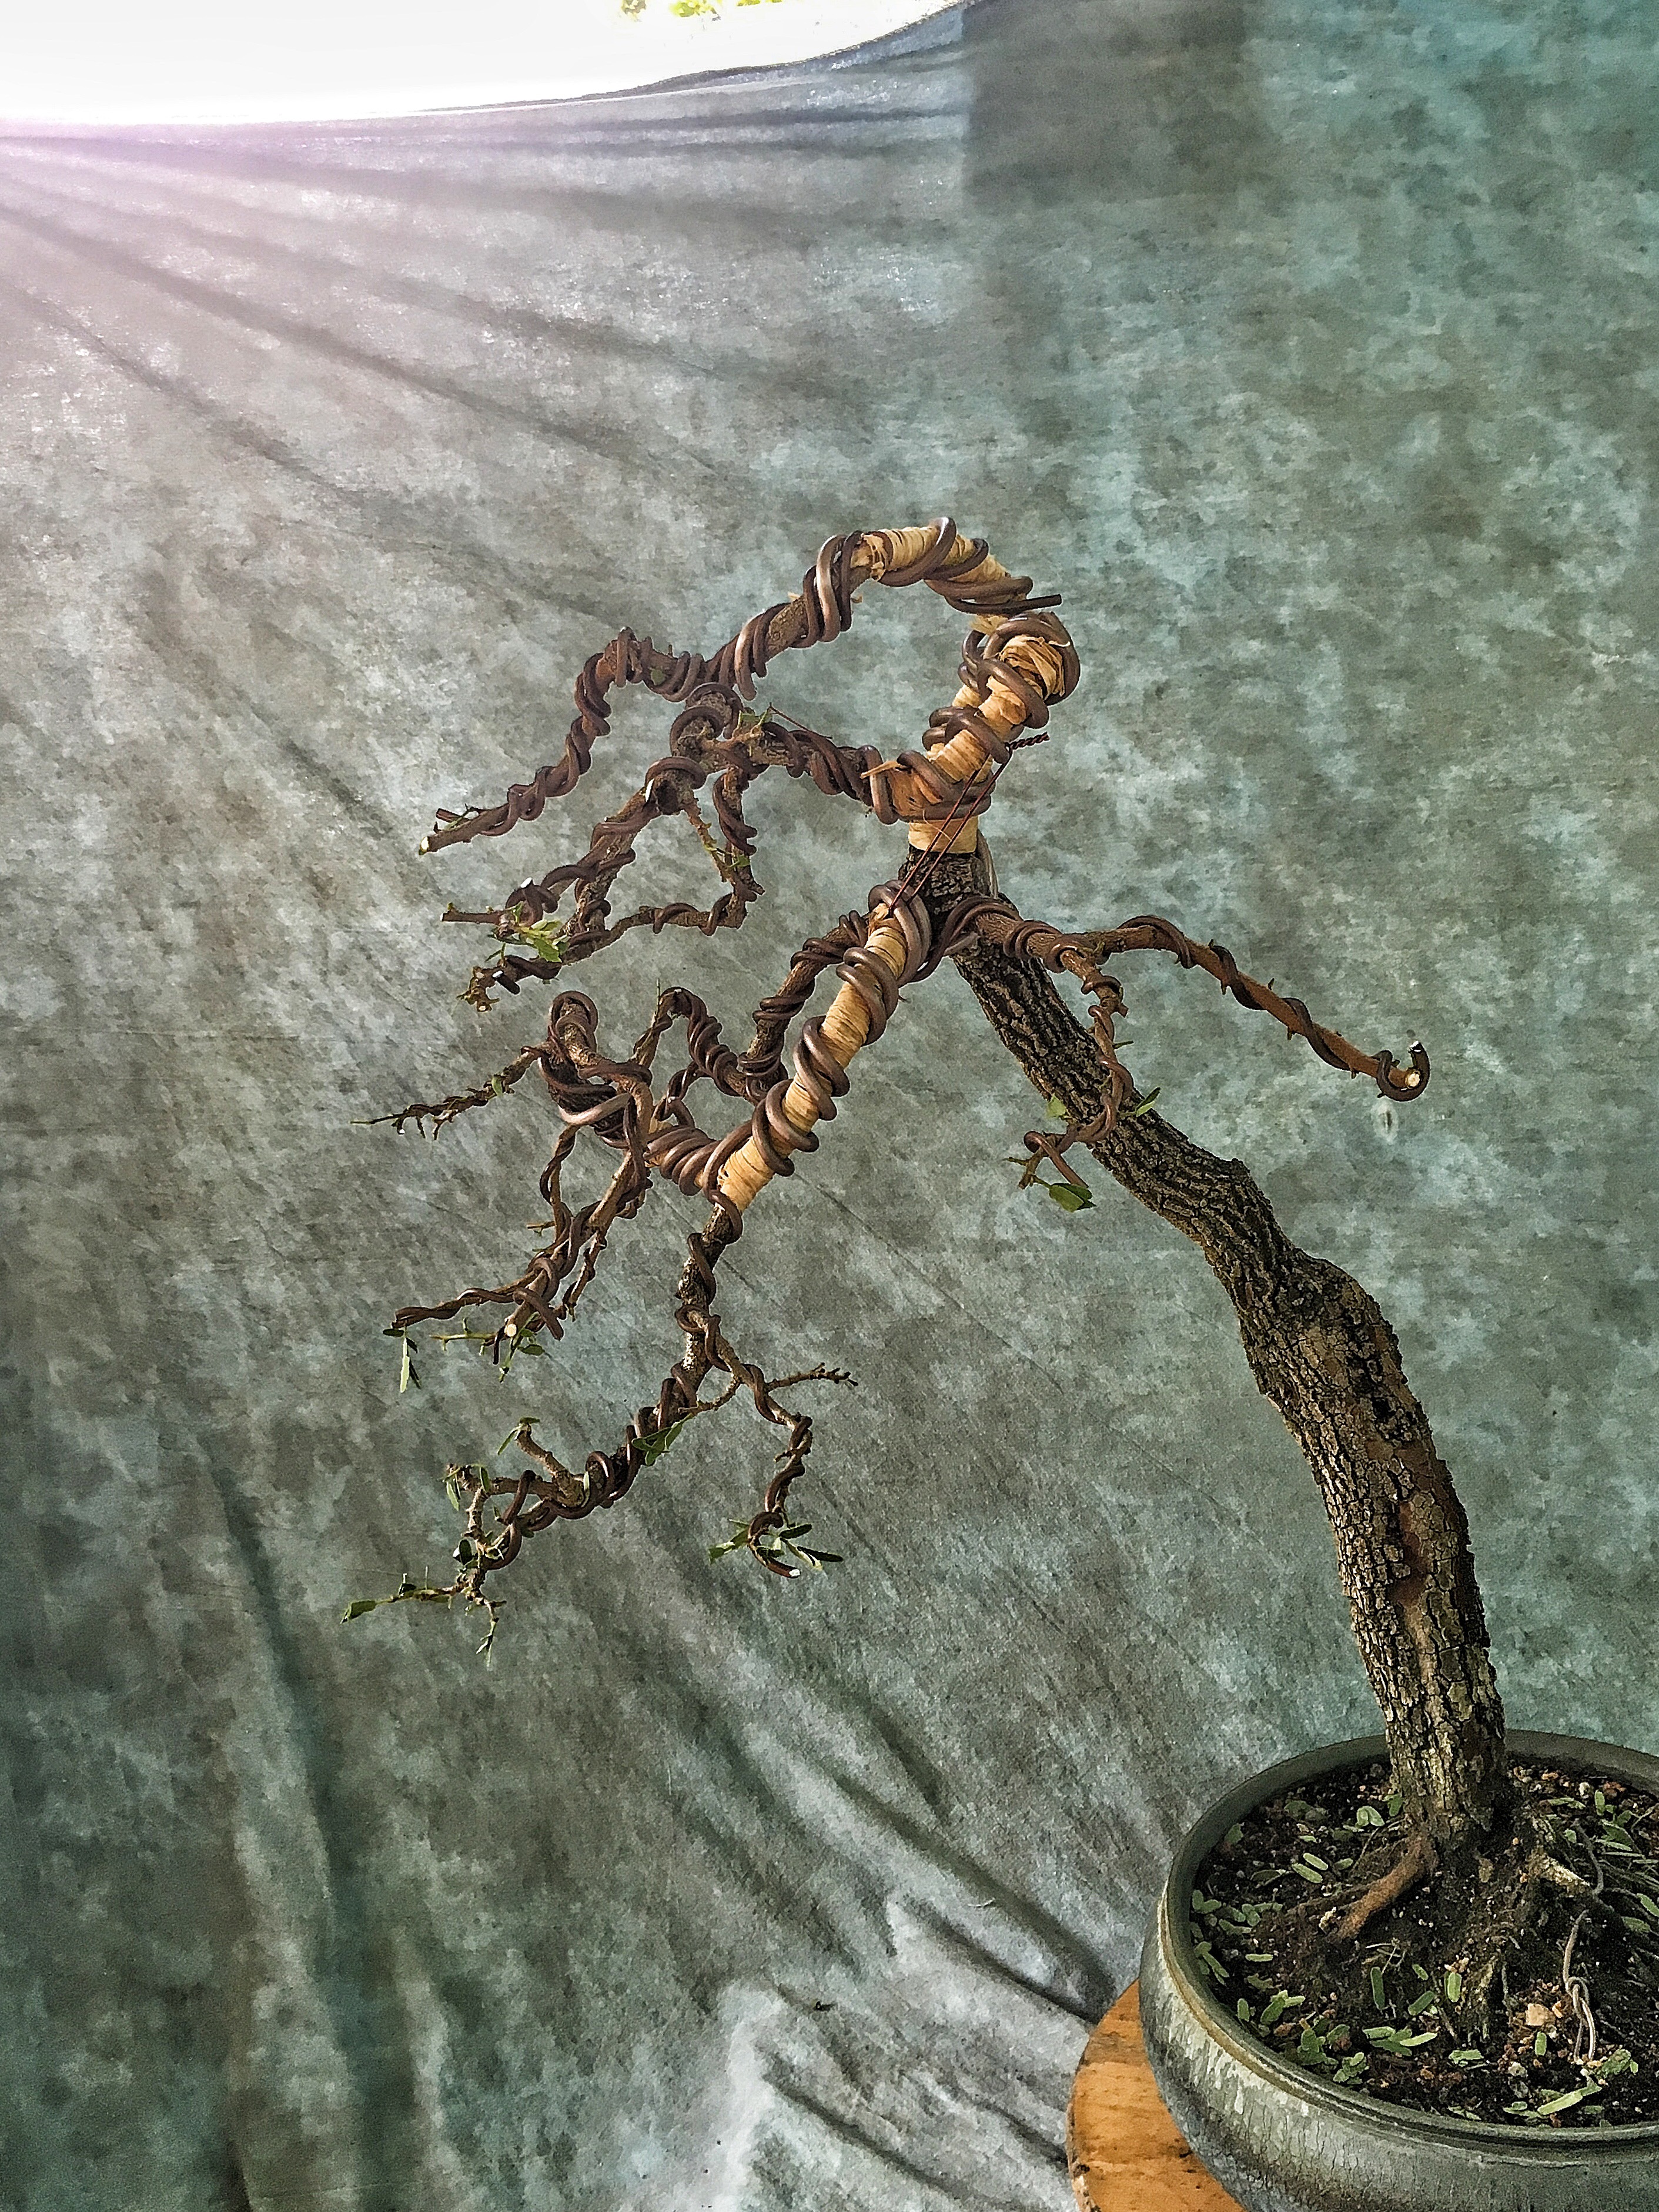
I have the main branches positioned. 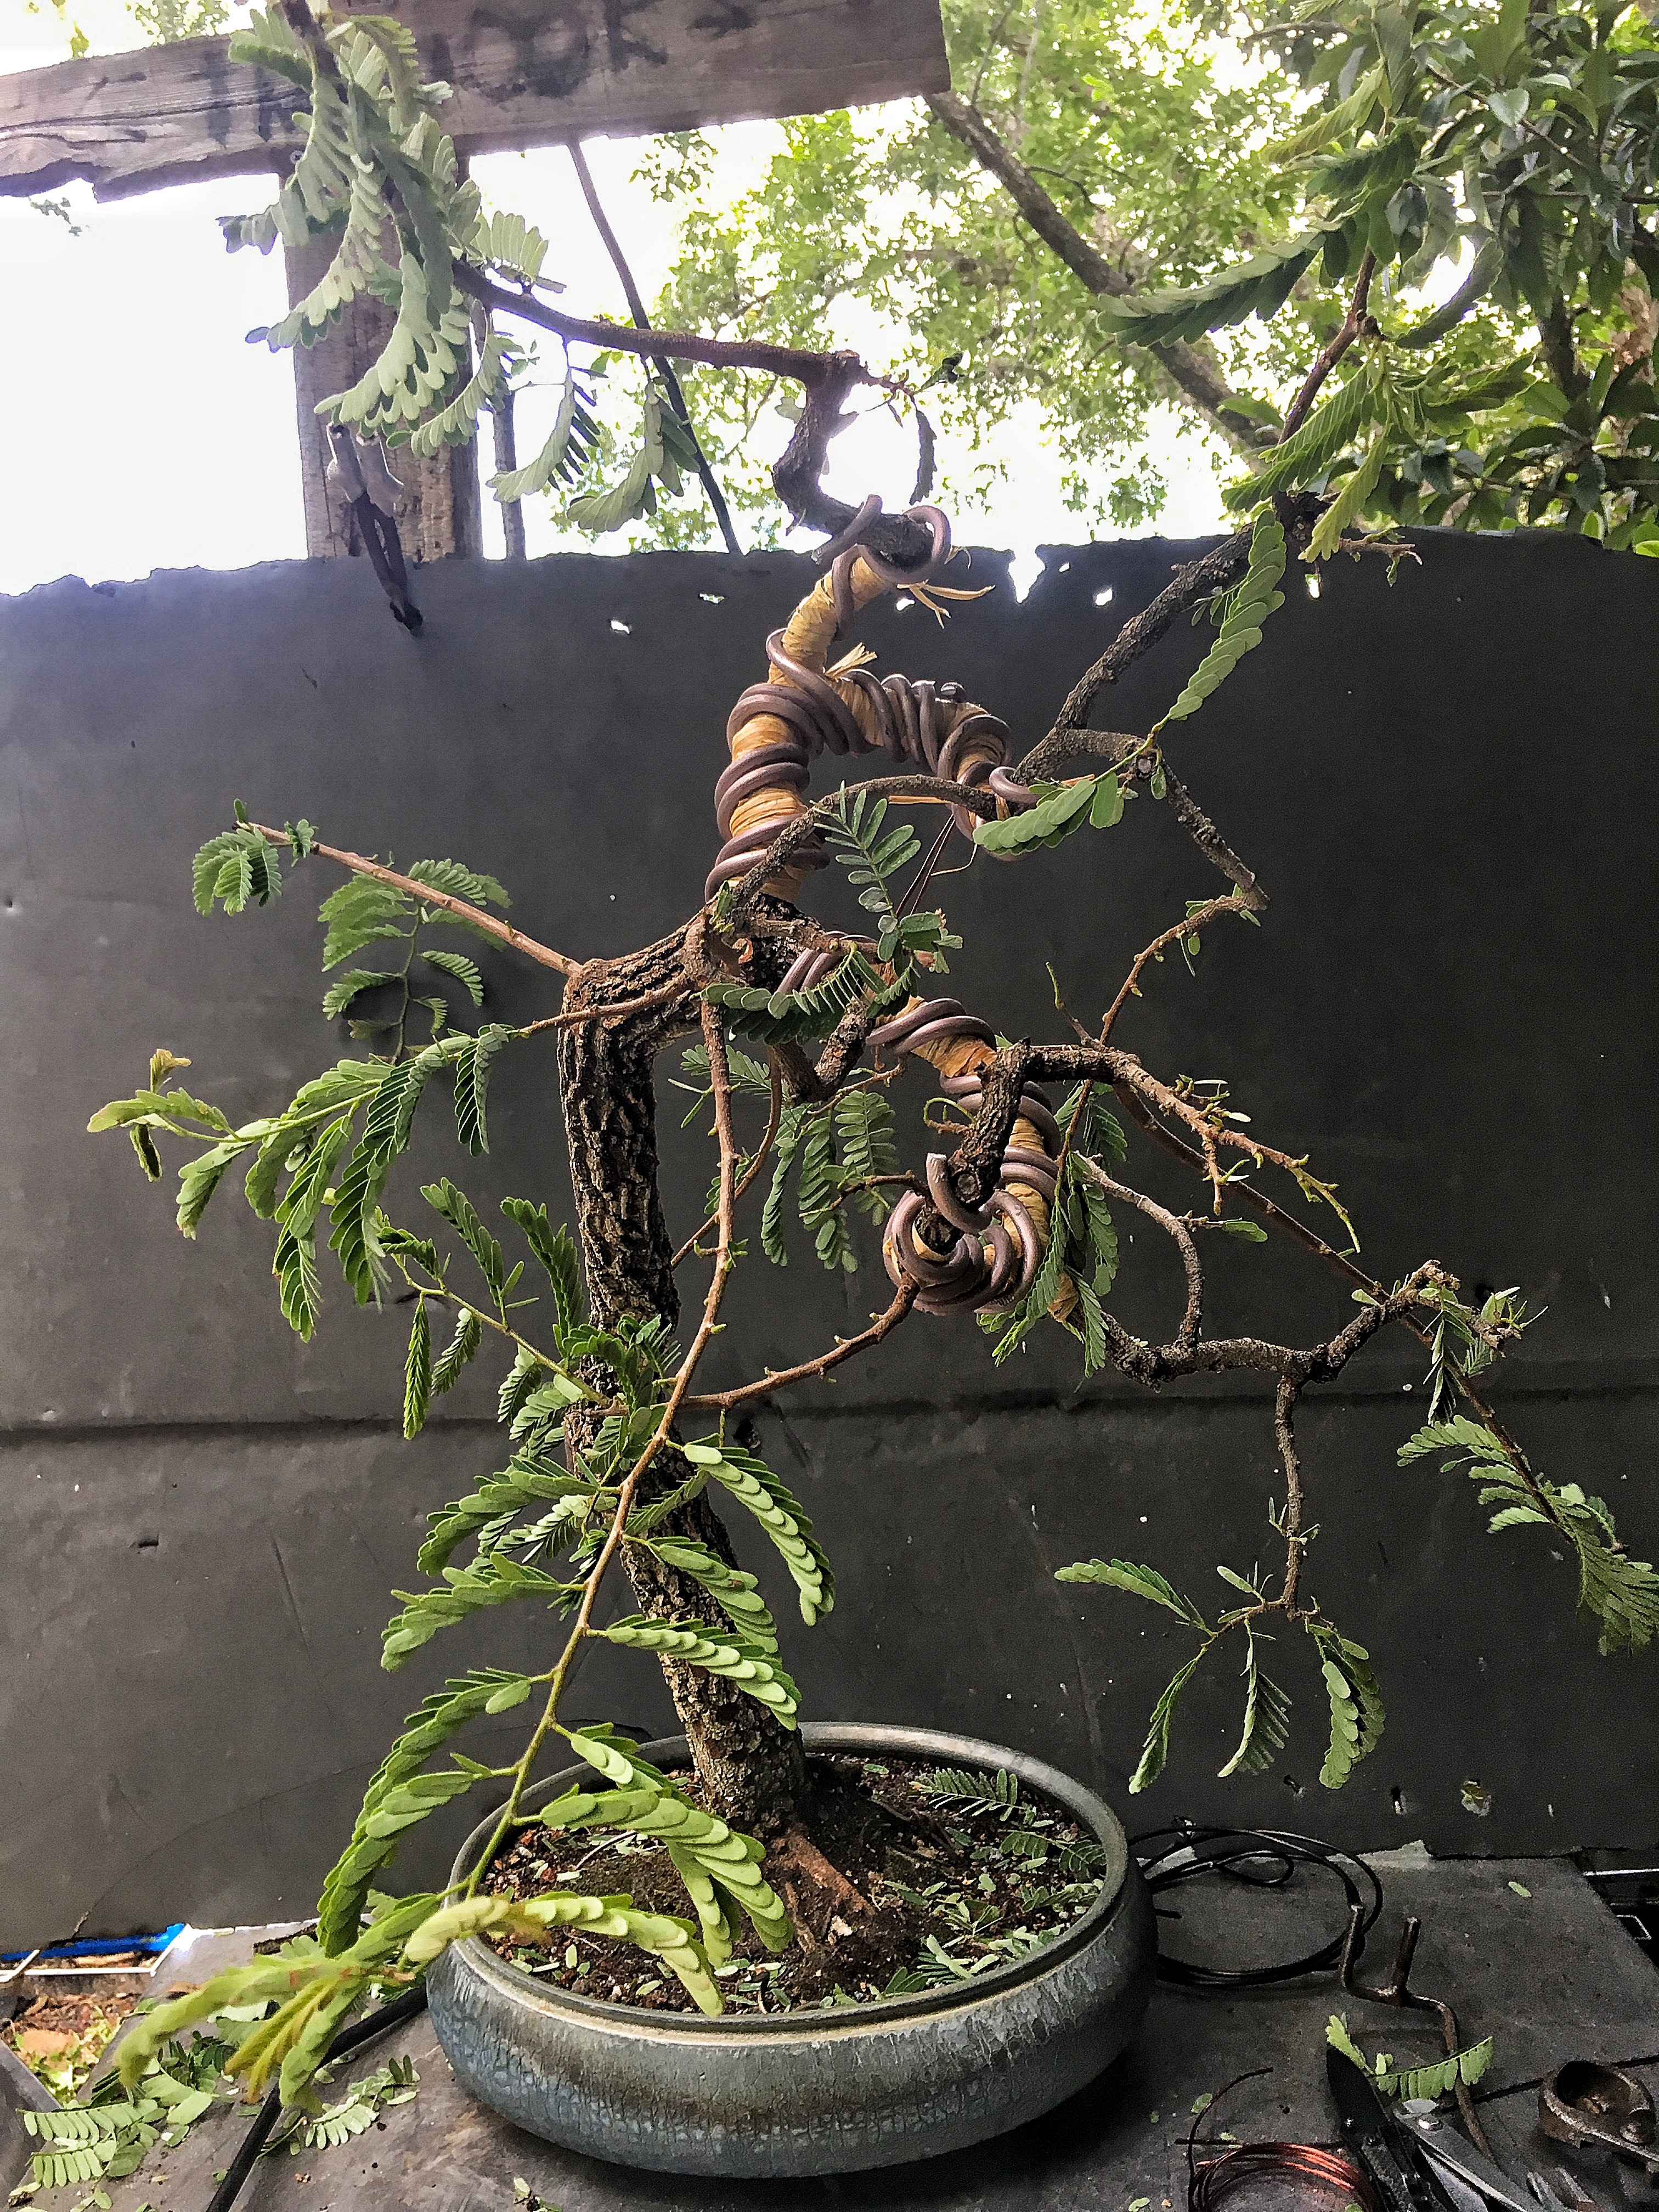
Some more establishing shots. 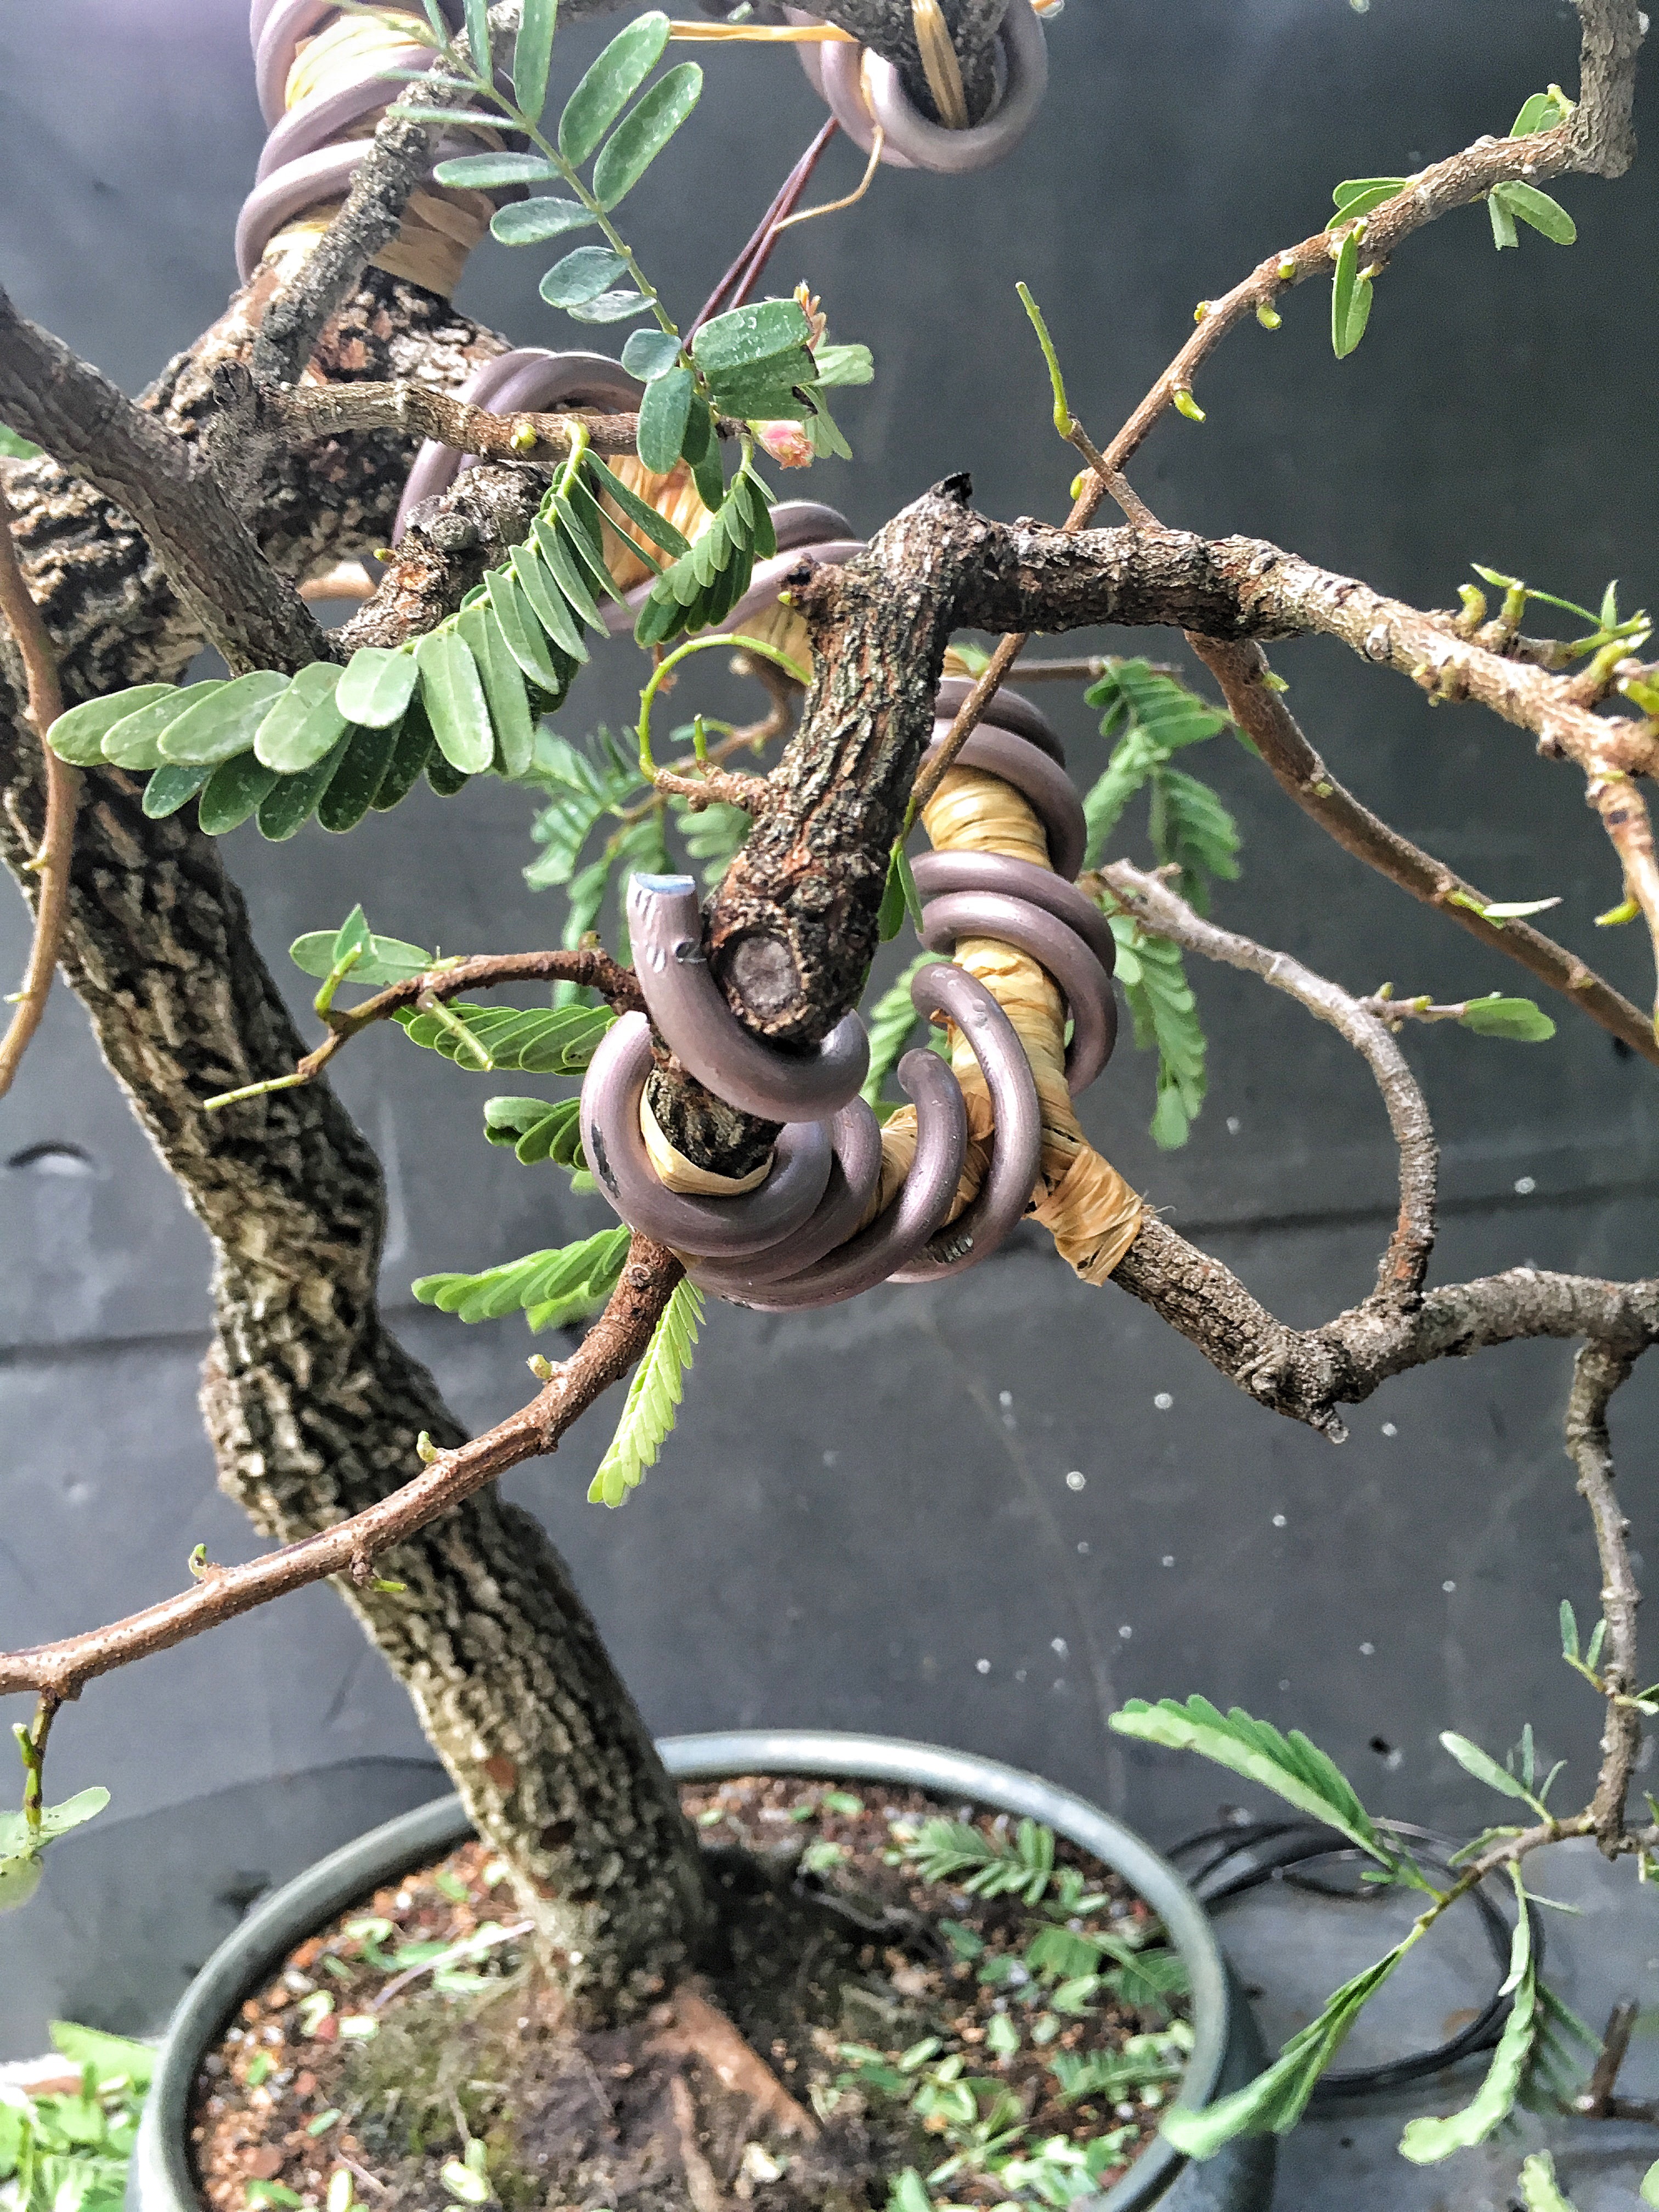
And the finished tree!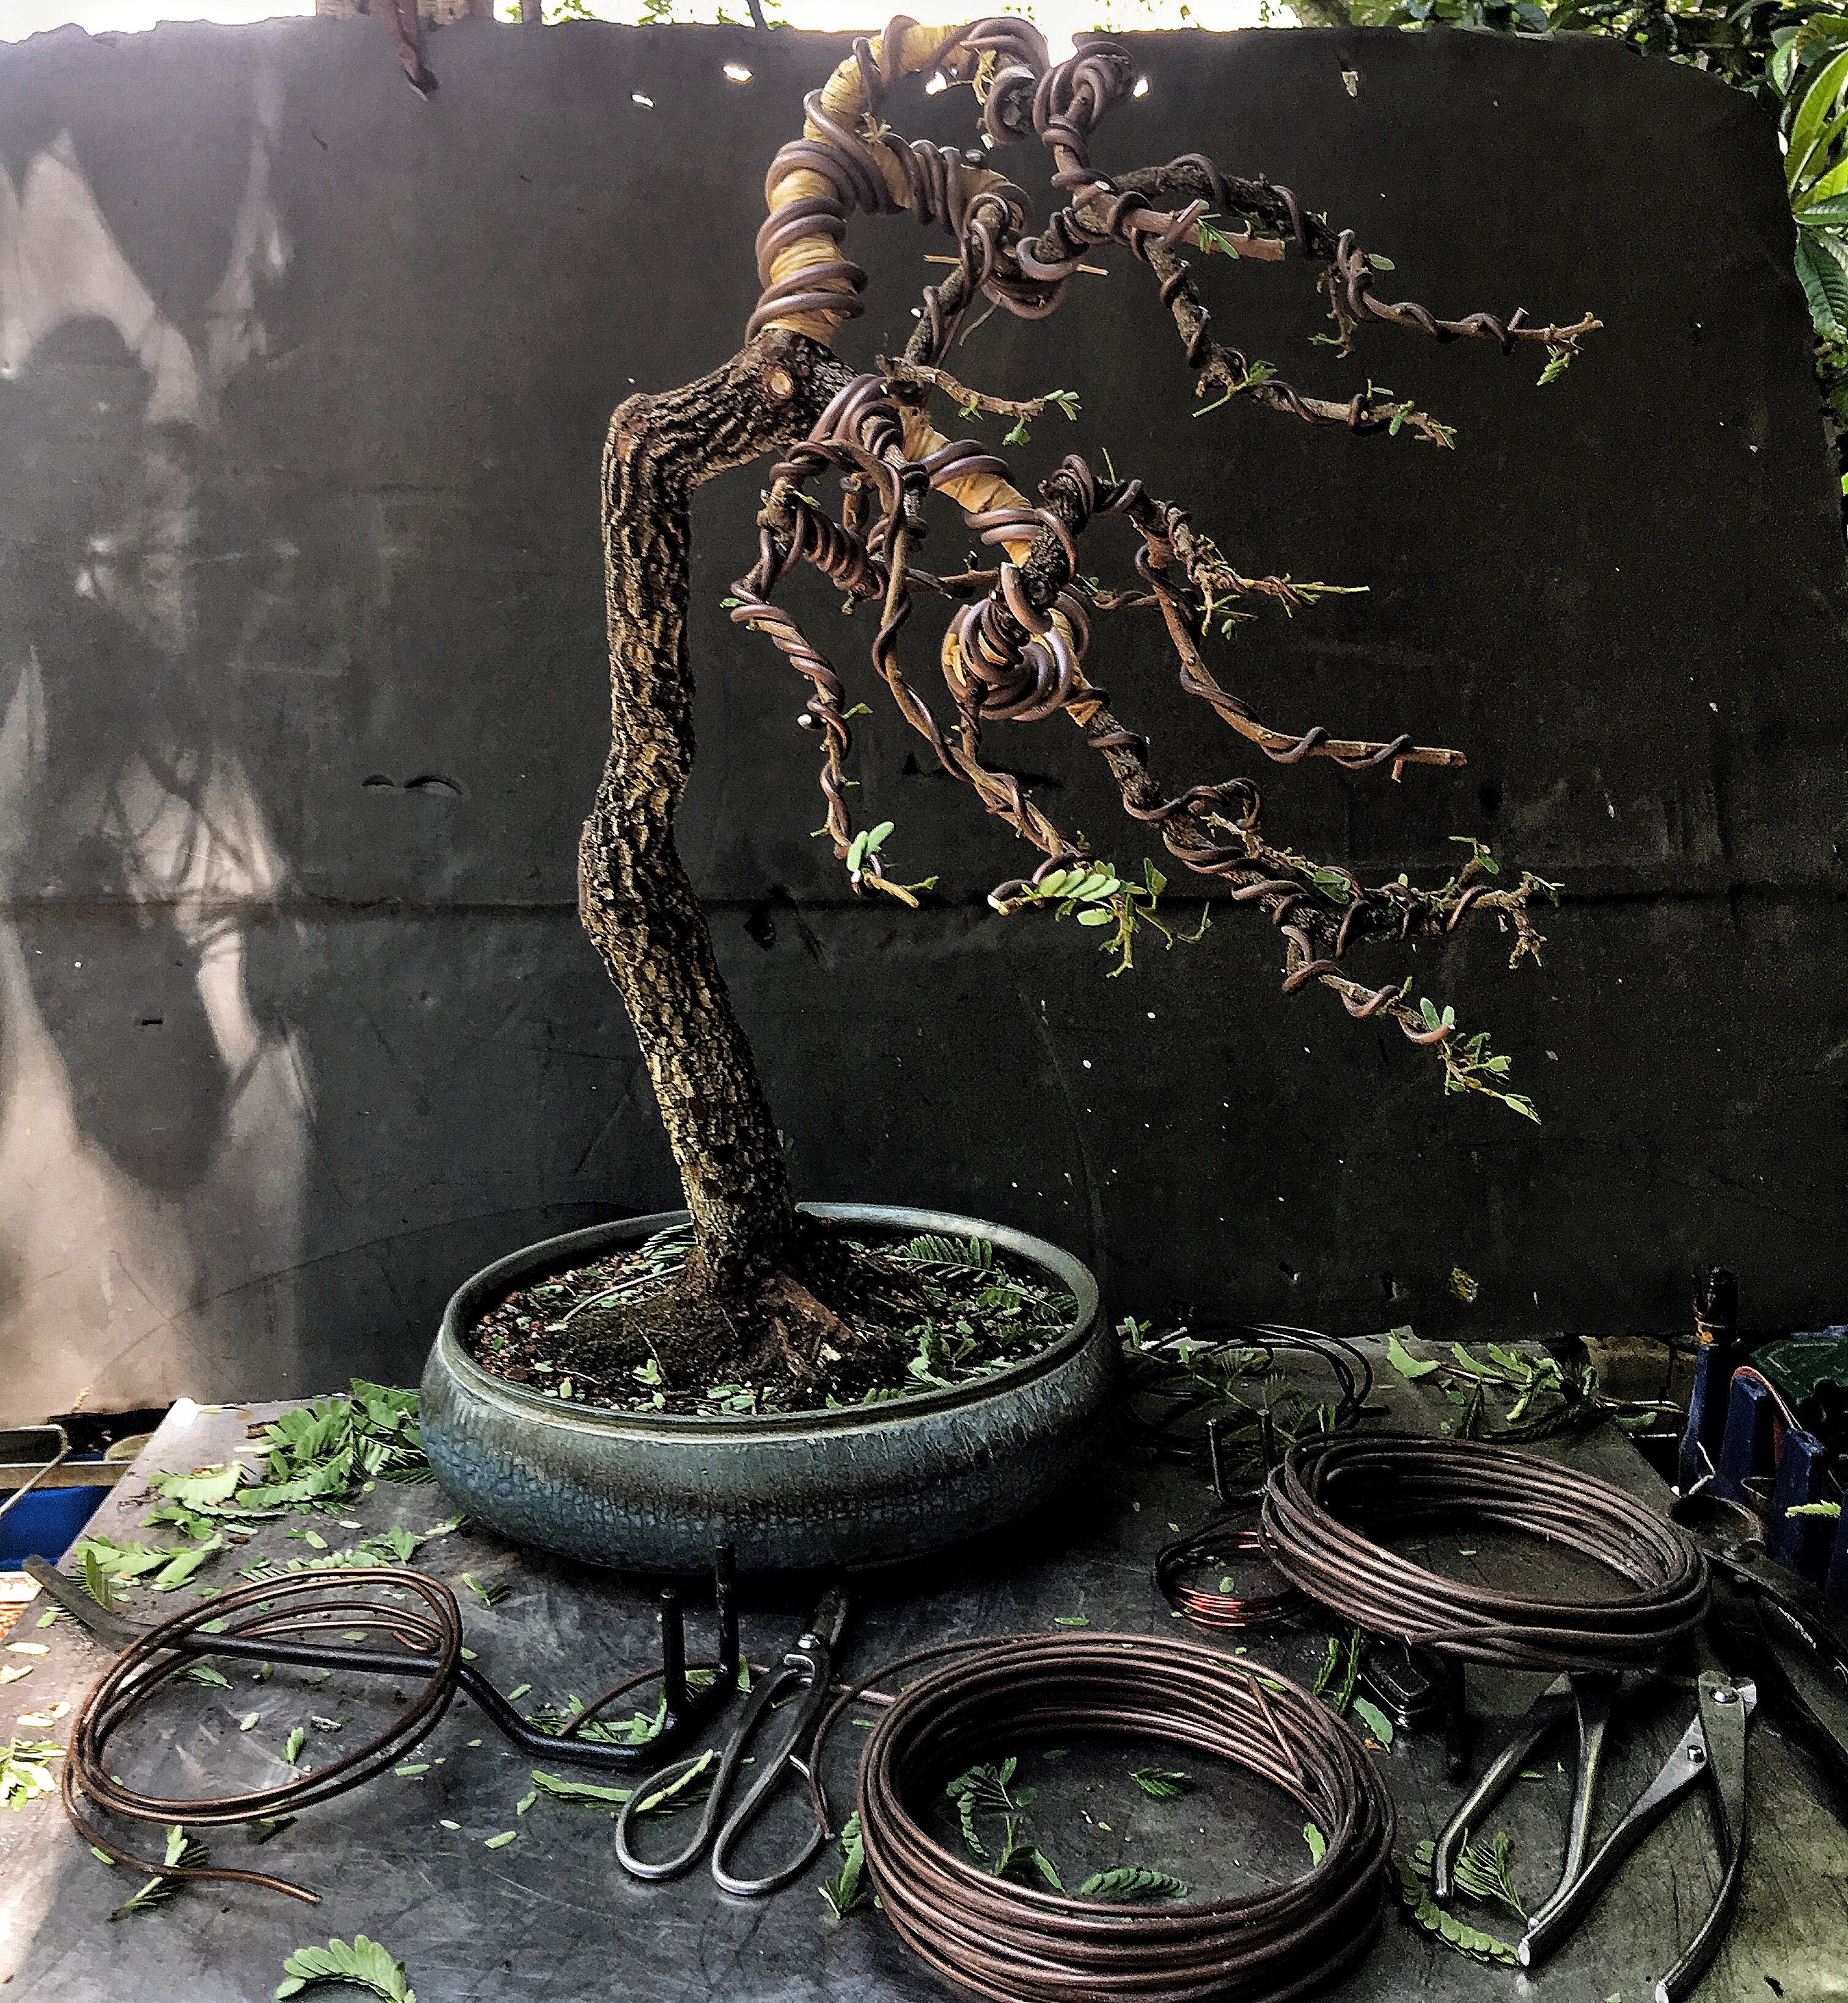
Let me move the tamarind to the “official” photo area so you can see the tree better. 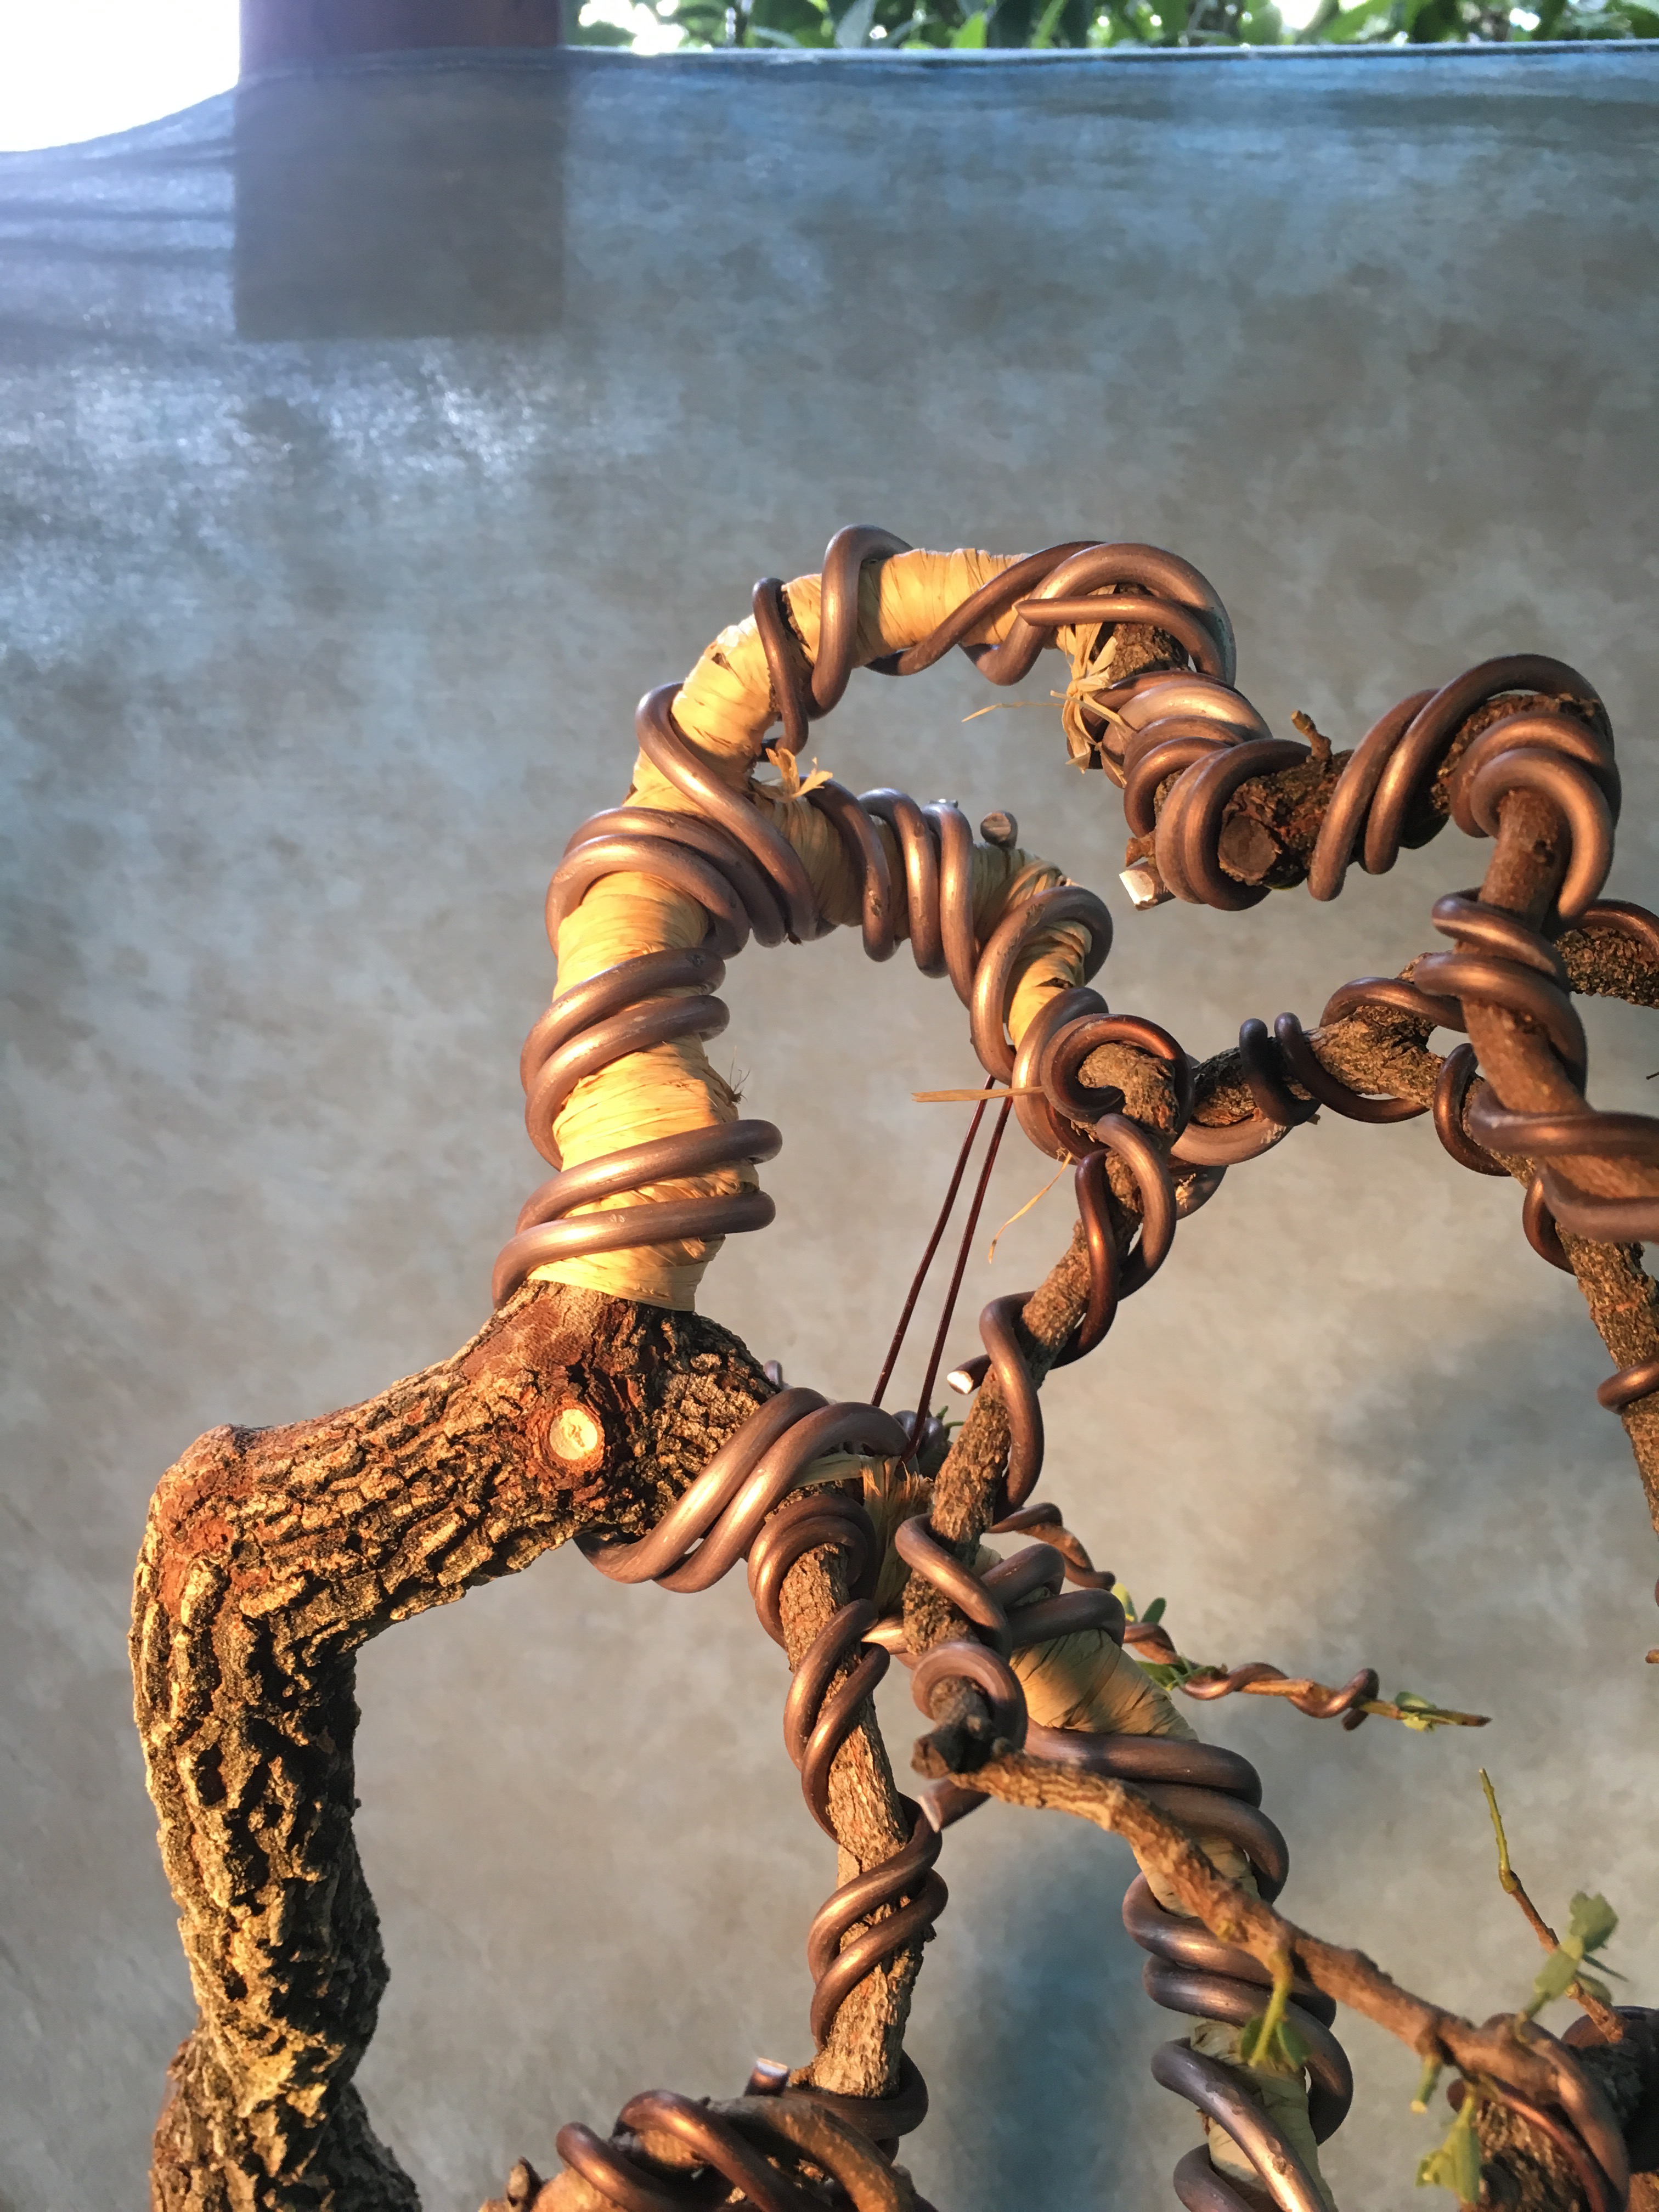 Closeups.
 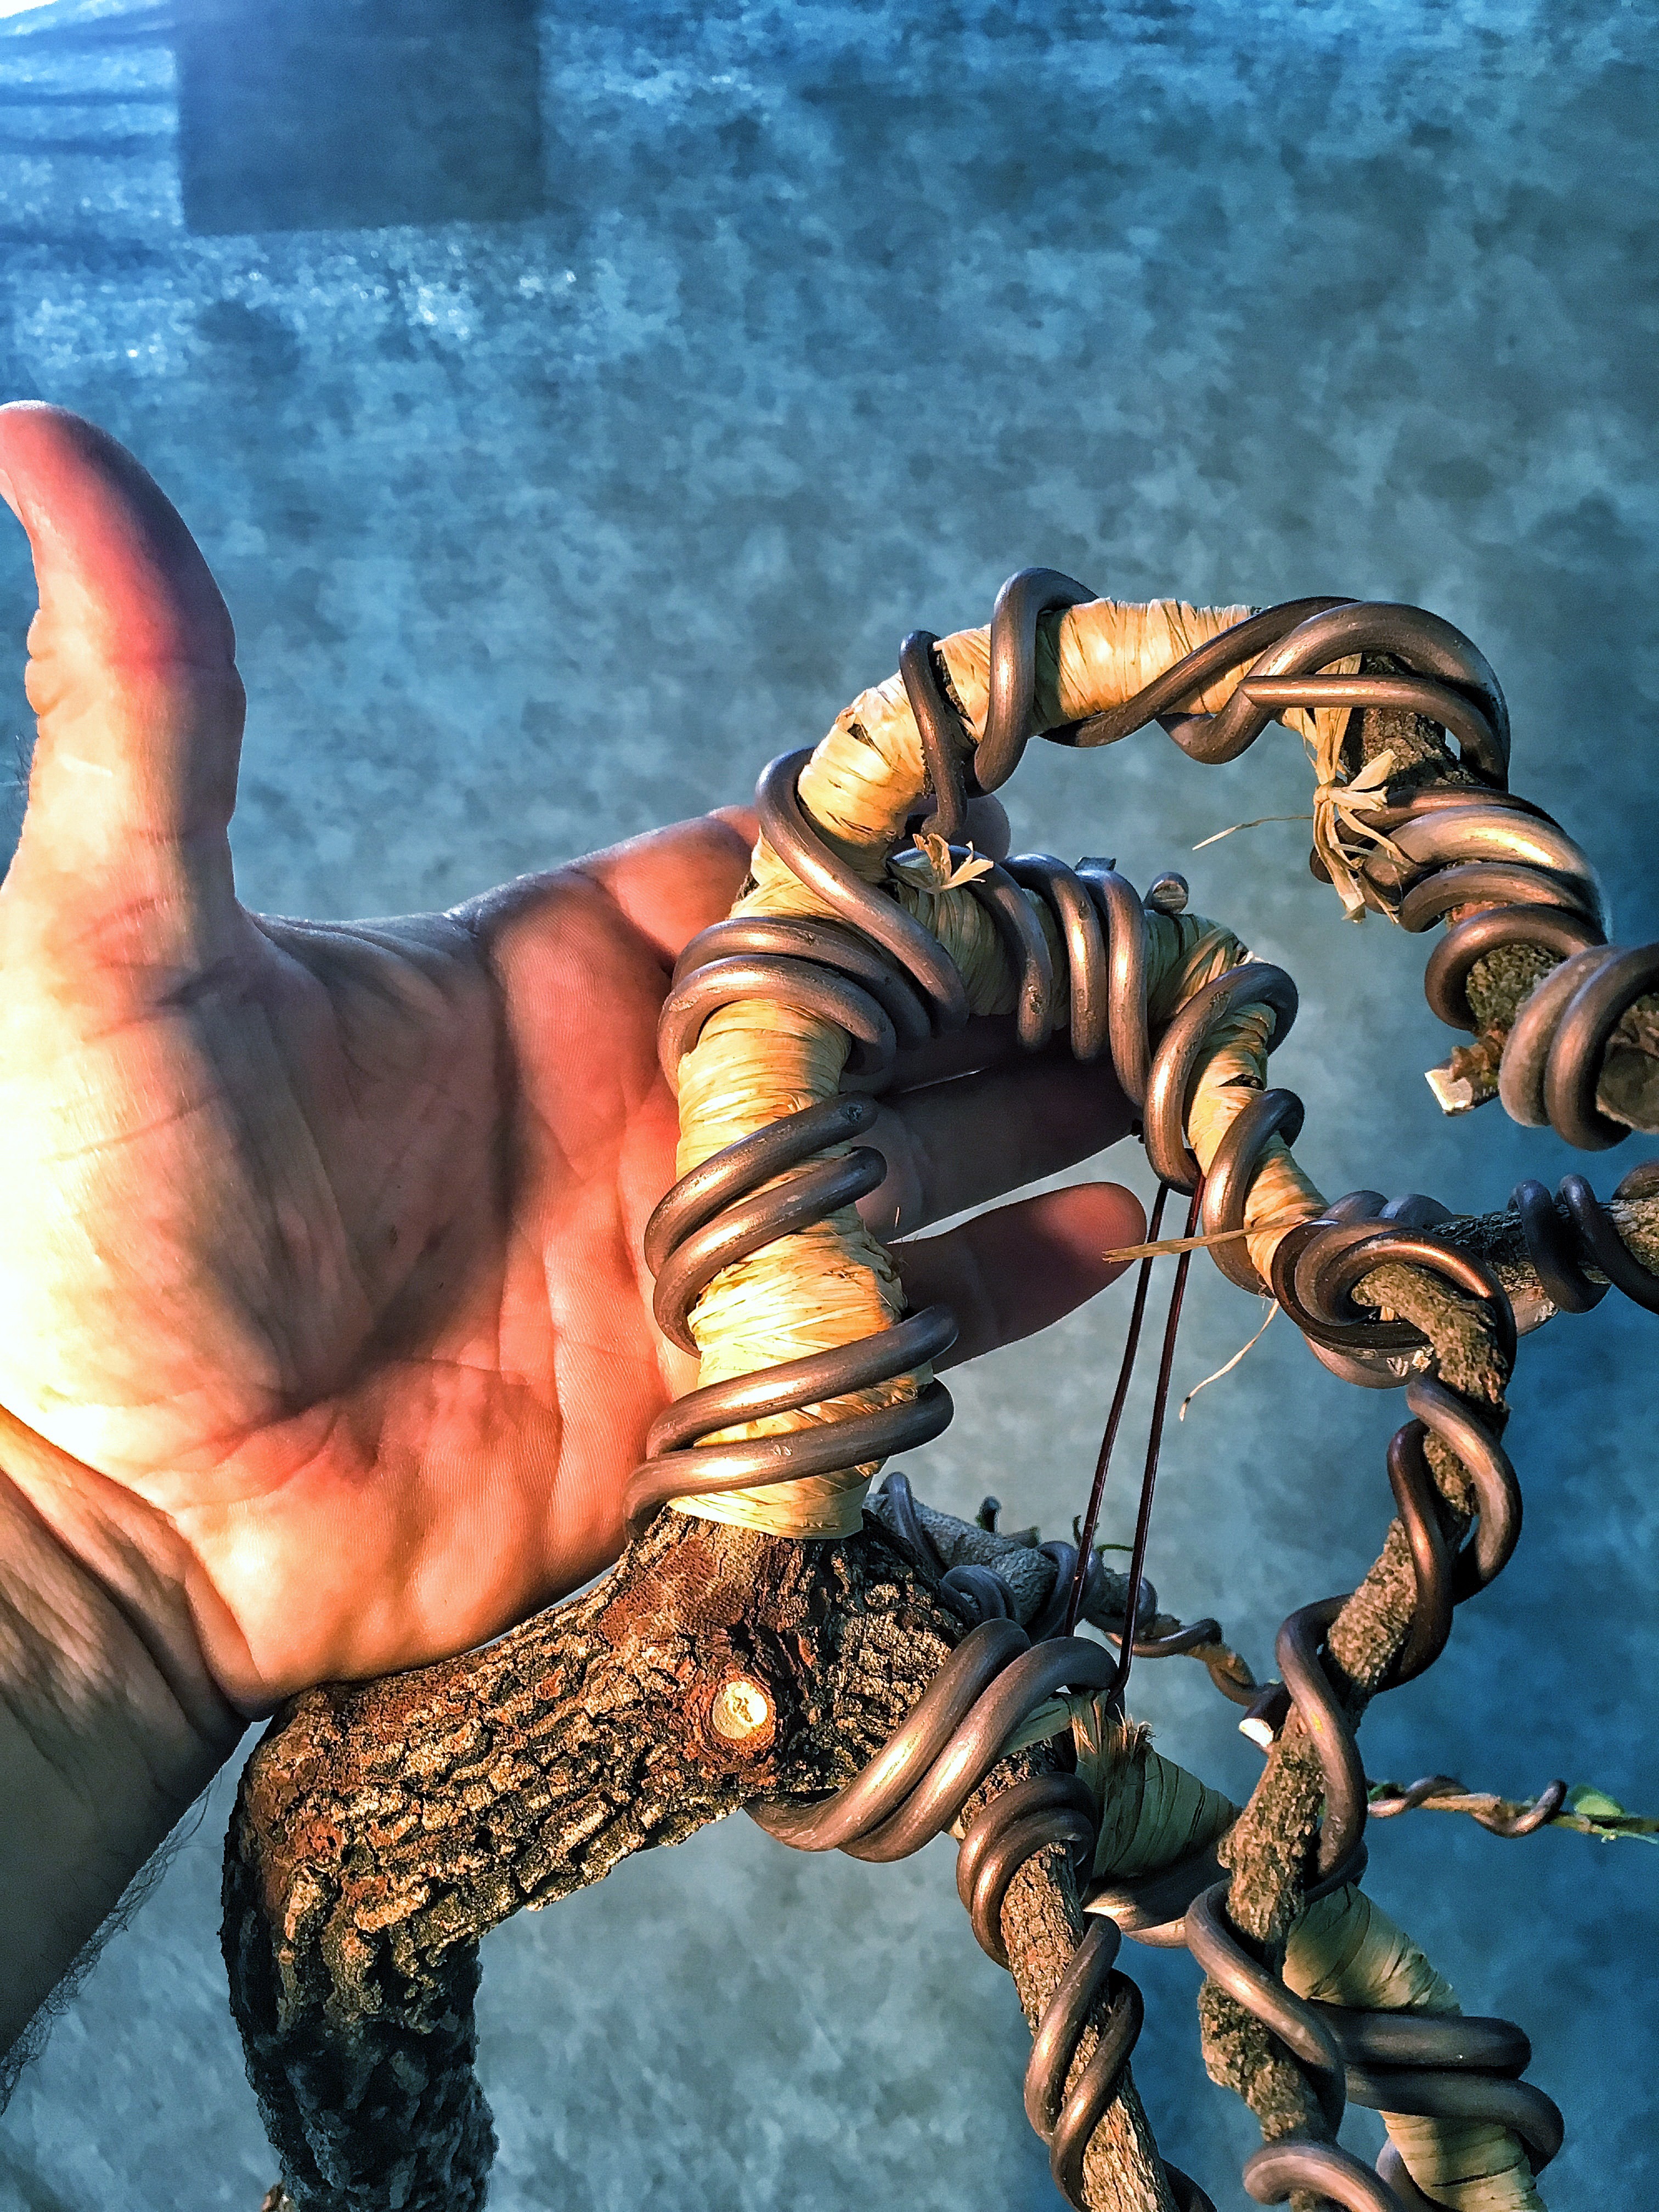 The before, to compare.
Side views: 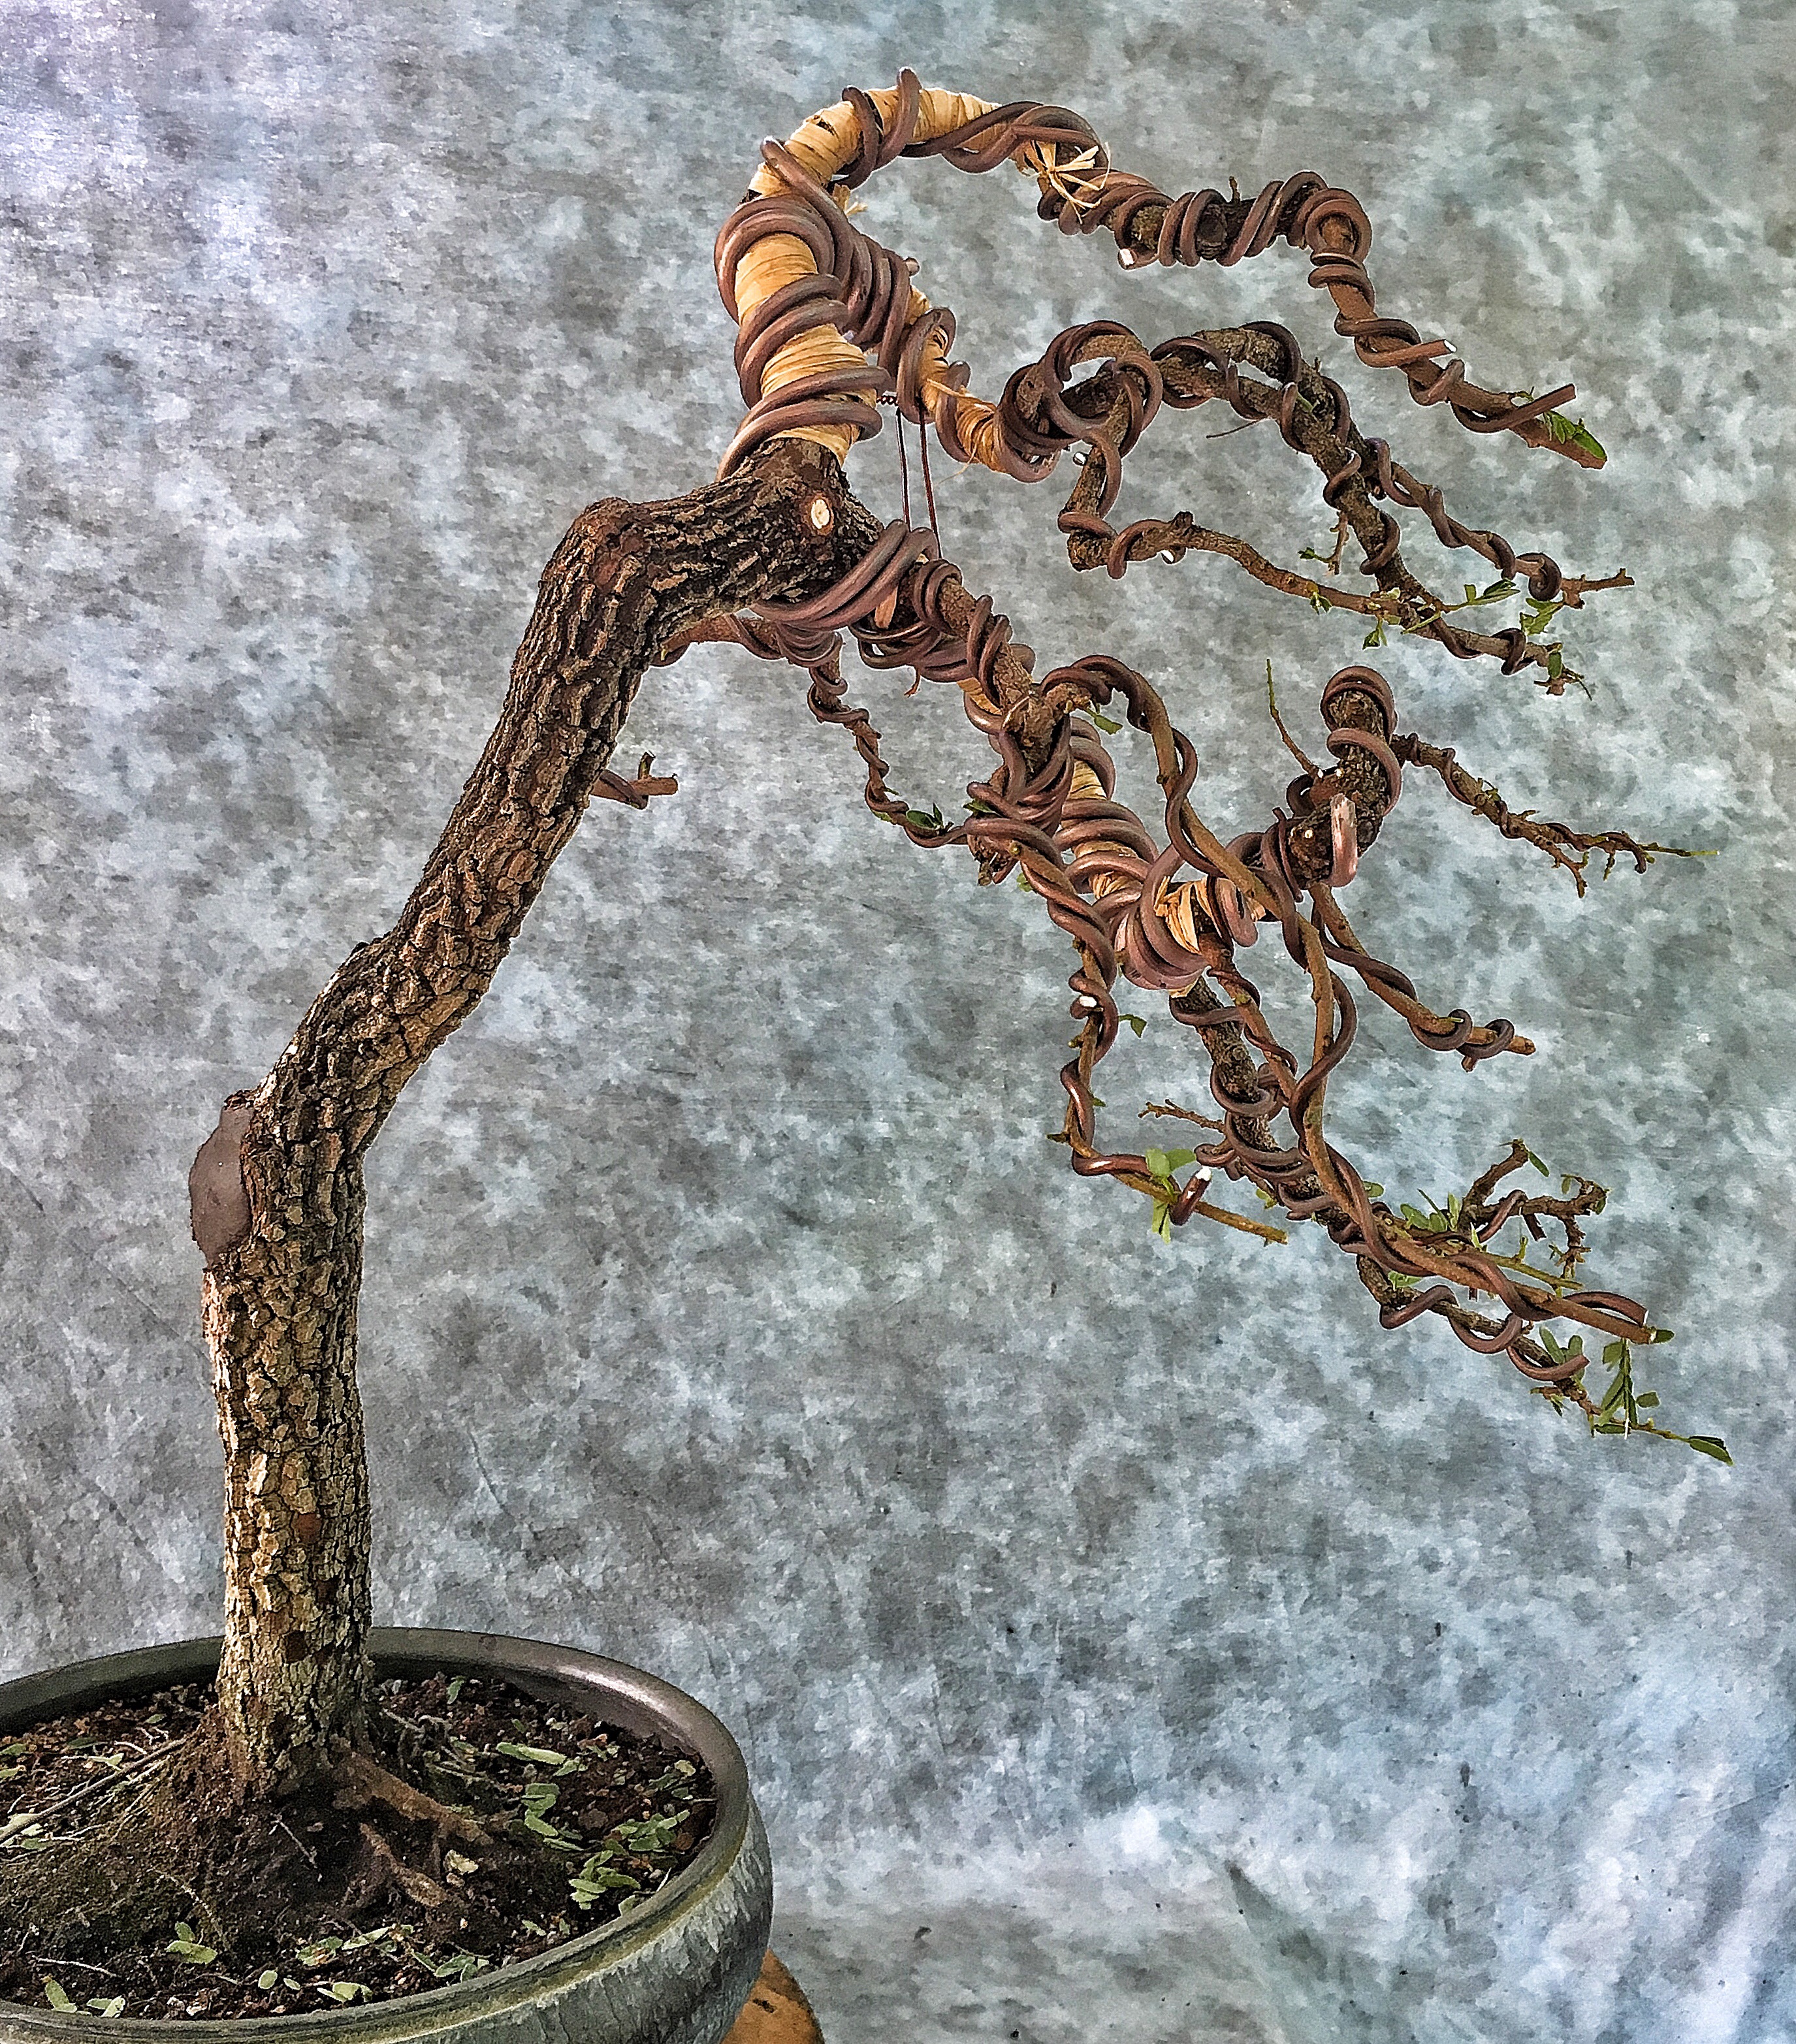
I’m thinking a round pot. It’s in a Taiko Earth oval now. 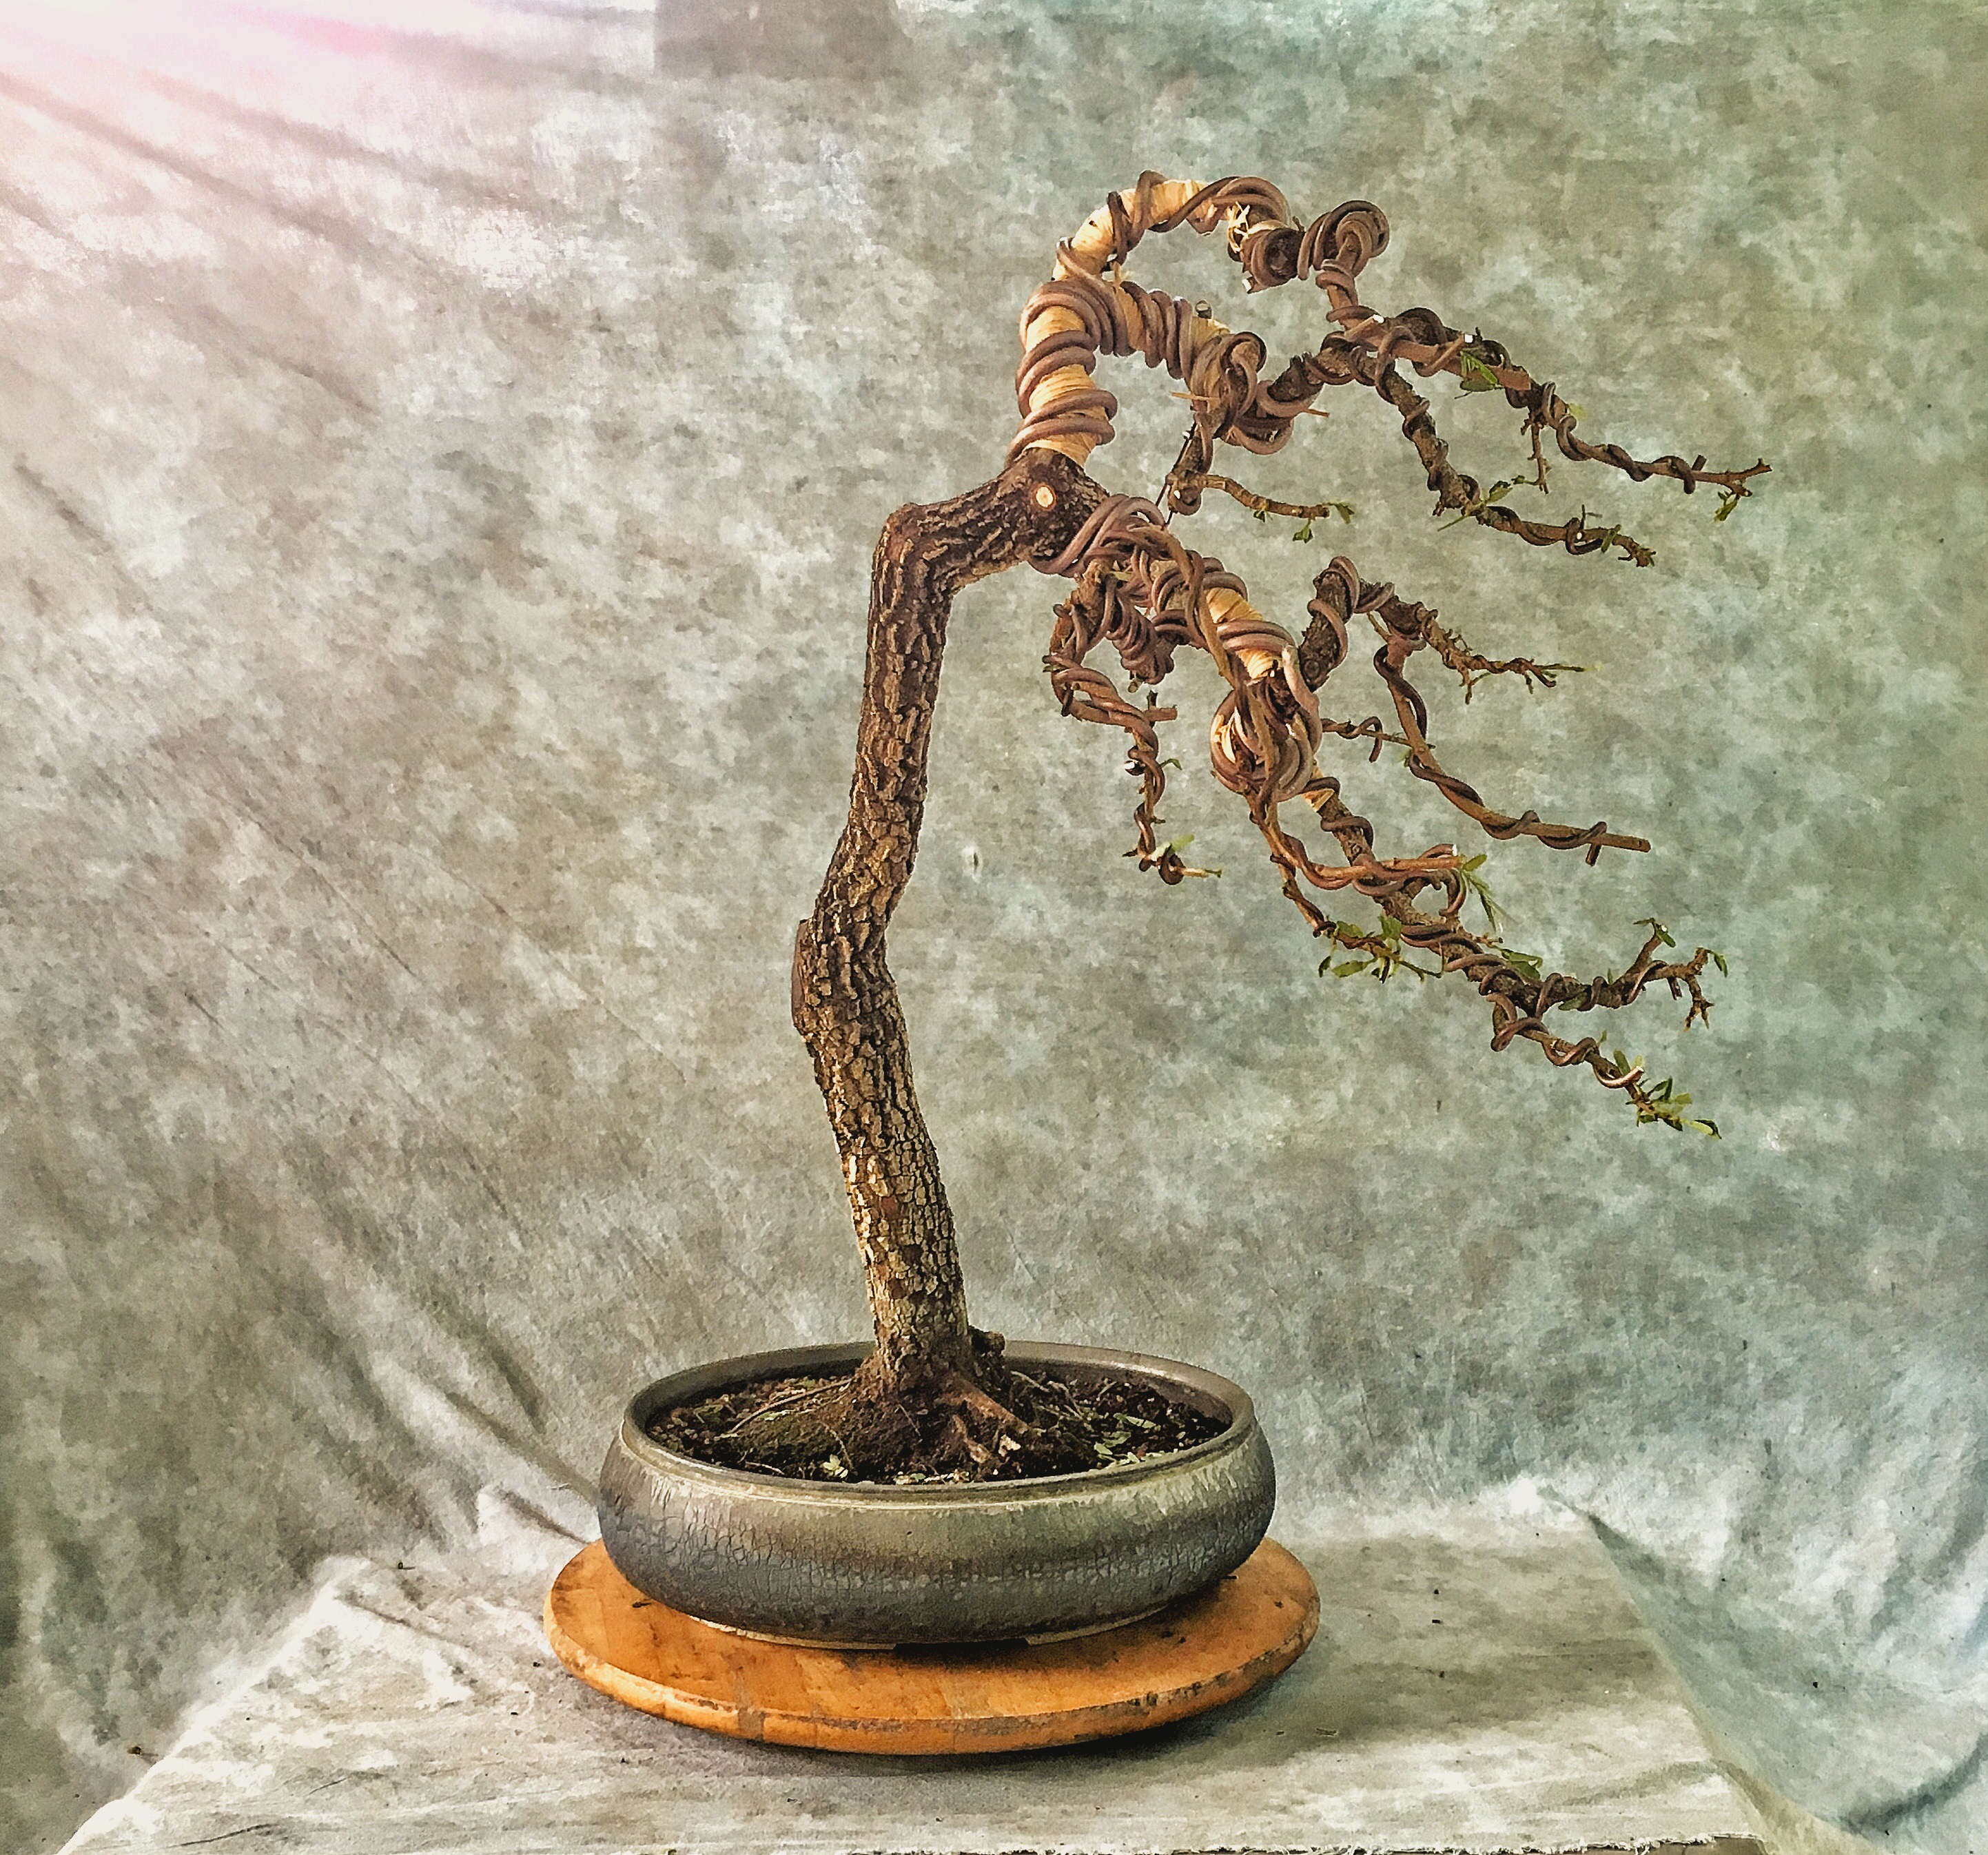
I still need to refresh the top soil level but you don’t need to see that. I’ll fertilize and keep it in the shade for a bit, I did some heavy bending and it doesn’t need the late summer Florida sun toasting the branches.
The before:
And the after: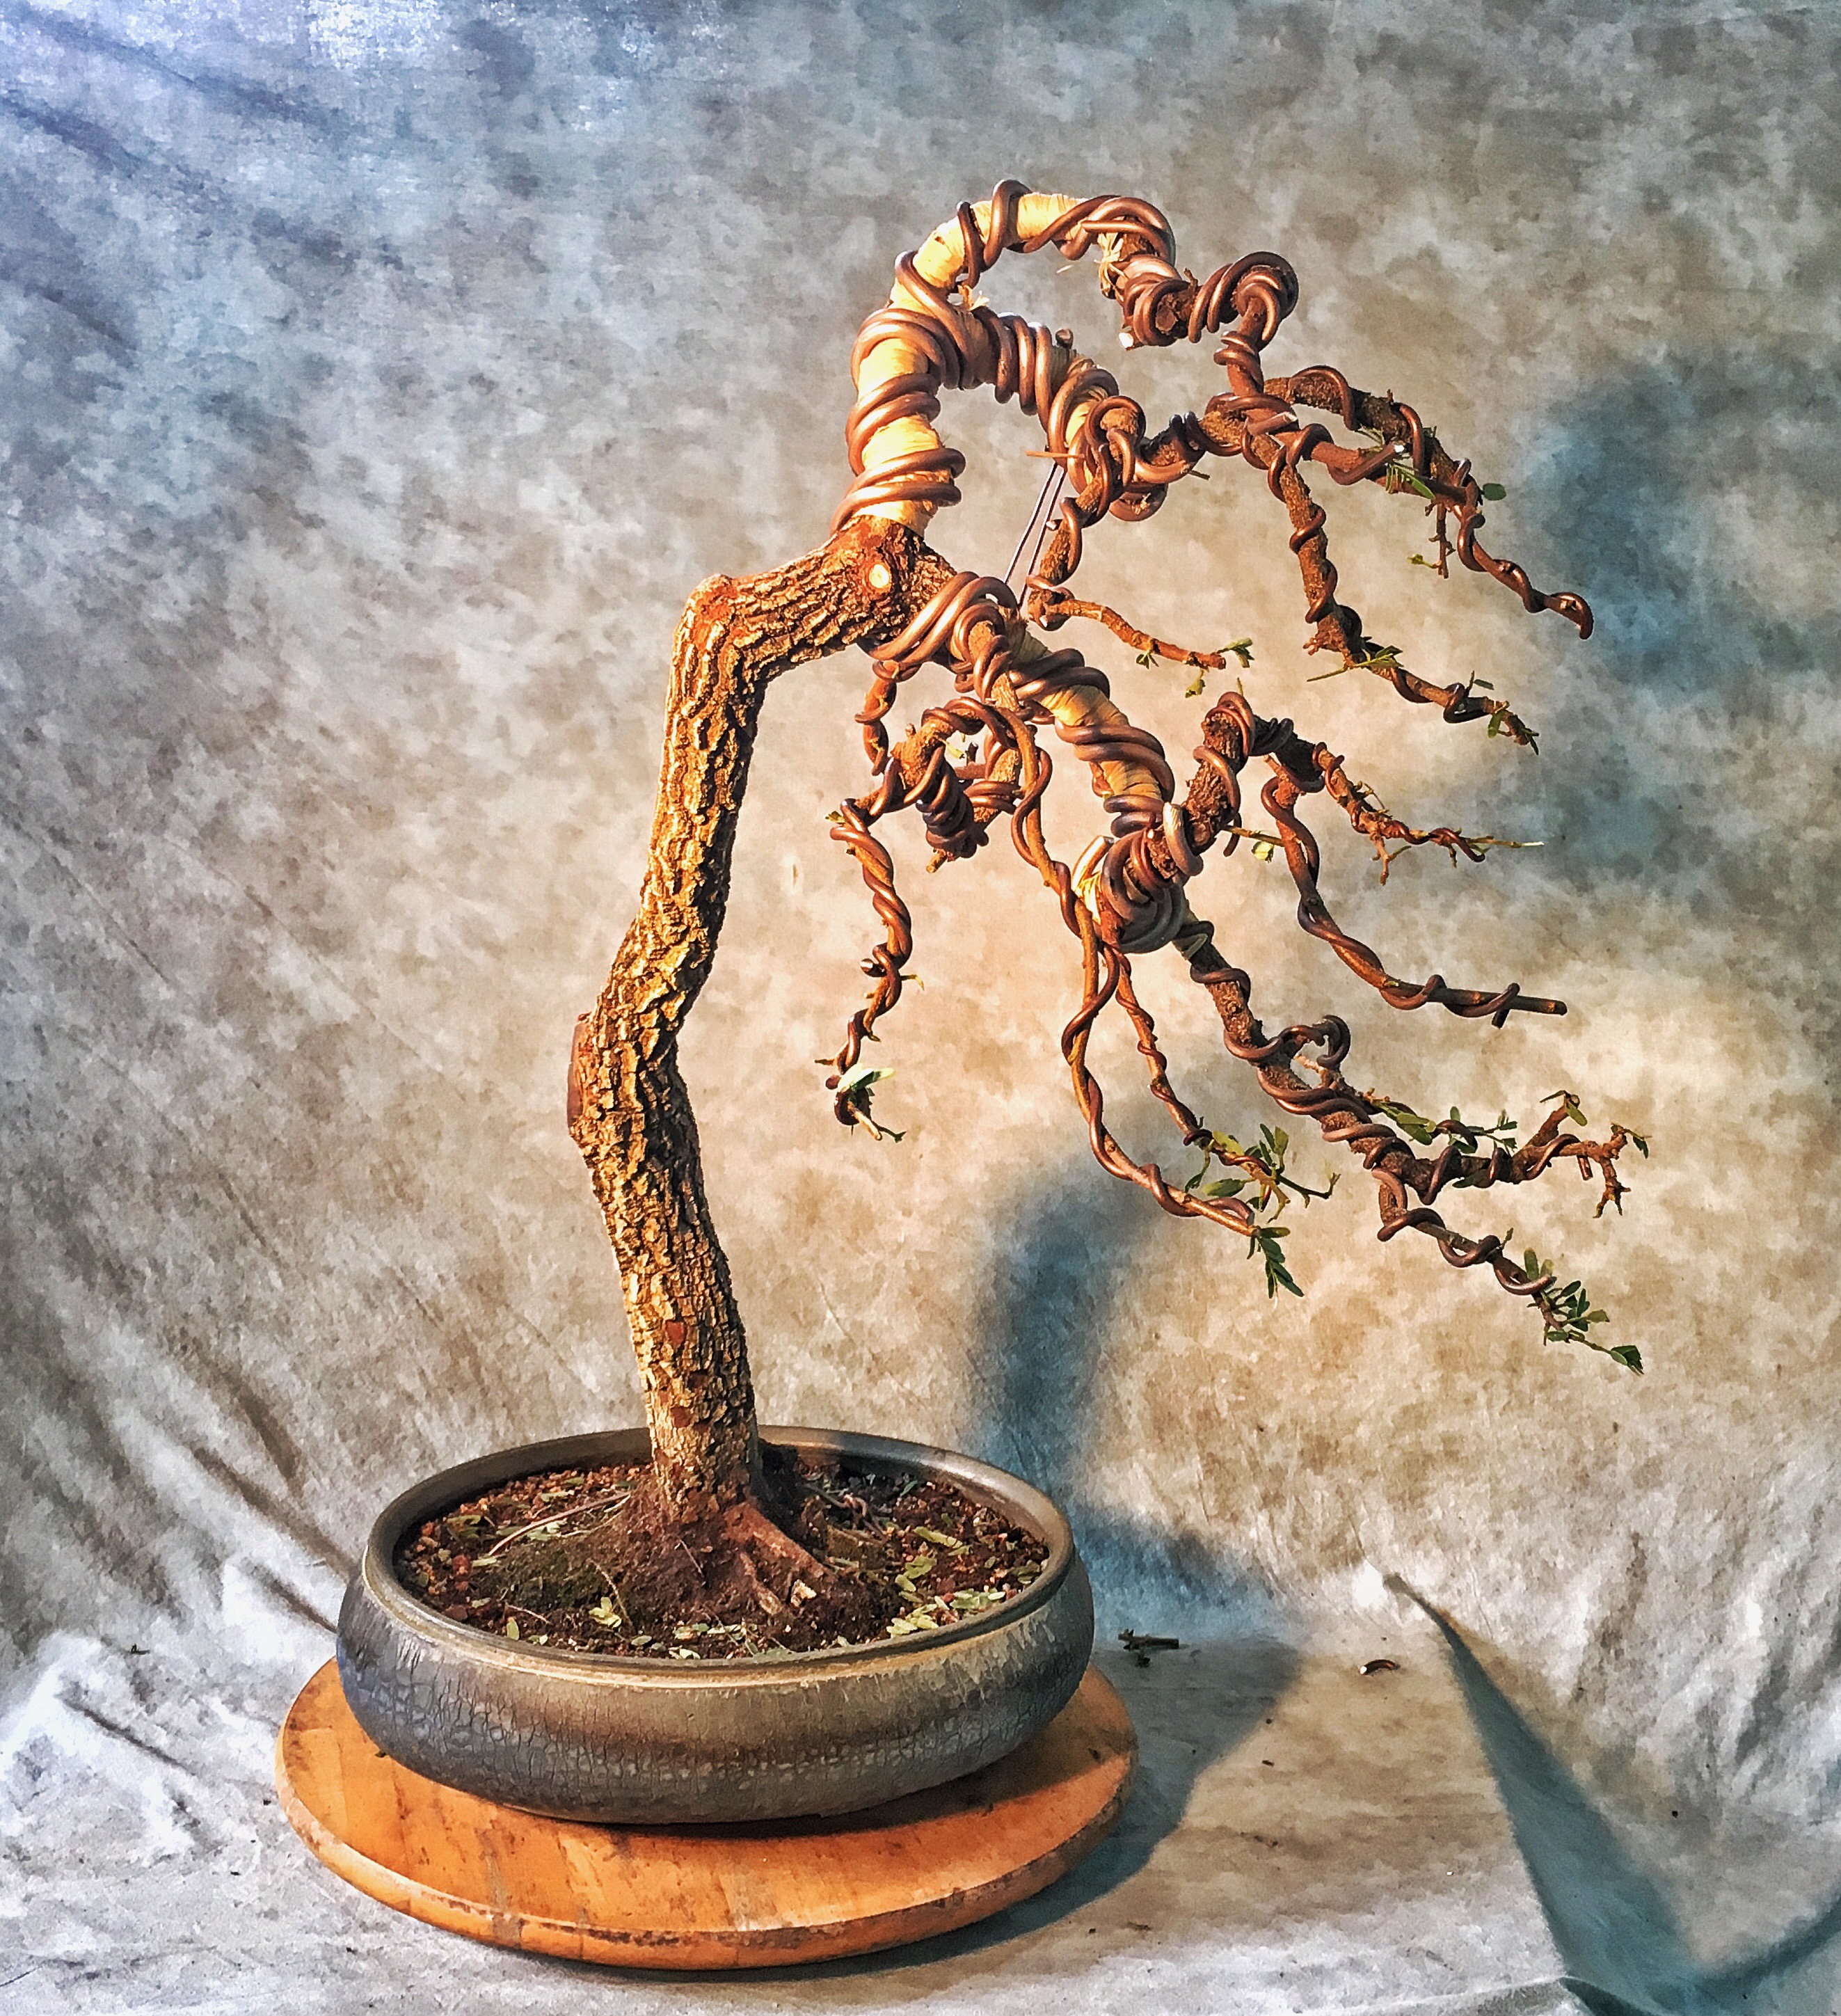 I enjoyed that. What’s next?
Make sure you like, share and subscribe to the blog and go over to my YouTube channel (Adamaskwhy) and subscribe there too. I’ll be posting the first long form video soon (maybe even tomorrow, we are close!) . I’ve also set up a Patreon account to help pay for materials and equipment so I can continue providing quality blog posts and videos for the bonsai community. If you like my work, please support it.
Thanks!

This is one of the coolest trees you’ve styled in a while. I can’t believe you got it to bend that much.
LikeLike
Thanks CD. Did you doubt me?
LikeLike
Most excellent my Sensei……………..your most humble Grasshopper…….
LikeLike
I’ve learned more from you Rick than I’ve ever taught you
LikeLike
What a wonderfully informative post Adam. Thanks.
LikeLike
Thank you Adam. I really enjoy your posts. Magnificent work on this Tamarindi. Did the branch heal?
LikeLike
Thanks! It’s only been a week since I did the work so probably not much healing yet
LikeLike