It is time to revisit the ficus retusa I chopped back on the july 24th post of the same name (minus the fancy “***” and the word “update”).
Sew.
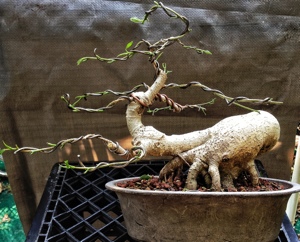
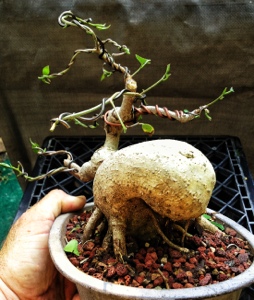
This is how we last left the tree.

Kinda rough. Looks dirty and scarred up. Maybe I should wear some gloves to protect my poor hands.
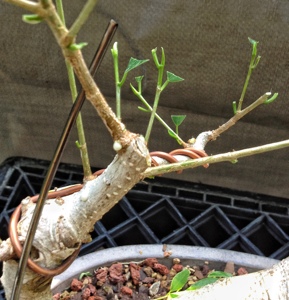
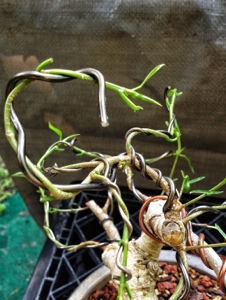
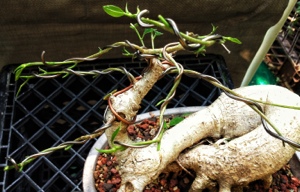
The tree has responded well.

I’ve defoliated it so I (and you) can see the new growth.

Lots of branching even though this species of ficus is not so excessive in its budding back-ed-ness. It doesn’t bud back so prodigiously. A lot. A great deal. A bushel and a peck. You get the idea.
In fact, this variety is known for dieback. Like a deciduous tree, it will dieback to the next bud.
I’ll cut it to the top branch.
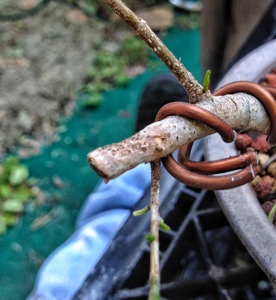
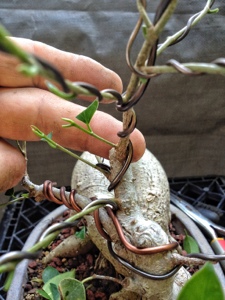
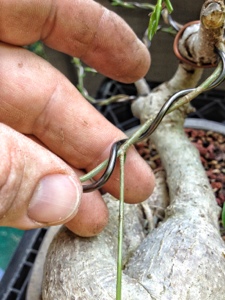
Now for some wire.
I am using somewhat heavy wire for these branches. I’ve learned that on a ficus, if you use the “proper” size, the growth will actually be vigorous enough to move the branch.
So
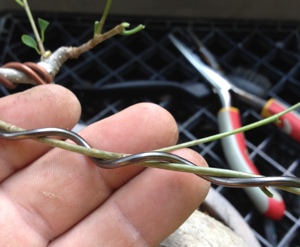
This

This and

This are appropriate sizes for this tree this early in the development.
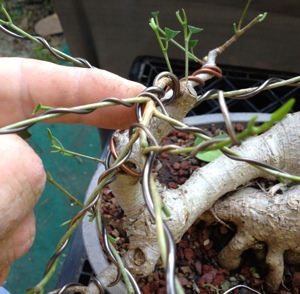
All wired. Now for the placement. This is actually the main purpose of this post.
There are many, many articles about the mechanics of placing wire on the tree. I’m not going to write about that.
I’m going to show you ( hopefully) how to style it. To move the branches and make them pretty.
Now that’s a word (style) that I believe could be used more accurately than it is now.
Style. In bonsai, style is usually thought of as the “form” of the tree that we are trying to mimic. Such as; cascade– a tree hanging off a cliff or, formal upright– a tree growing under ideal conditions, etc.
When I use “style” I mean like the difference between a Vlaminck sky and a Van Gogh sky. A Michelangelo sculpture or a Modigliani sculpture . A Kobiashi pine or a Suzuki pine.
The medium and form used is the same in each case ( landscape oil painting, marble sculpture of the human figure, bonsai pine trees) but the execution of each is different.
After we learn the rudimentary skills of bonsai (watering, fertilizer, wiring, soil), it is aesthetics that come next.
If your teacher is any good, he or she has been priming you with cues that have been molding your subconscious into “seeing” how a tree grows. Those “rules” about “number one branch, number two branch and taper,taper,taper etc” are actually lessons in design basics.
It should be noted, we are not copying actual trees. We are presenting stylized trees that have been simplified for design and horticultural reasons.
And each artist has his/her style and how one arrives at the “tree” is unique to that individual.
What I’m getting at is, when an artist “styles” a tree it’s not the act of choosing whether it’s an upright informal or a windswept, (although that does have something to do with it. But it’s the tree that decides the form; i.e.,the artist doesn’t make a straight, tall, tree into a cascade) it’s the techniques he or she uses to get there that is the styling.
Now, I’ll show you how I style something and try to explain why.
(the why is actually difficult. At this point I just “see” whats missing or in the wrong spot. I’ll refer you to two books on how the brain works and why this is.

And

When I’m “in the zone” the brain is working on automatic and I “see” what needs to be done. These books explain how the brain does this. Using SCIENCE!)
Back to the tree
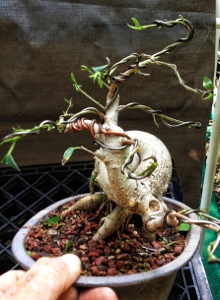
This branch is the leader. We are looking at the trees right side and the front is to your right.
The branch needs to go forward

Why? Well, when we grow up, our brains are “taught” that a tree tends to be bigger than us. So when we look at a tree, we tend to look up and it seems to loom over us. Since a bonsai is not a big tree, but we are trying to make it look like a big tree, we must use some visual design tricks to “fool” the brain. One of these tricks is; by leaning the tree forward, the subconscious is tricked into thinking the tree is taller (this works best if you are looking at the tree at eye level, which is how we should be looking at them).
Next step
Bending this branch horizontal.
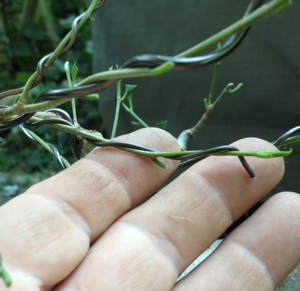
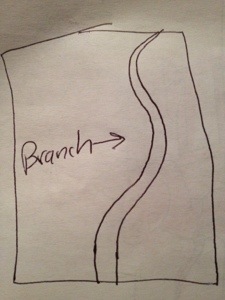
This one must be removed because the next bend will put it underneath and inside a curve. We don’t use a branch on the inside of a curve for two reasons. Number one, they don’t tend to happen in nature (tend to, I said)
Why? A branch growing on the trunk will force a tree to grow more on that side, therefore causing the trunk to bend away from the branch. And therefore it ends up in the outside.

Secondly, design-wise, a branch on the inside of the curve breaks up the line (interior lines keep the mind occupied ) and confuses it, whereas a branch on the outside keeps your eye from wandering and contributes to the composition.
So, the principle is, if we bend a big branch, it will “look” better if a smaller branch is on the outside of the curve because, even though we don’t know consciously, our subconscious knows that a tree grows this way.
Conversely, if we put curves in a branch without secondary branches it will actually grow those curves out.
The flow of water and nutrients will go the shortest distance first, causing them to grow faster.
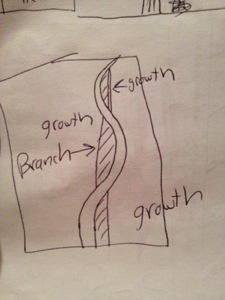
The shaded areas represent added girth.
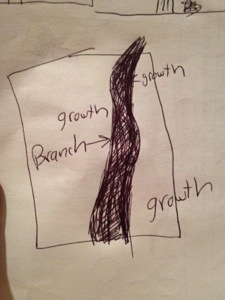
Therefore, with time, the bend is softened. This works with extreme bends more so. If you are wiring a whip to shape and intend to let it grow for years be more radical in the bend.
You will see this on the bigger, older S-curve elms or maples. But, unfortunately, if there isn’t an anchoring branch on the outside of the curve, it looks forced and artificial.
I’ll bend the branch here, per that last 200 or so words and 5 or 6 pics.
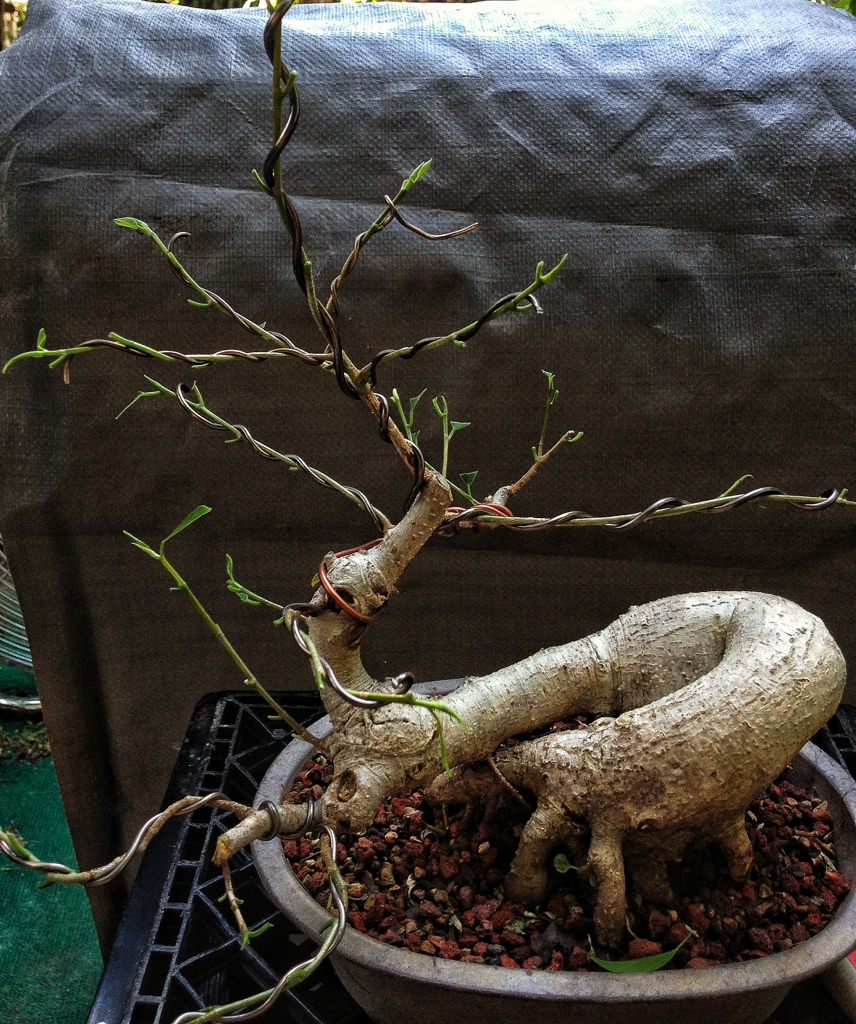
So, following my advice, I’ve arranged the branches and the leader. This is the very top. I’ve actually bent it backwards and down in a counterclockwise twist. That may seem contrary to what I said earlier but this maneuver will serve two purposes; one, it blocks out the space and, two,after the leaves fill in, adds to the silhouette.
There it is. The top will be lowered eventually. A bit. Just need a branch right ……. there. You see where I mean, right?
Top front.
You can see how it leans forward but then the top comes back to balance it.
That’s a sexy view. Baby got back!
The line of the leader travels forward, up, forward and back. It’s important to have up and down movement as well as side to side.
The art of bonsai is a 3d art, so any depth you can add to it will make your tree better. And more believable.
Think of the trees canopy like its the helmet-hair of your local news anchor. Open on the from to show off the trunk but engulfing the tree in the back and framing it.
But (to continue the metaphor) instead of a jumbled contradictory mess on the inside, have a well ordered, clean and coherent structure holding up the helmet.
Well, hopefully I’ve explained a bit about styling. I fear I haven’t very well.
It may be one of those activities that require one to be there listening to my bad jokes and funny speaking voice.
( I will be at Erik Wigert’s open house again this year doing a demo click here for details. Then you can actually hear my bad jokes in person. And see a real rockstar

Look at that badass!)
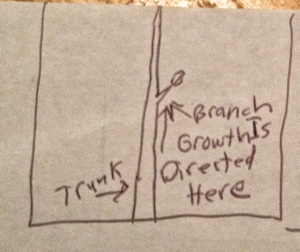
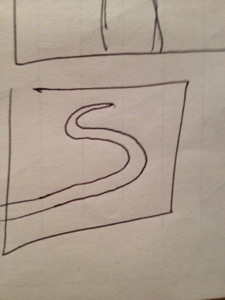
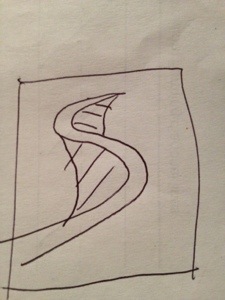
Here’s a sketch of what direction I see this tree going in

With more leaves and in color of course.
As always, I’ll post updates as the tree matures.

Hello to all, because I am truly eager of reading this weblog’s post to be updated on a regular basis. It includes good material.
LikeLike
This tree will make a small appearance in the next post
LikeLike