Well, it’s kinda like this..I was thick in the moment, working on my trees, and I just grabbed this ficus and chopped it back without thinking

I got it at the BSF convention to use as the subject for a progression series on the blog.
So here is a pic from the convention highlight,
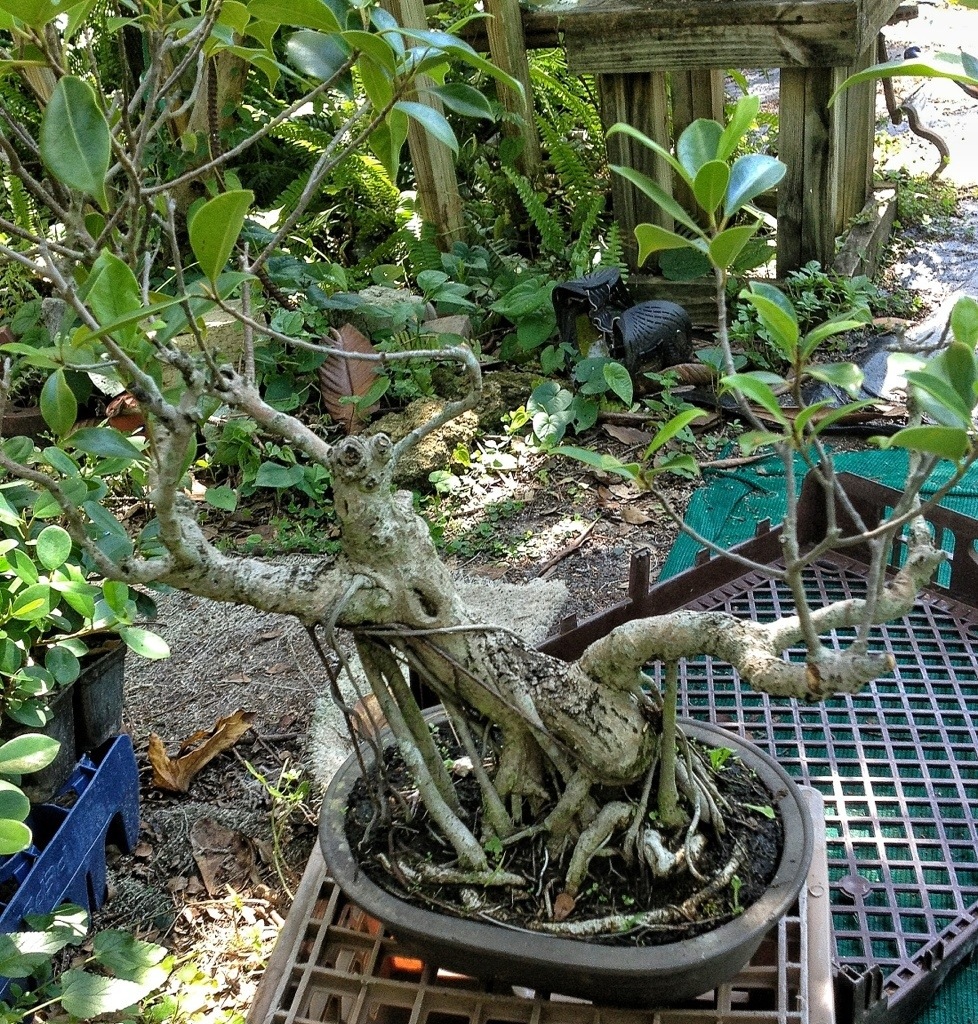
not a very good pic, I admit, but it was just a small detail of that post (click here to read it).
So thats all I have for a before pic. I promise that all I did was chop the tree back

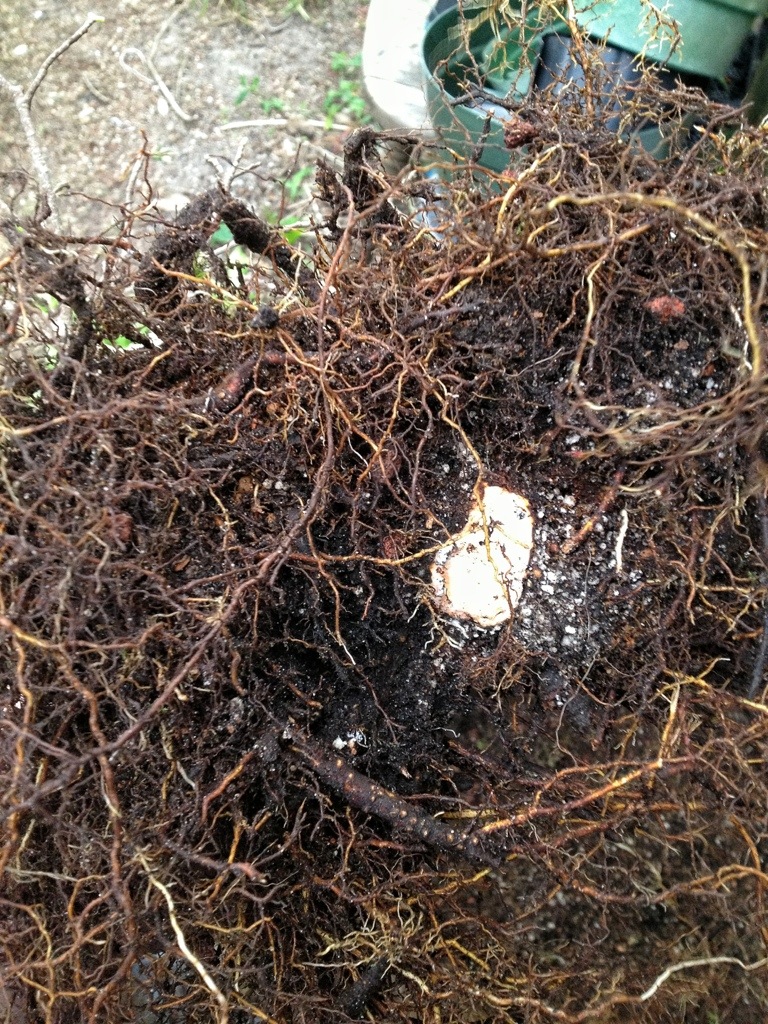
and comb out a few roots

By now you’re wondering about the title and what post was actually part one though, right?
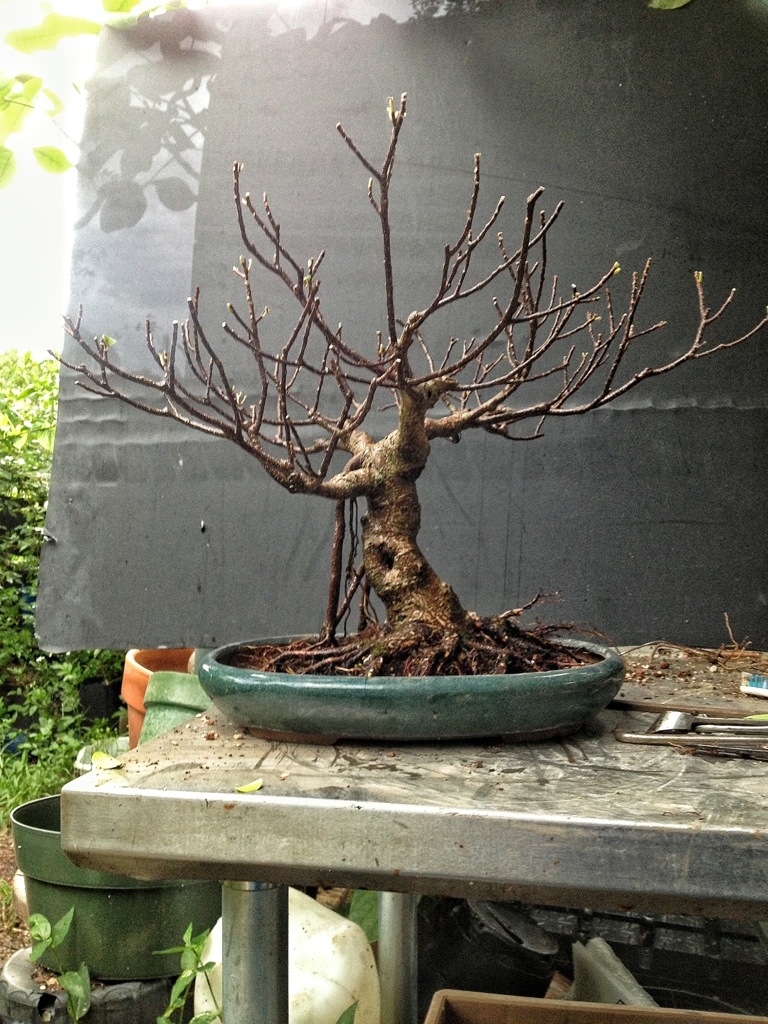
Part one was on this tree,

which we saw last at the end of September. I plan on working on it too.
So what do I need to do to the first tree to rejuvenate it?
The first thing I did already: I chopped it back.
Next I need to cut the roots

Wait, you say, you remember the previous post with this name (click here to read it) and what I counseled then was restraint and patience.
Ah, dear readers, that was on September 26, ficus are not growing in September.
It is now the end of June, I can toss a cutting on the ground and it will root.
Welcome to the “Wild Abandon Bonsai Show”; throw caution to the wind, burn your bras and hold onto your concave cutters!
Welcome to the Jungle, Baby!
Comb out the roots and straighten them (mostly)

The visual nature of this tree can allow for some crossing roots.
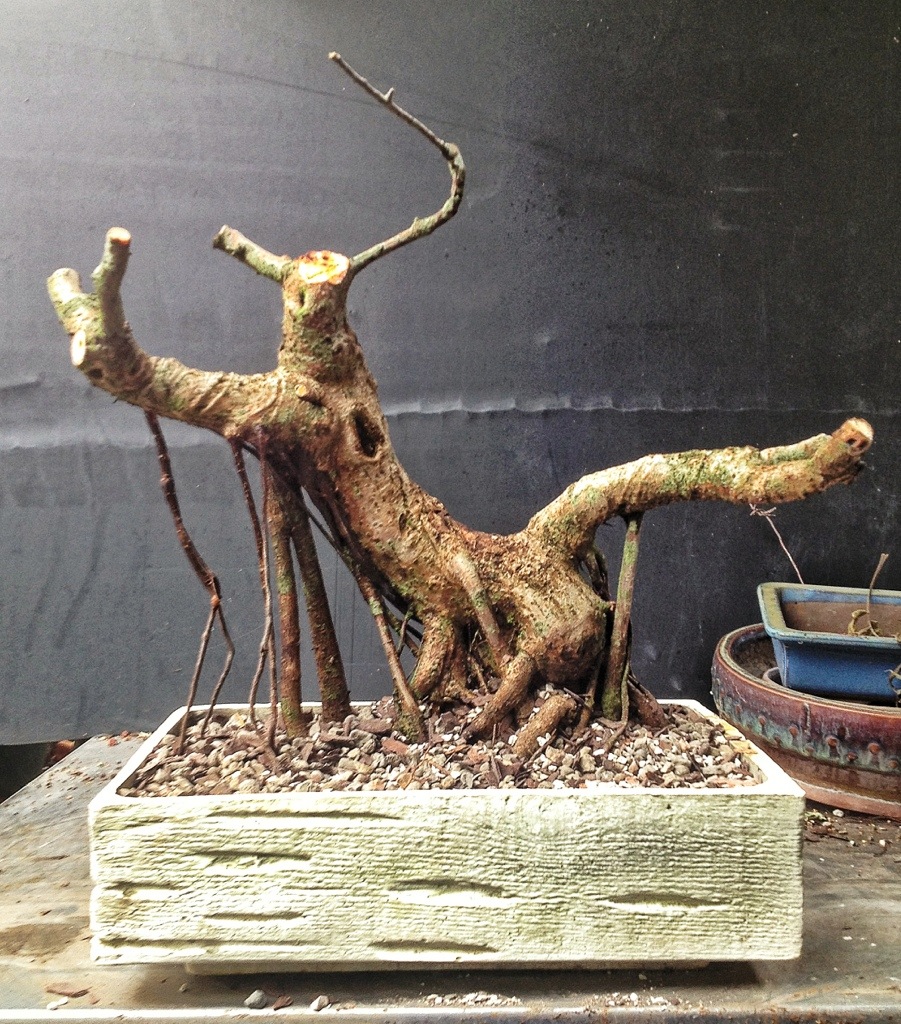
Here’s its new pot

Which looks awfully familiar.
The one detail I want to be specific about is the correct placement of the aerial roots.

I believe they should be arrow straight into the ground. Design wise, the straight line contrasts with the undulating and organic shape of a ficus and shoots your eyes to the “ground” and frames the trunk.
Horticulturally that’s how they grow in nature.
A little wire

And we have straightness

You may be wondering about this soil

The mix is Diatomaceous earth (white) expanded shale (grey) and pine bark (pine colored). I had a gallon of it left over from my soil post (click here) and I decided to use it.
It was an experimental mix that I put together for purely aesthetic reasons.
We will see how it works horticulturally now too. It’s a mix where it should be easier to find the components locally. Red lava is hard to come by.
Ok, now the star of the show: ficus microcarpa “retusa”!

It actually looks kinda boring, right?

Not really a good nebari either

Why am I bothering with it?
Well….I know the ending now, don’t I?
Lets proceed:
instead of defoliating I’m cutting the branches back

At this point I need to push the growth in and get the tree to bud back.

Whoops, missed a leaf!
Got it.

If you’ve read my styling posts before, you’ll remember that I like to repot first and then wire and place the branches.
This is backwards of how most people do it.
So, contrarian that I am, let’s repot

One thing to consider: if you are trying to grow a tree and grow branches, its usually best not to detail wire the tree (you can place primary branches and such) until its in a bonsai pot. Putting it into the smaller pot slows the growth and you won’t be rewiring so often (and you won’t get the unspeakable sin: wire scars). Conversely, a tree in a big pot is easy to forget and wire left on too long will cut in badly.
As always, cut the bottom roots directly under the trunk
and comb and trim enough so you can fit it in a small pot.
And, wow! Look at the base

Pretty nice, huh?
Now, it seems I never have the right pot

People ask me all the time if I sell pots.
Usually I say
“No, I’m not a pot dealer. I only buy”
Choices, choices, choices…
How’s this one?

No, not bad but not good.
This one?
Looks good but, to the left I think

And some soil

Now, it’s the time of the Preacher.
When I showed restraint in November, it was in anticipation of this: wire the heck out of it.
My arsenal

Every branch (well, I missed one or two) is wired.
The result:
Blam!

It’s a modest, mature looking tree with a good nebari (base) and good branching. It has a few aerial roots but not flamboyantly so.
It’s a good tree.
Side by side comparison of our two trees

I suppose I should draw a picture of the first tree for your perusal and enjoyment.
How about a lesson? Sure.
First I take a photo
Then do what is called a figure sketch (this should take 15-30 seconds)

I usually start at the pot and then fill in the tree.
Next I give some depth

By defining what’s in front or behind.
Then some shading

(I was taught that a pencil is a linear drawing tool so that’s why my shading consists of lines and not smudges.)
The next step is pure make believe (although I hope that it will grow this way)
I put some branches (at this point you should have this song running through your head. From Simon in the Land of Chalk Drawings)

And then I erase the guide lines and darken those I wish to keep.

Then I add leaves

And… almost done

A few finishing touches and my signature

That grey turd looking thing in front is a kneaded gum eraser on the tip of my pencil.
And as you see, I photoshop the pic of the finished drawing a bit too. That’s what’s called “color correction”.
Not bad for an hours work: two trees and a drawing.
Time to relax

See ya’ next time.
Maybe I’ll work on some strangler figs. That should cause some controversy.

Adam, great post! One of your best yet and in a couple of hours and extra time to relax with that much deserved beverage! Thanks for your greatness! Artist and good man you are!
LikeLike
fantastic post (again). thanks for the drawing lesson. definitely earned your bottle of the dog.
LikeLike
Can’t wait to see the large ficus after it develops! Not usually a fan of the banyan style roots – but it really looks good on this tree. I’ve been using that same soil mix for awhile now and so far so good. I use O’Reilly’s Optisorb for the Diatomaceous earth. It seems to have larger particles than NAPA so you don’t lose as much after sifting.
LikeLike
I’ll have to check it out. Thanks
LikeLike