Whoa?! What?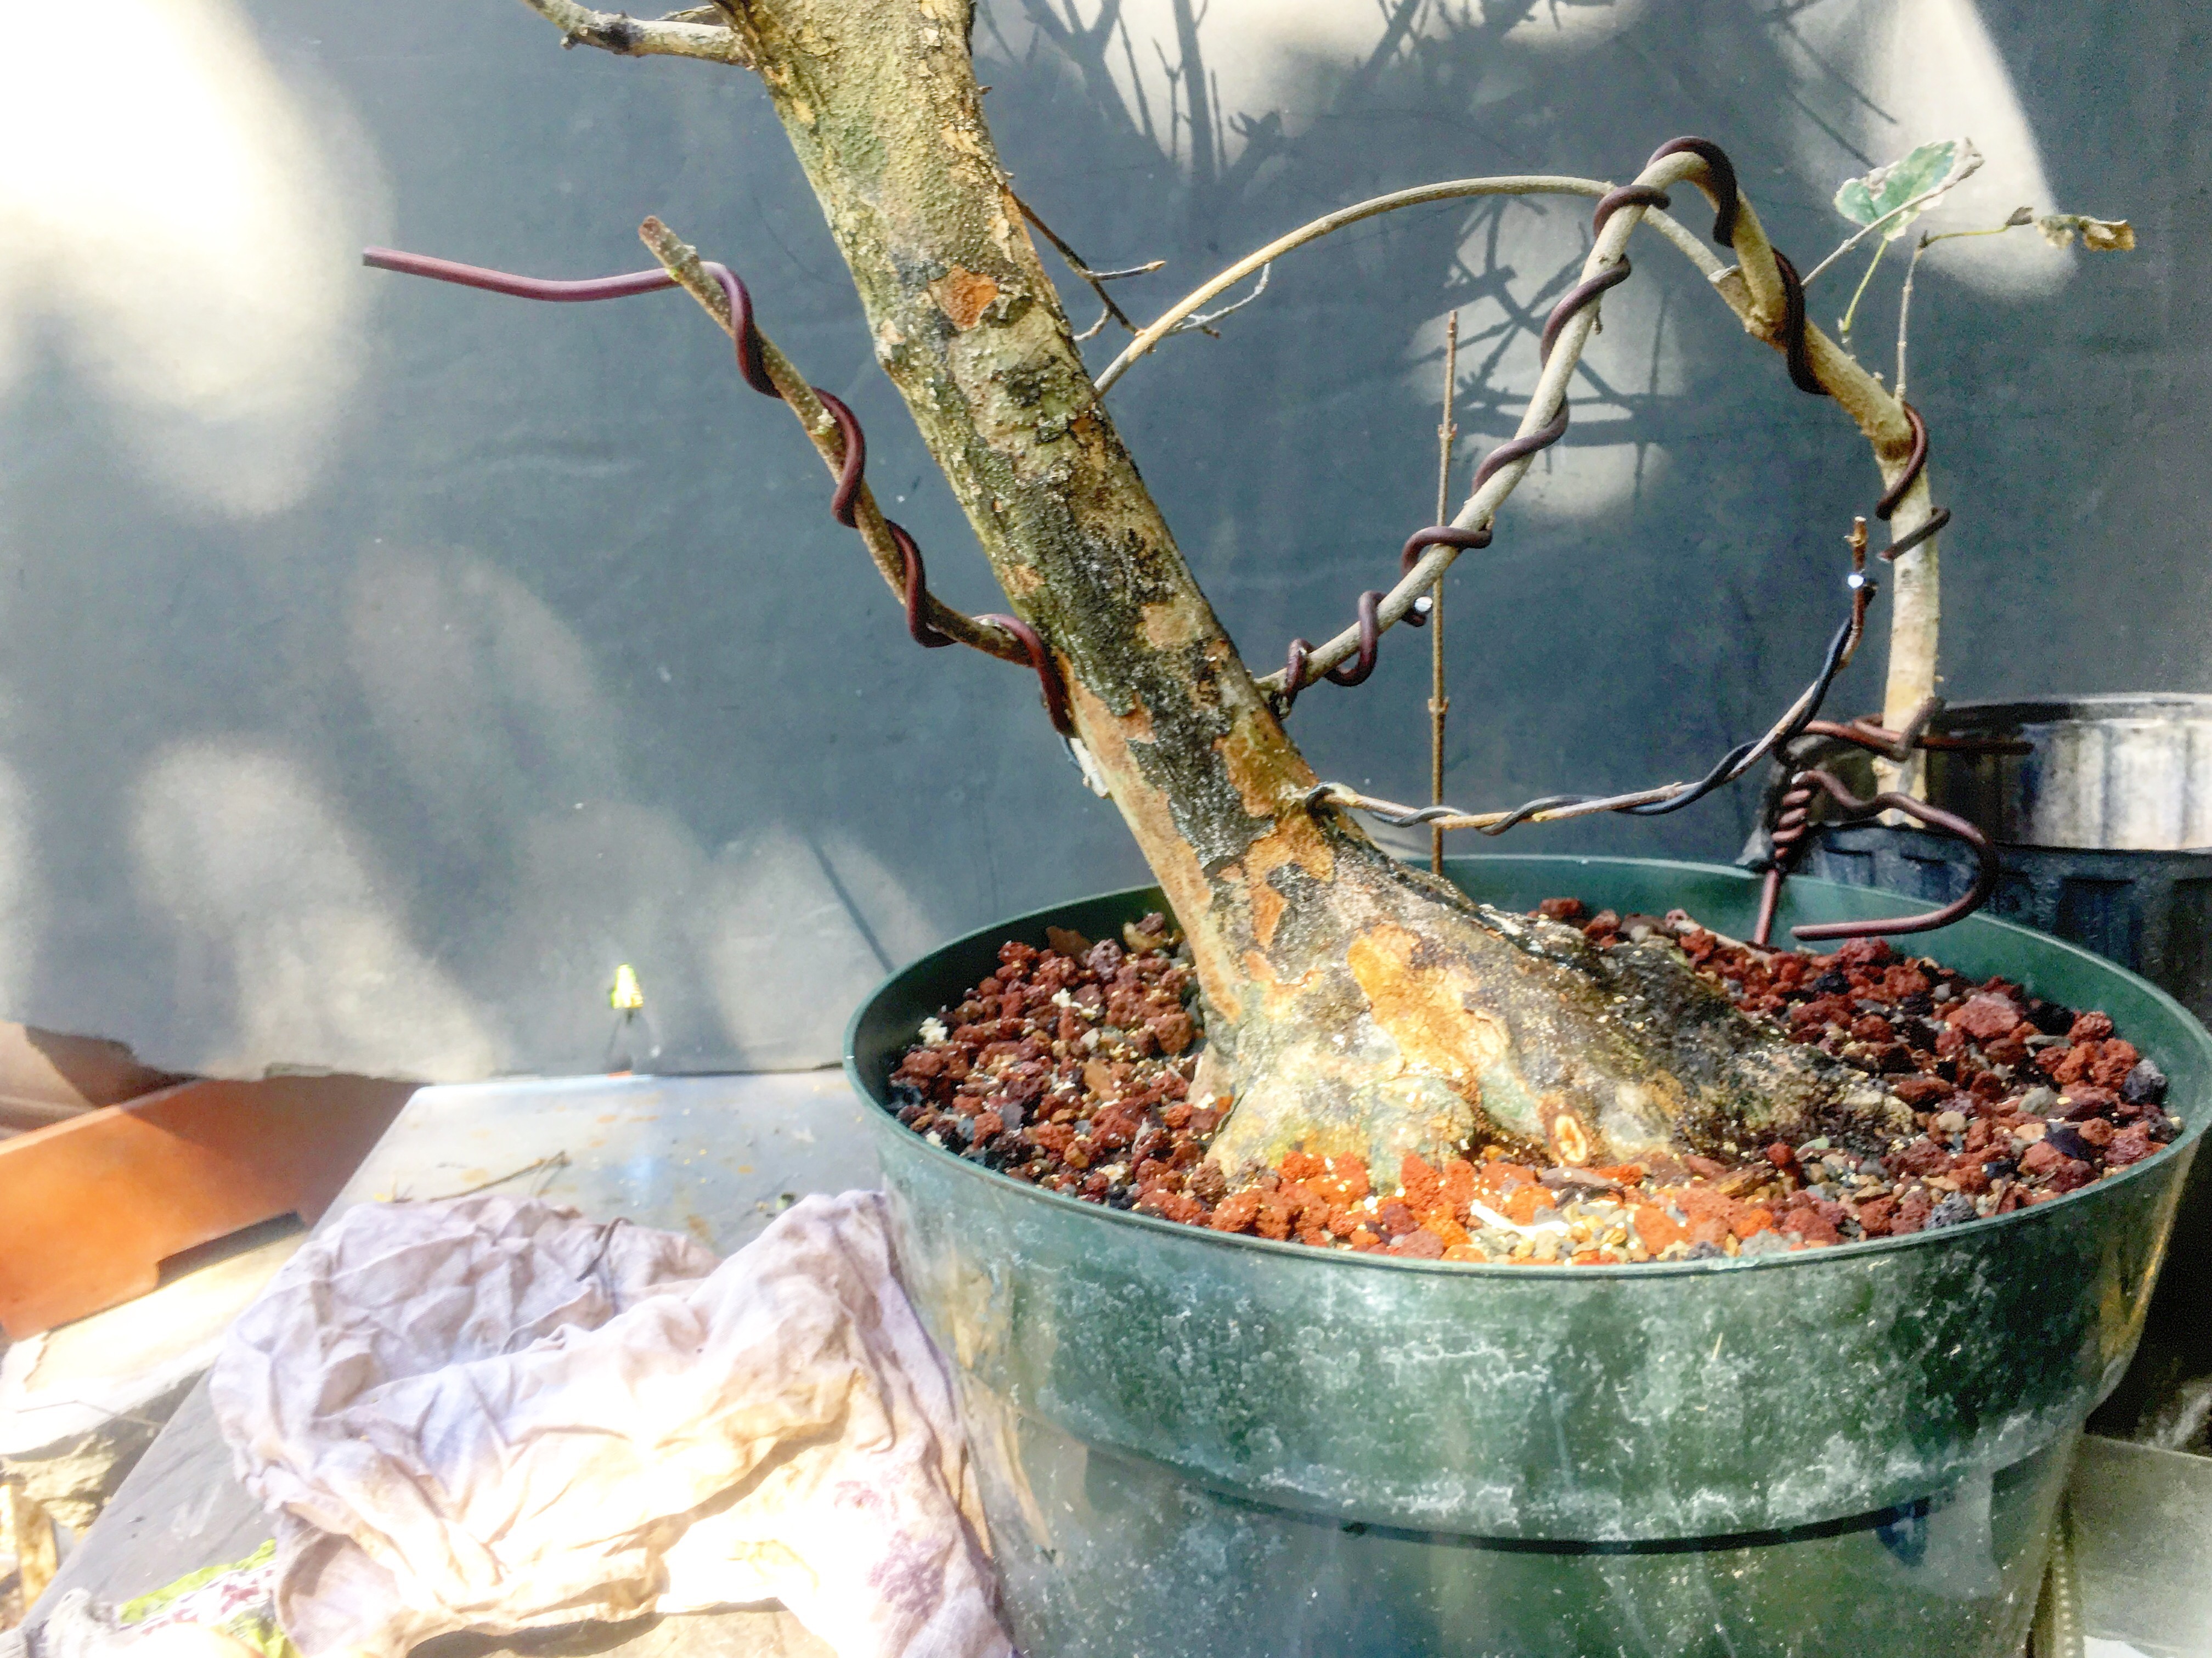 Are you drilling holes in trees again Adam? It looks like one of those parasitic worms trying to stick its tendrils into a tree and the tree is trying to get away.
How about we start at the beginning? Let me ‘splain. We have three trees. Here are two: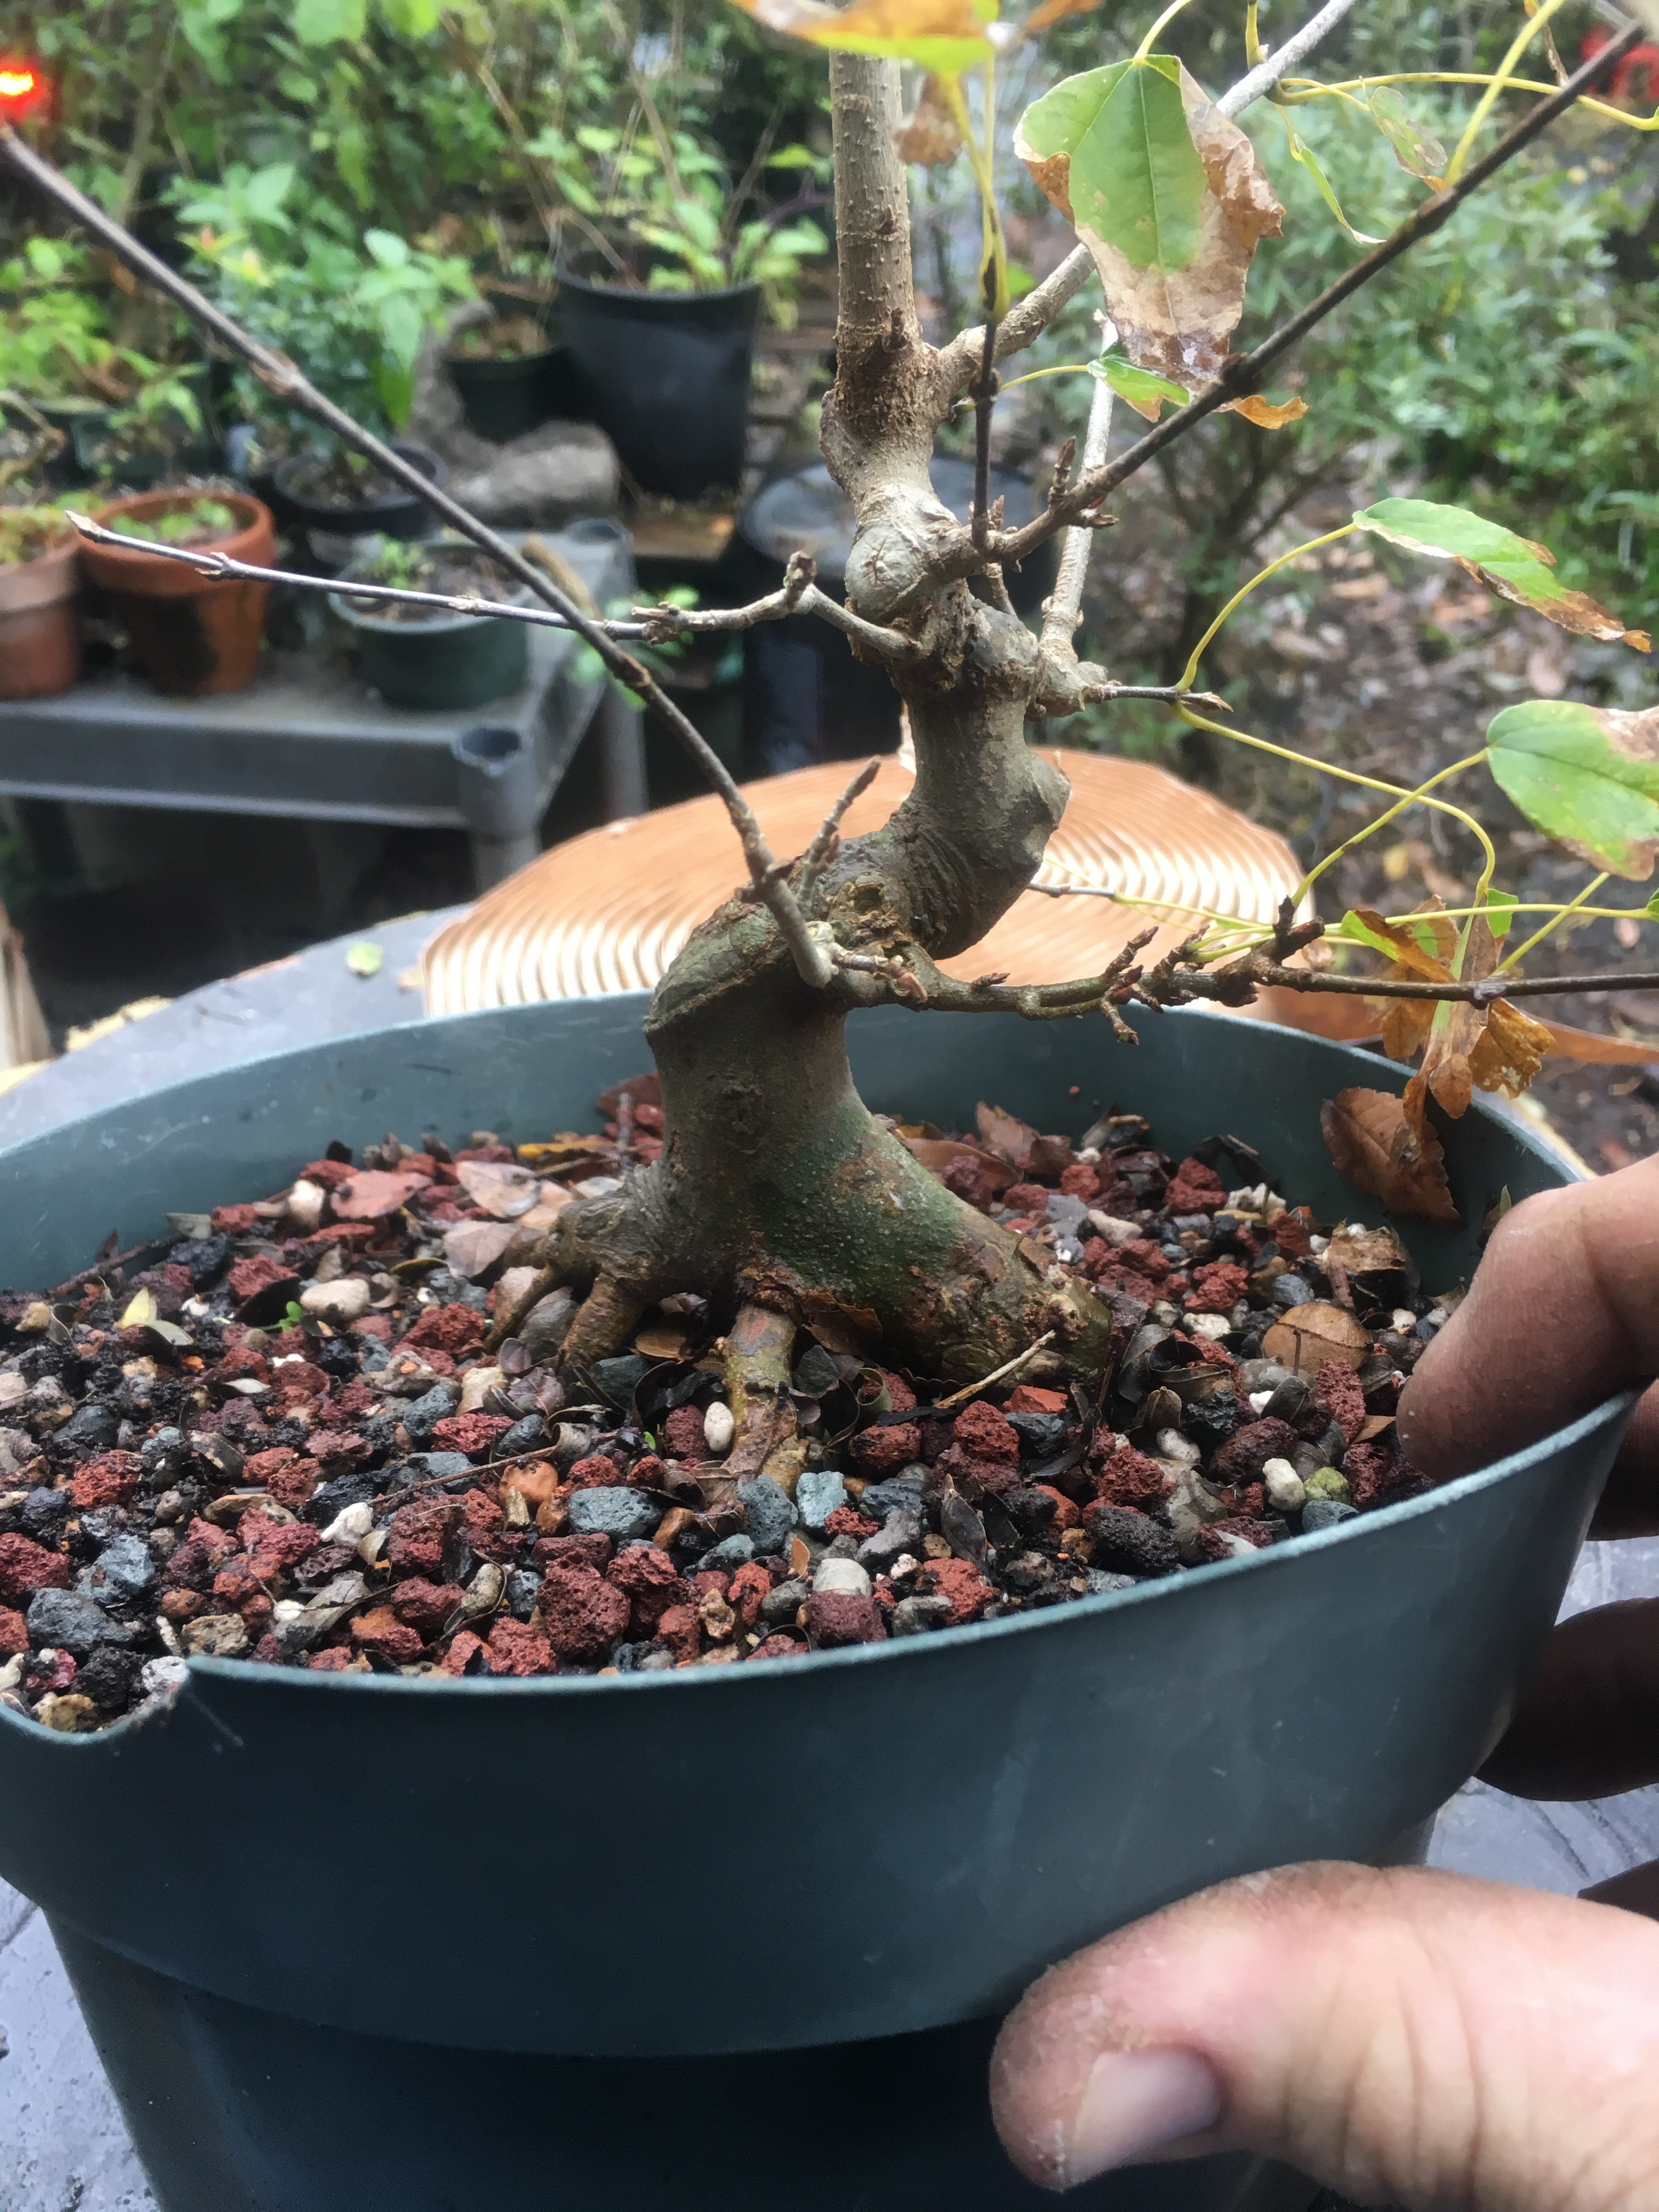 This is one I’ve been pruning for shape for about 8 or 10 years.
  All that movement is from chopping, regrowing, healing, chopping. Repeat.
This was from the compact disc root layering experiment. 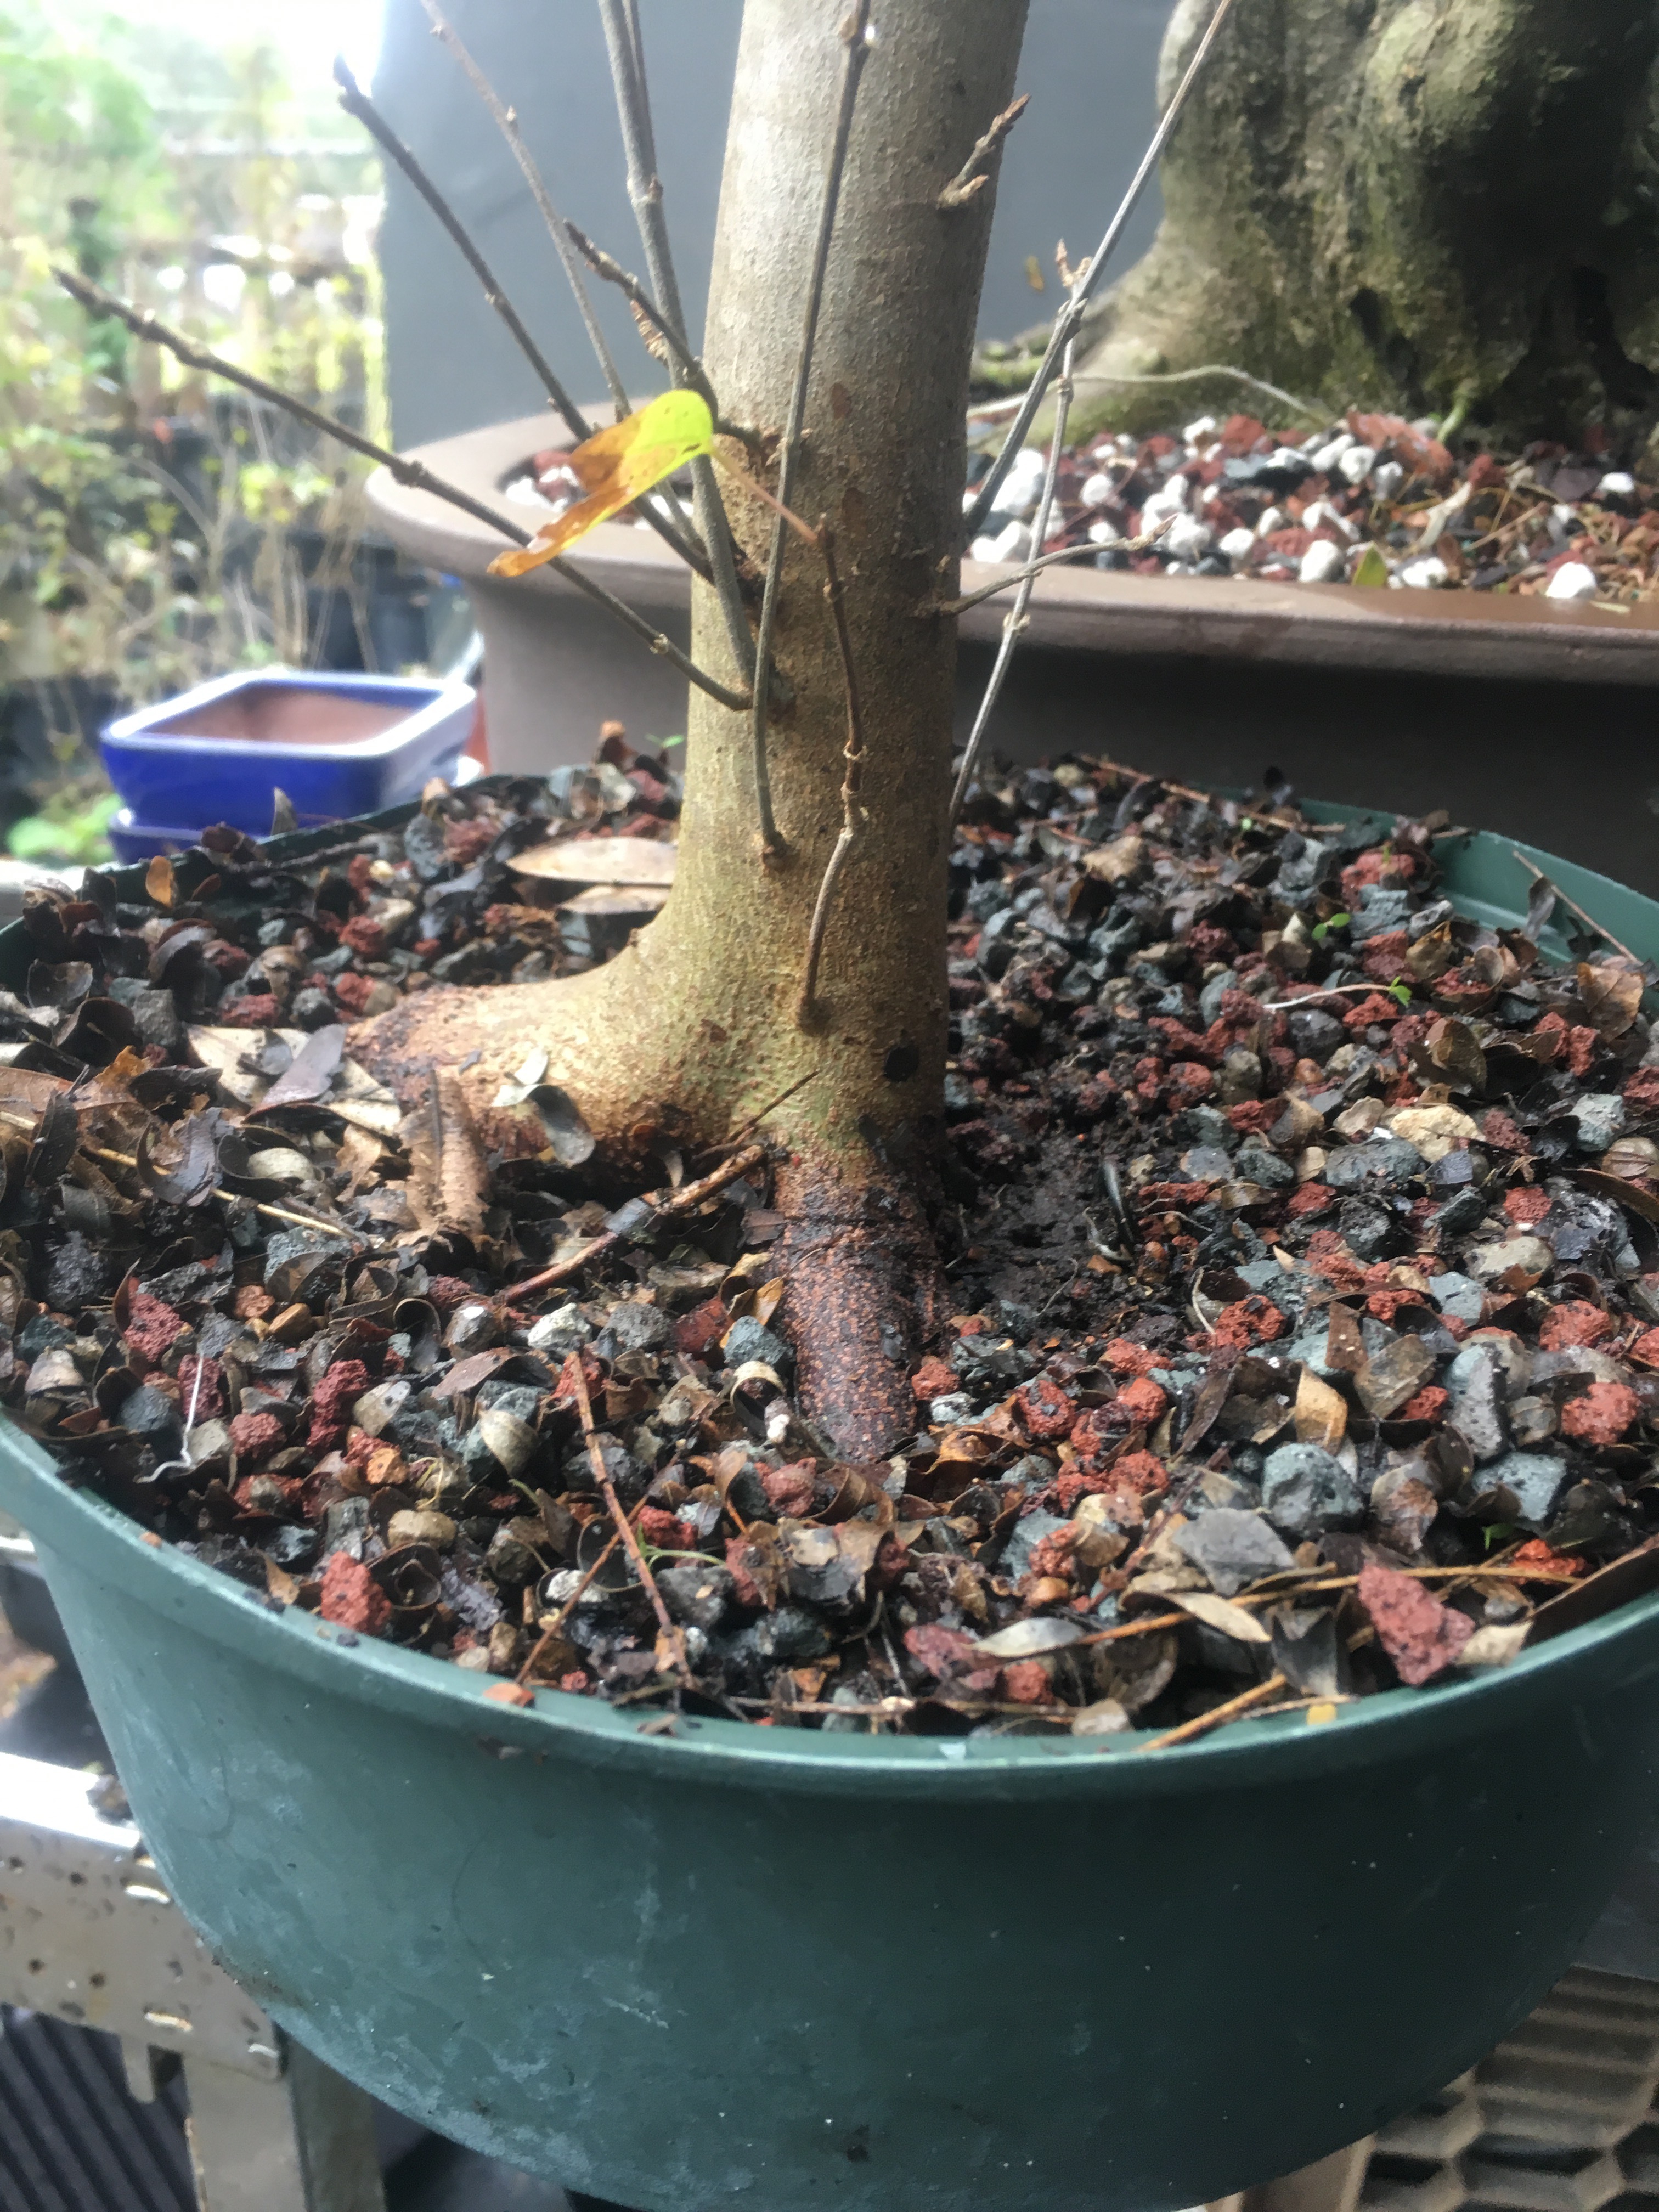
 It’s ready for some chopping. Let’s begin with it.
Fortunately, its budding back all over. 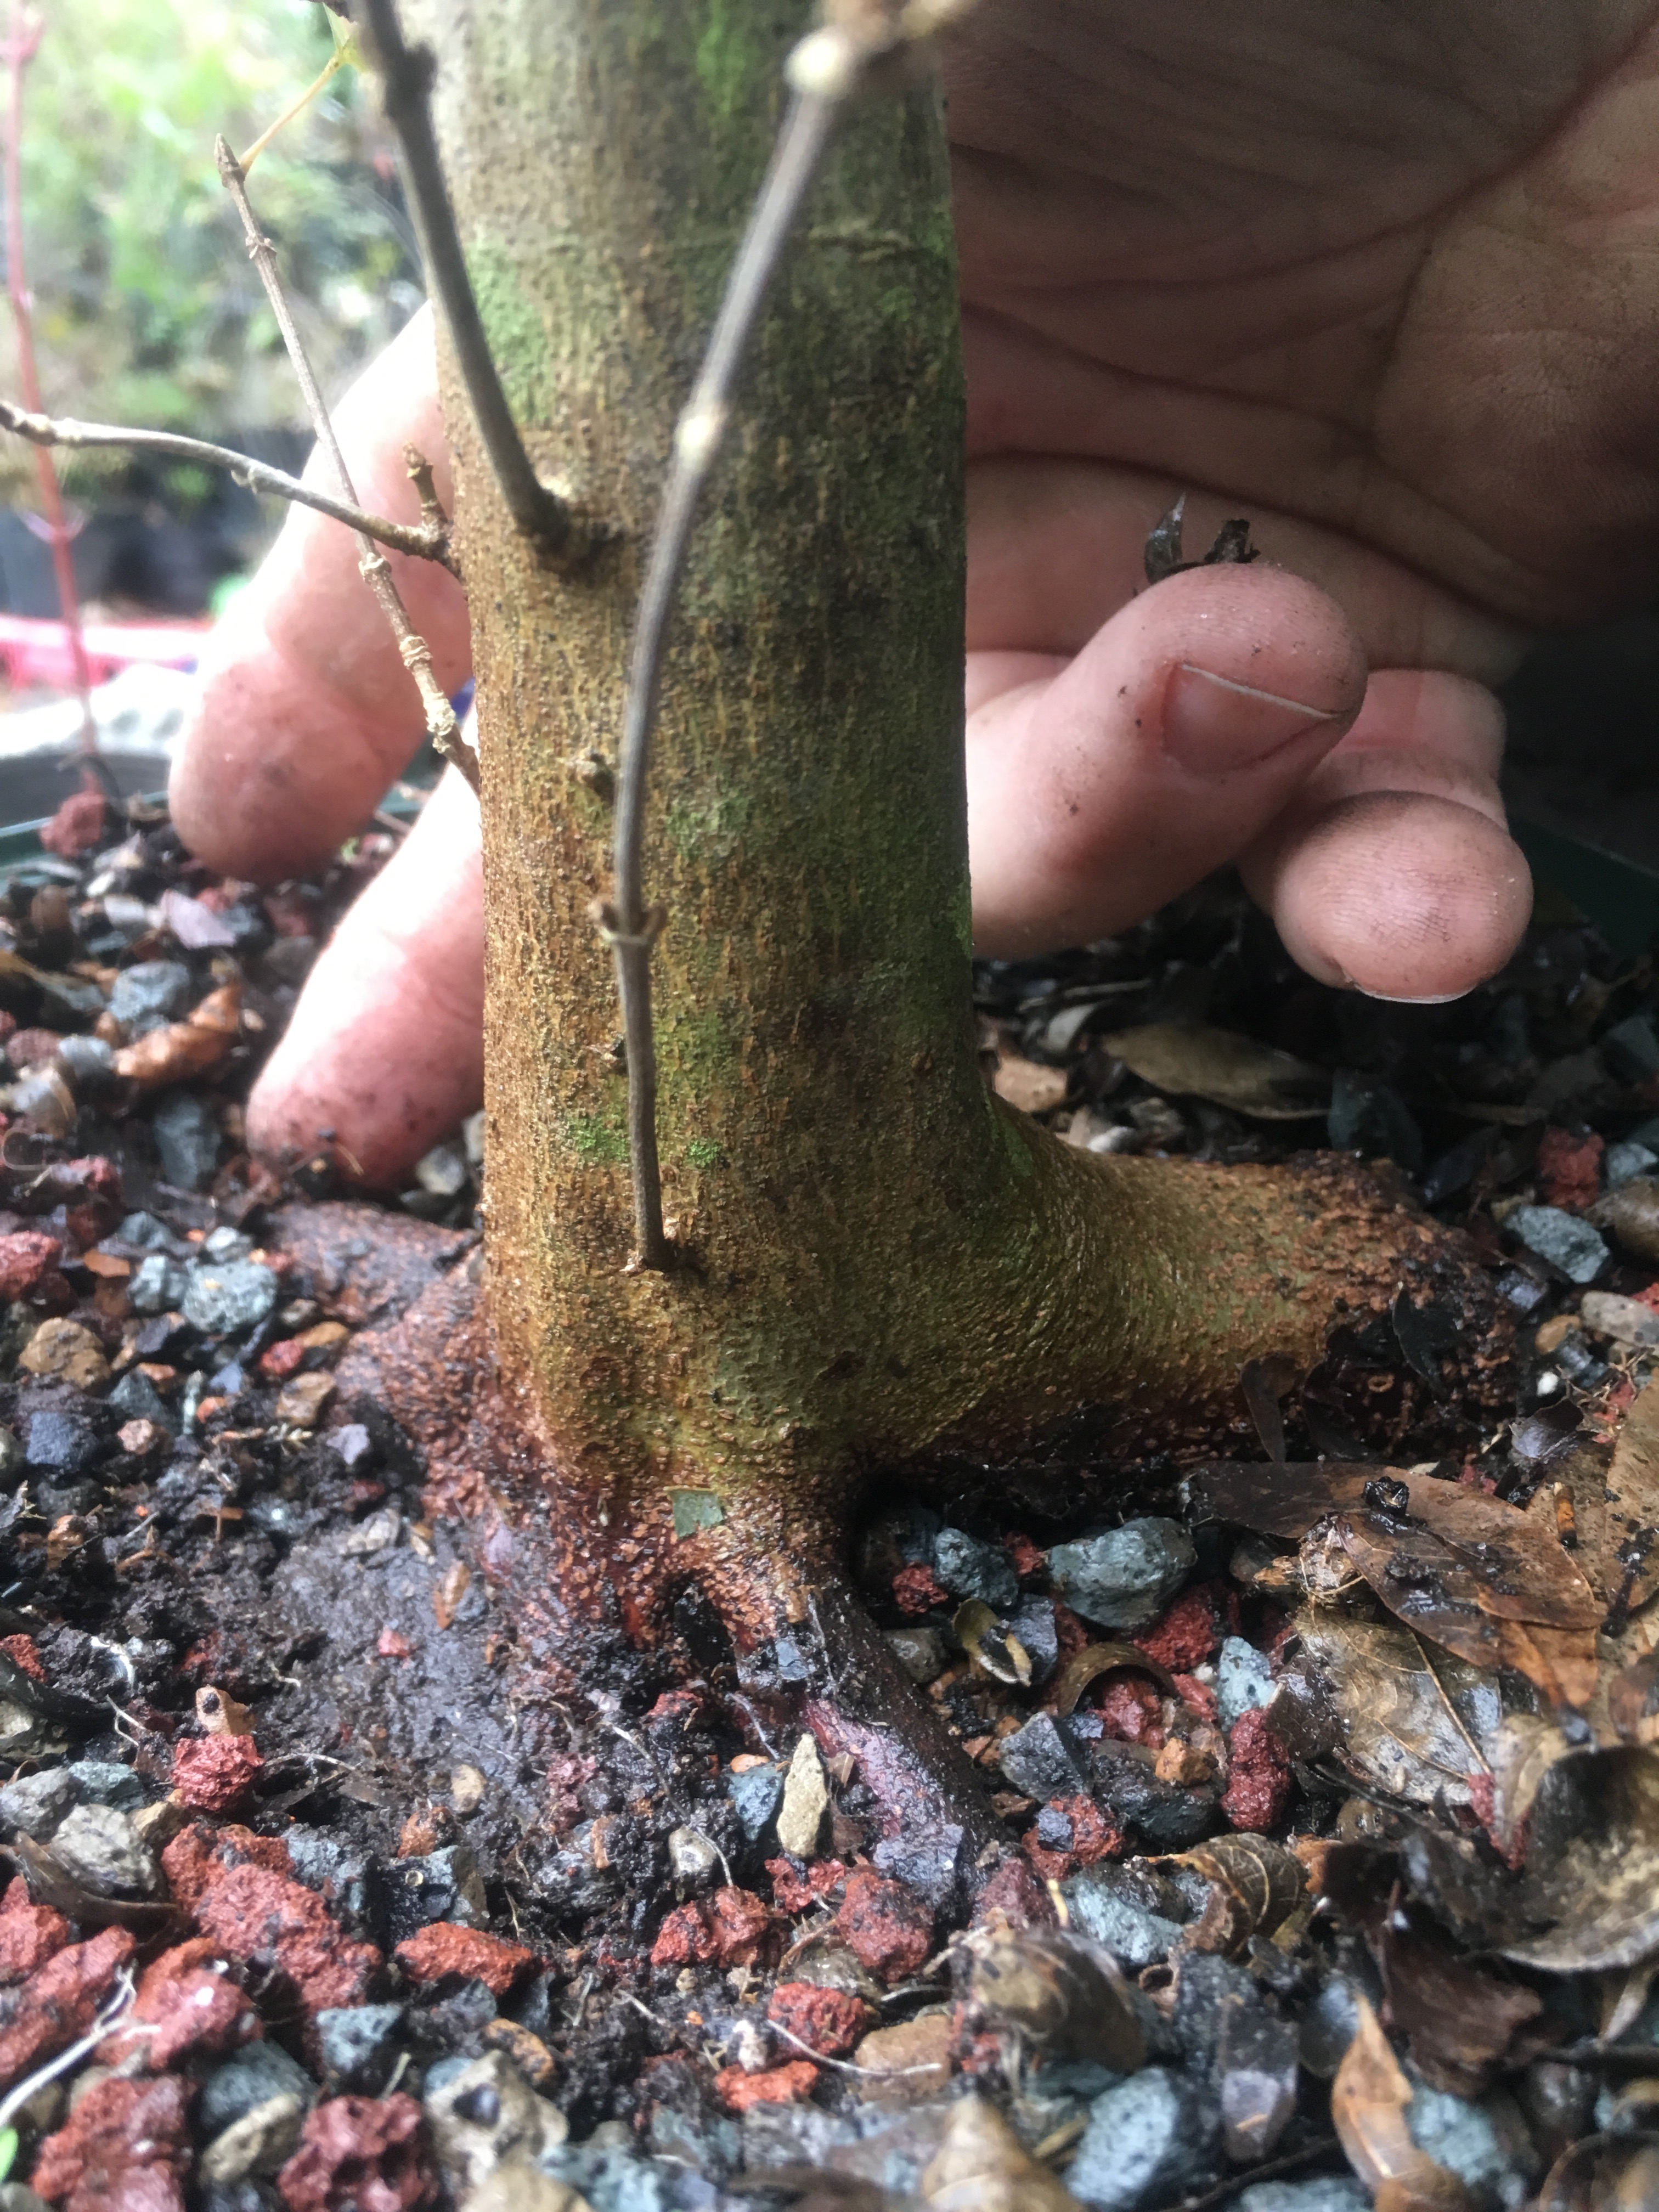
I have all kinds of branches to use as a new leader. 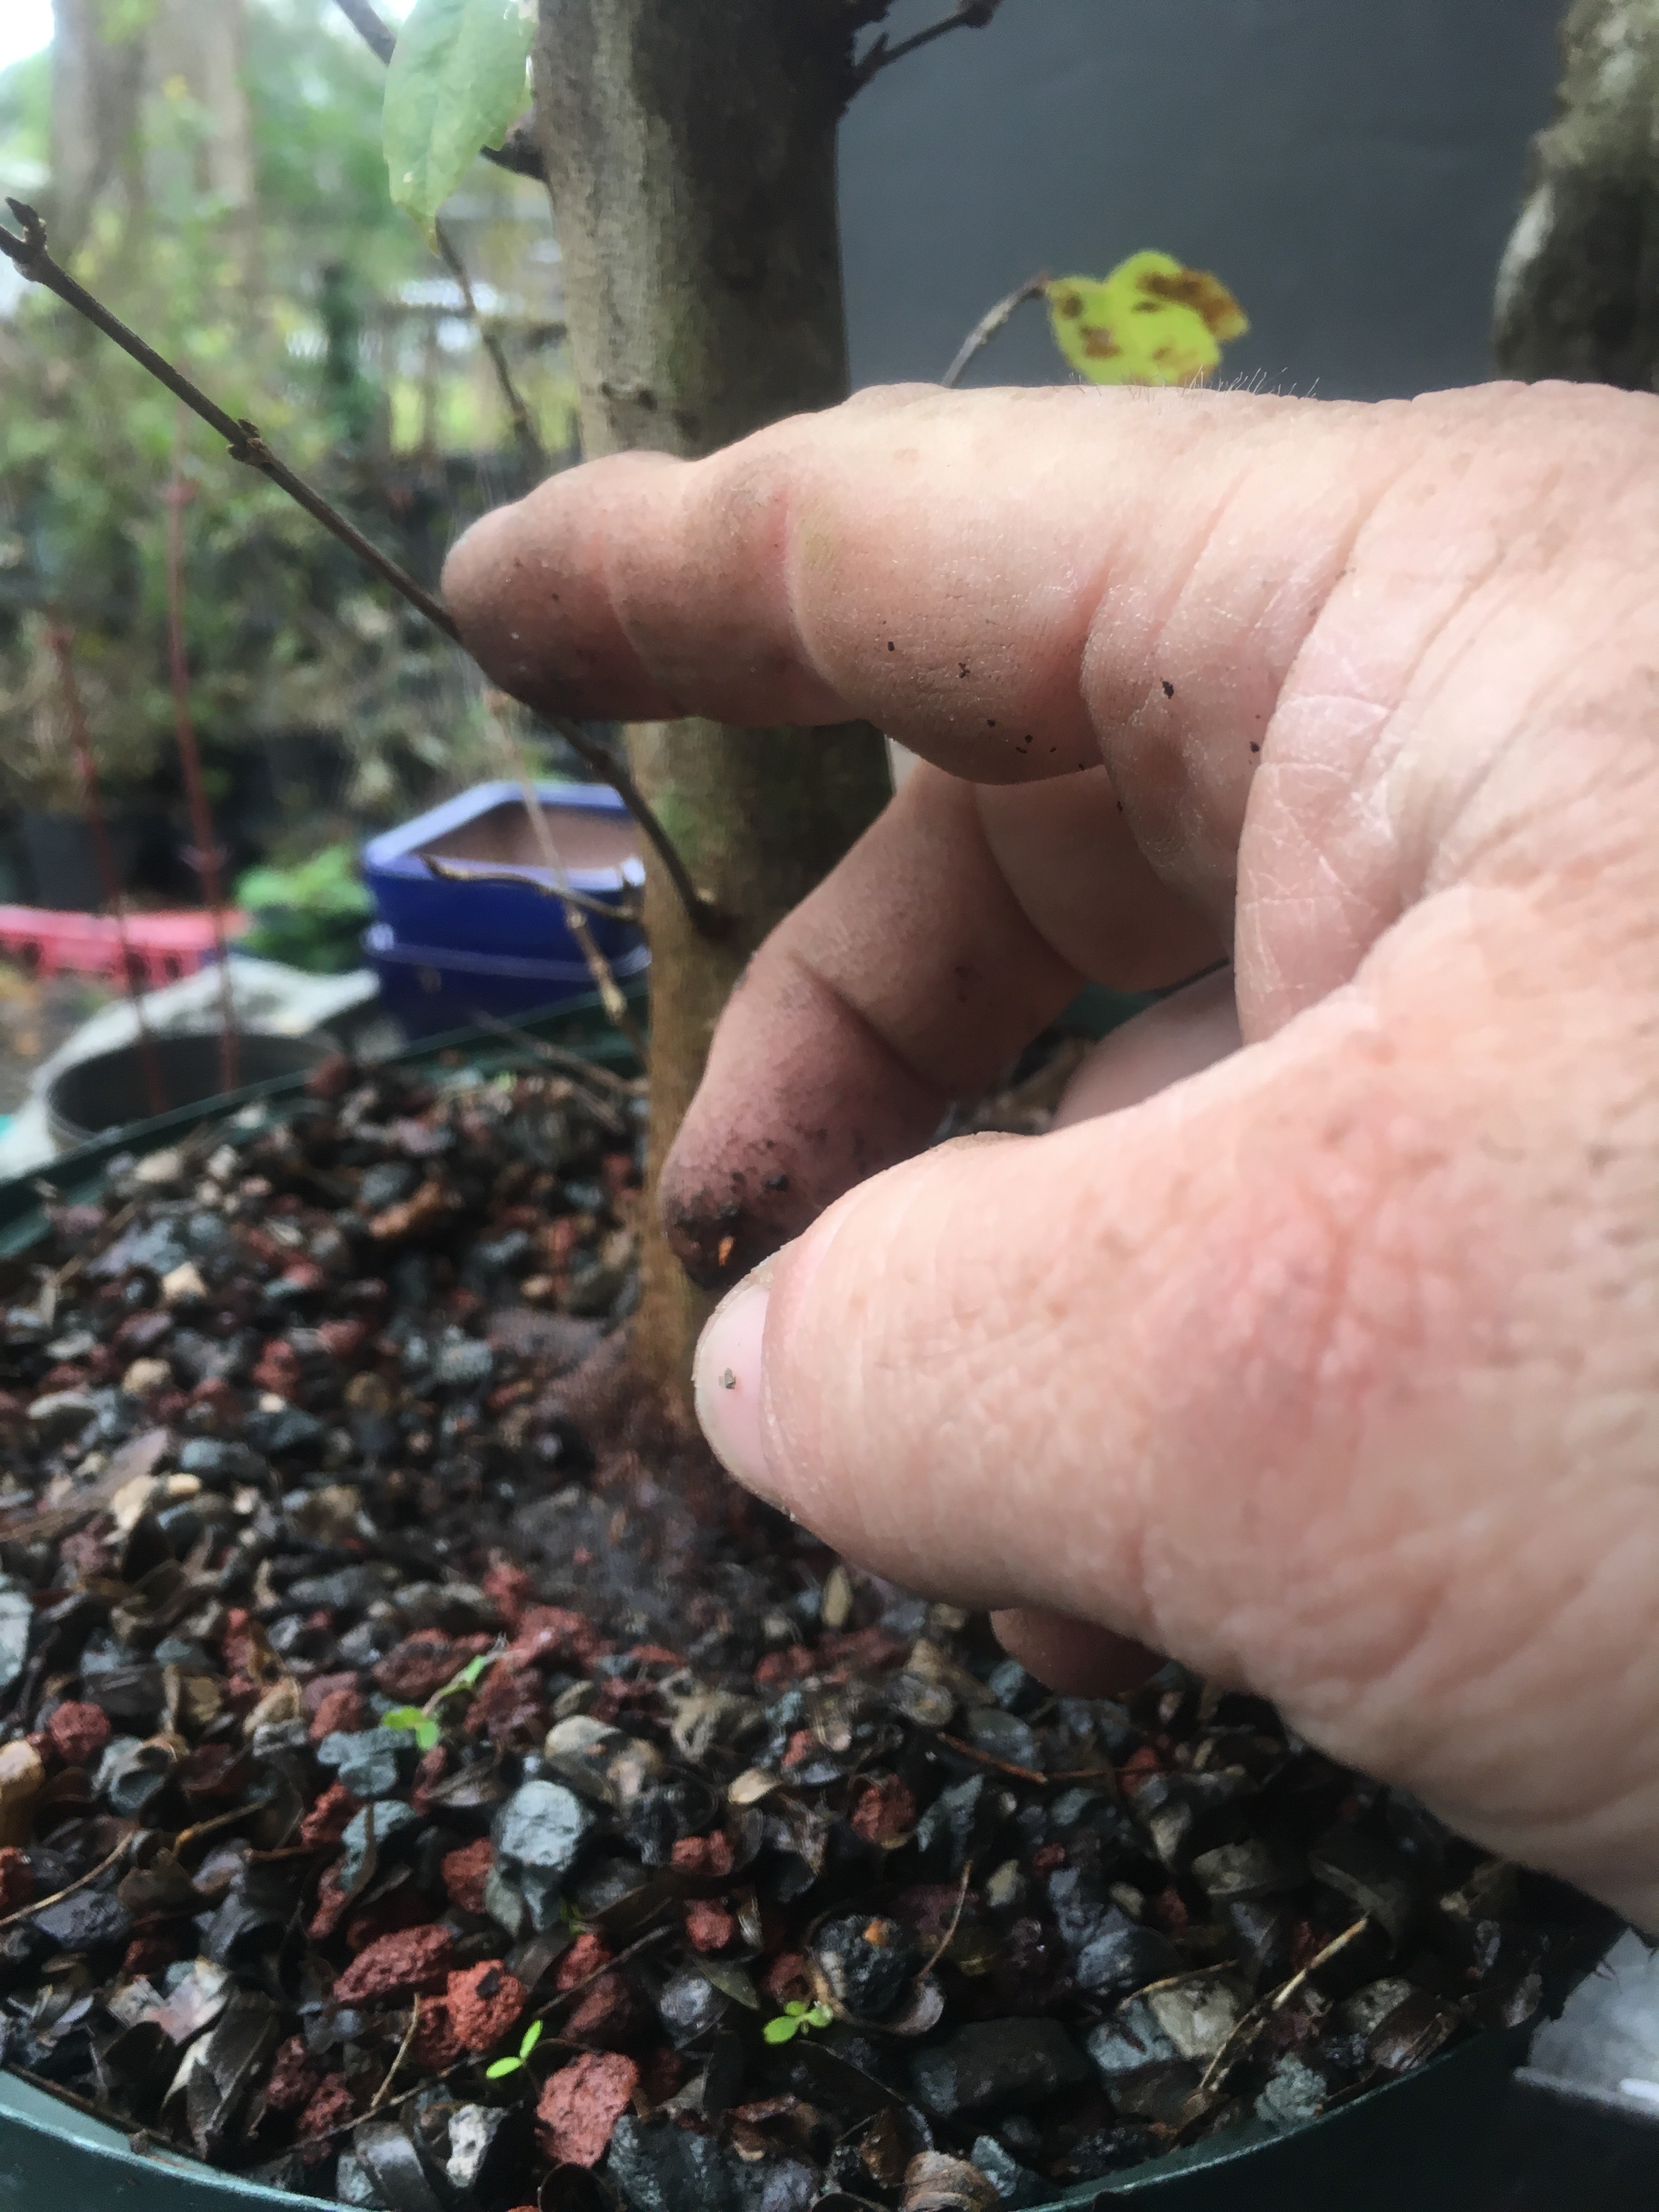 I’m thinking around here.
Or here. 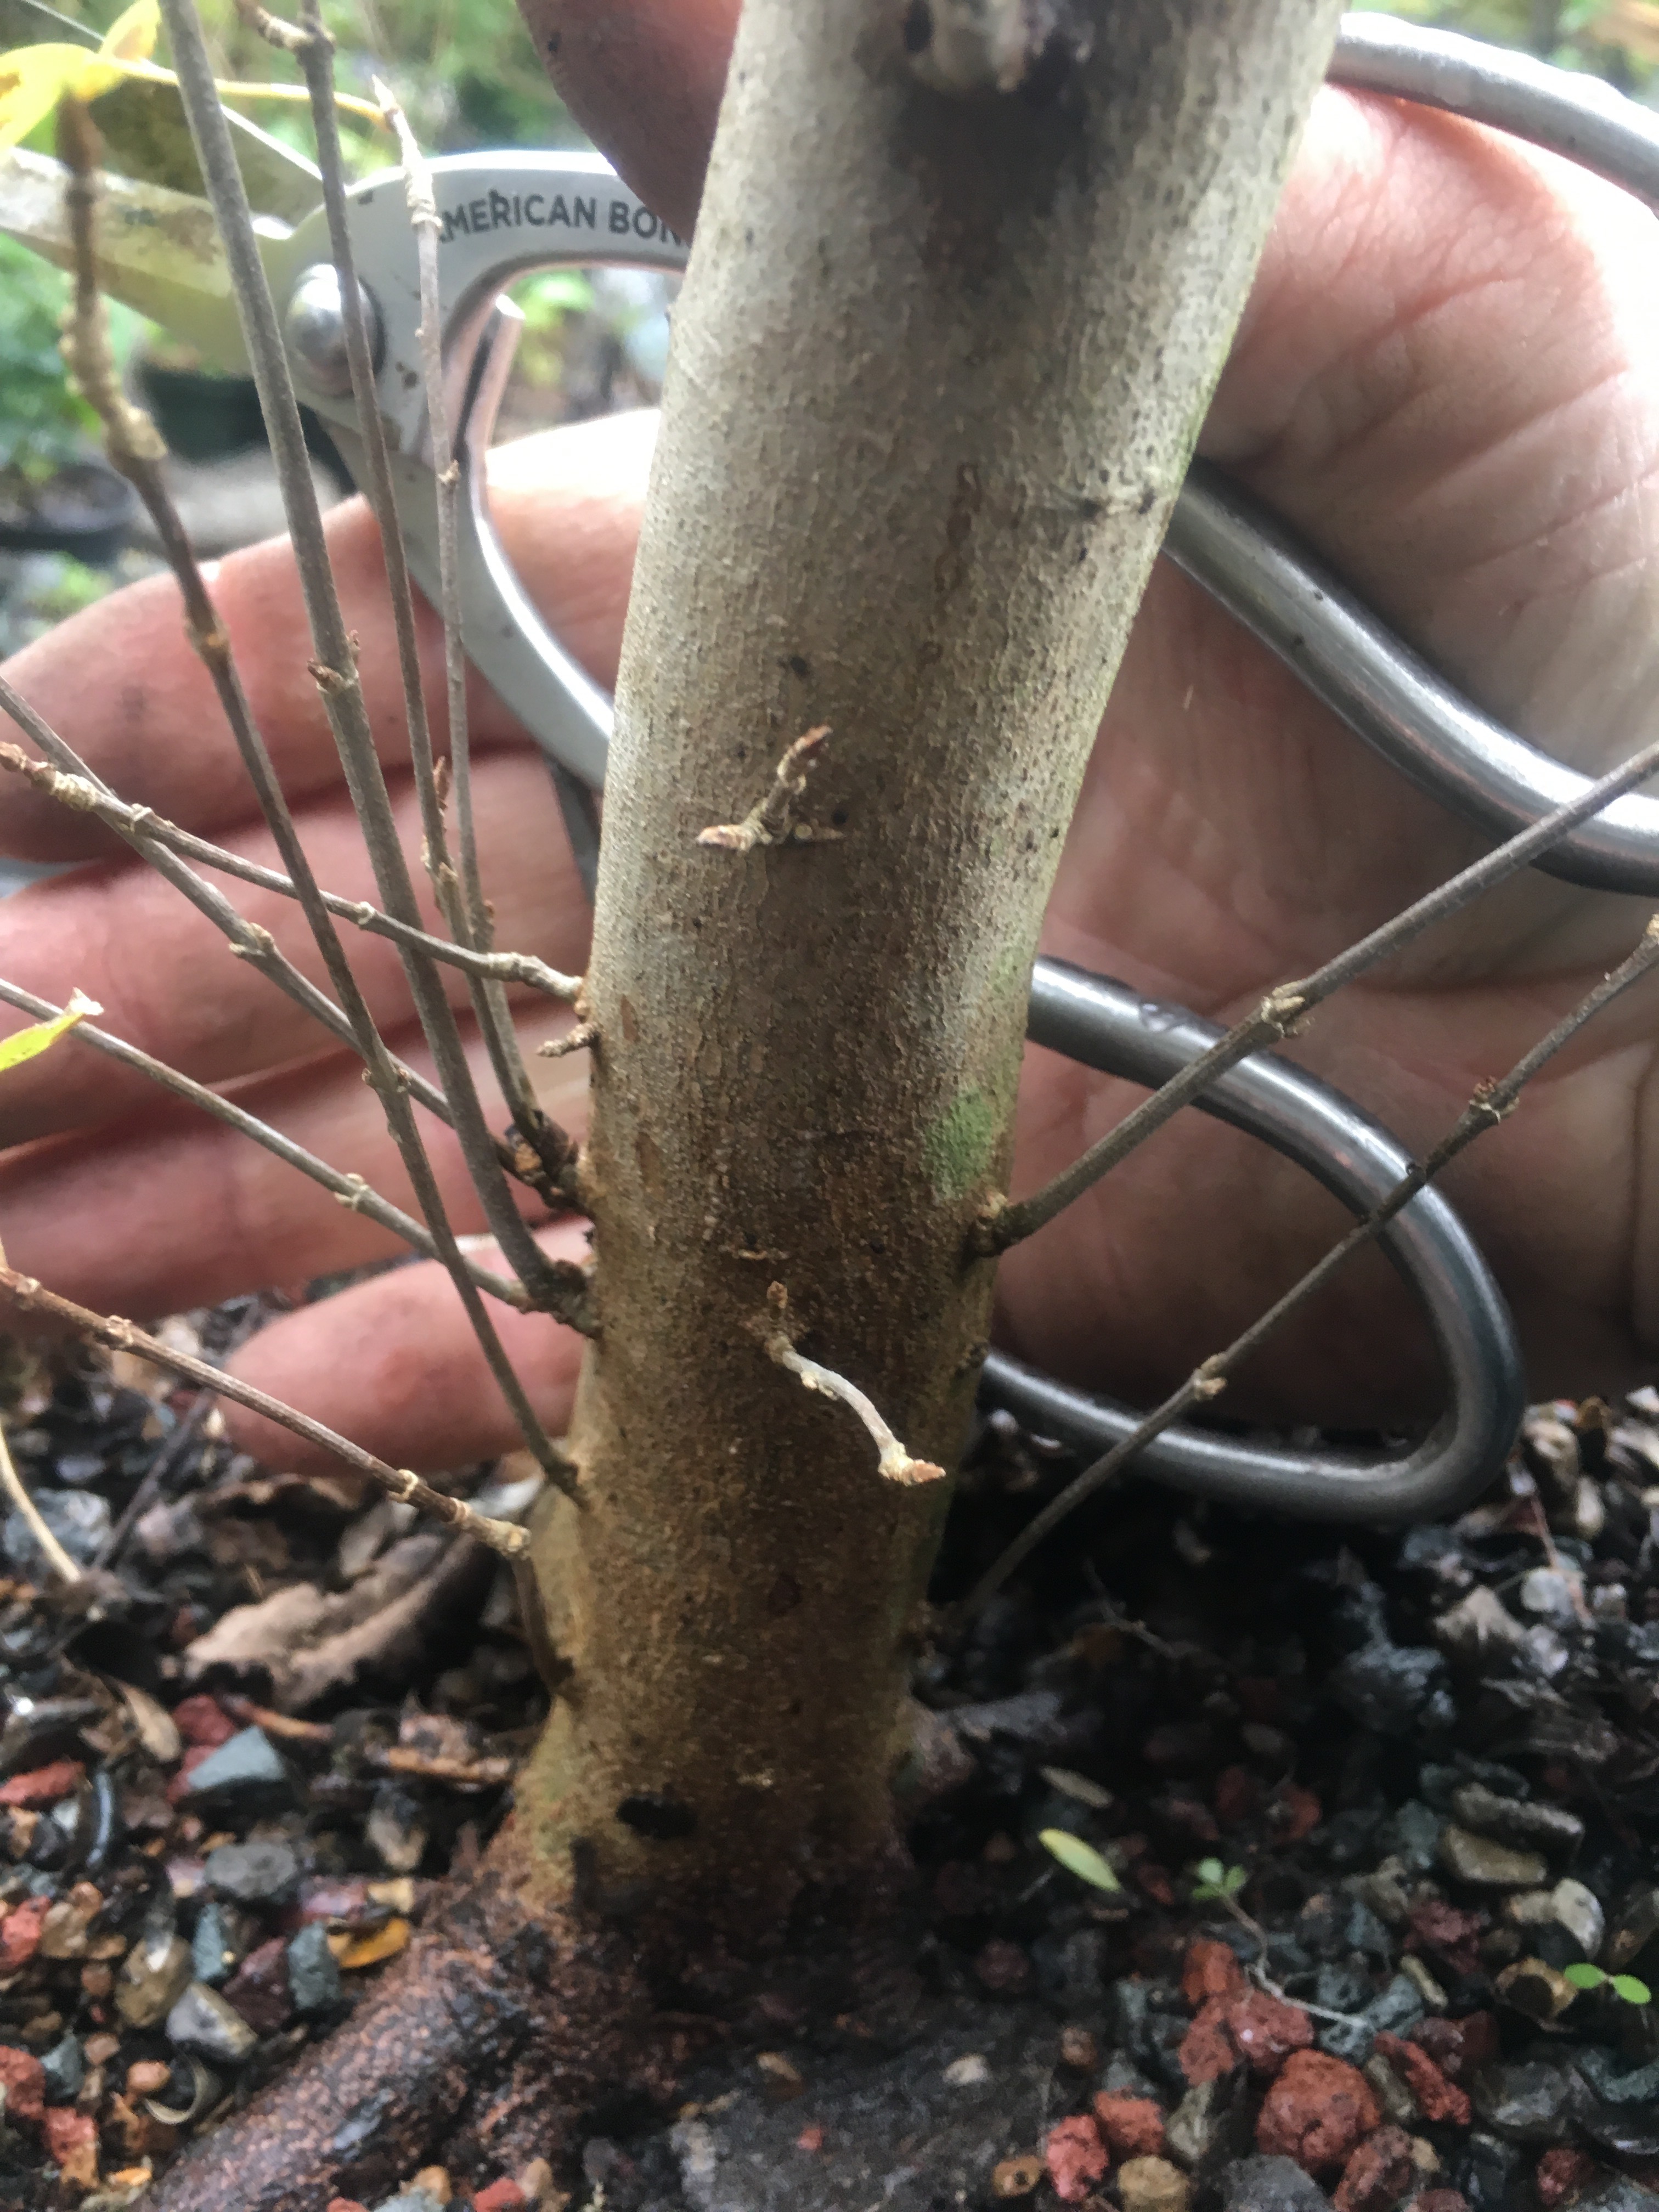 Somewhere….aha…I see, I saw.
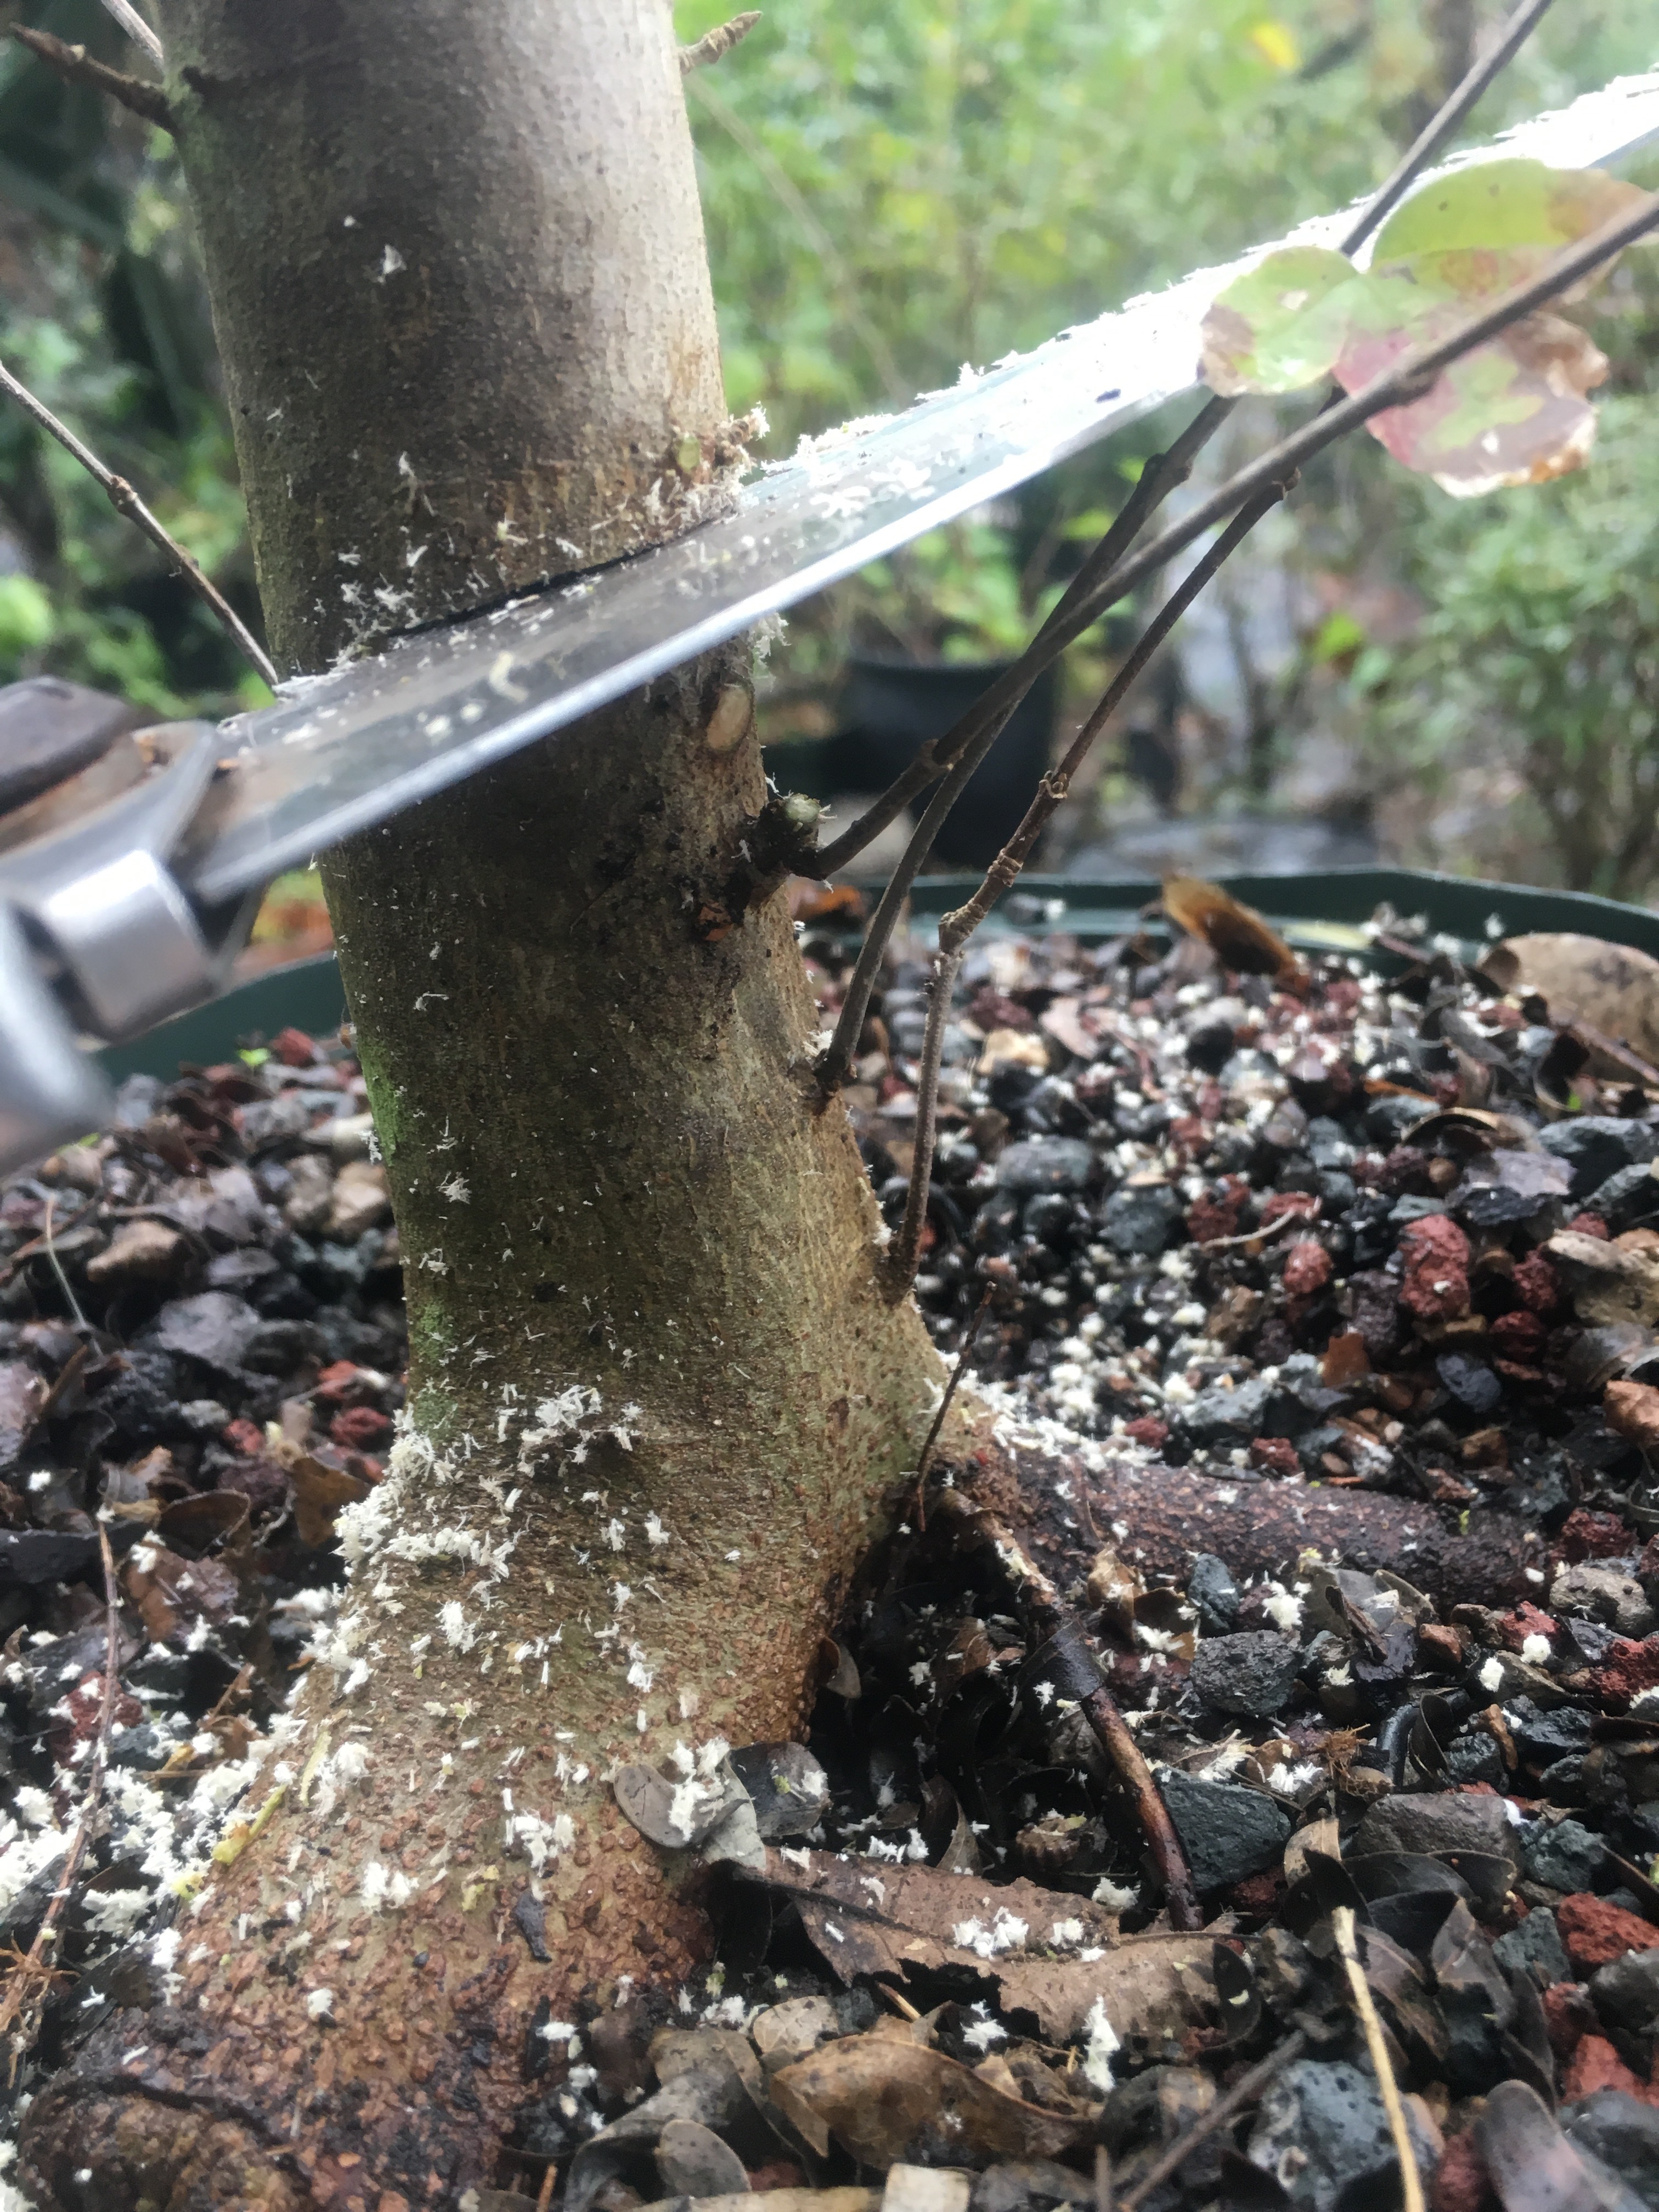
Timberrrrr!
 Now, a little contouring.
 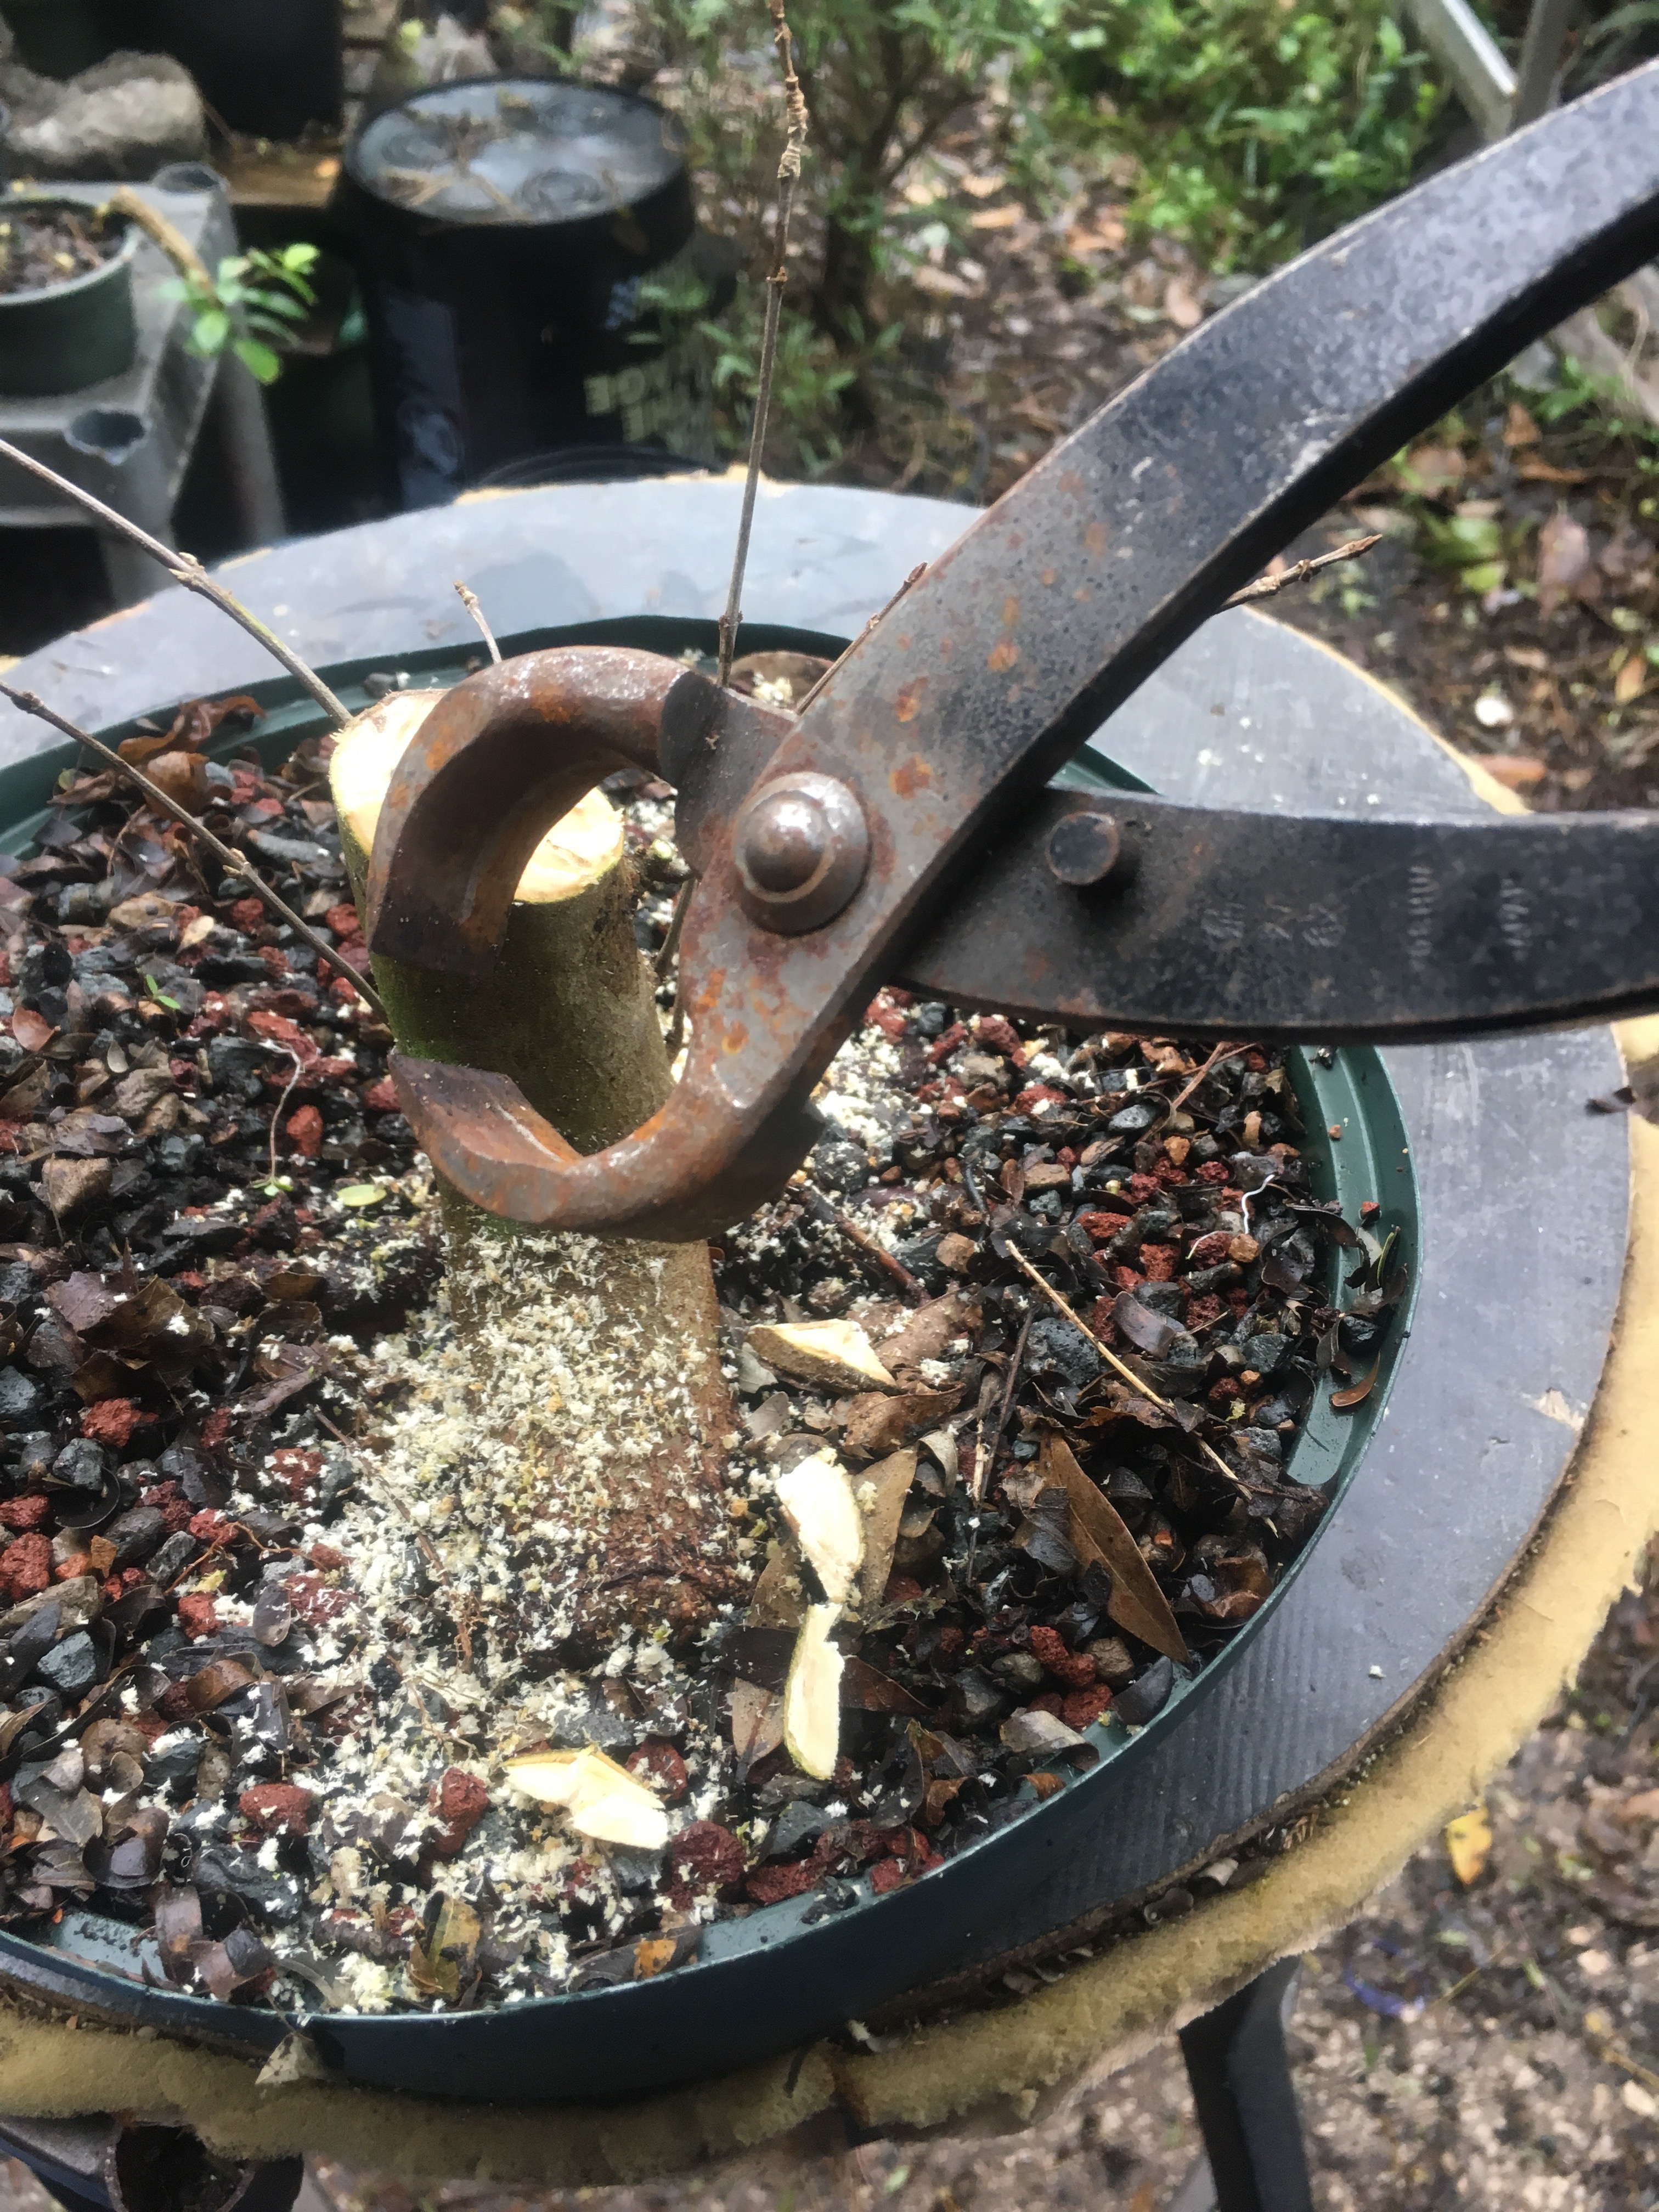 A rusty tool (where are my good tools?)
A sharp knife. 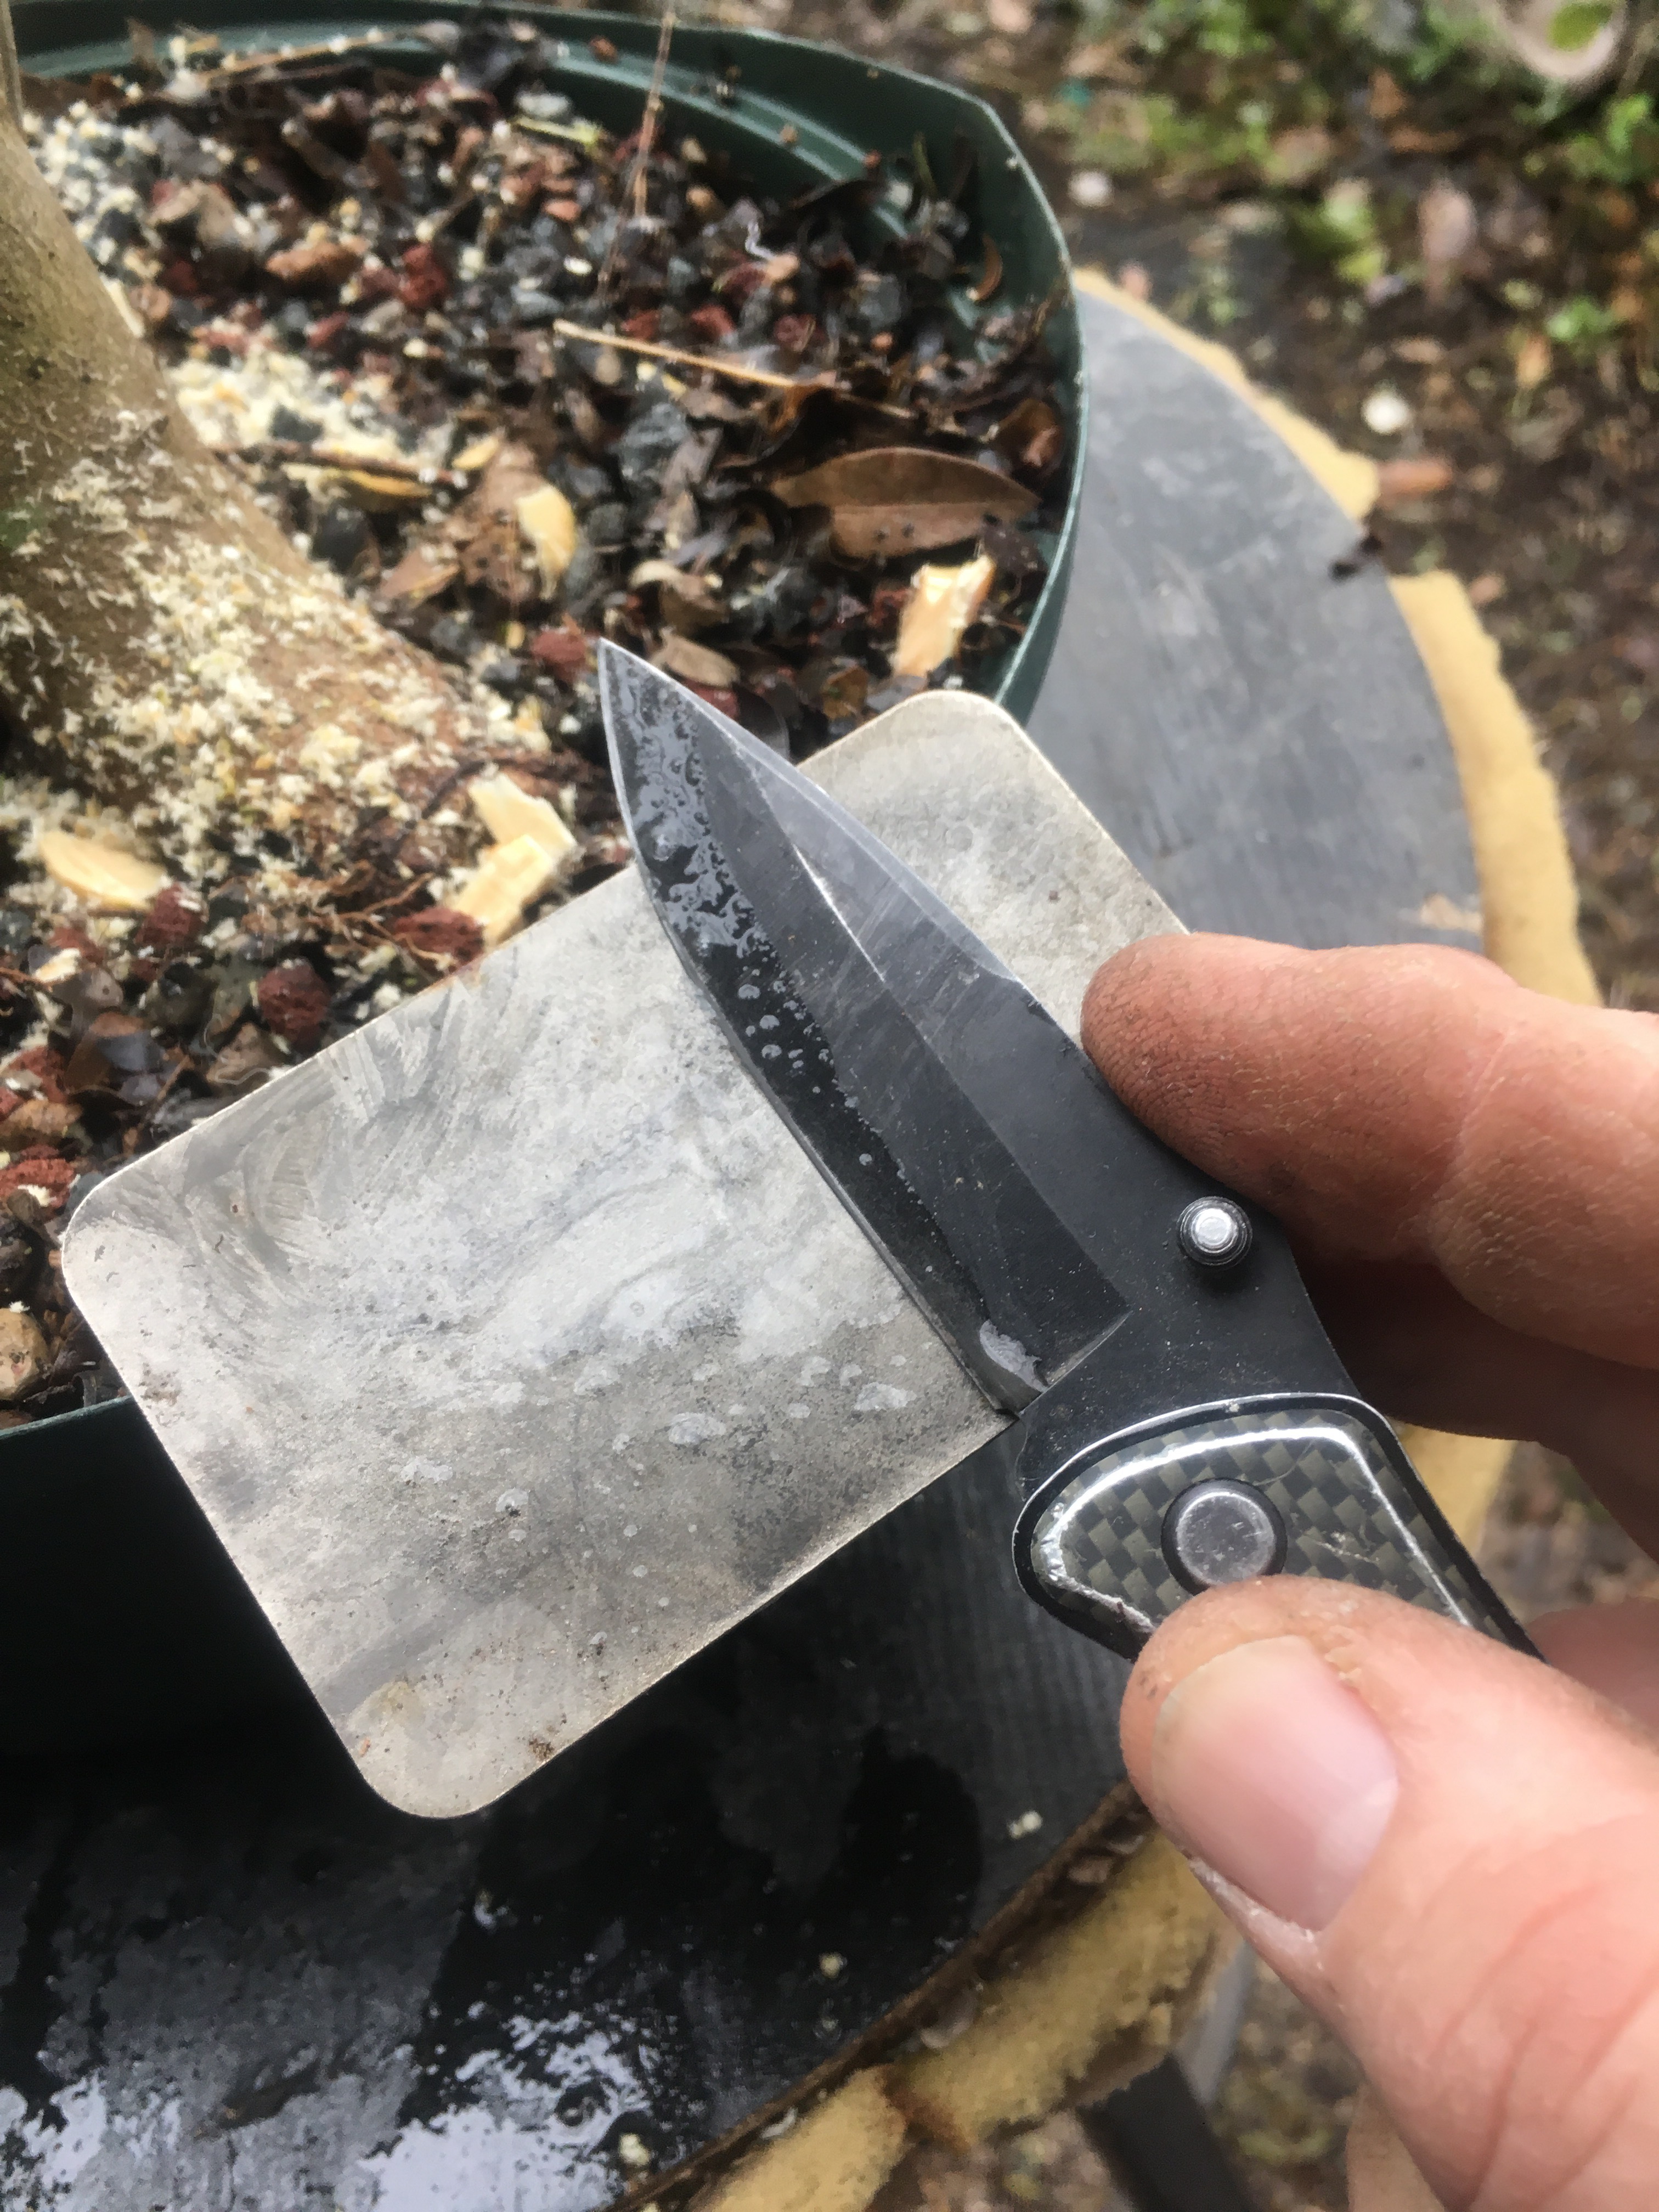
That’s better.  You’ll hear nowadays to make a square cut instead of an angled one like I just did. If this shoot wasn’t here:
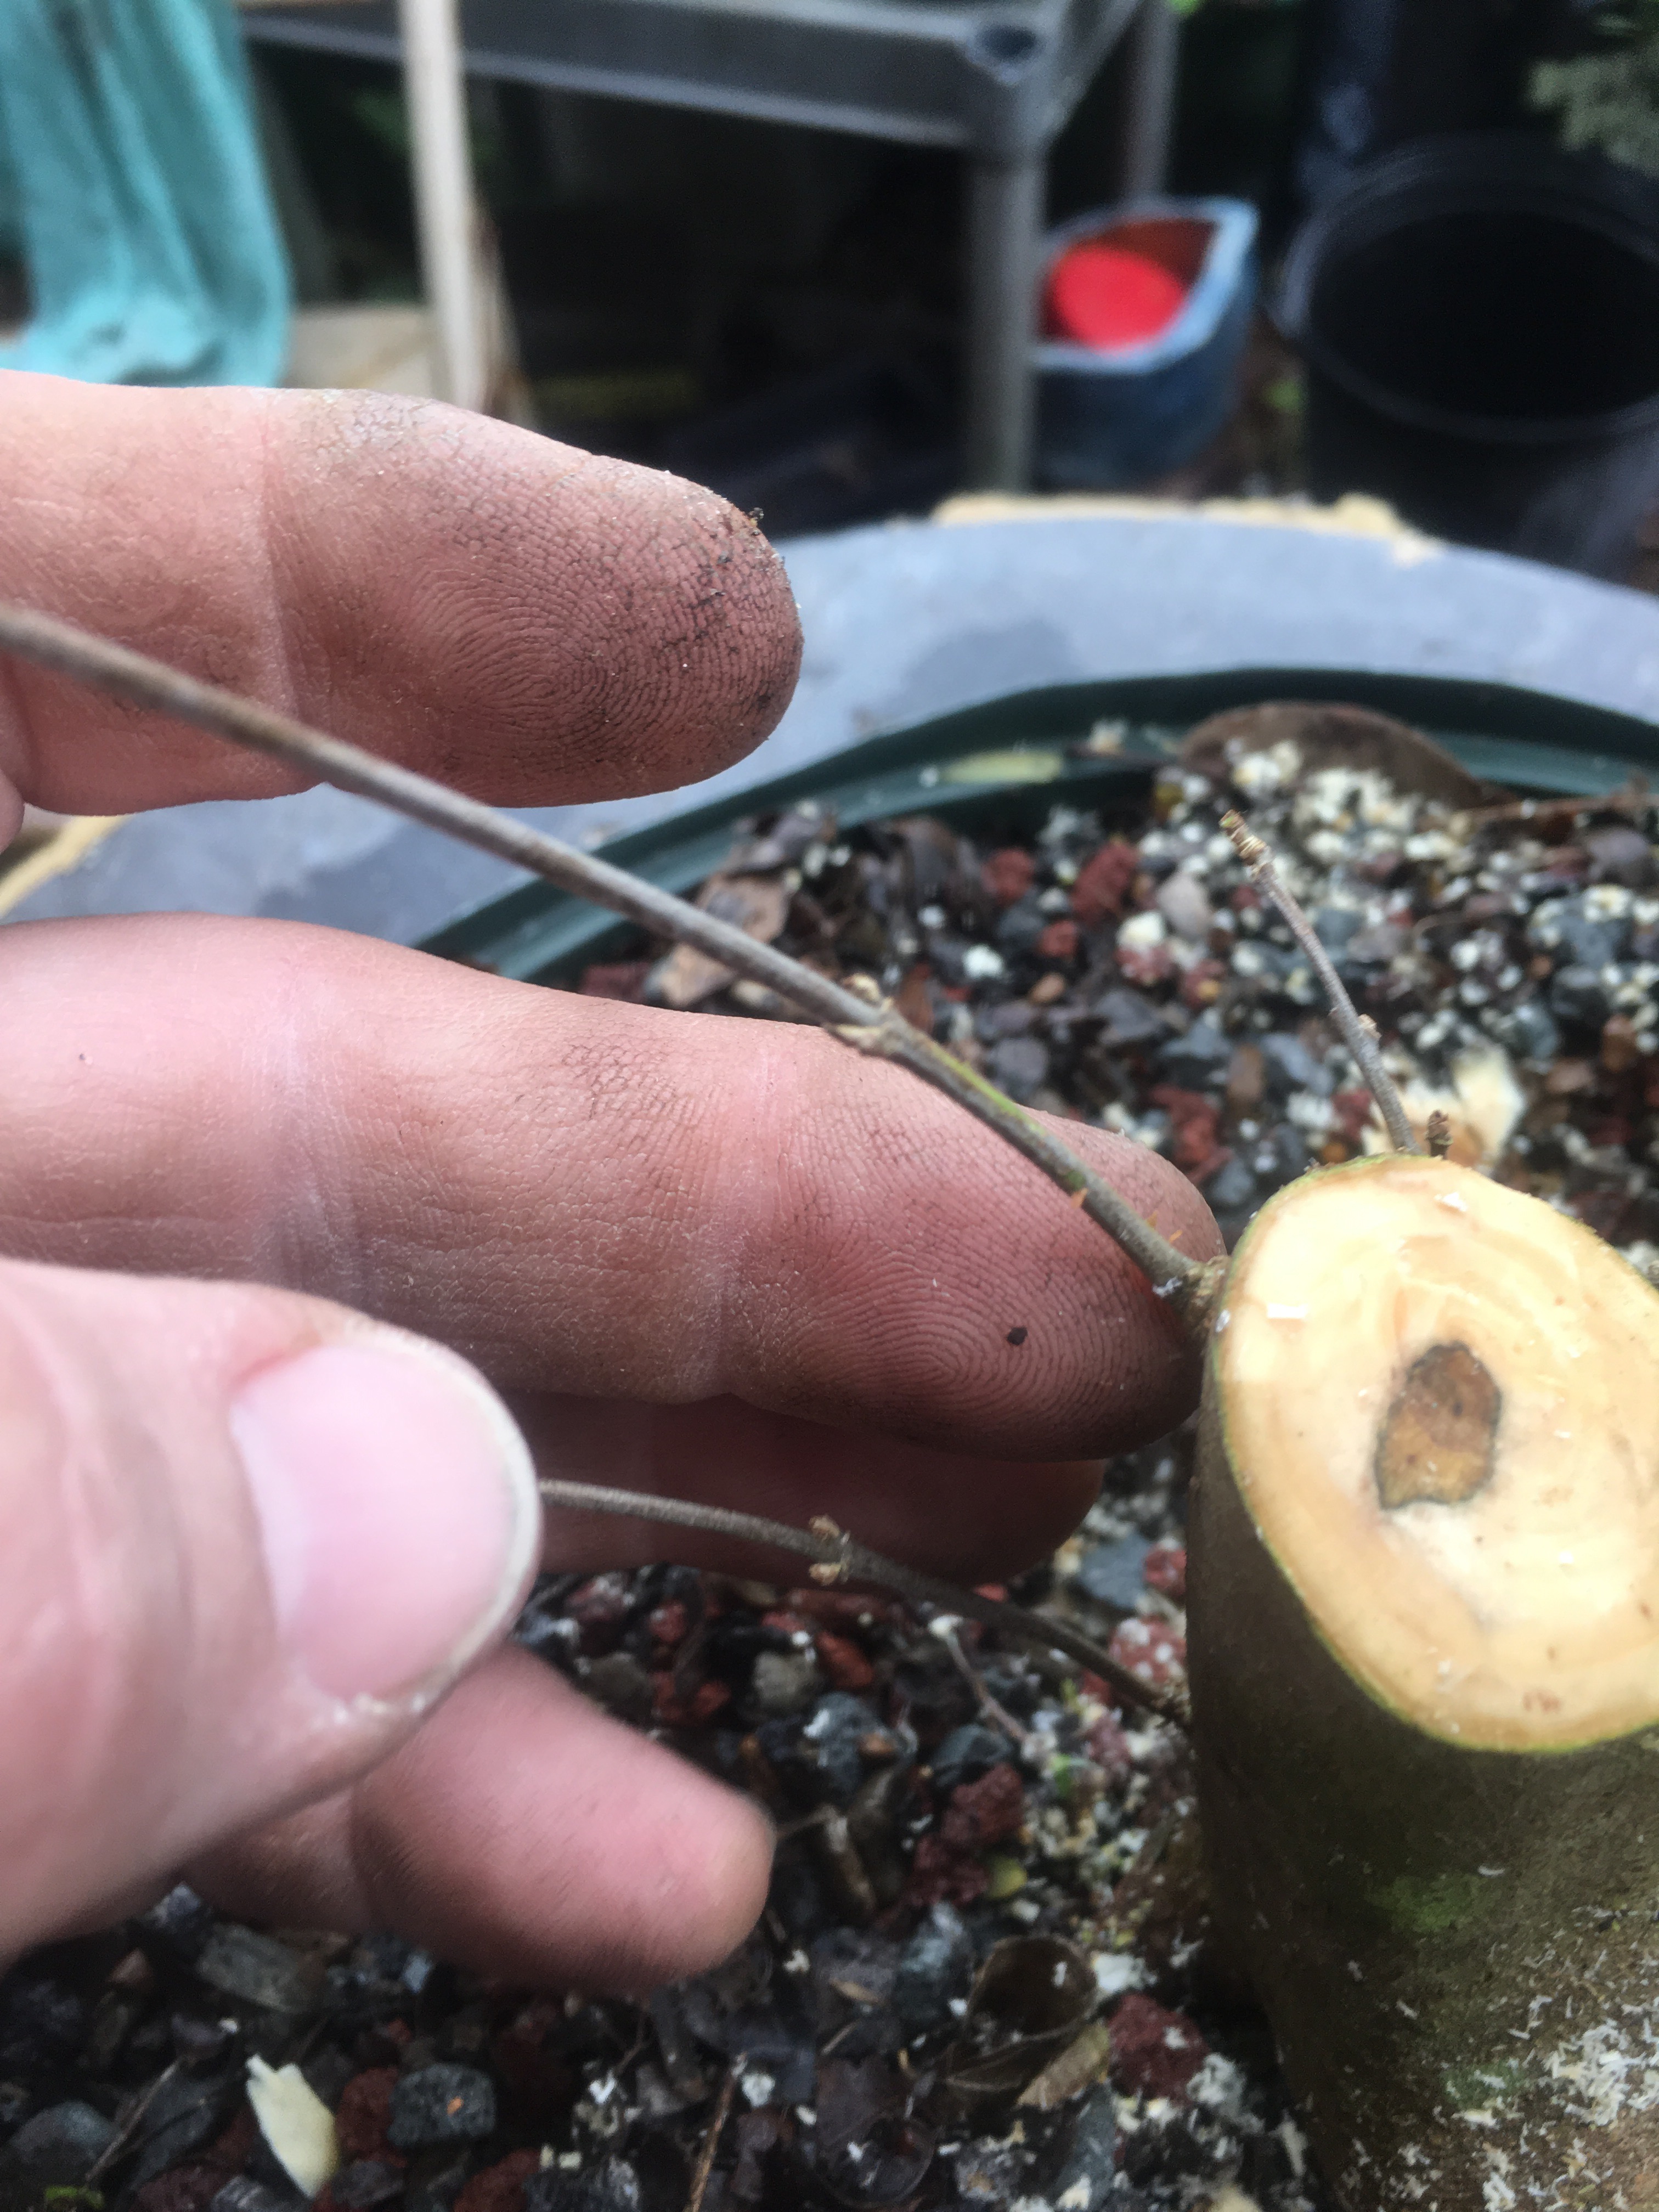 I would be making a straight cut. You don’t know where the new shoot will pop from and, as likely as not, if you made an angled cut, it would pop from the bottom of the cut instead of the top.
There are plenty of shoots down below the cut, that makes me feel better than doing a blind trunk chop. 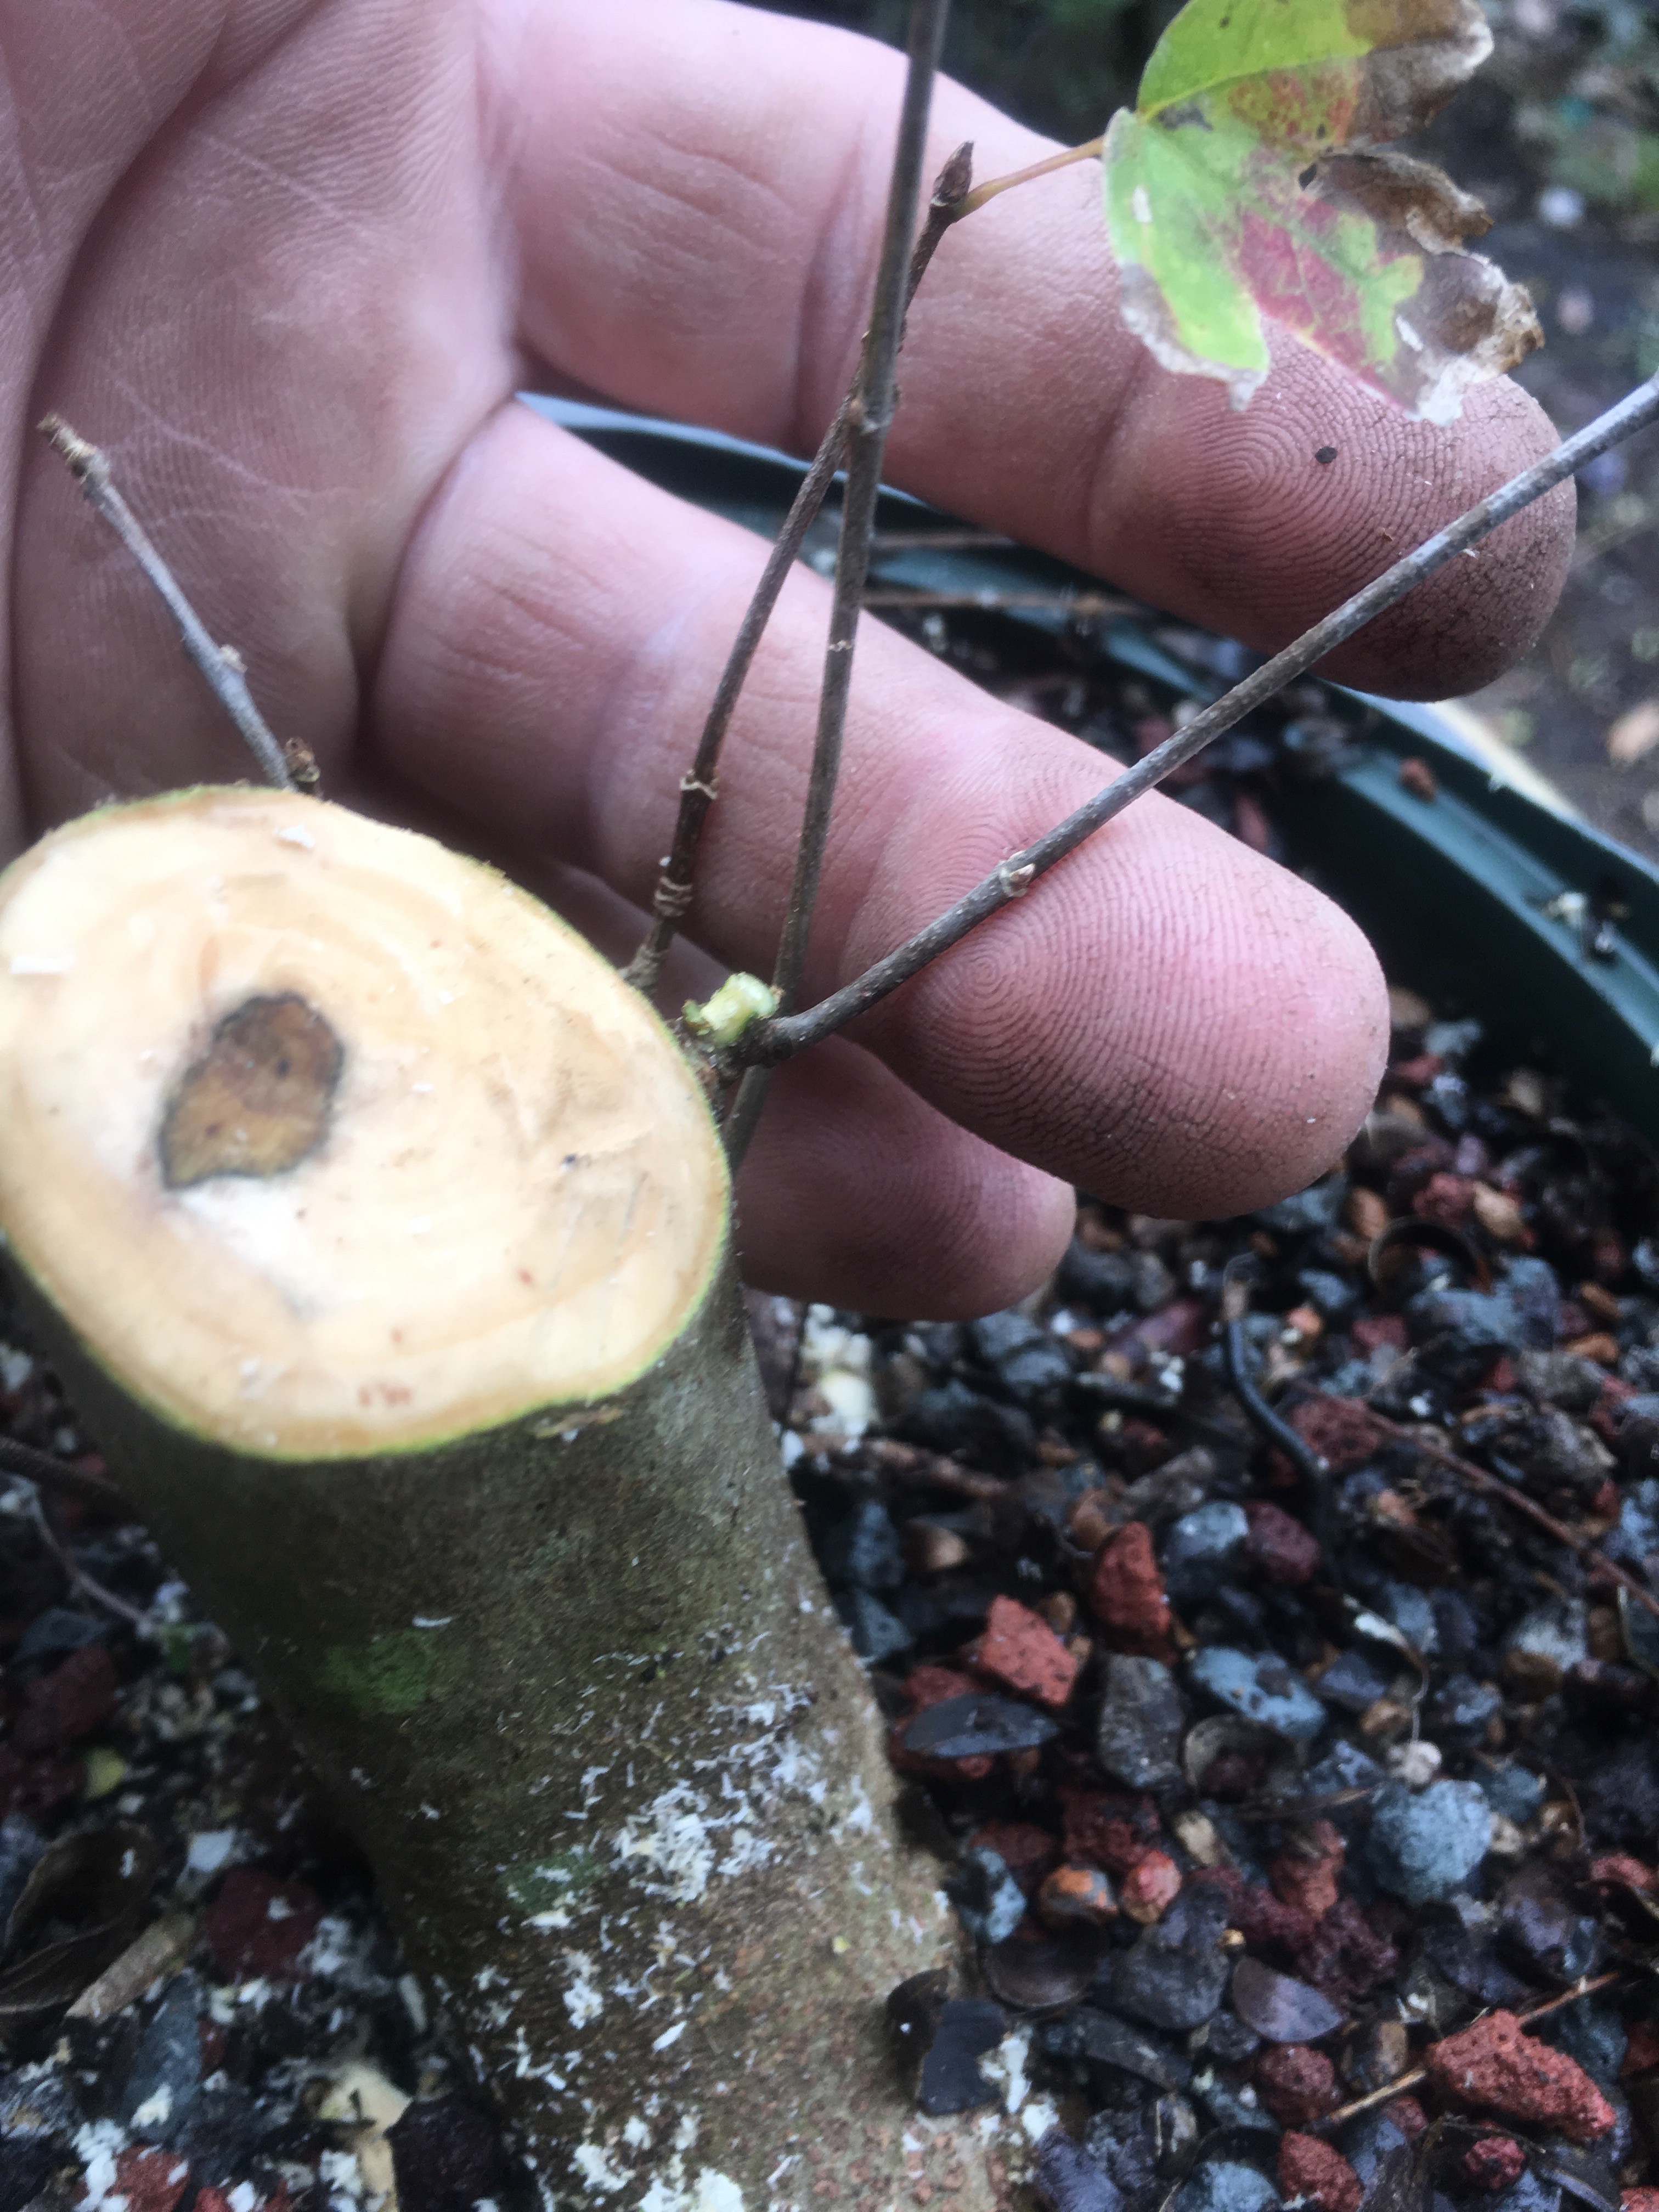
I can get rid of some there are so many. 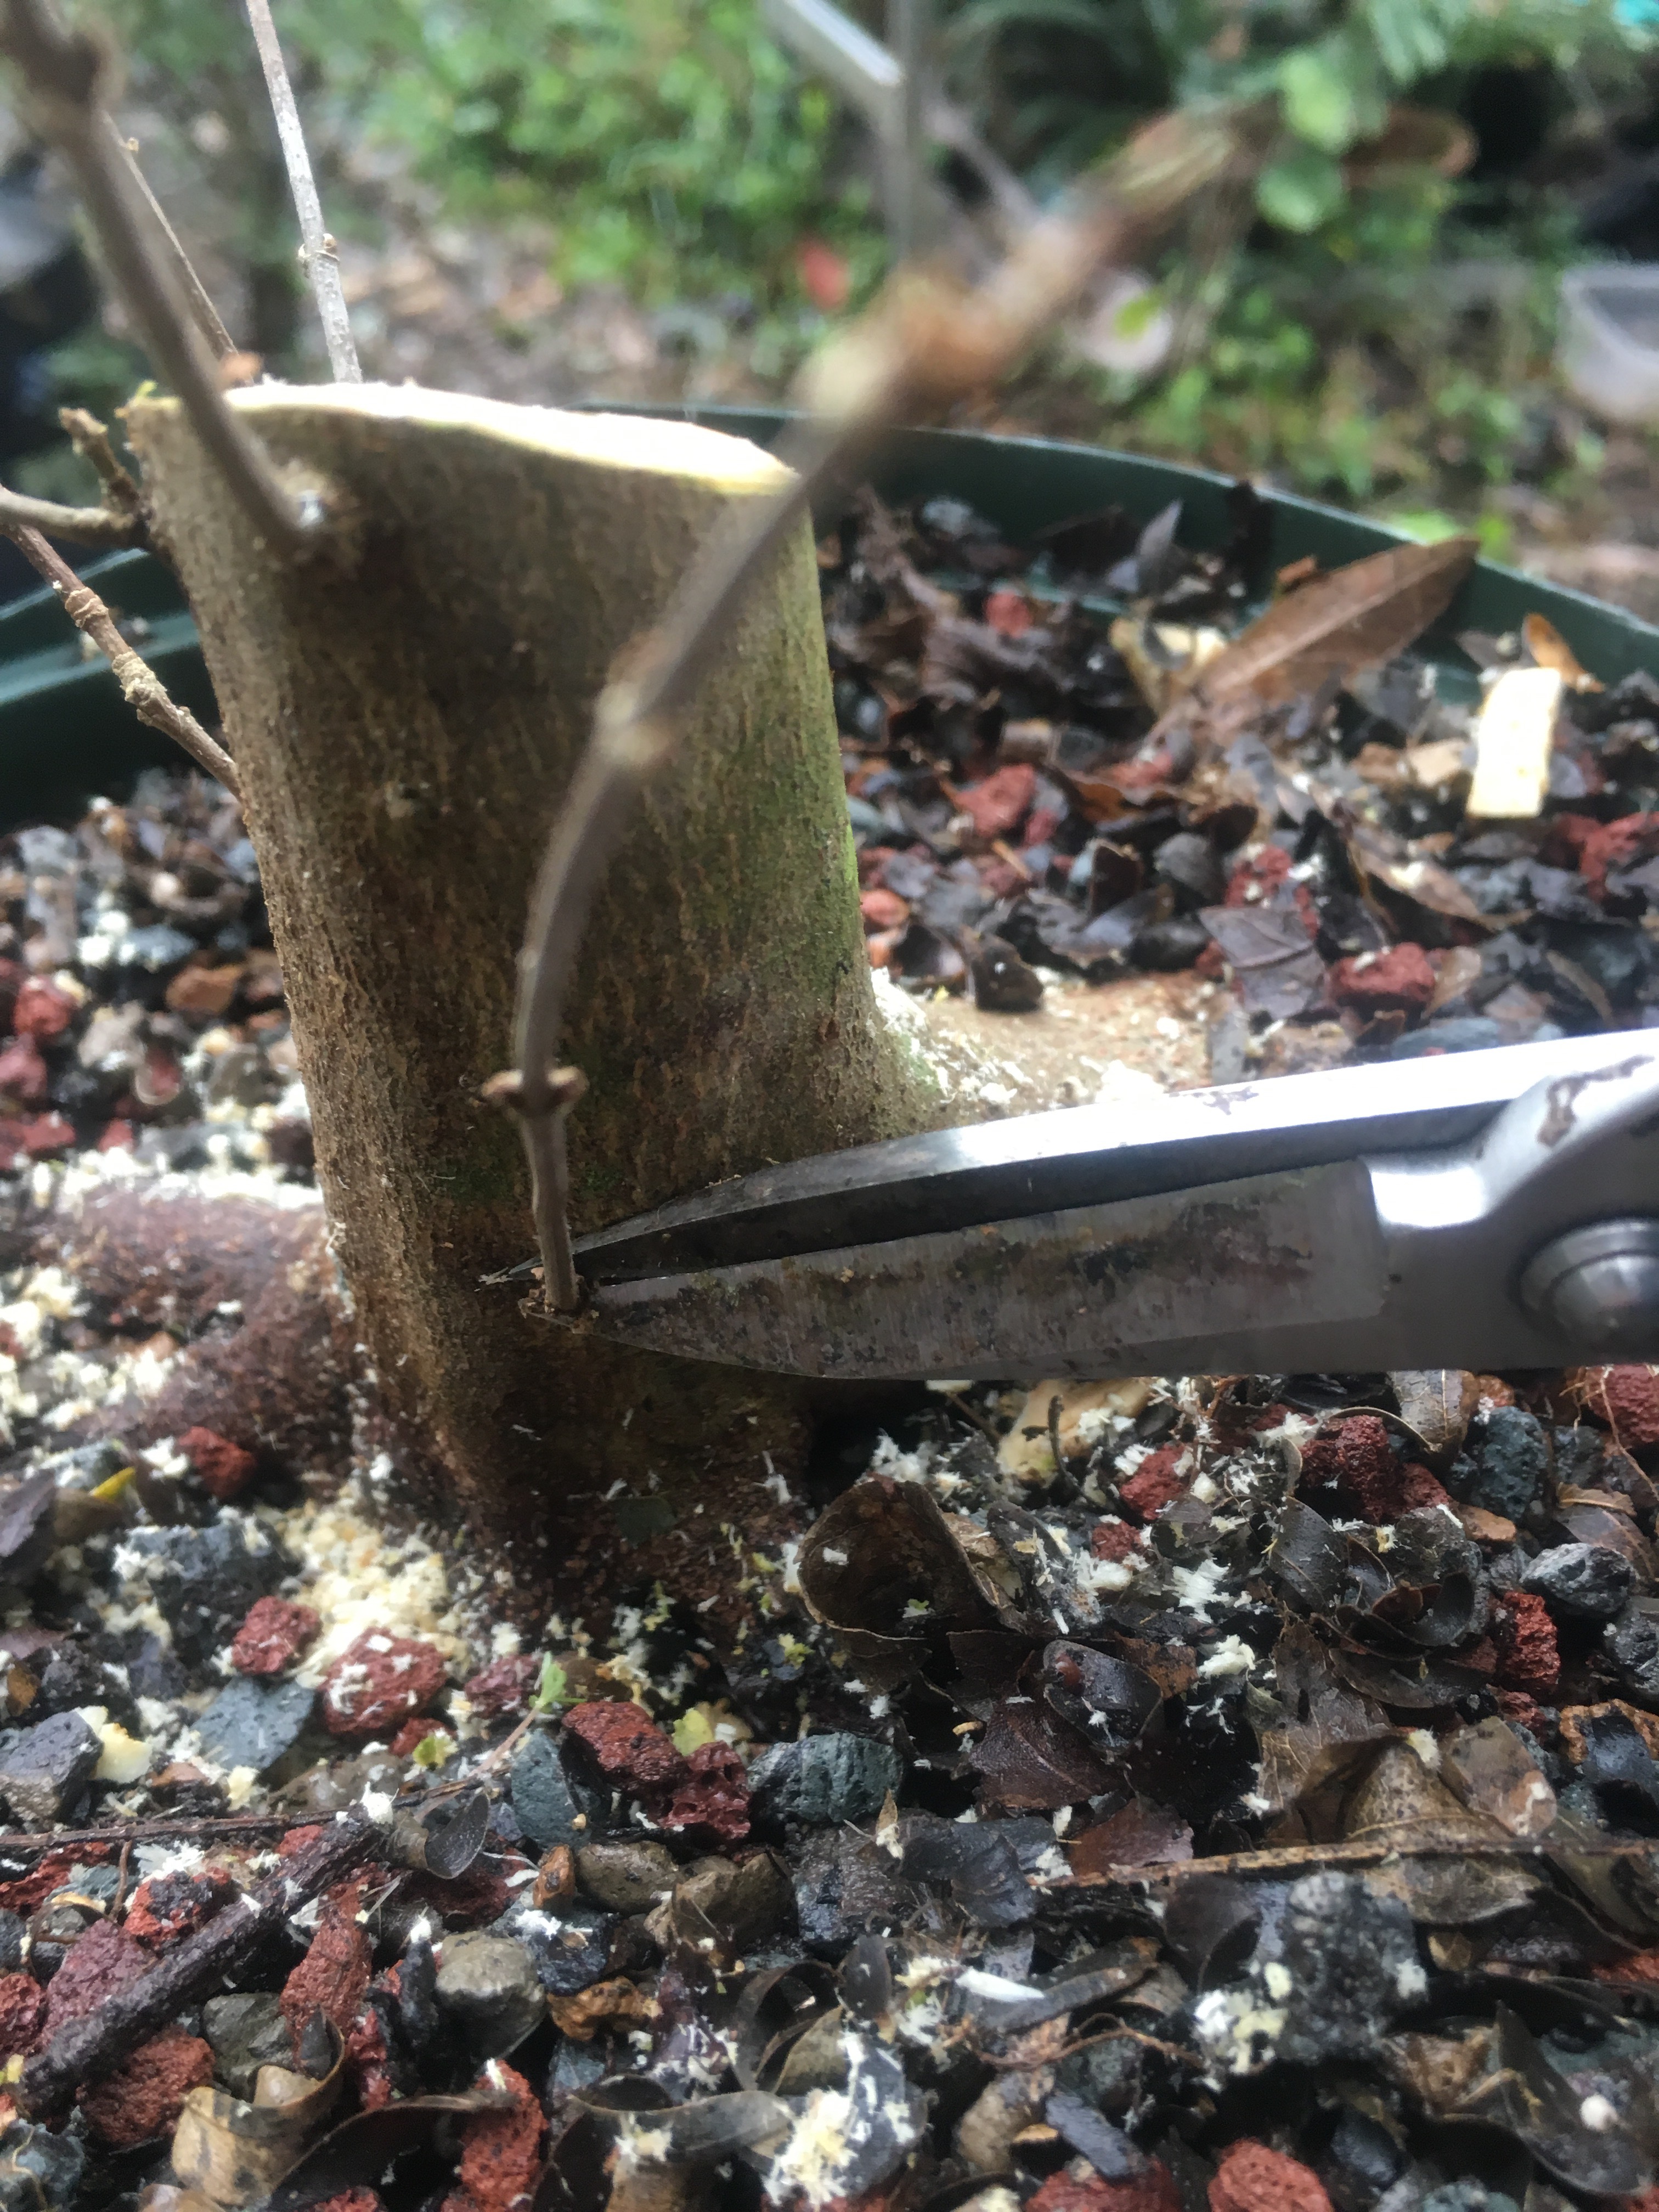
A bit of wire. 
Here’s a tip, the skinnier the branch, the more movement you put into it with wire. Especially close to the trunk. 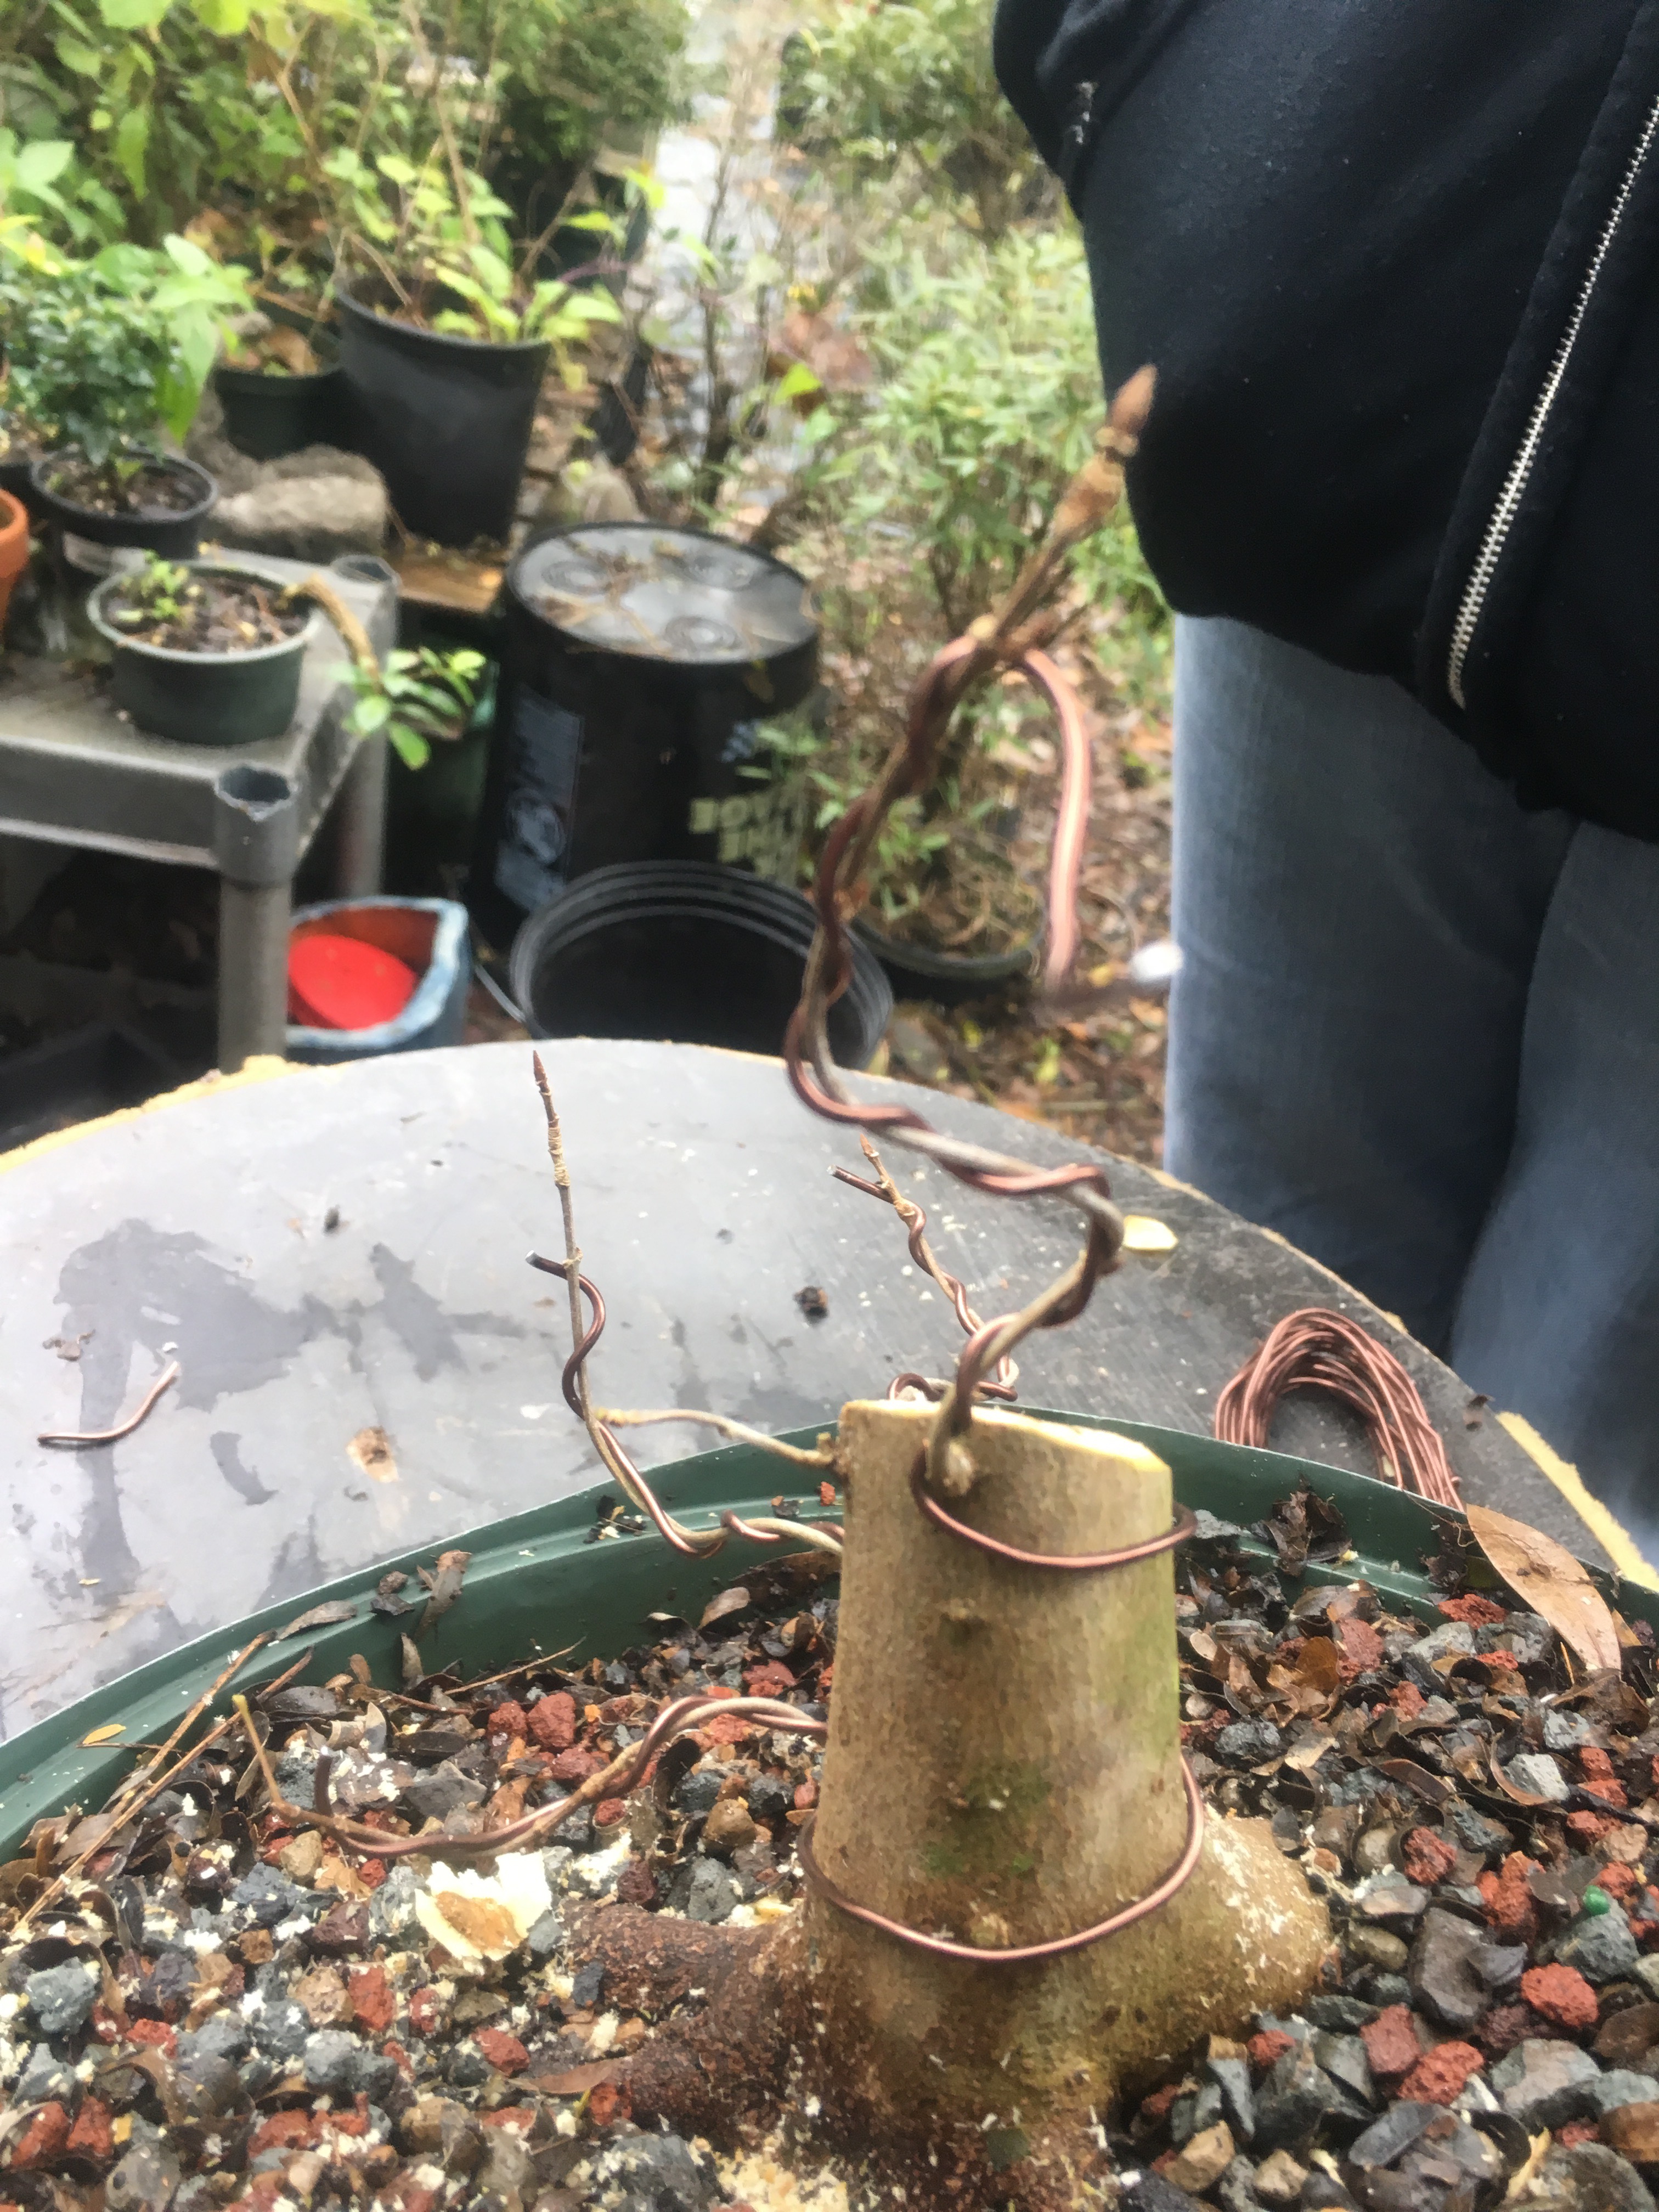 As the branch thickens, those exaggerated curves will grow out and be more natural.
 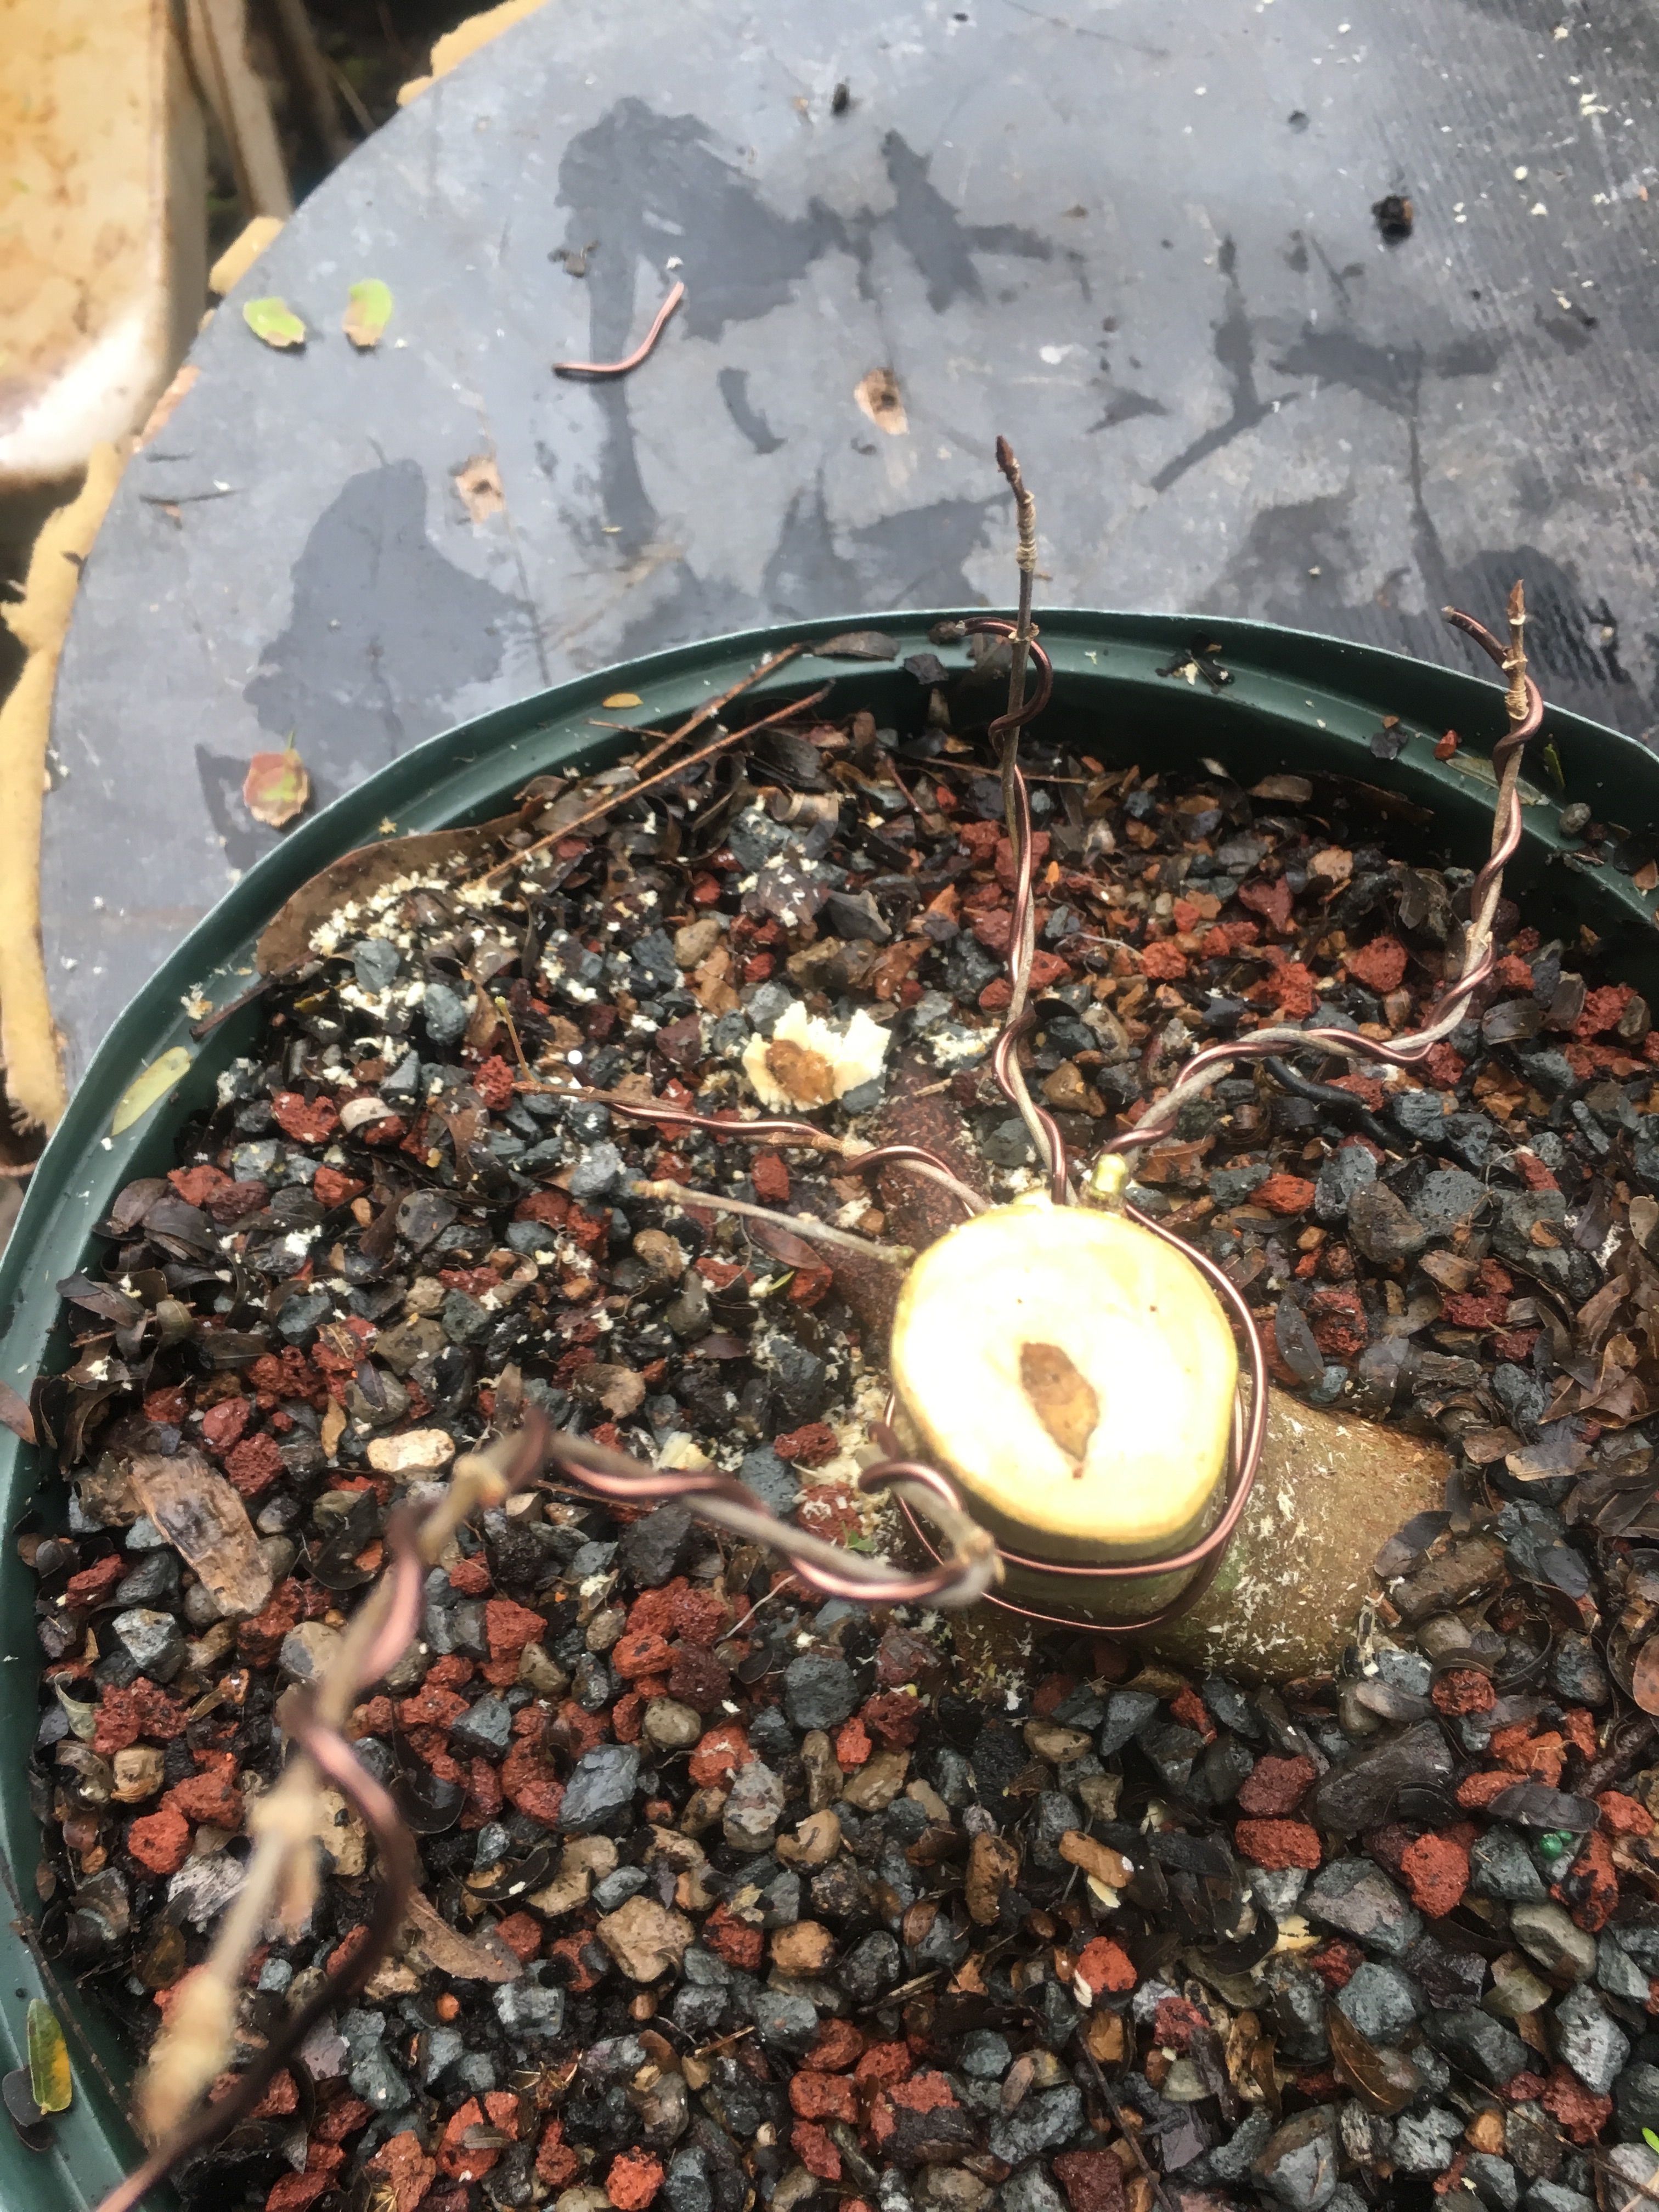 And I’ll be chopping the branches back to the first curve anyway.
One last thing, to focus the growth hormones, always point the tips upward, especially in this building stage. You’ll get stronger, faster growth. 
On a cut like this I’ll use a wound sealer. 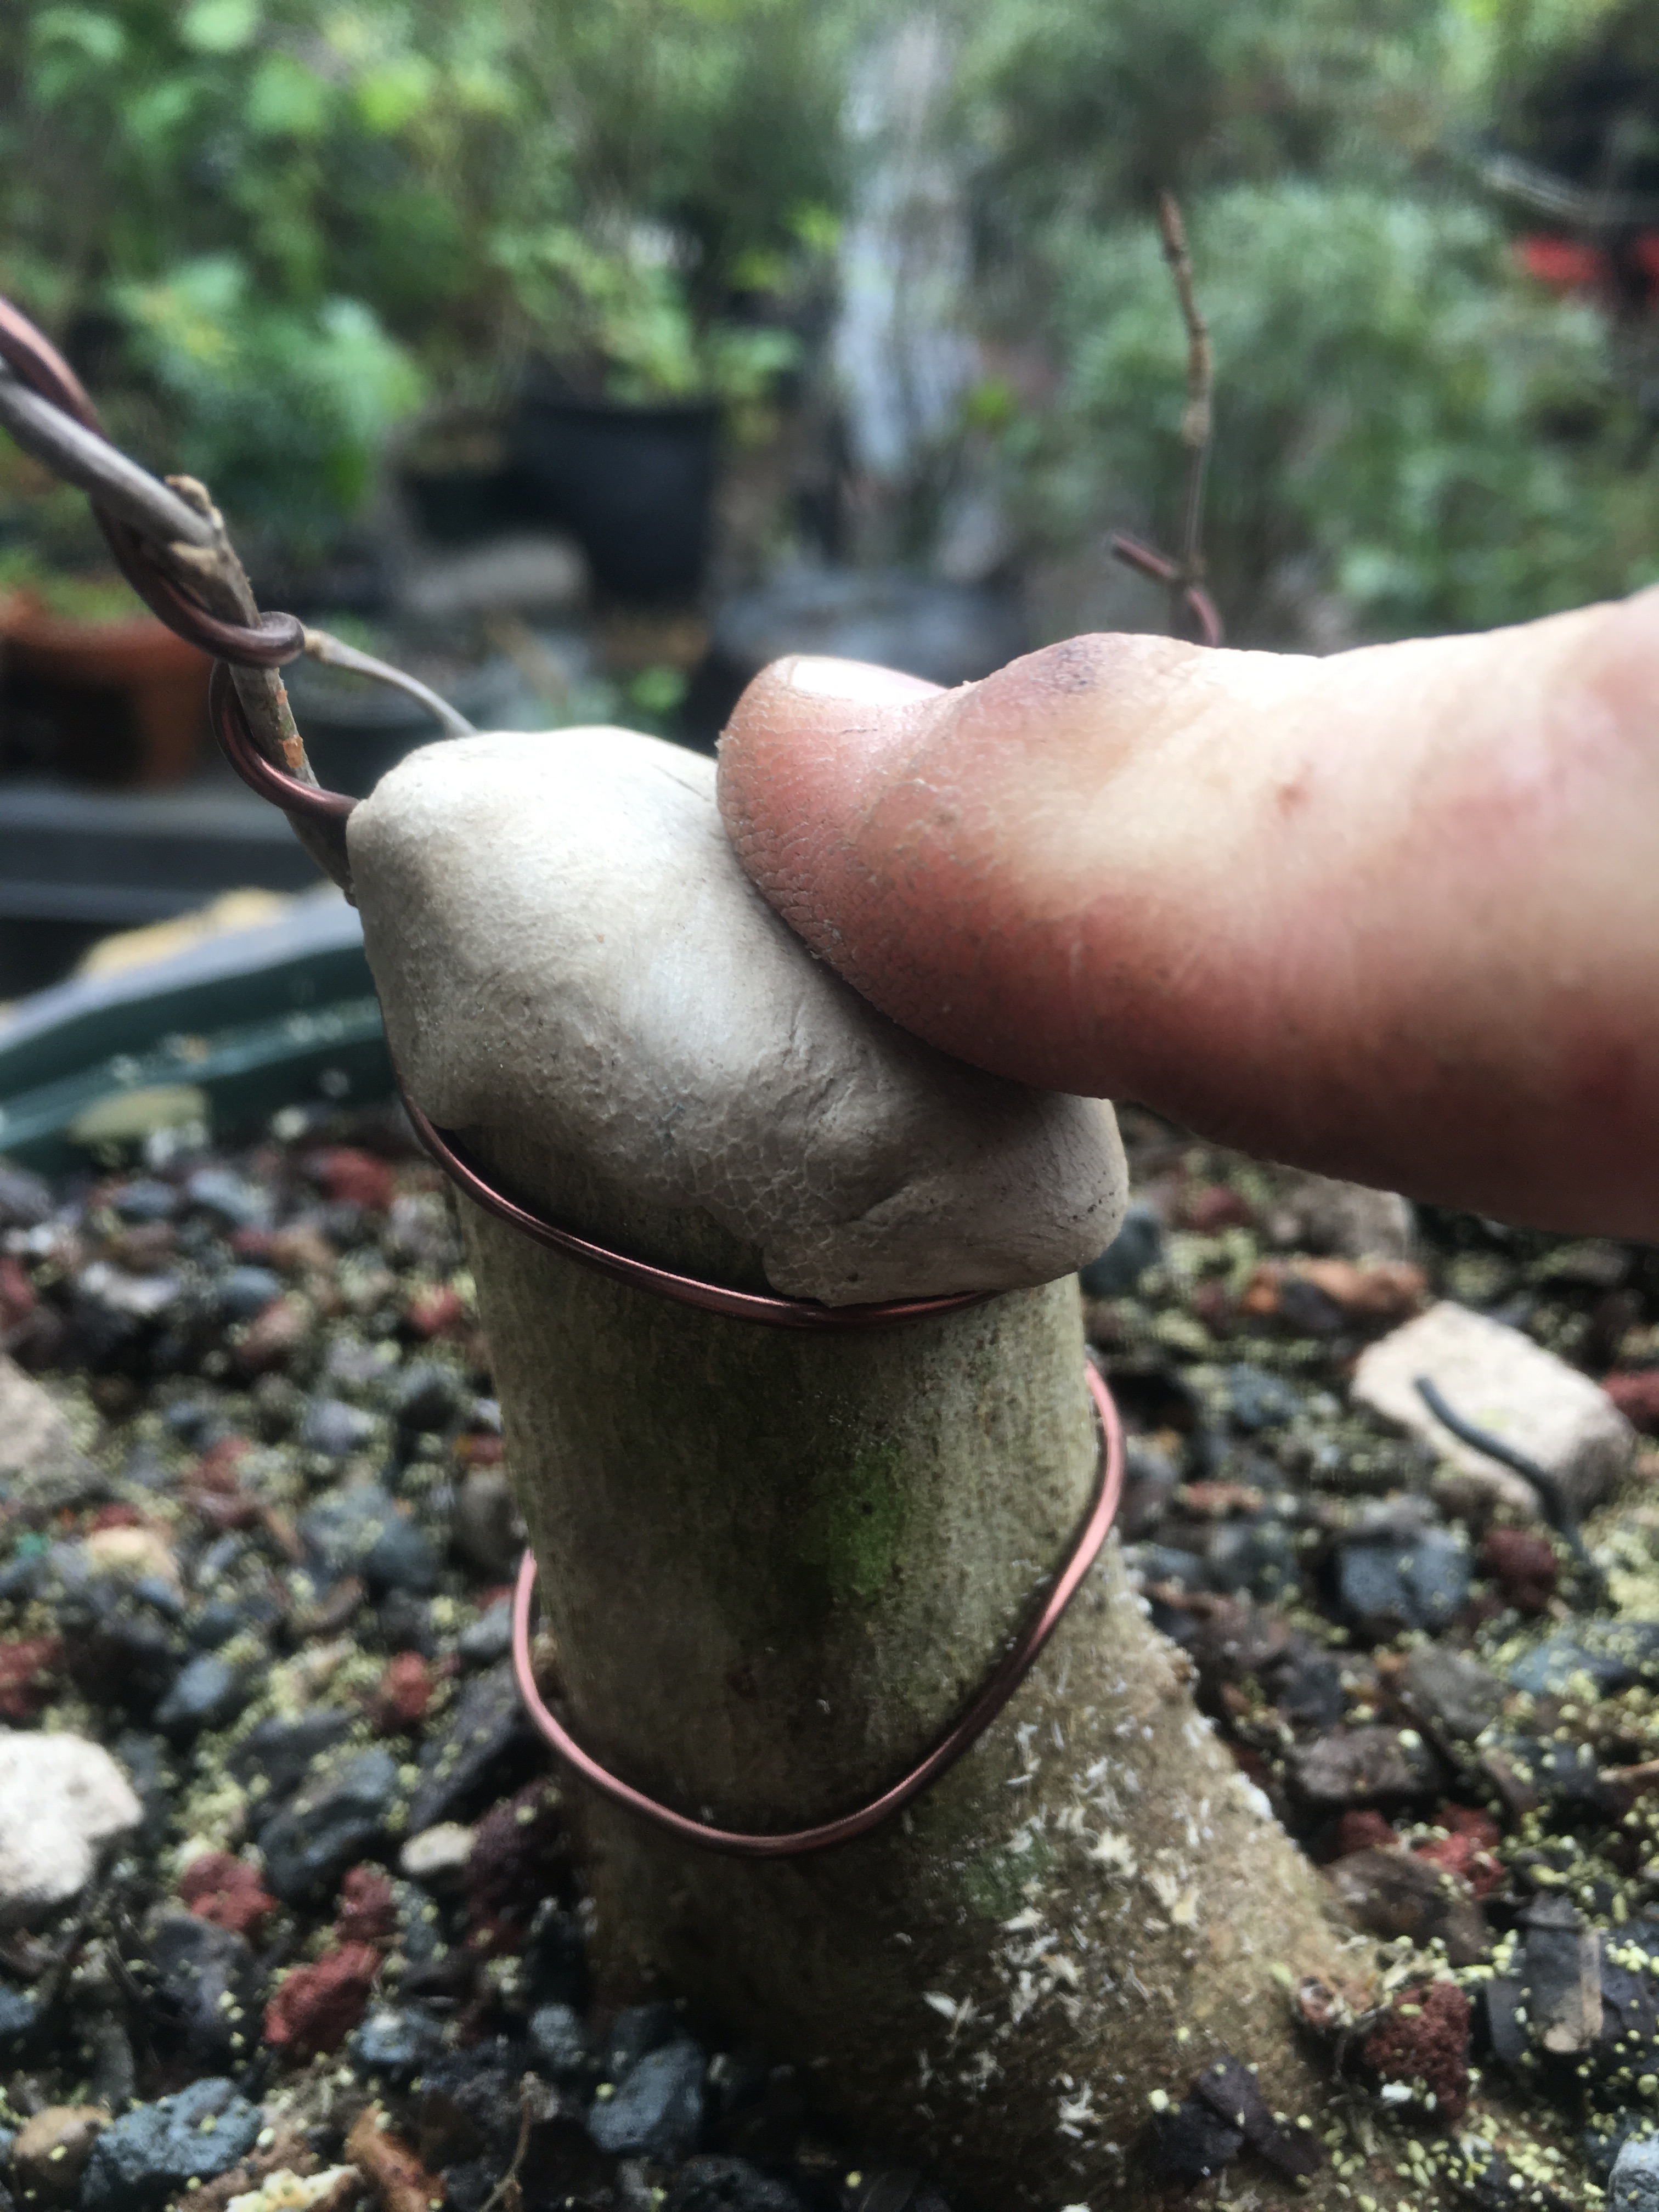 This is inexpensive duct caulk (say that aloud, very loud, in a crowd: DUCT CAULK!)
Now, normally I wouldn’t be fertilizing at this time of the year, but I want to accelerate that new leaders growth, which will then accelerate that chop healing. I am expecting it to get about 4-5 feet tall this year. 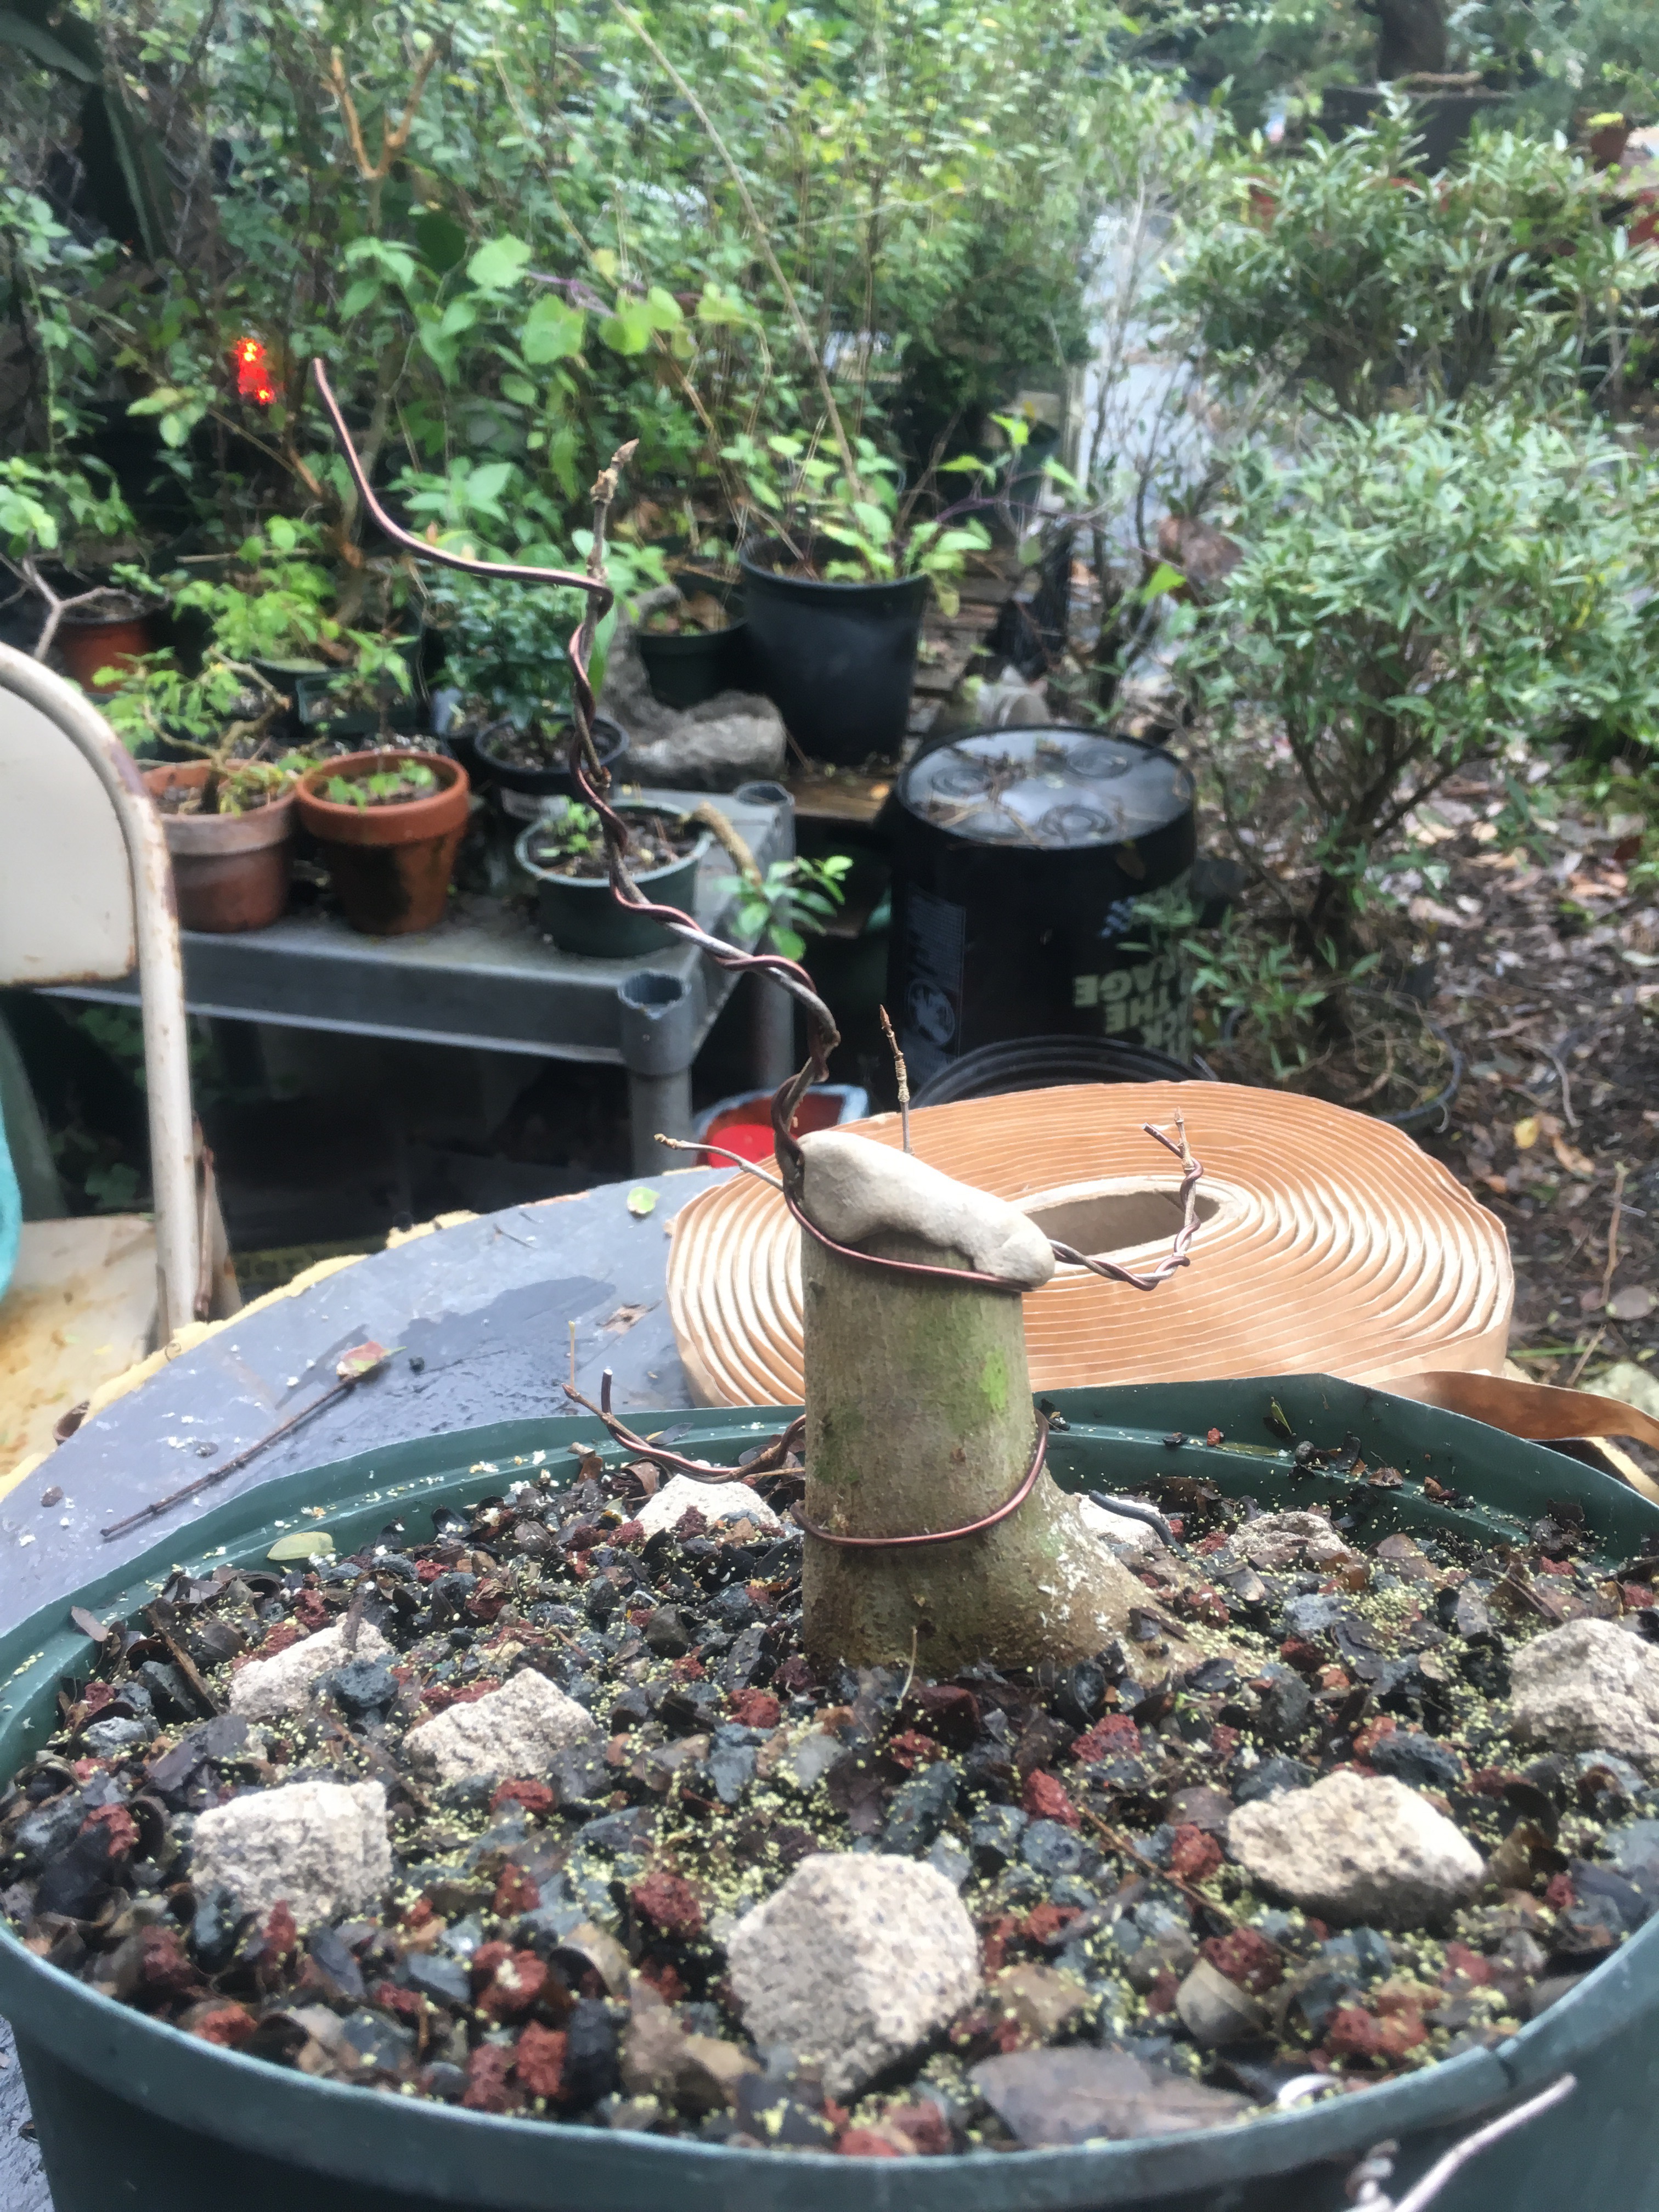
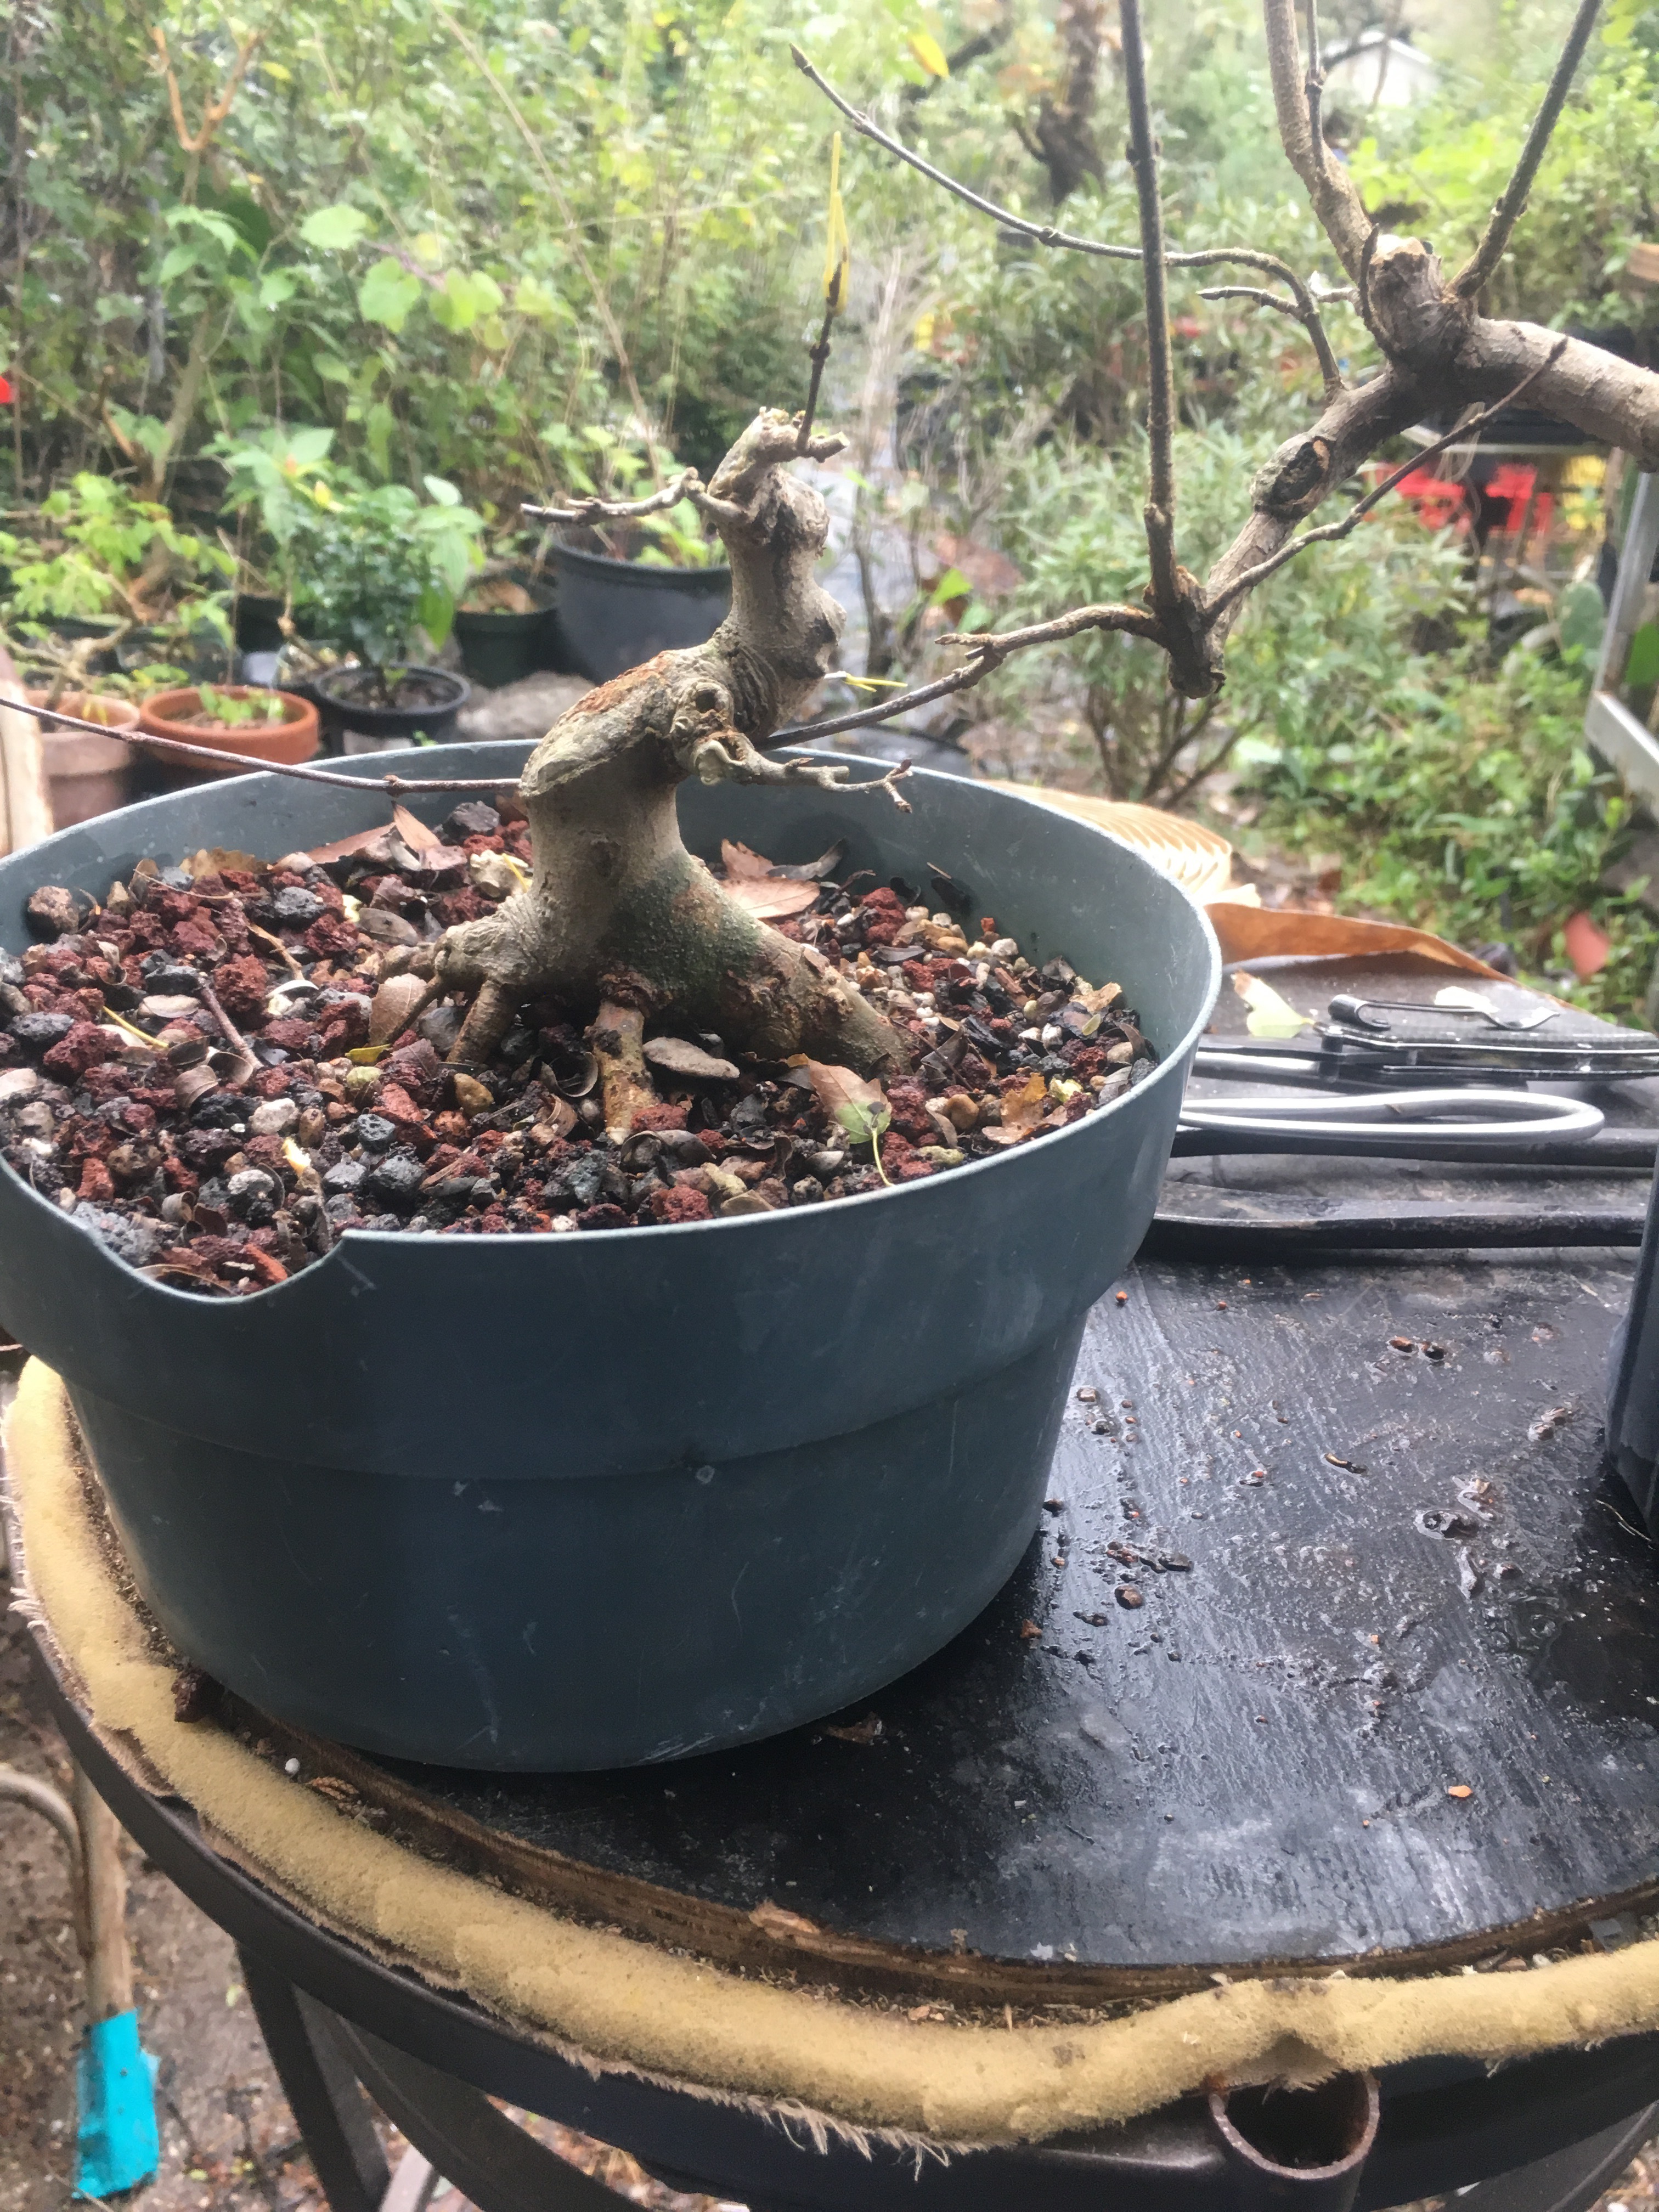
Now, the second trident. I’ve been building this tree for maybe ten years.
 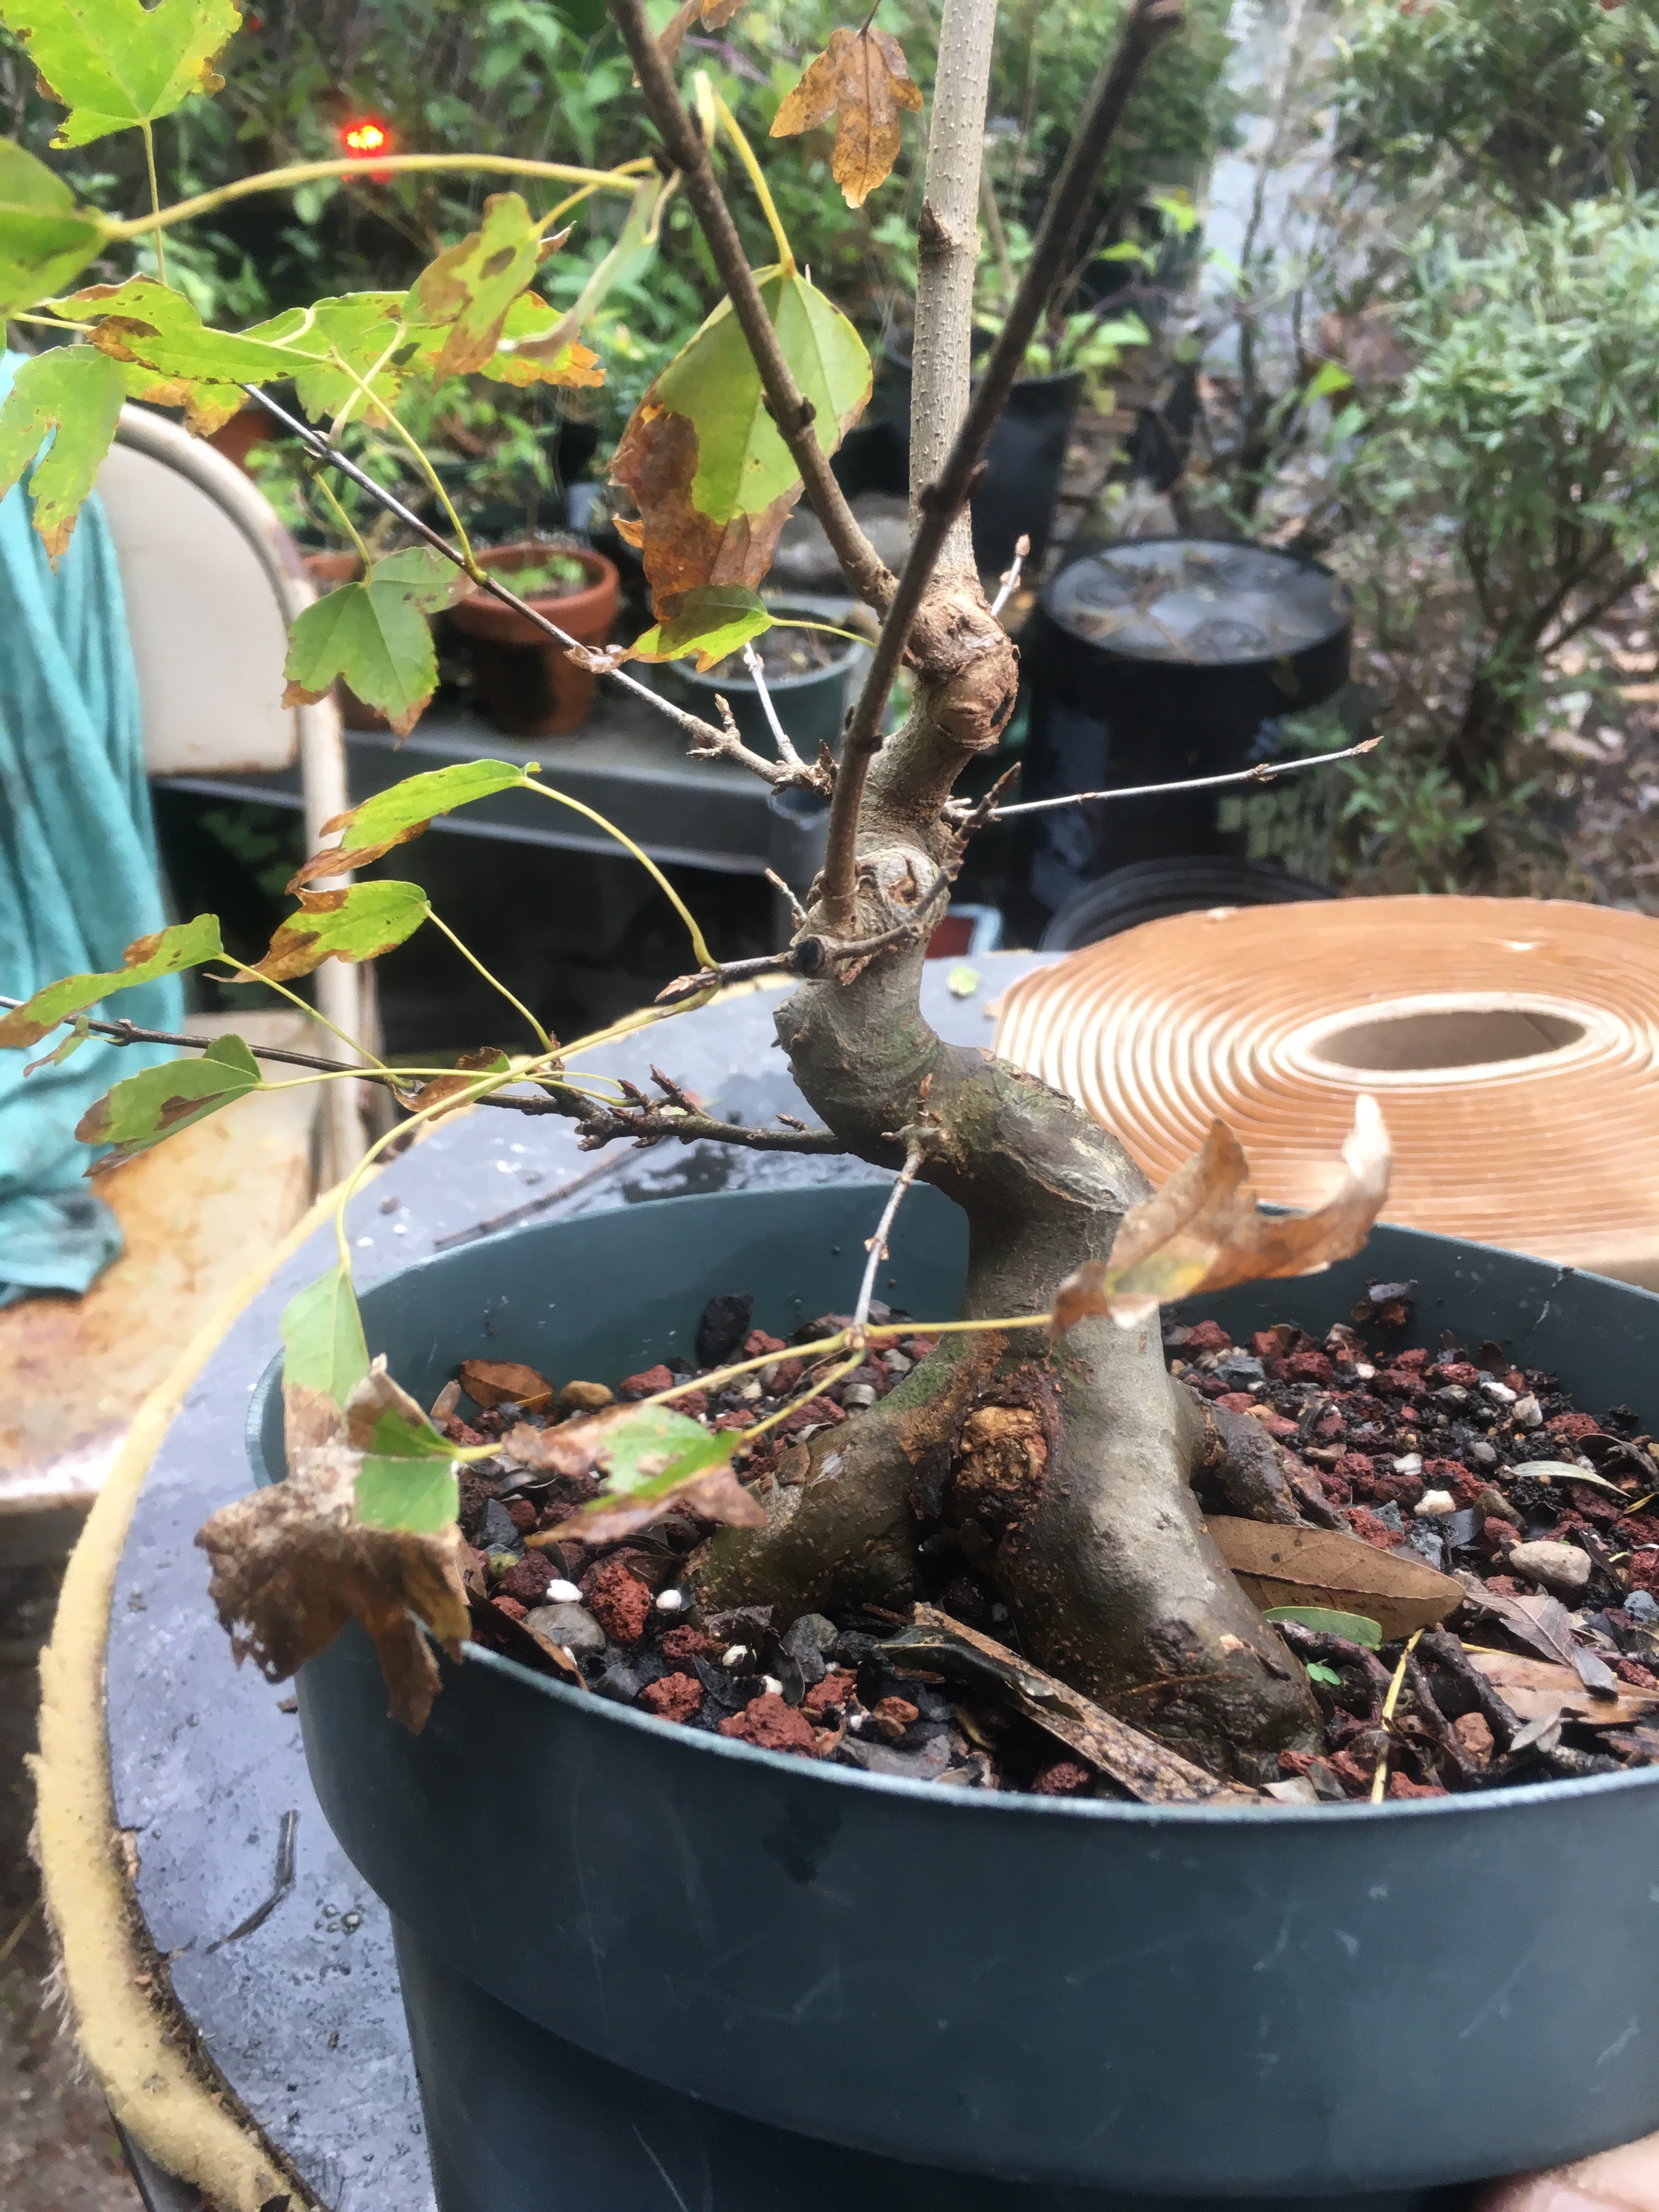 The first cut is healed, as are all the subsequent ones. Keeping a strong leader growing makes the difference. Some call it a sacrifice branch, some, an escape branch. Call it what you want, it works.

Now that’s a gnarly trunk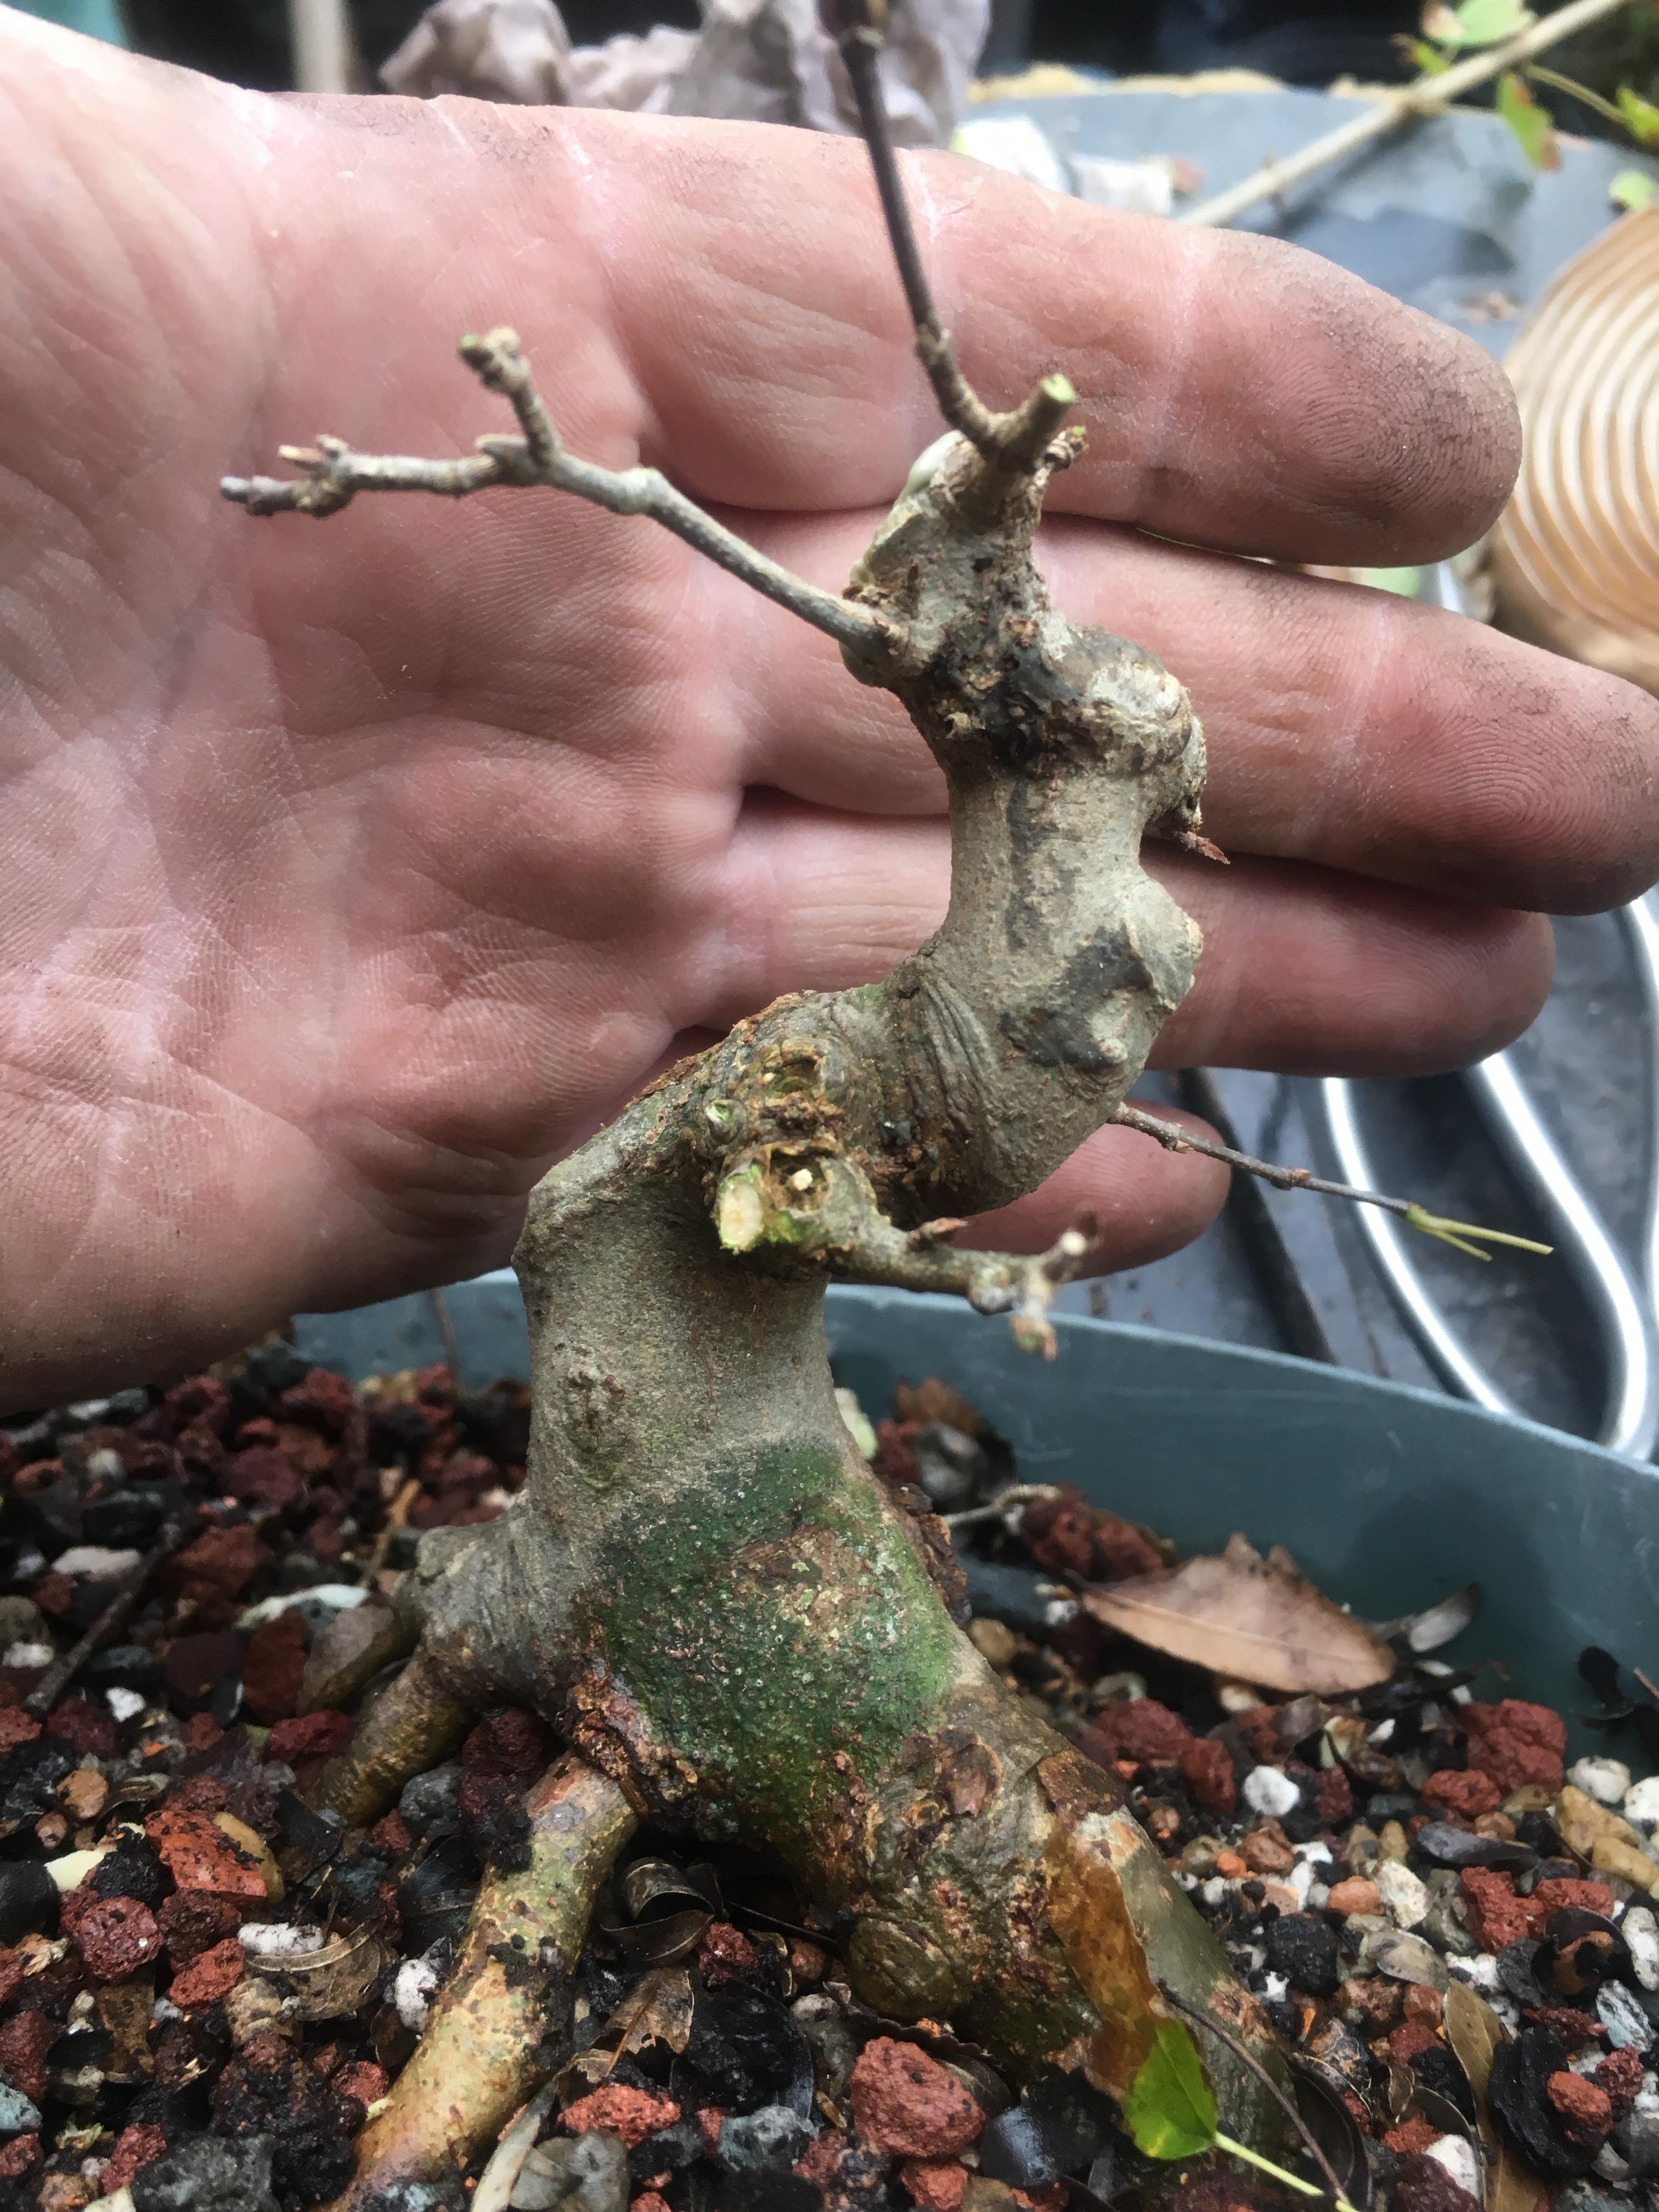 Now it’s time to add some branches.
The donor tree. 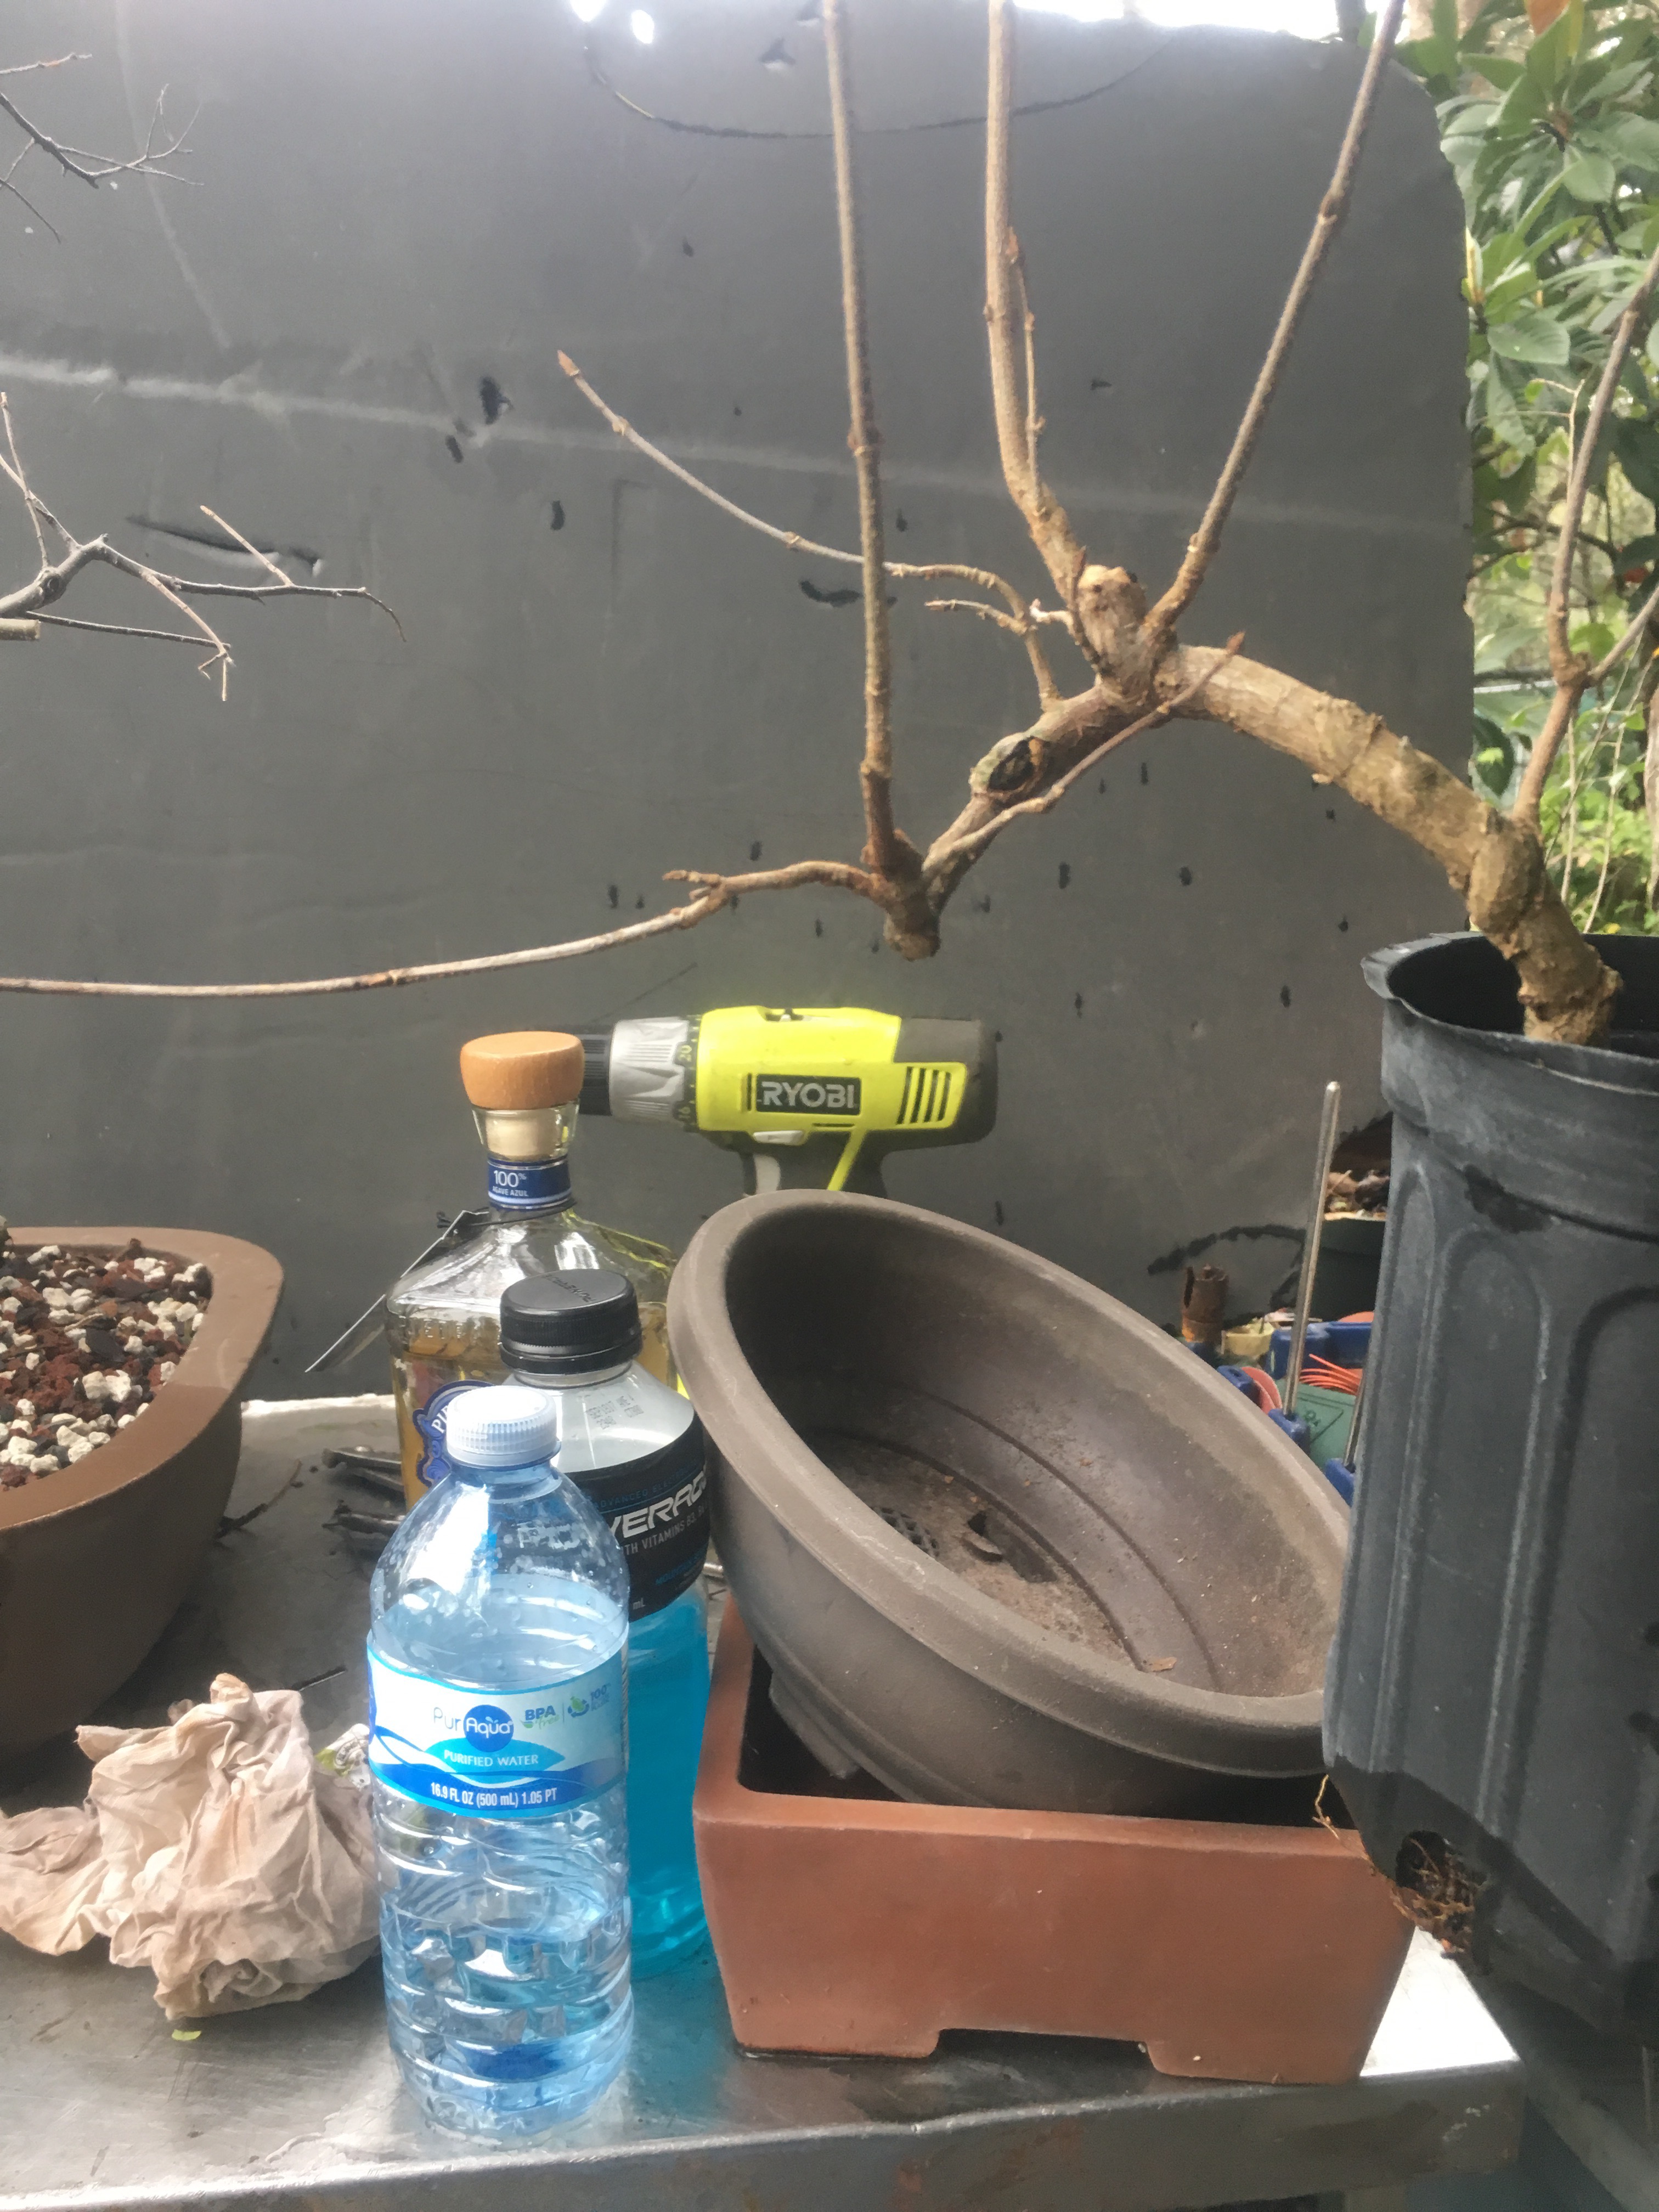 And, back to front, the tool of the day, the liquid courage, and the cures for the effects of that liquid courage.
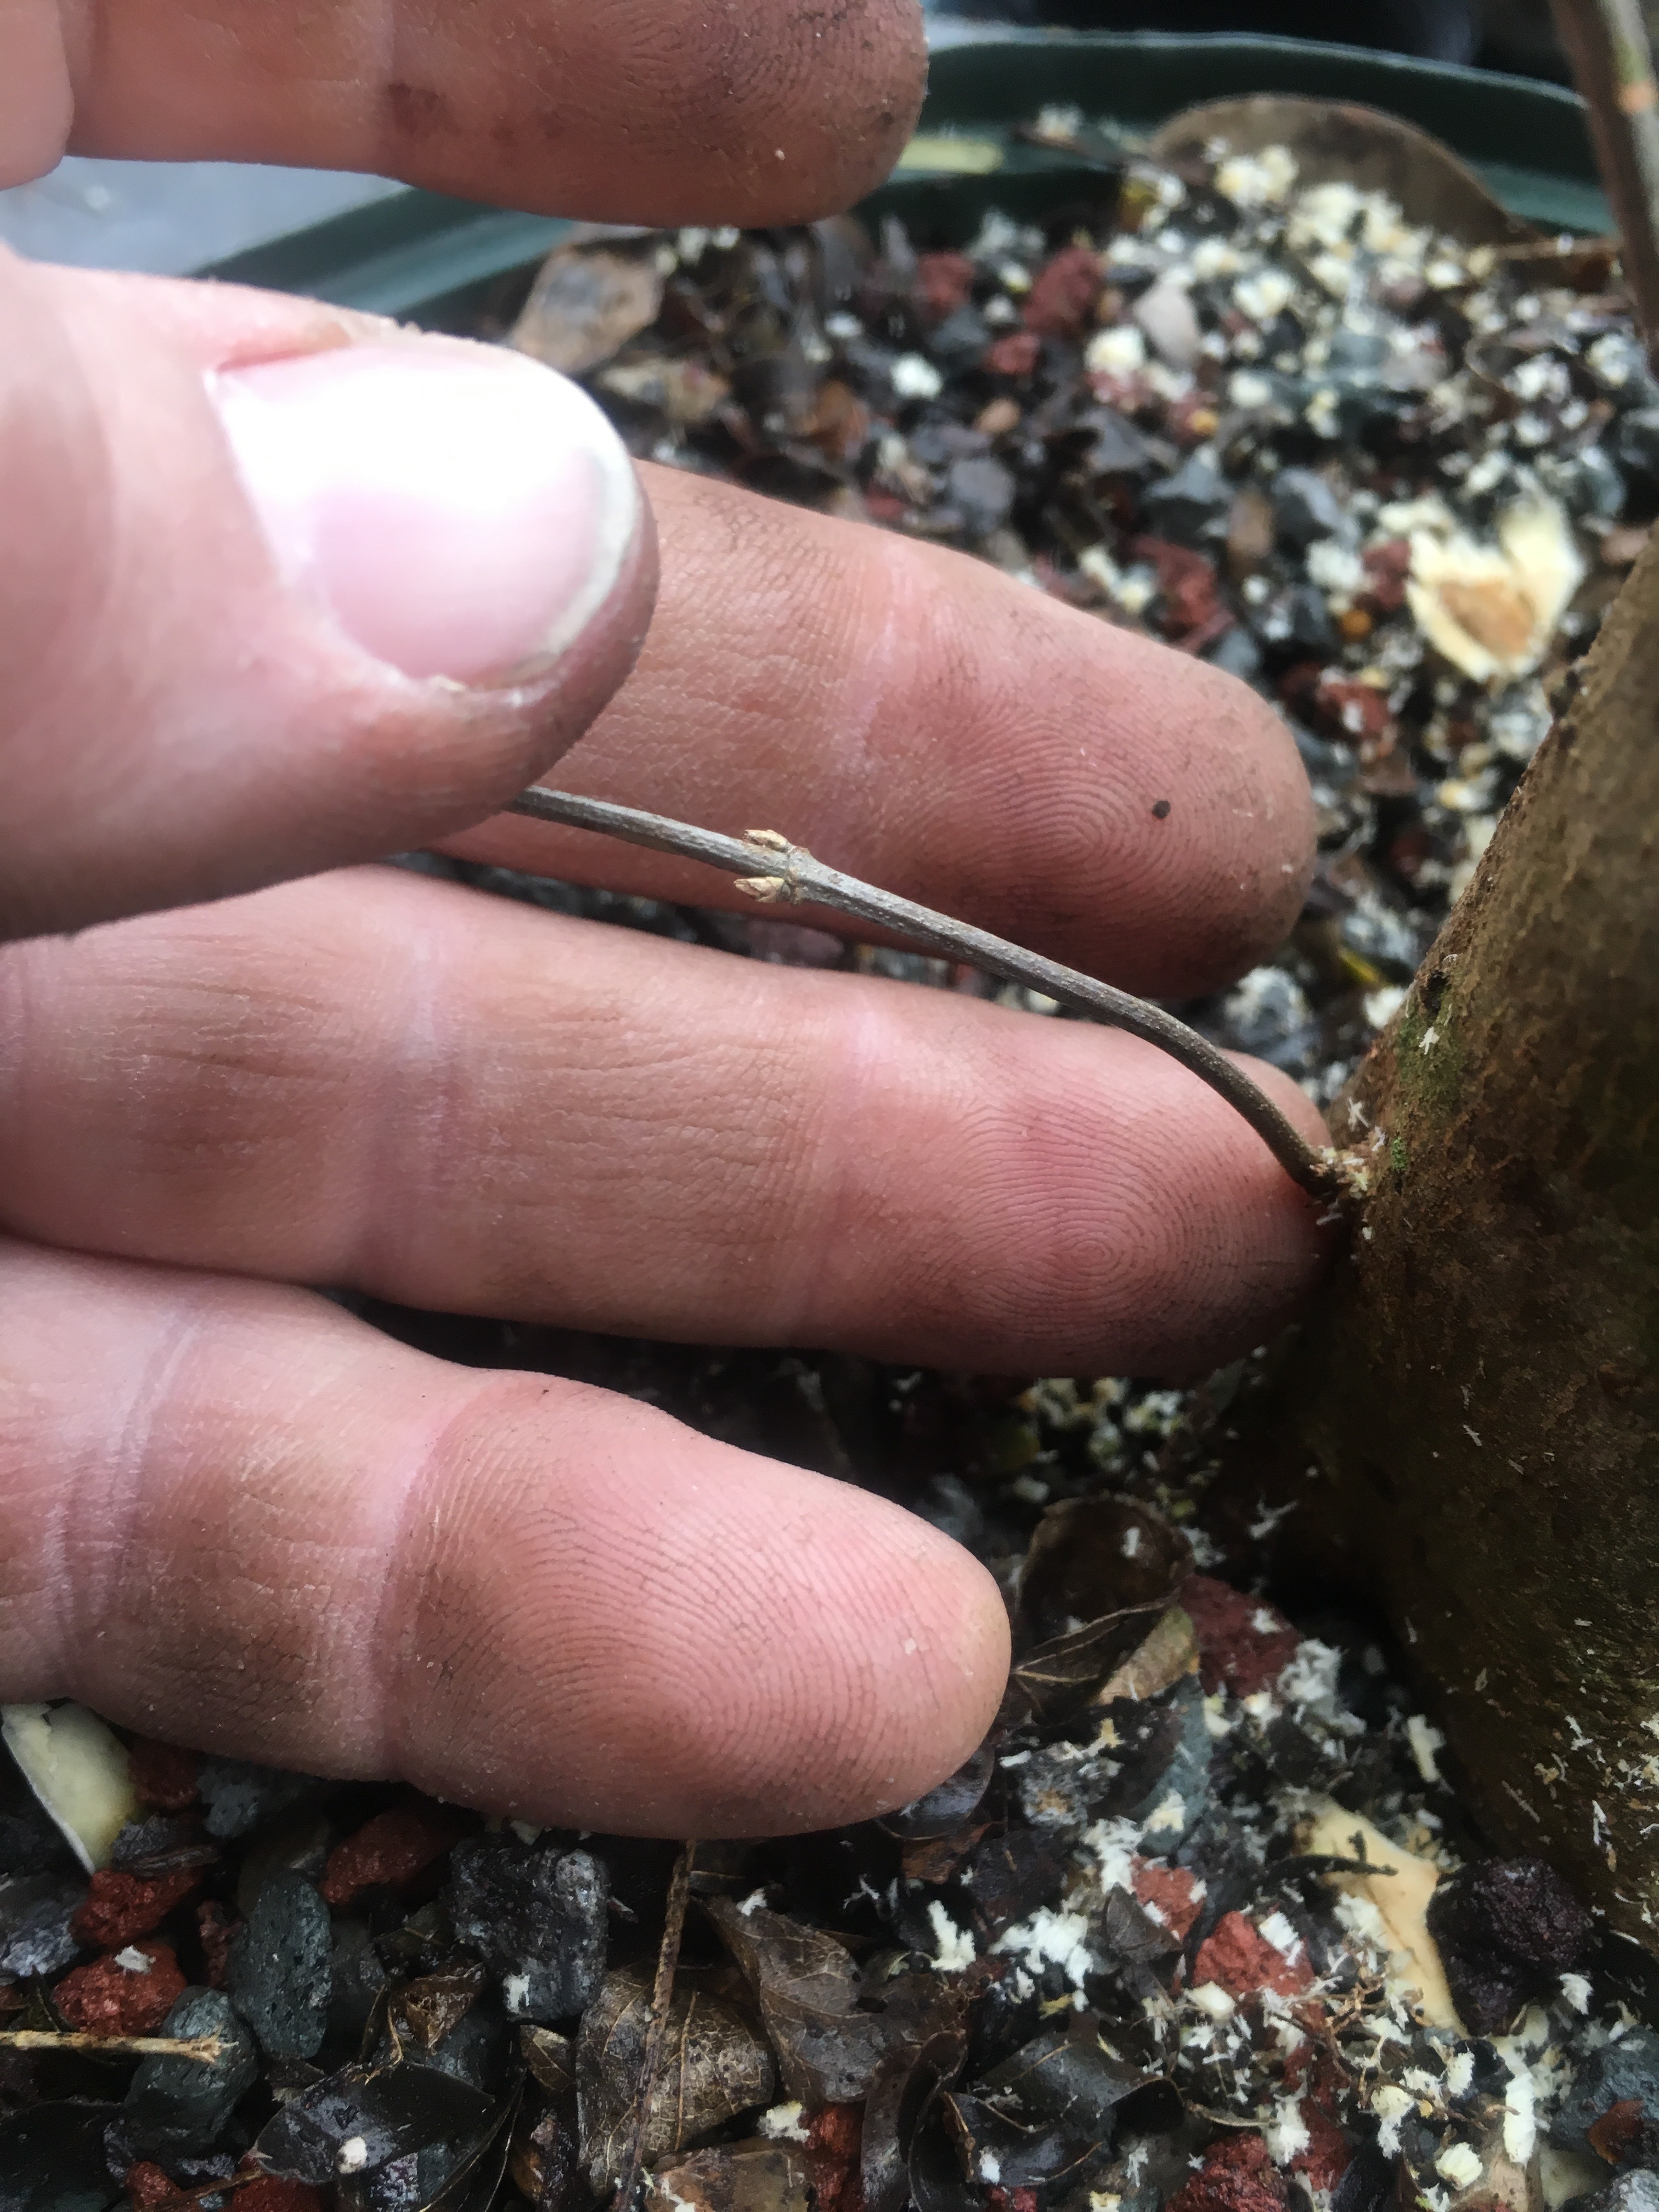
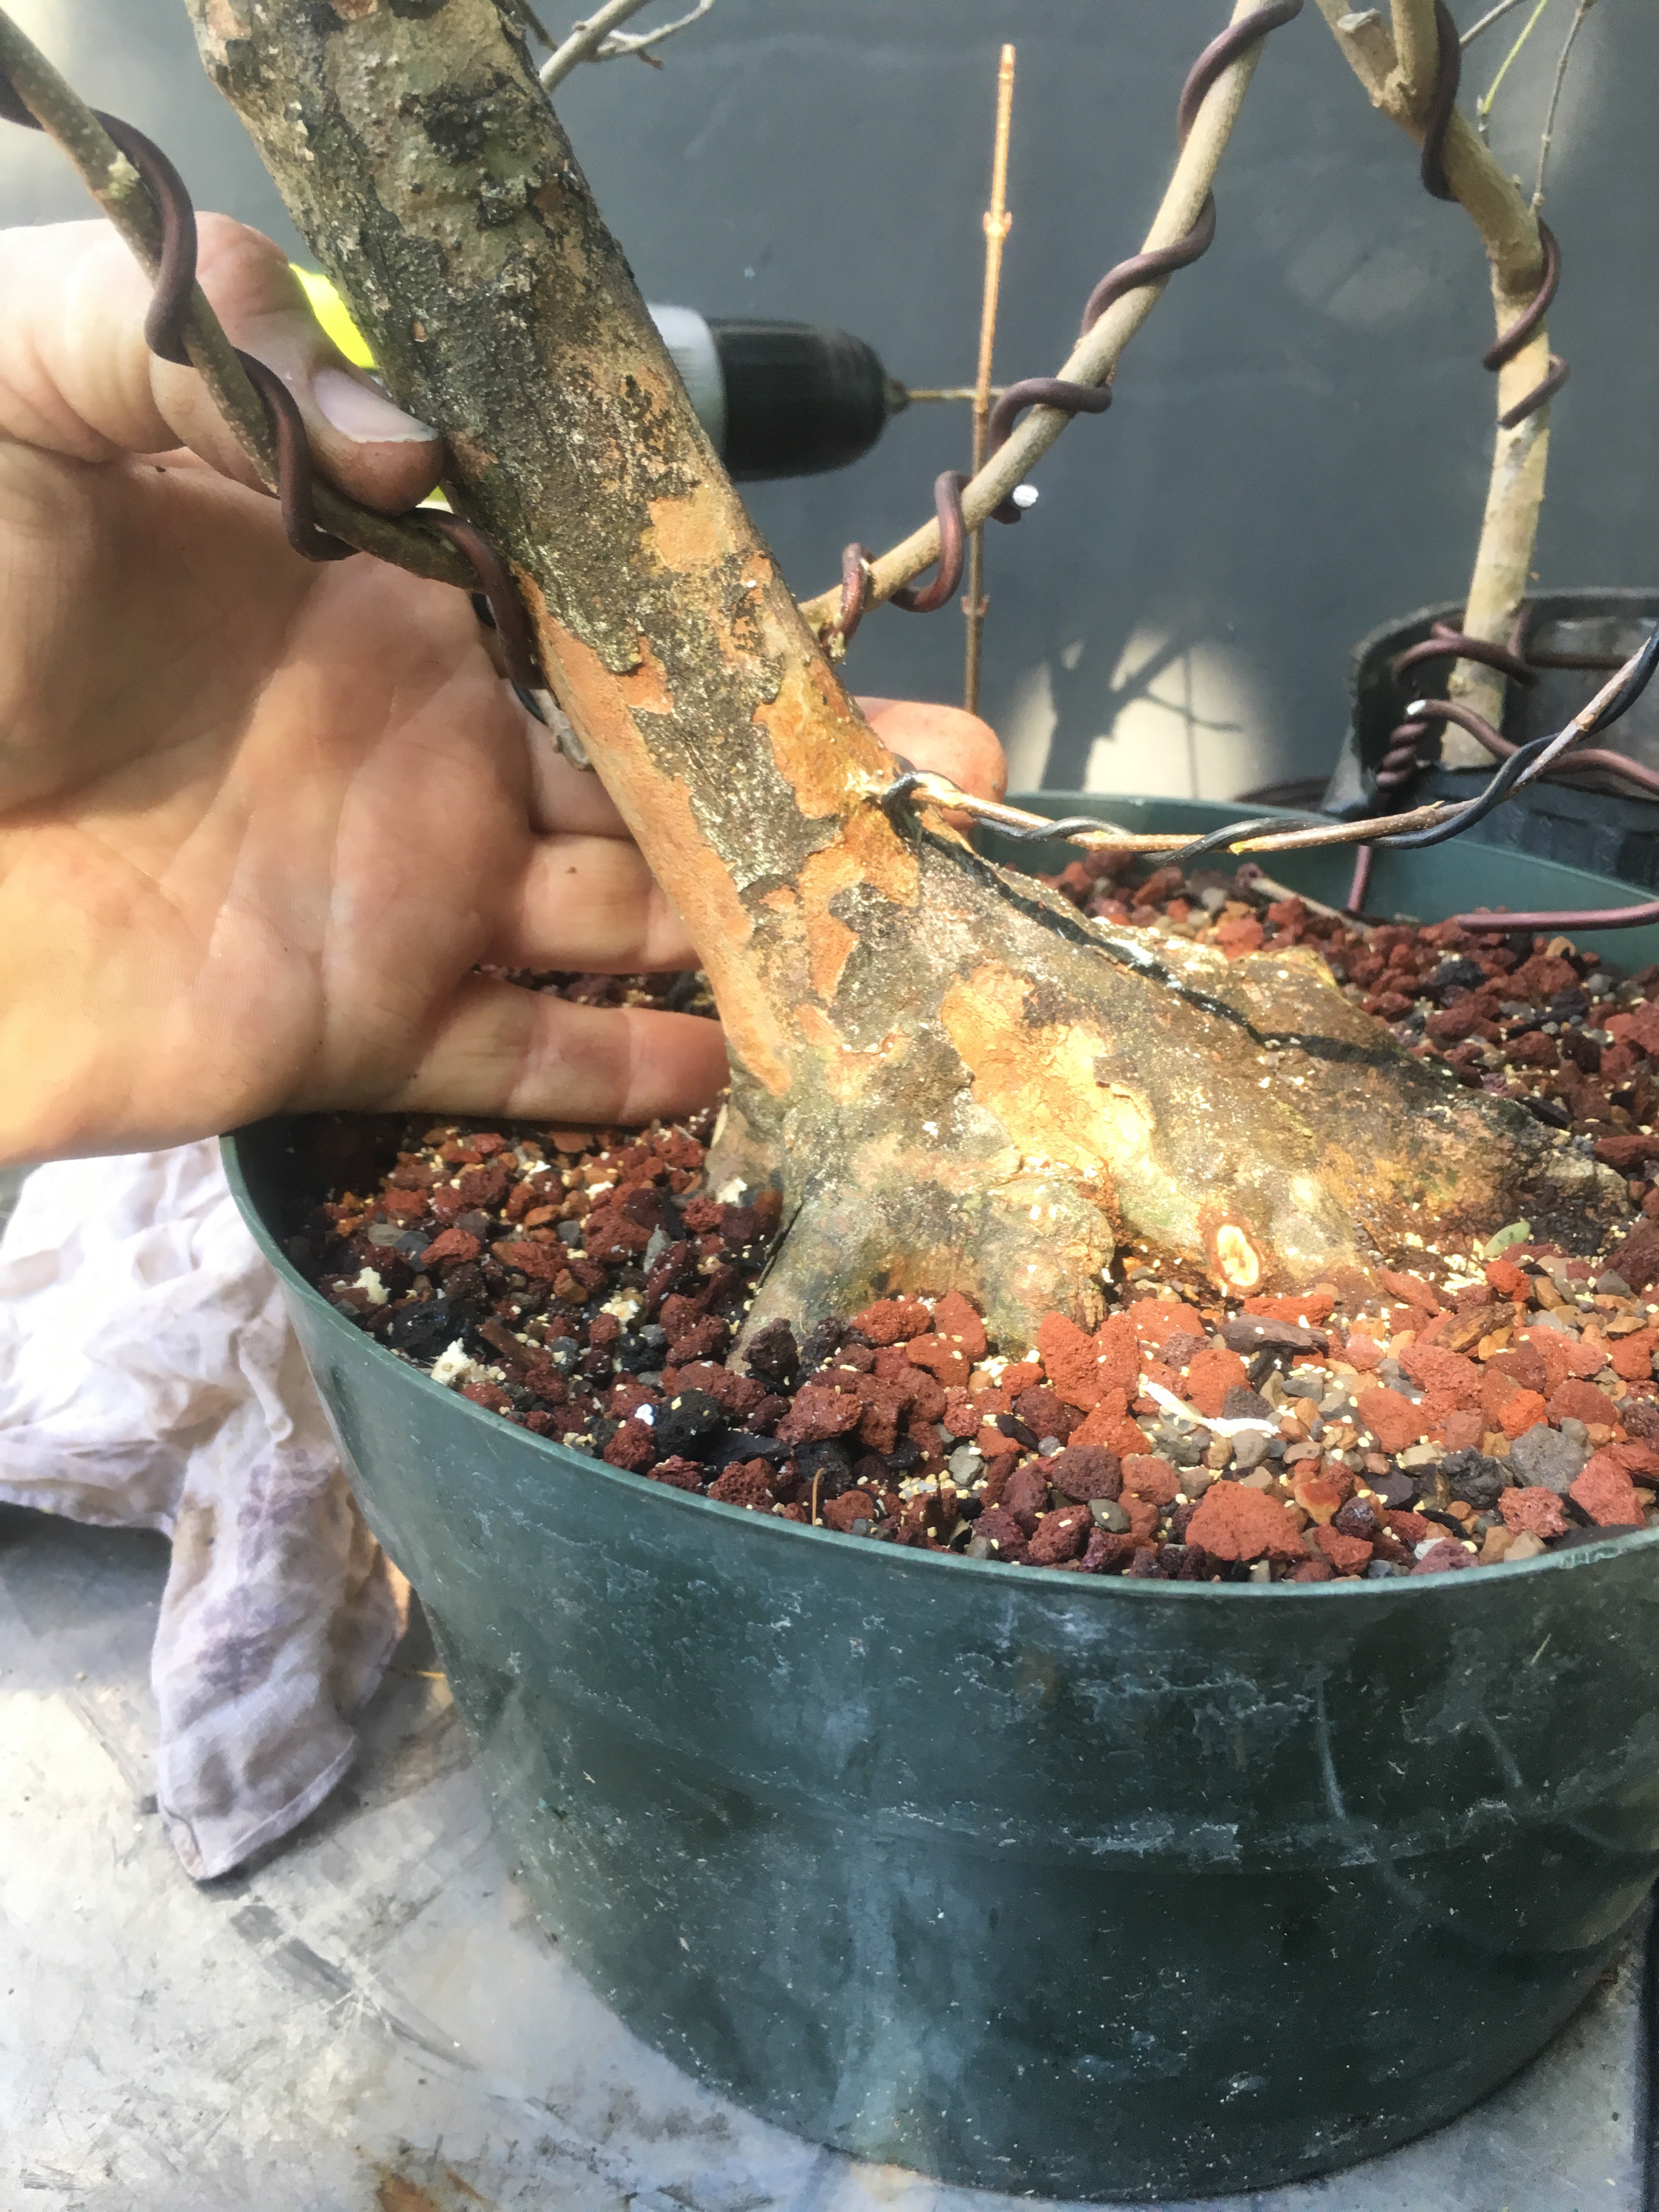
I need a branch here, at the base of the healed chop. 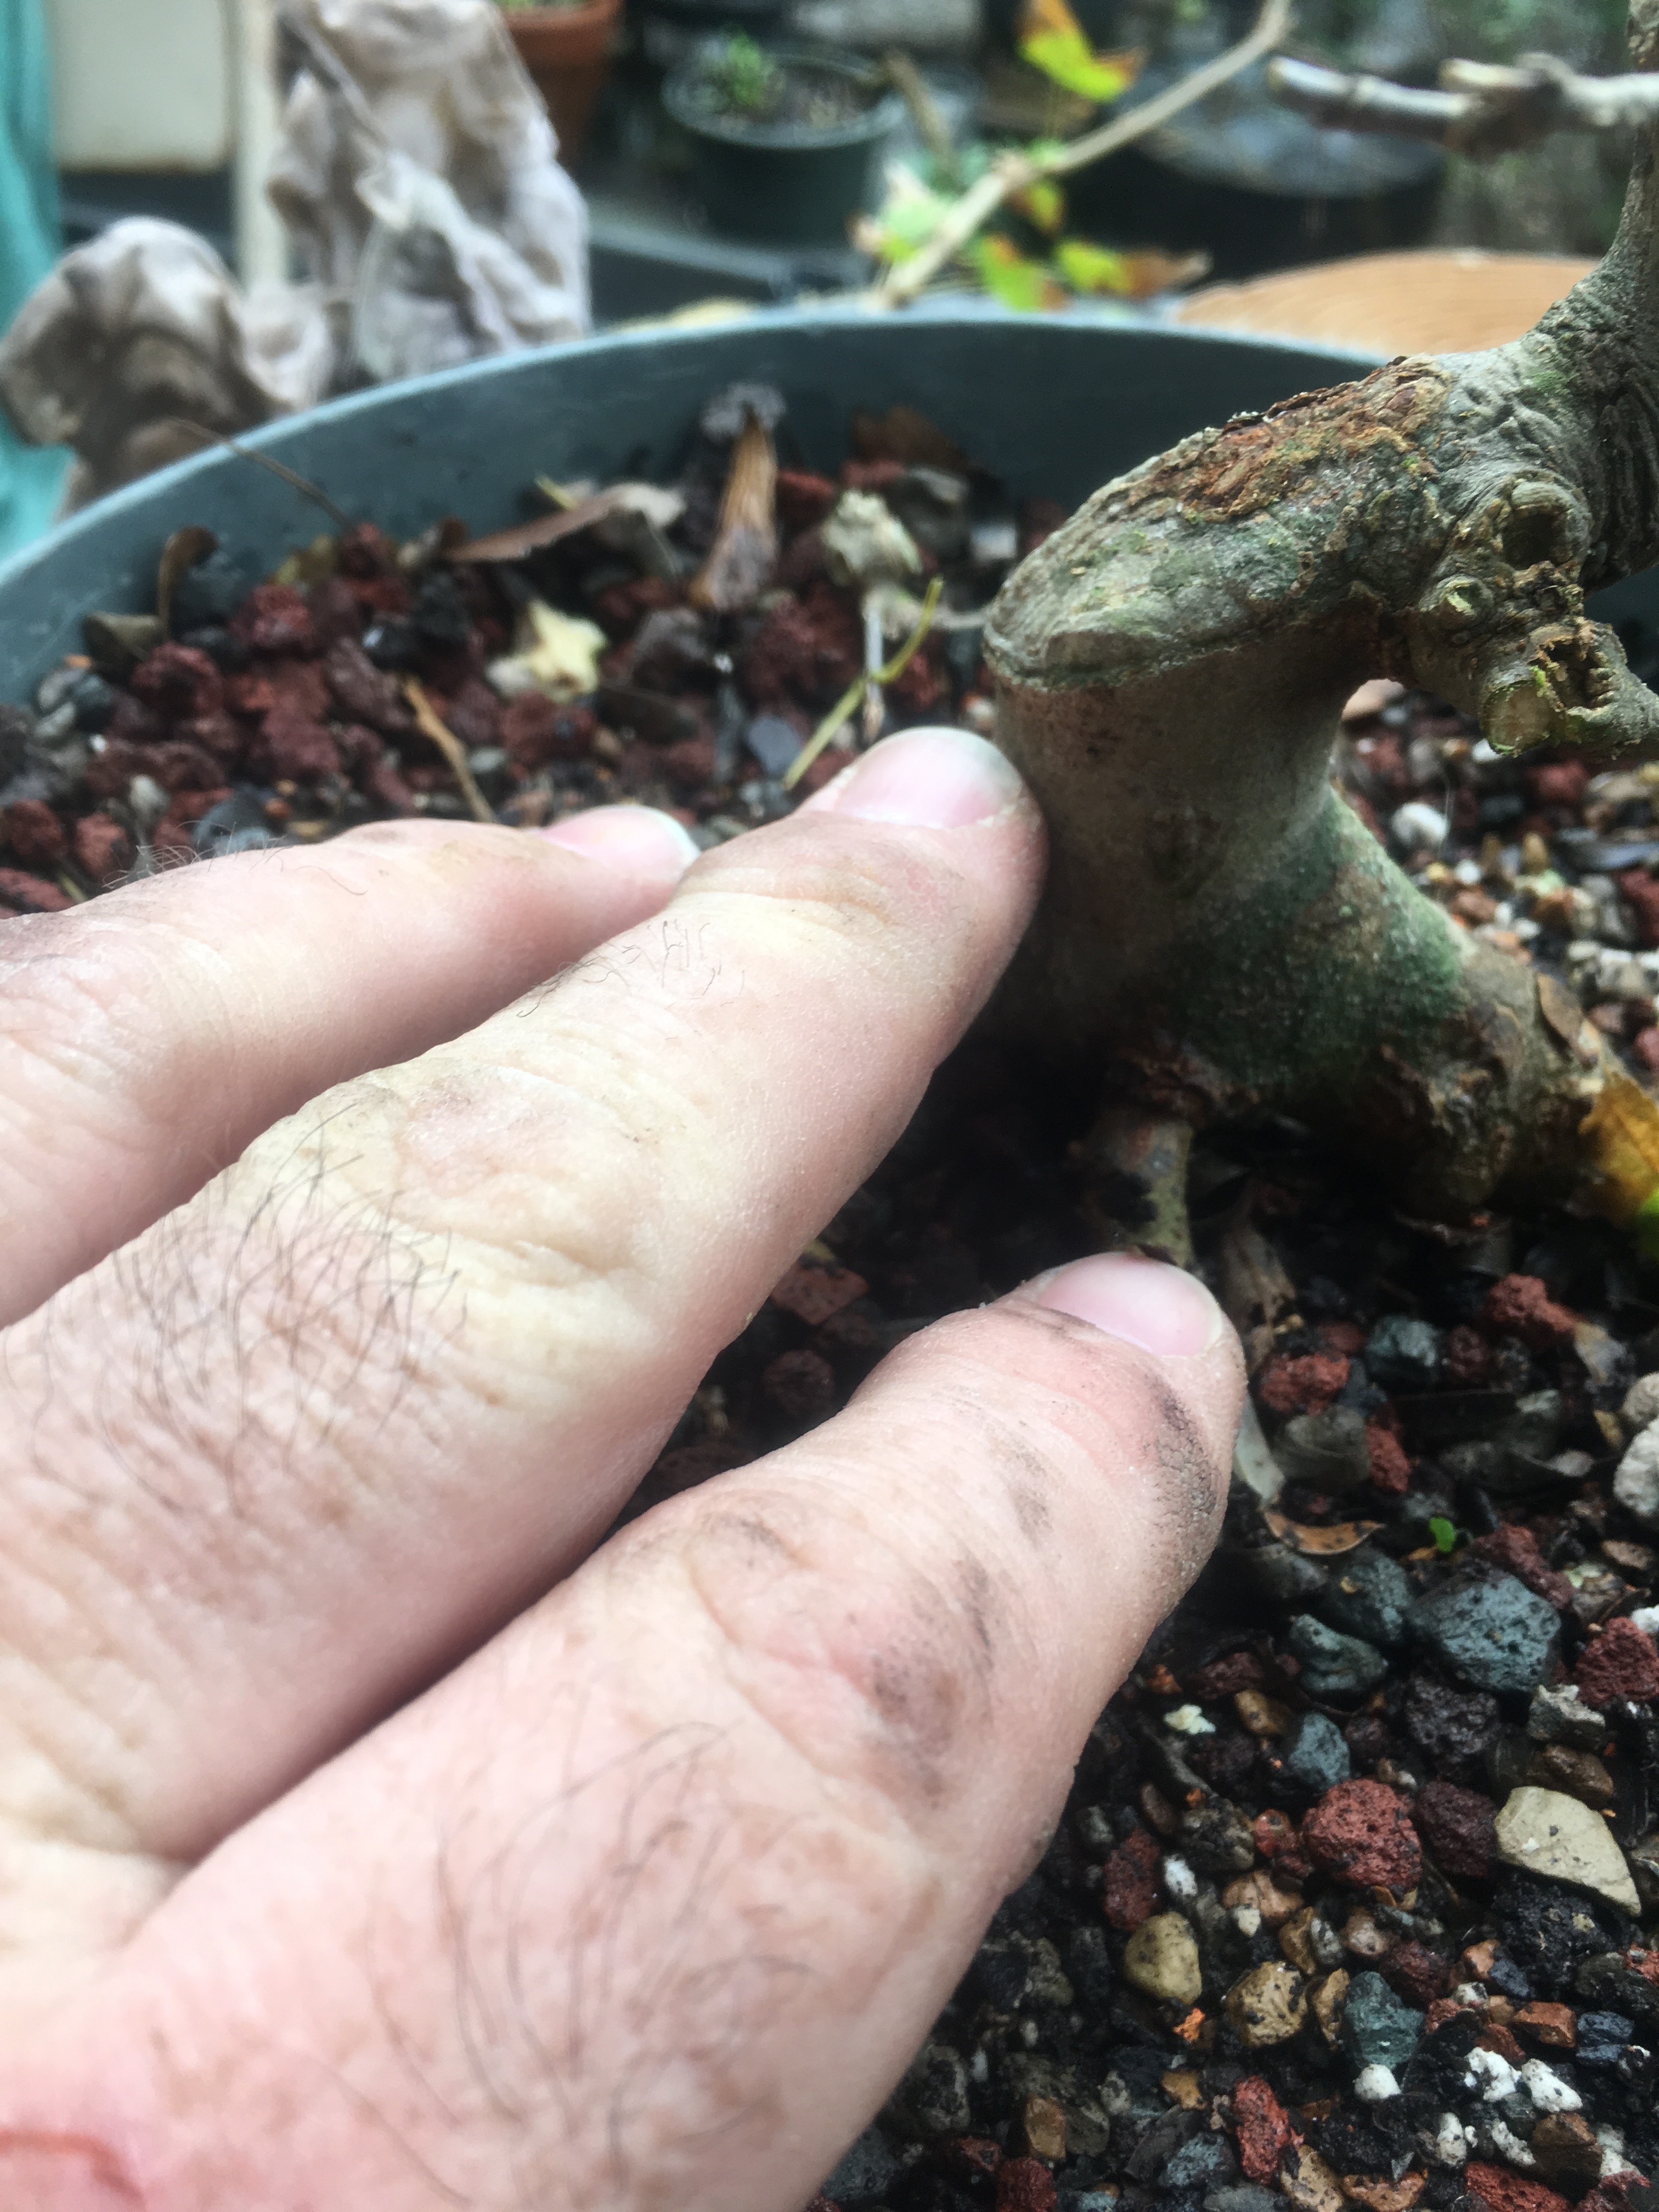
I’ll do it by a thread graft. Basically, drill a hole all the way through the trunk and insert a branch through that hole and let it grow, filling the hole and grafting with the tree, and then you cut off the donor tree. 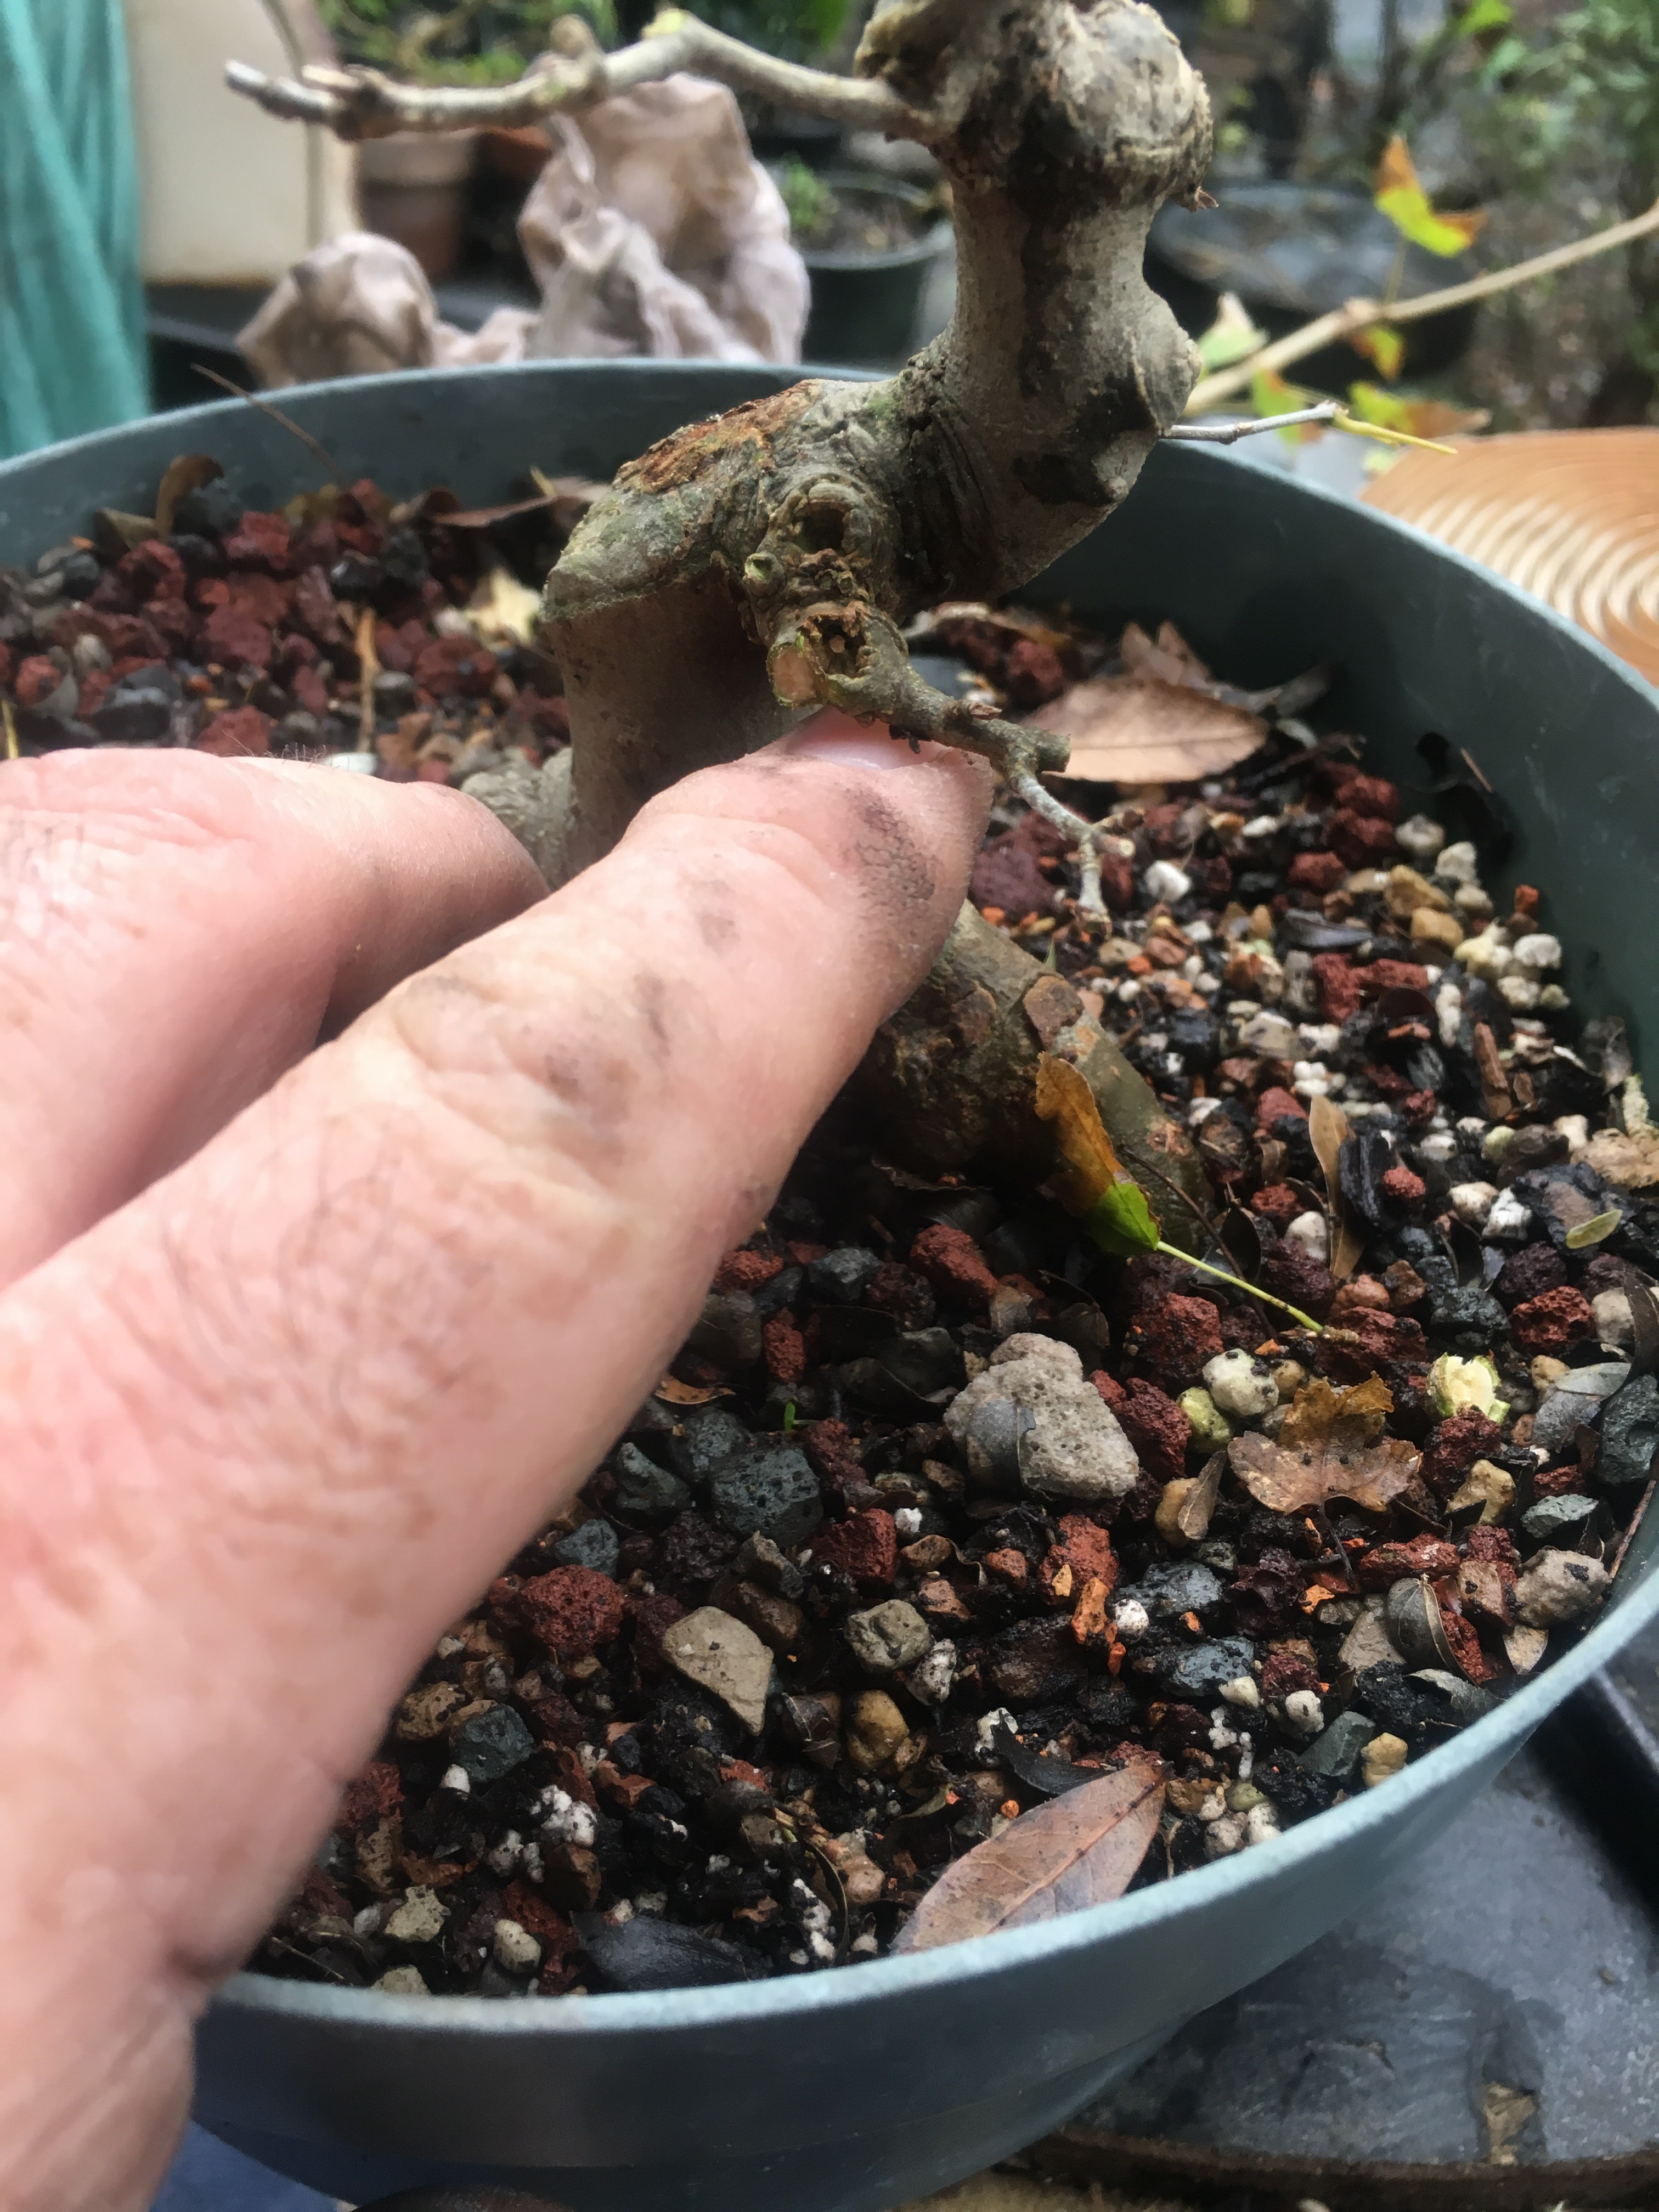
It’s the easiest graft to do, with a high probability of success. 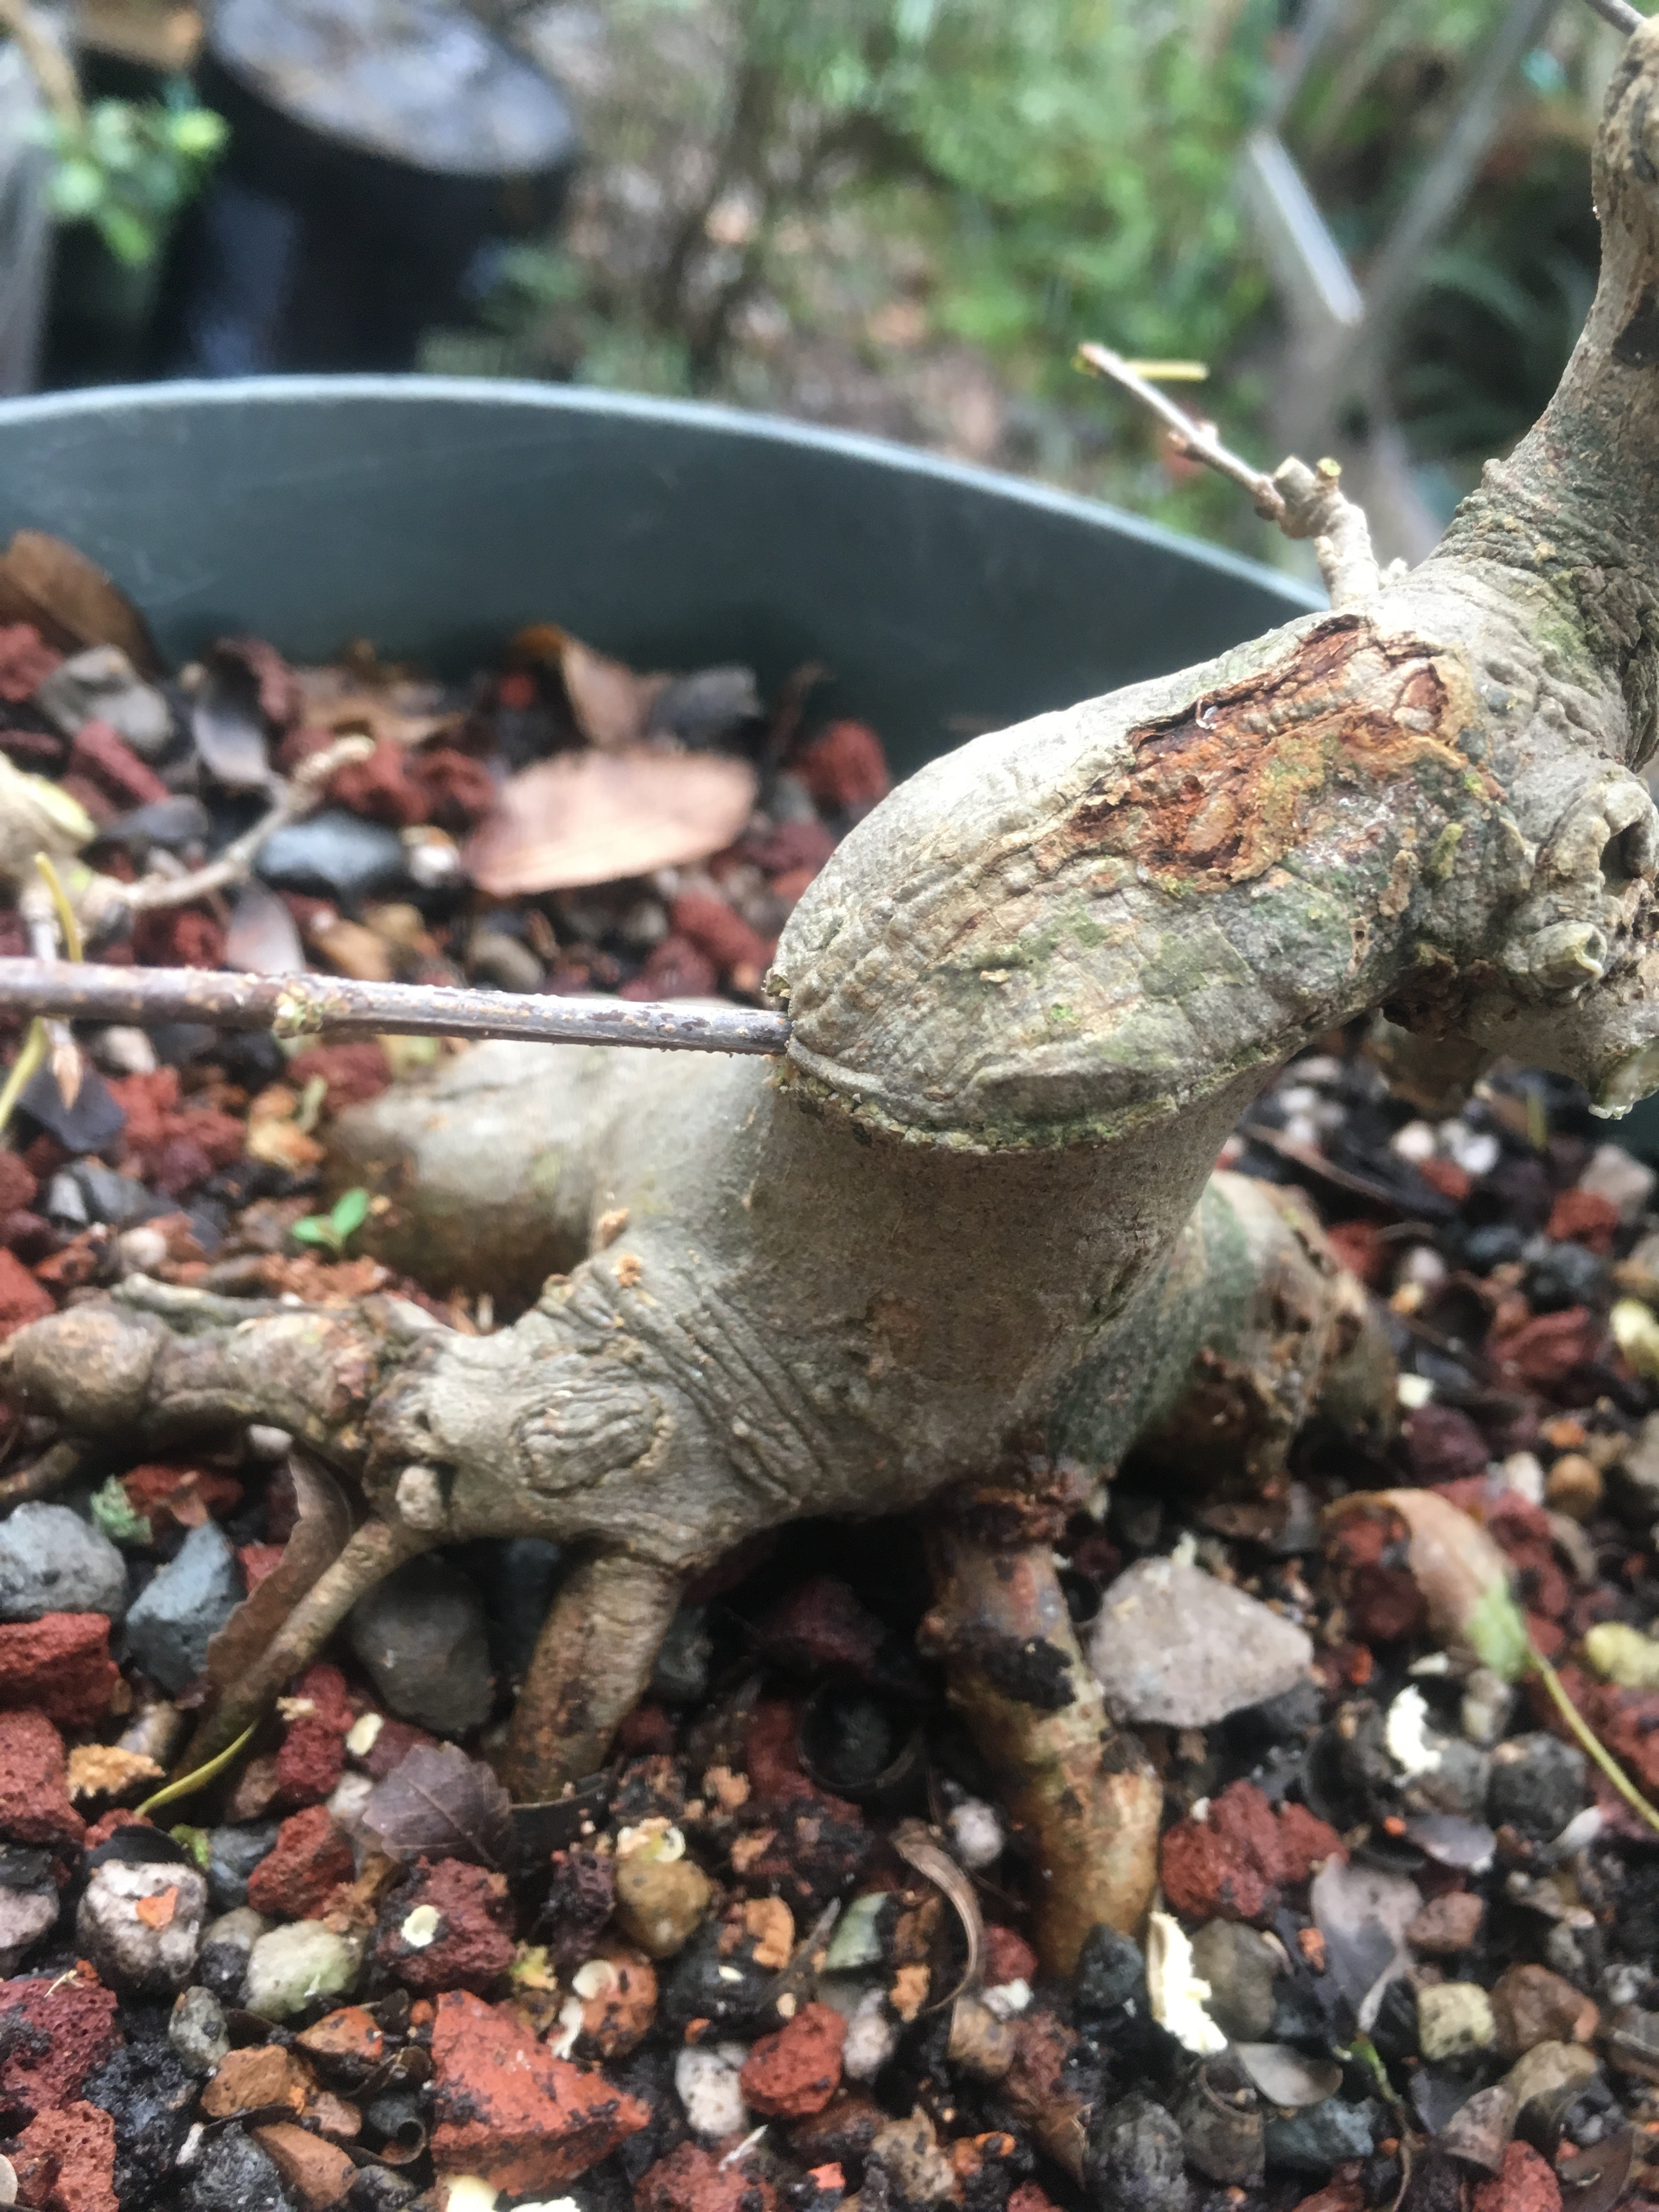
While I’m at it, I think I need one here too. 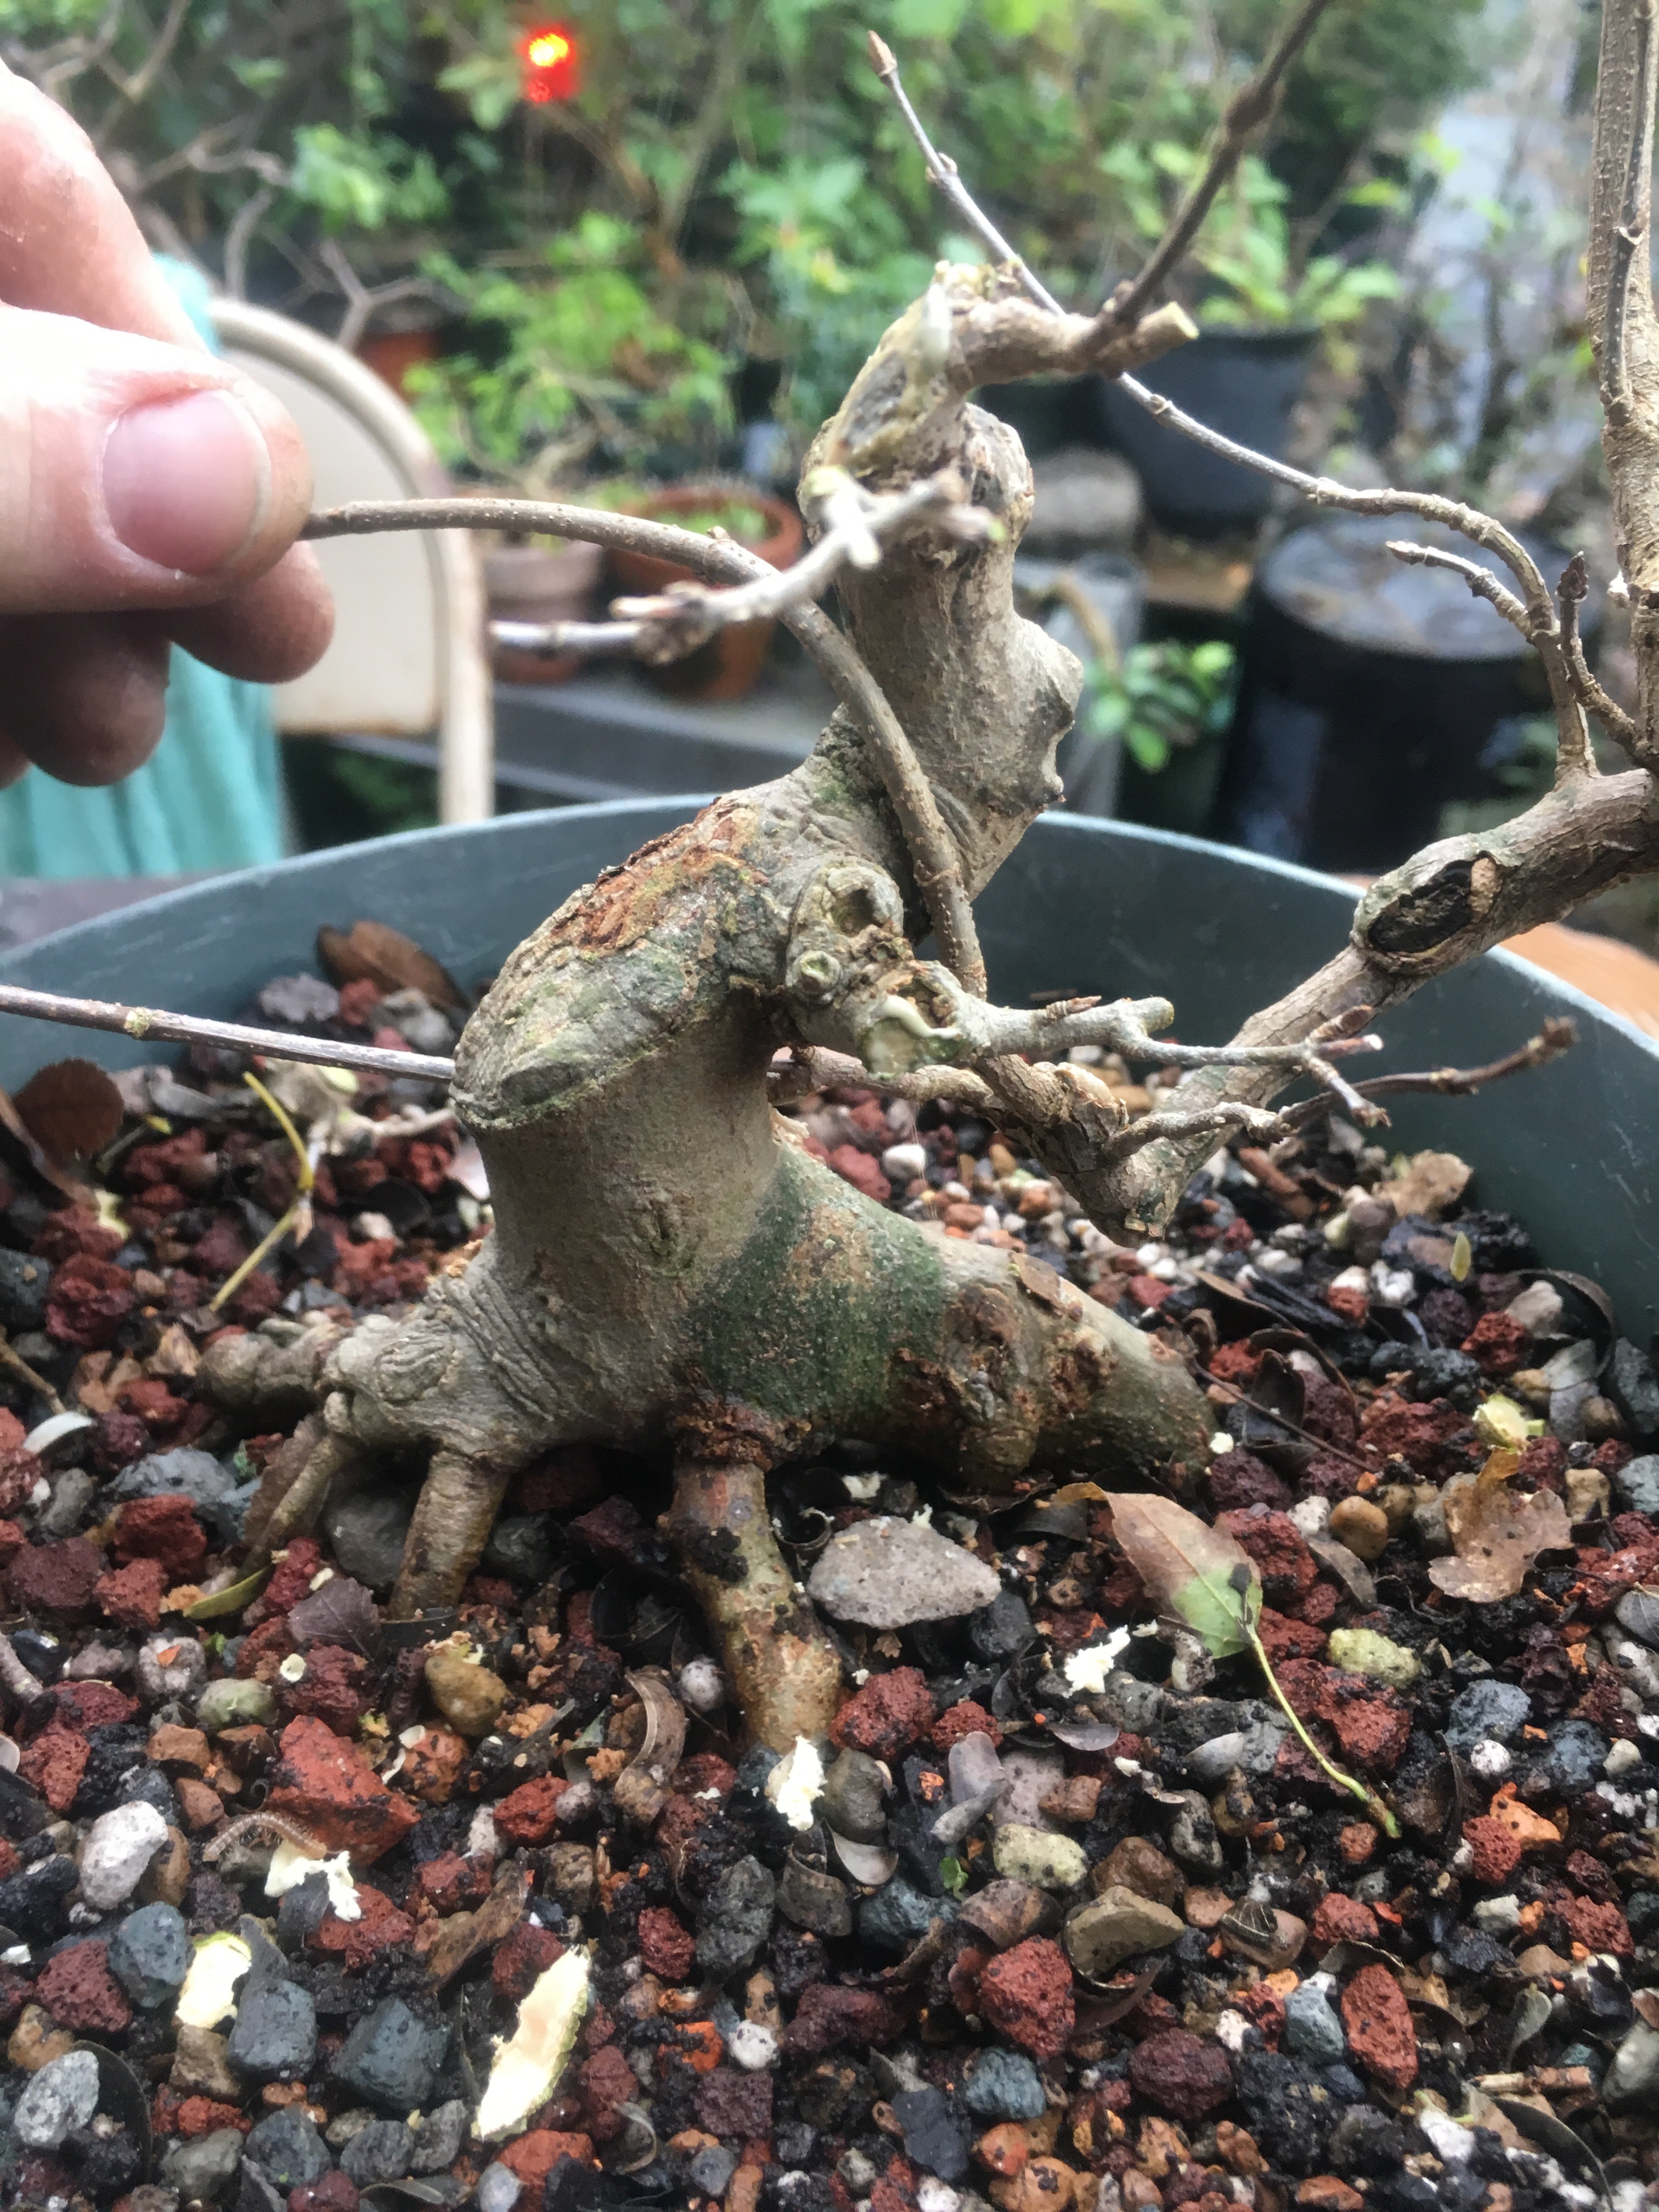
I like to seal the wounds with a cut paste (the snot variety) that stays flexible when dry. 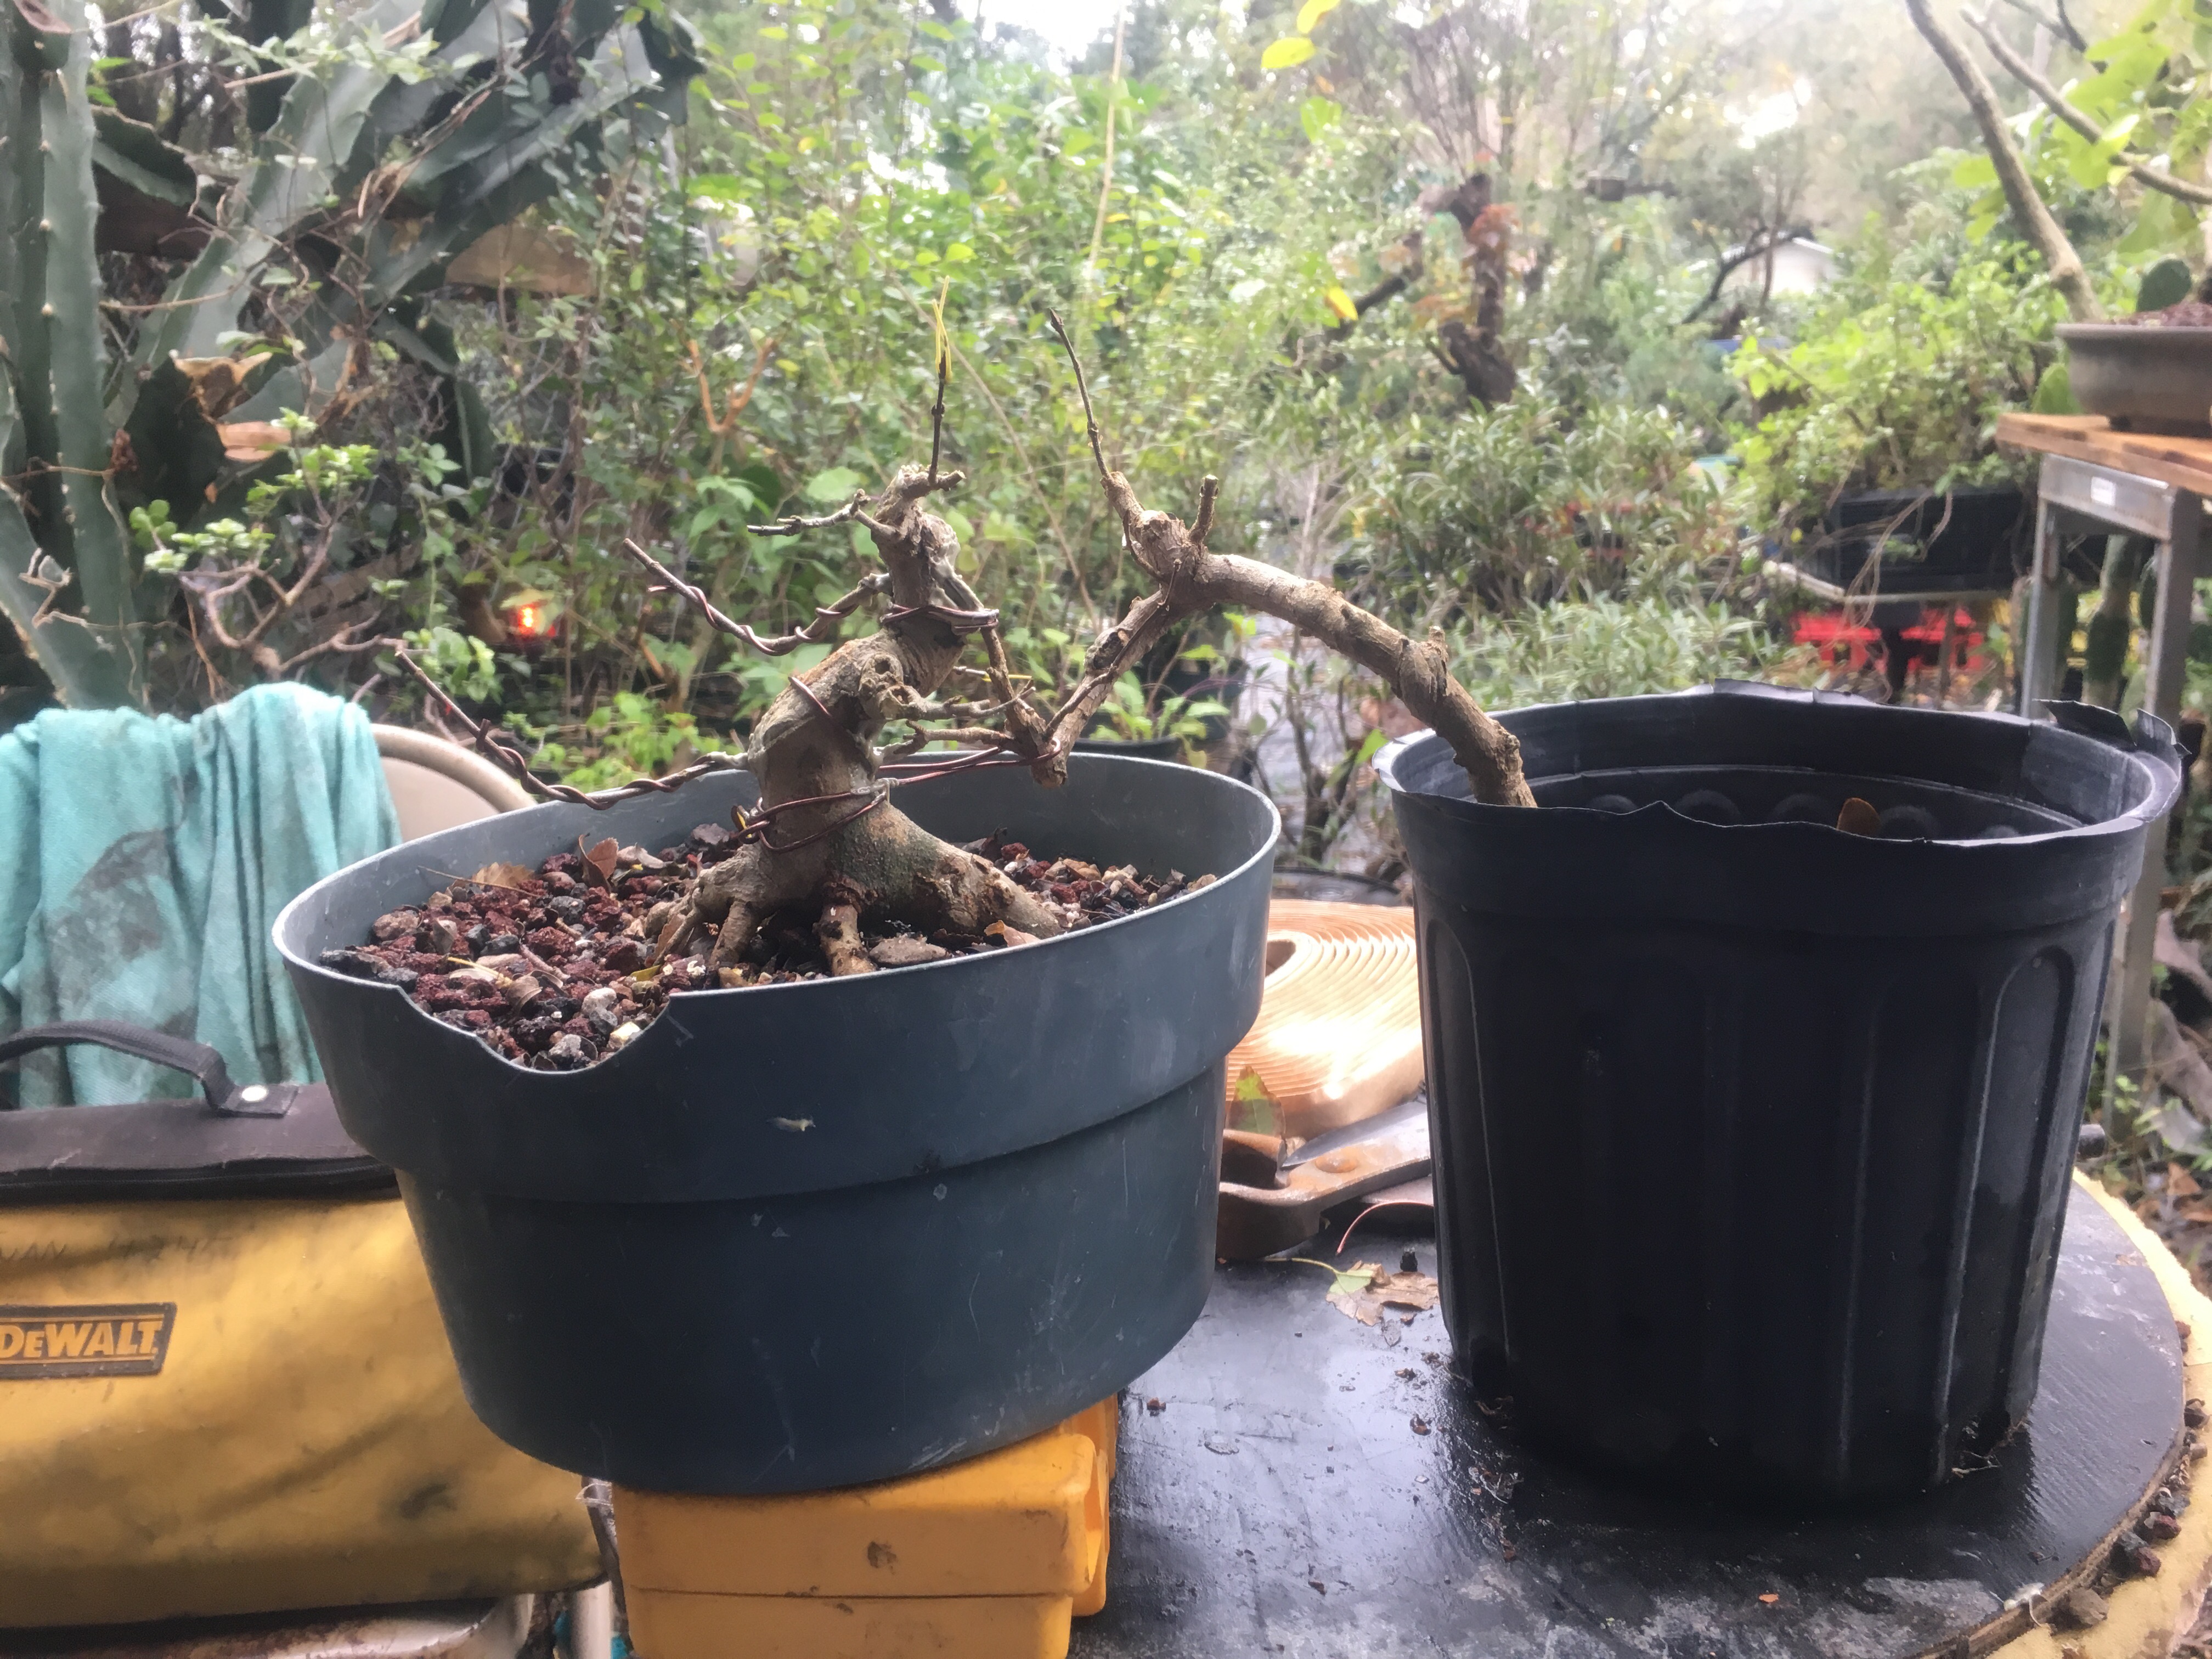 I also like to secure the grafts with wire and, of course, put a little movement in them.
 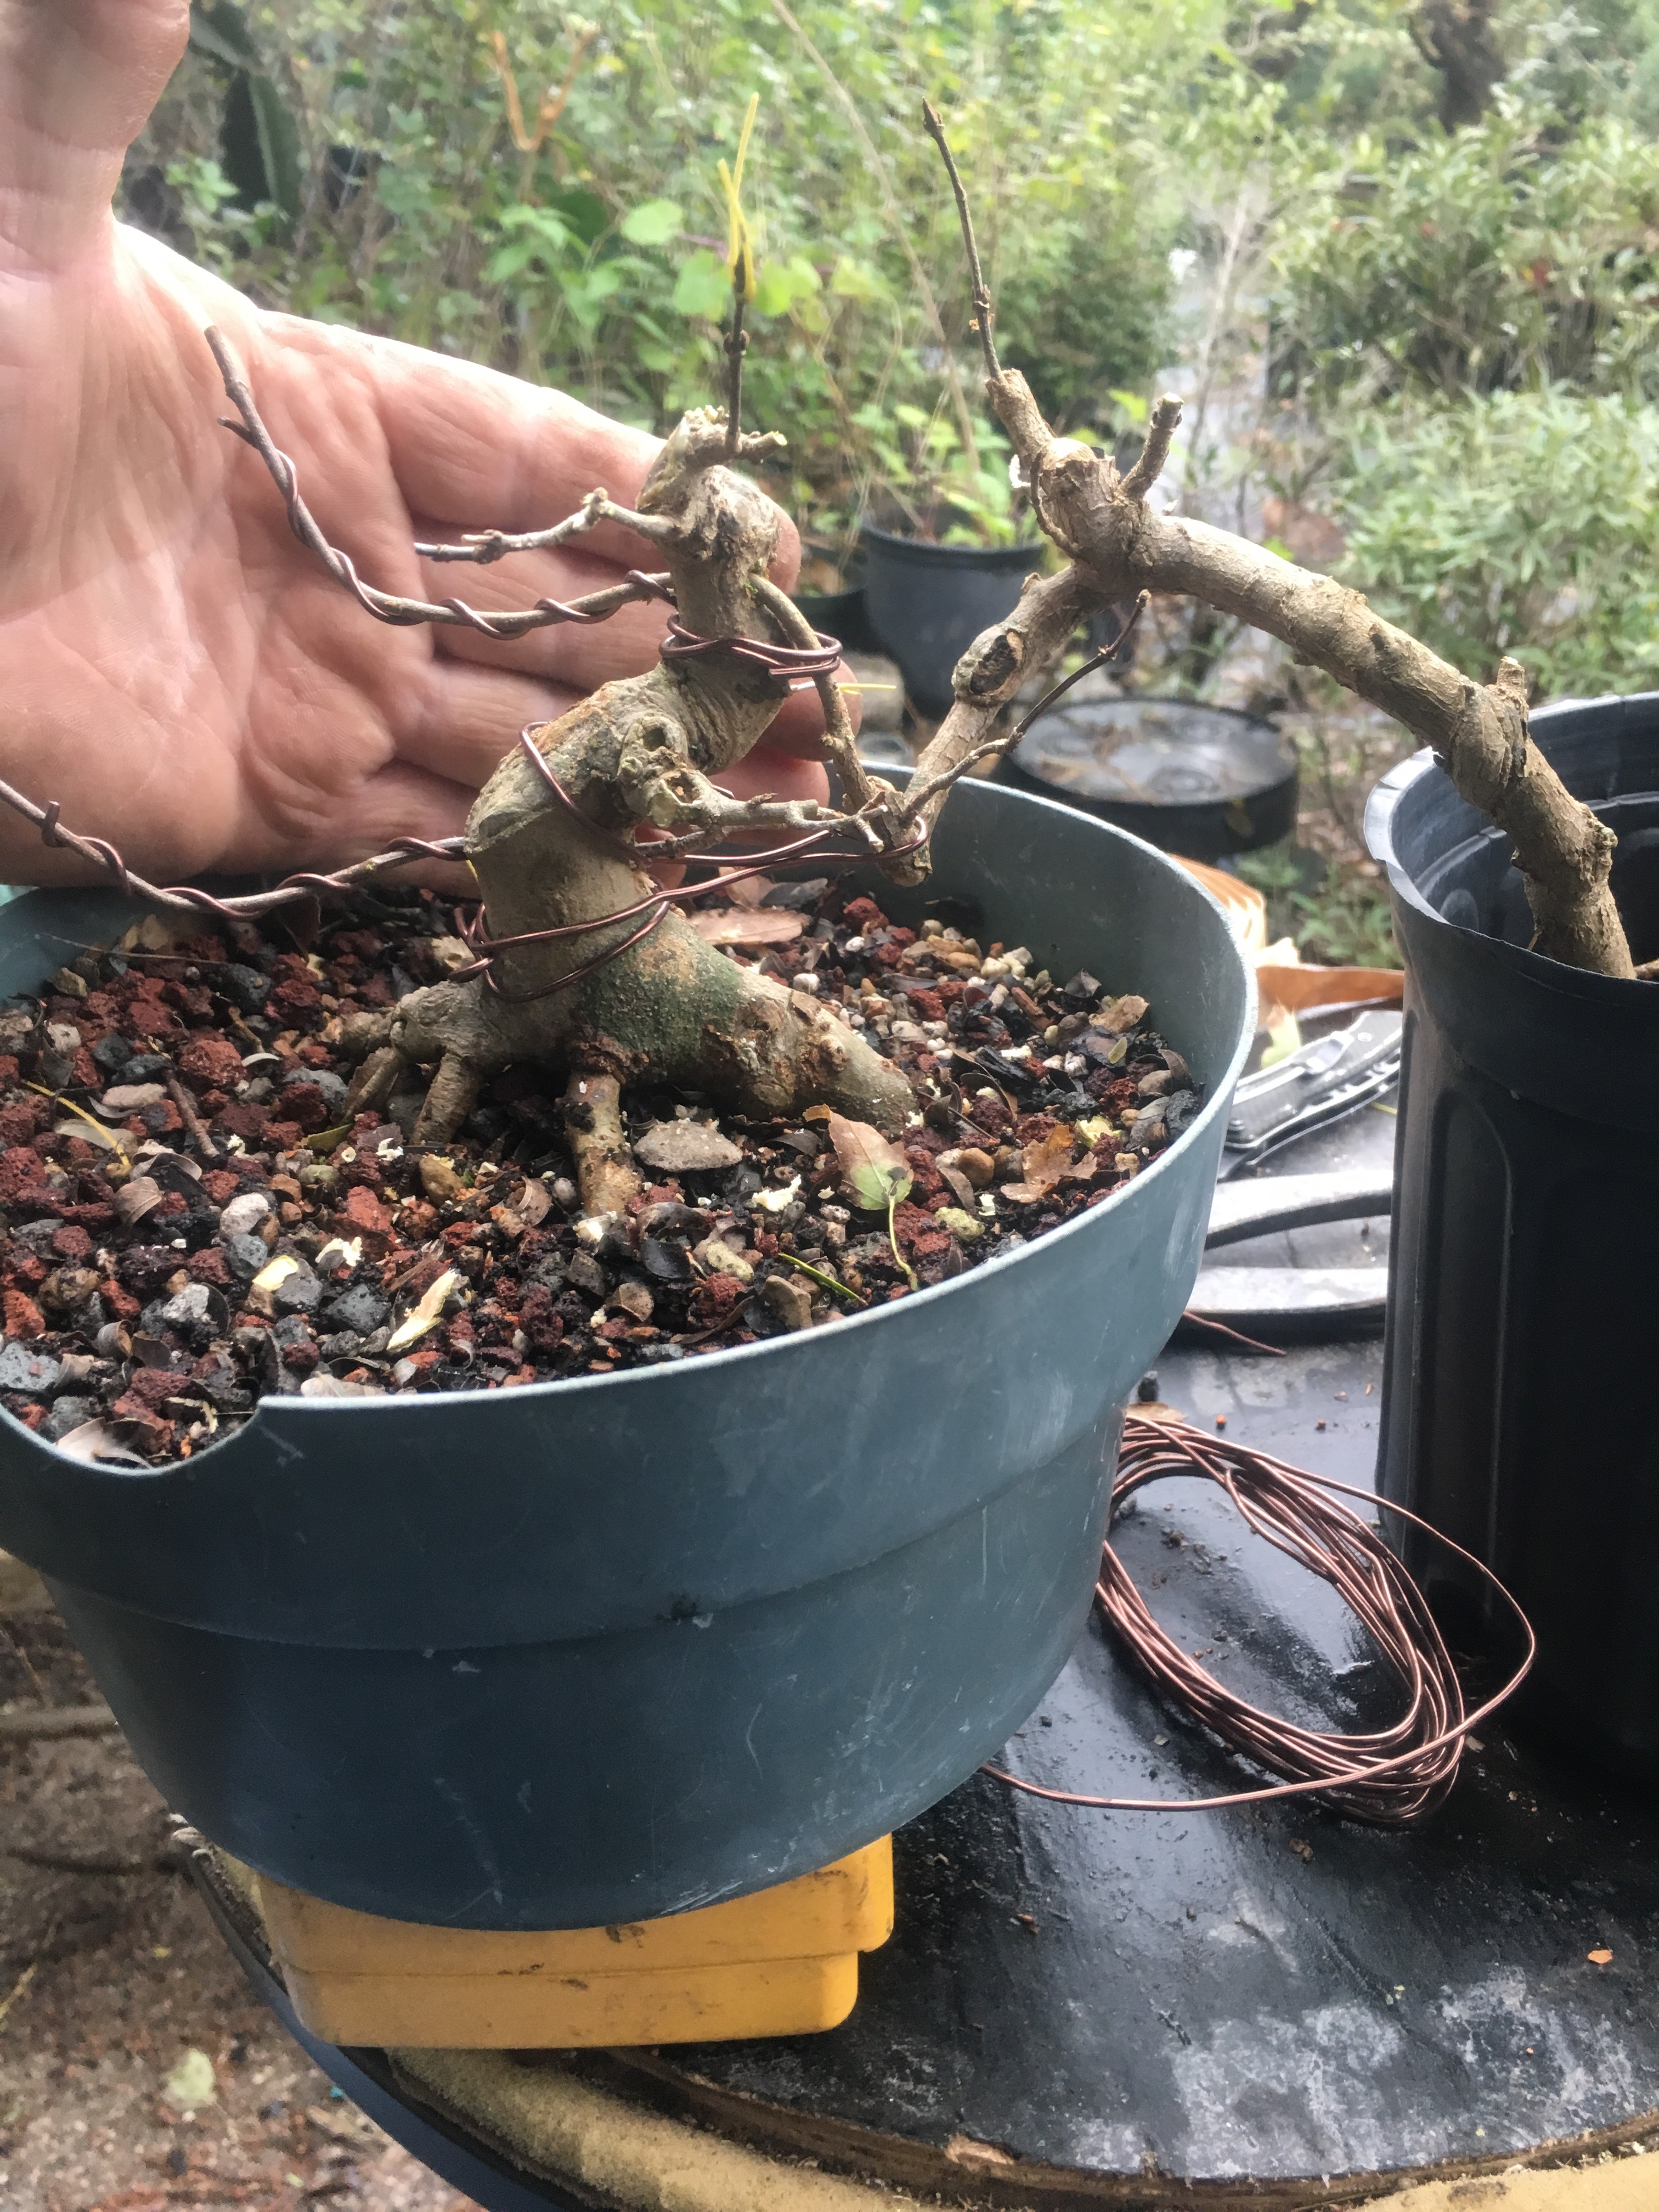 I also tie the pots together to minimize movement.
Here’s a short video to let you see what I did a little easier.
I’m digging the music.
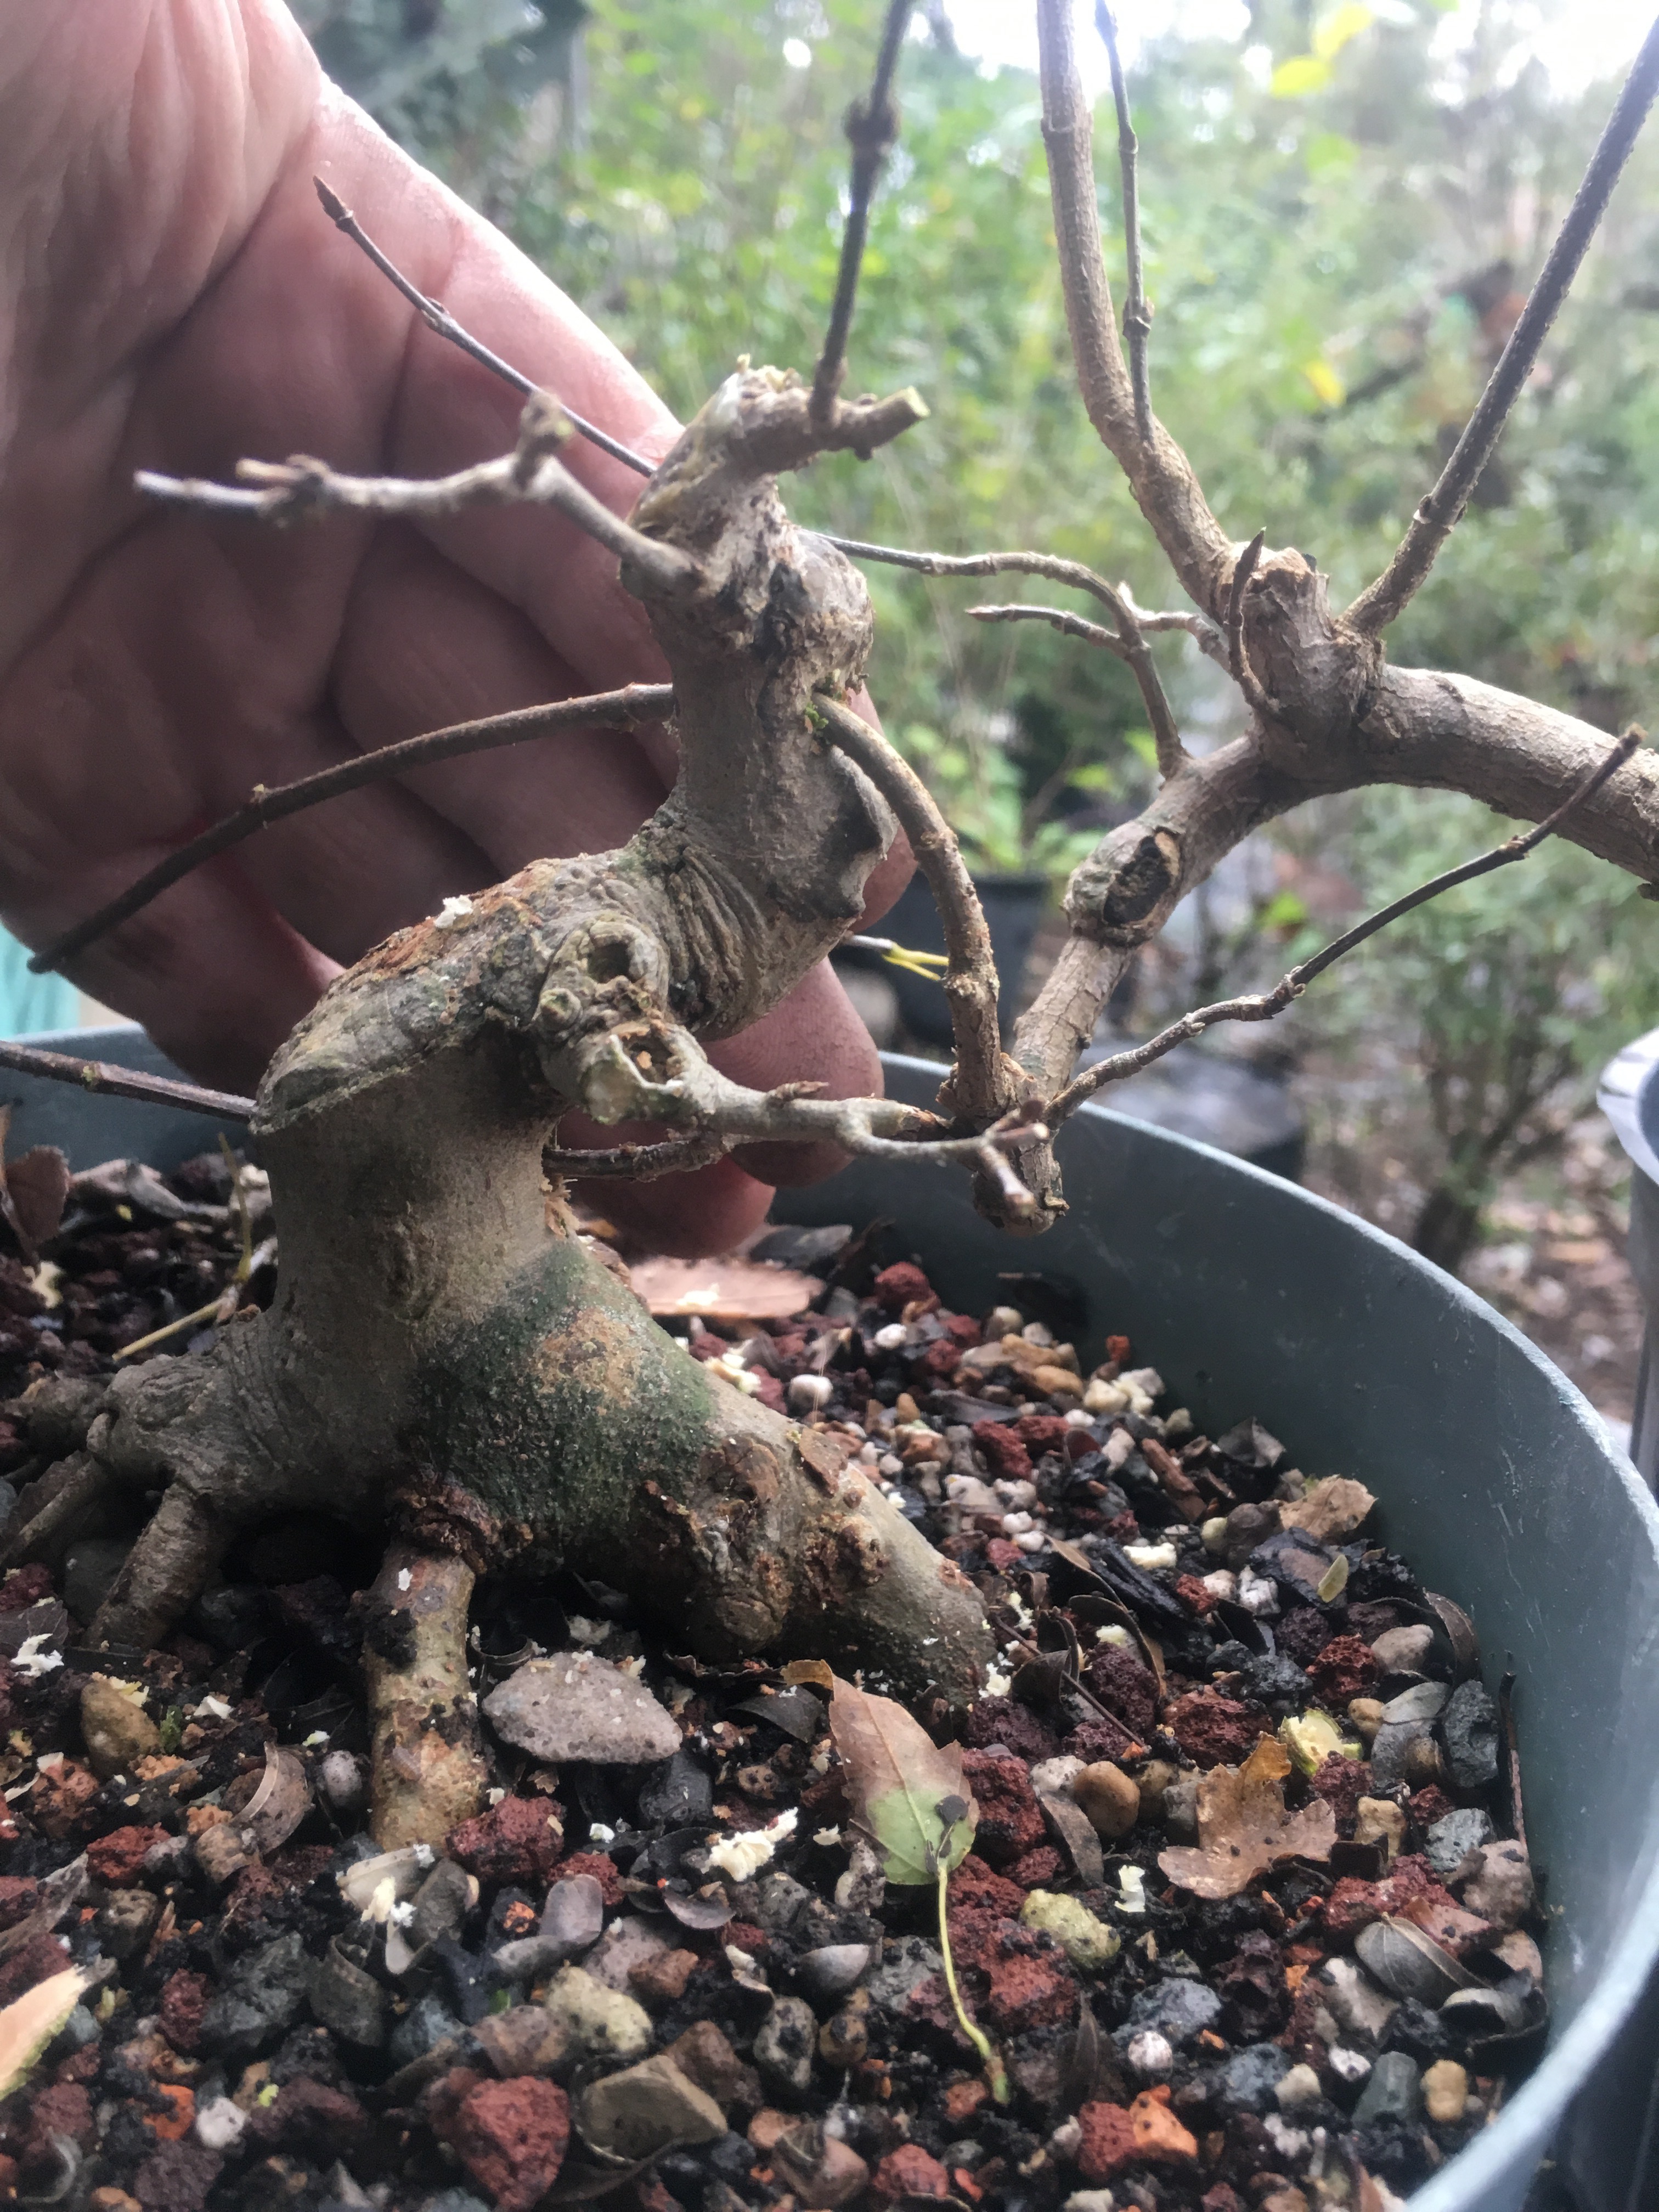
Here’s that first tree again. 
 Look at that nebari! Instead of a blind trunk chop, I put the grafts exactly where I wanted them and I’ll chop it next year. It’s Daves tree. You’re welcome Dave. Cabron.
I’ll cover some approach grafts in a future post.

All is great, But warning! You drink too much!
LikeLike
Reblogged this on Wolf's Birding and Bonsai Blog.
LikeLike
Is that anthracnose on the first tree chopped(black in heartwood)?
LikeLike
Could be but it usually doesn’t kill a maple. I might have trouble healing the wound but I can cover any rot with bondo and then it’ll heal
LikeLike
I get the process, but in my mind I am thinking “Human Centipede”….ew.
LikeLike