This is a very short, topical (and tropical) post so I’m getting it out quickly and therefore be able to give you an update next month.
I do have about four more drafts in my blog queue and I’ll be working on them every day (especially the fertilizer/chemical/soil extravaganza!) and there should be one of those coming out soon (for those waiting for them).
Anyway, on to the EXPERIMENT!  I was perusing a social media feed and I came upon a grafting video. Being the tropical grower I am, I was drawn to this particular technique that’s used for thick barked species, like ficus or, in this case, a buttonwood.
The first step, cut a T in the trunk or wherever you’re wanting to graft a branch. 
The next step is to peel away the bark flaps you’ve just created, making sure to peel it all away from the wood. 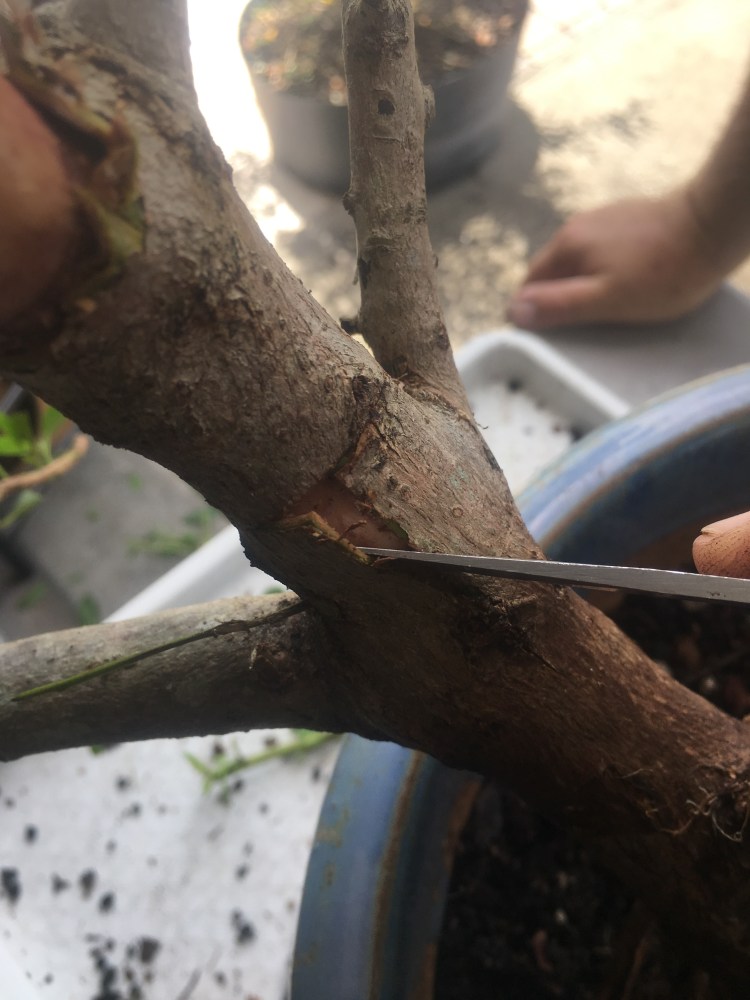
Flip flap. 
Next, choose a shoot you want to graft onto your tree. They call this shoot a scion. 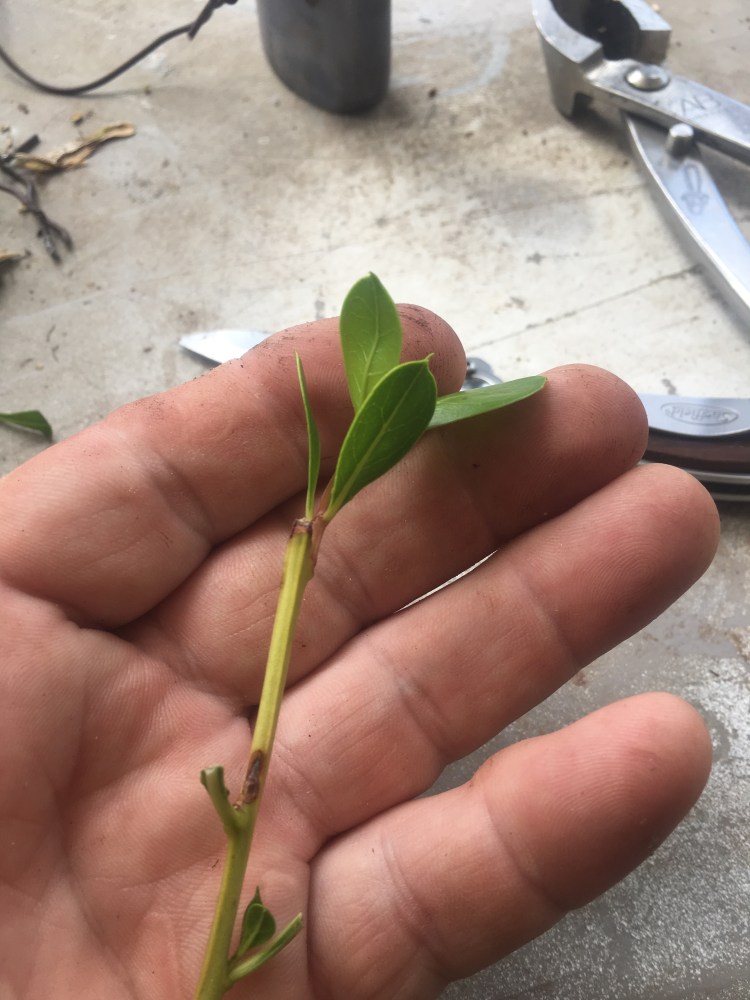
In this case, I’m grafting a buttonwood.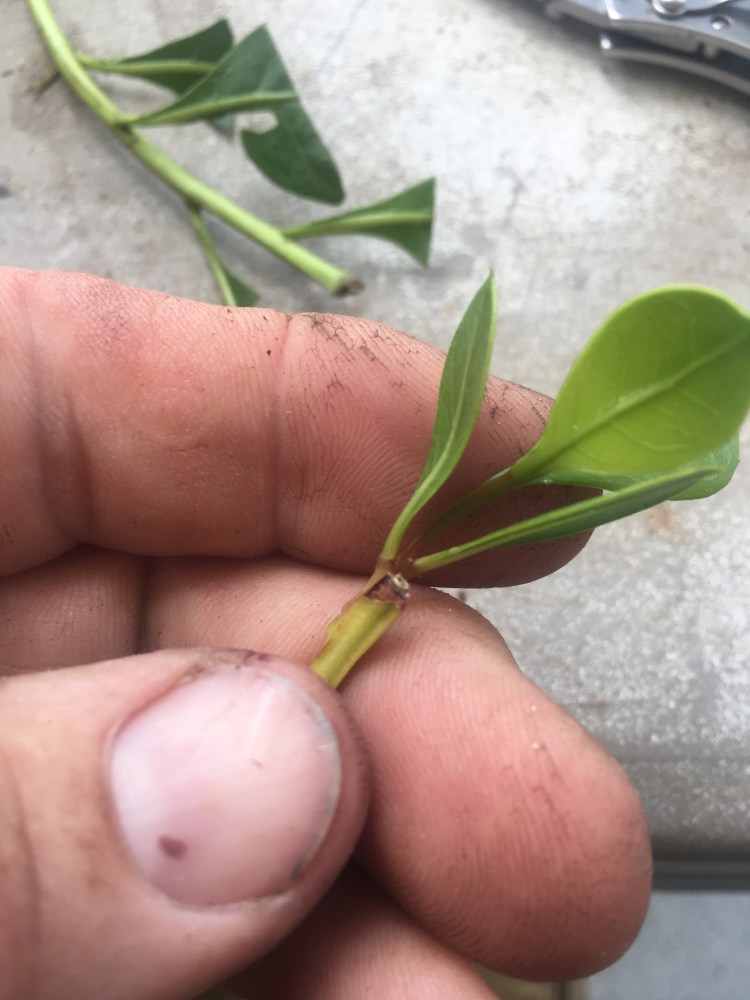 You can’t tell very well but the scion I’m using is a cutting off of the more desirable “red petiole” variety of buttonwood. Which means that it backbuds more reliably, all along the branch, will get smaller leaves, and it has, as one can figure out by the name, red petioles.
 The green petiole variety backbuds ok, but it’s usually only at the tip of your branches. It’s very frustrating if you’re trying to build ramification and density on a bonsai when you don’t get inner back budding.
So, since we have a stock plant (a big cutting of the green petiole buttonwood that my student Tom had rooted as the tree) and some red petiol pruned foliage (off of a tree from my student Kathrin) and we are at my studygroup where I am supposed to be teaching advanced techniques, I thought it would be an appropriate experiment to try.
Anyway, let me talk about the principles of grafting a little as that is the important part of the next step in this technique.
Grafting is often portrayed as being an incredibly advanced technique and not to be not to be attempted by beginners or those unskilled in horticulture.
But I would say that it’s really easy. Grafting is the fourth oldest farming technique, behind planting seeds, pruning, and ground layering. It was practiced before written history. And it was practiced before we knew why it worked.
And that’s the rub. Sometimes it’s better not to know too much about something, and to just do it, and let the dogs lie where the cards fall in a row. Or something like that.
Much of the “Why” grafting works was only worked out within the last hundred years or so (well, the parts and techniques were named and described I guess).
But grafting is simple: for any successful graft, you need only for the cambium to match up. Very basically, it’s from the cambium that growth occurs, either inward making a new xylem ring (the growth rings of a tree) or outwards to the phloem, making new bark. It is where the main meristematic cells reside. If you deconstruct that word, meristematic, you’ll see the word “stem”. And we all know what miraculous things stem cells promise us in our own bodies. Imagine how amazing plant meristem cells are with those extra letters!
Anyway, grafting is as easy as matching up the cambium layers of the stock plant and the scion. There are some small details, but that’s really it.
The reason I’m illustrating this grafting experiment in this post is twofold:
First, I’ve never seen grafting on buttonwood. I’ve thought about it, and wondered why I’ve never seen it, and I figured it was appropriate with the opportunity at the studygroup.
Second, this technique looks easy to do on a buttonwood.
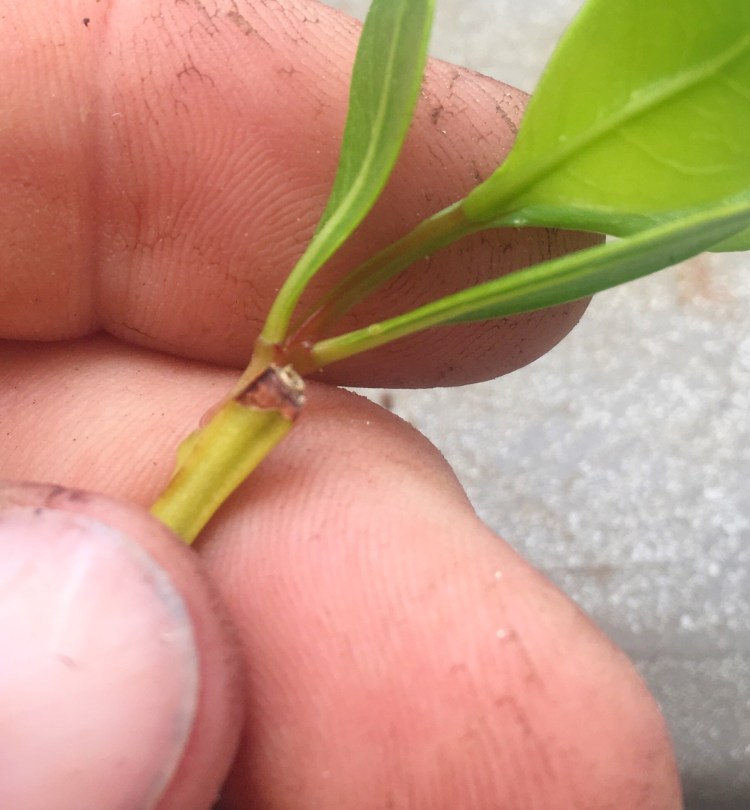
You saw the “T” cut and the “flap jacking”. Next step it to remove the bark on the scion, but keep the cambium layer (the green before you get to the wood).  I just scraped it with my knife.
When I peeled back the flaps, you remember I removed down to the wood , that means the cambium is attached to the inside of the bark.
And, if grafting is just matching up cambium layers, then I have all the cambium on the scion now slid under all the cambium on the stock buttonwood, nestled underneath like a bug in a rug. 
Using some of this “bonsai cut paste” which is really just a kind of grafting paste…..
I then seal the T cut. 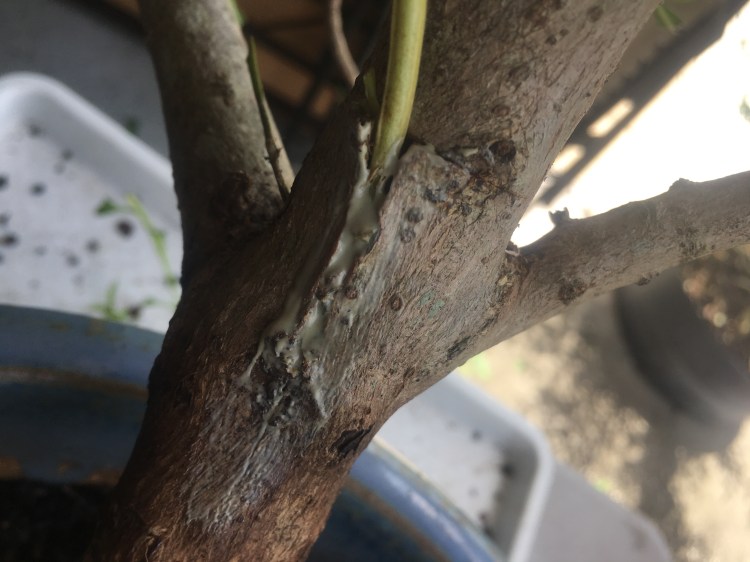
Then some grafting tape to hold everything tight…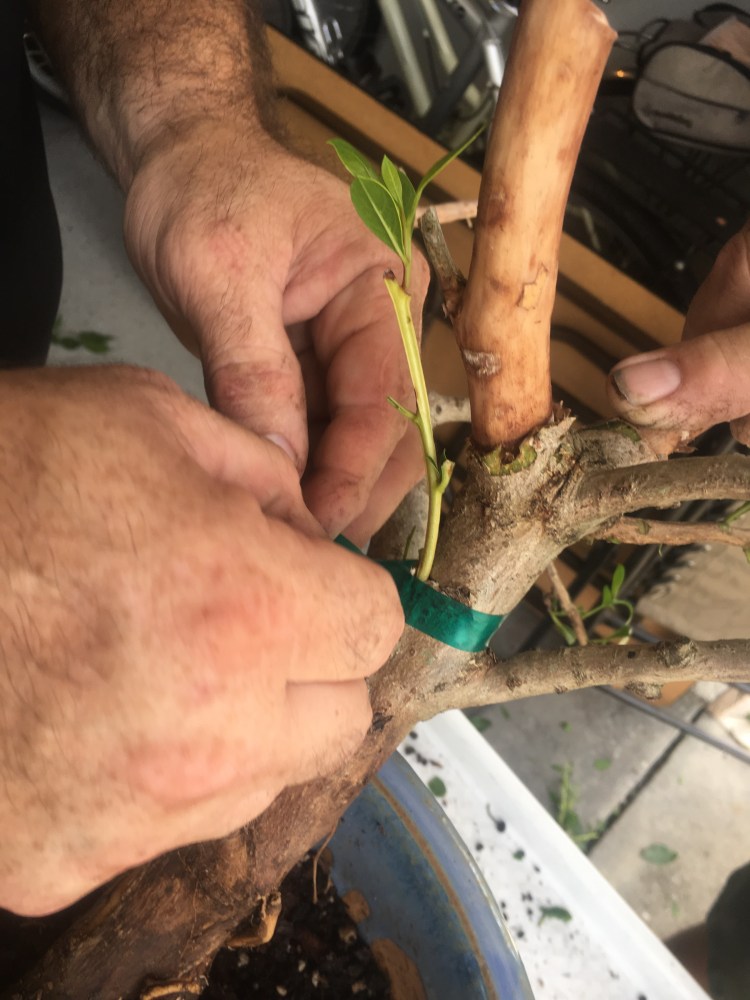

And lastly, using a little plastic baggie….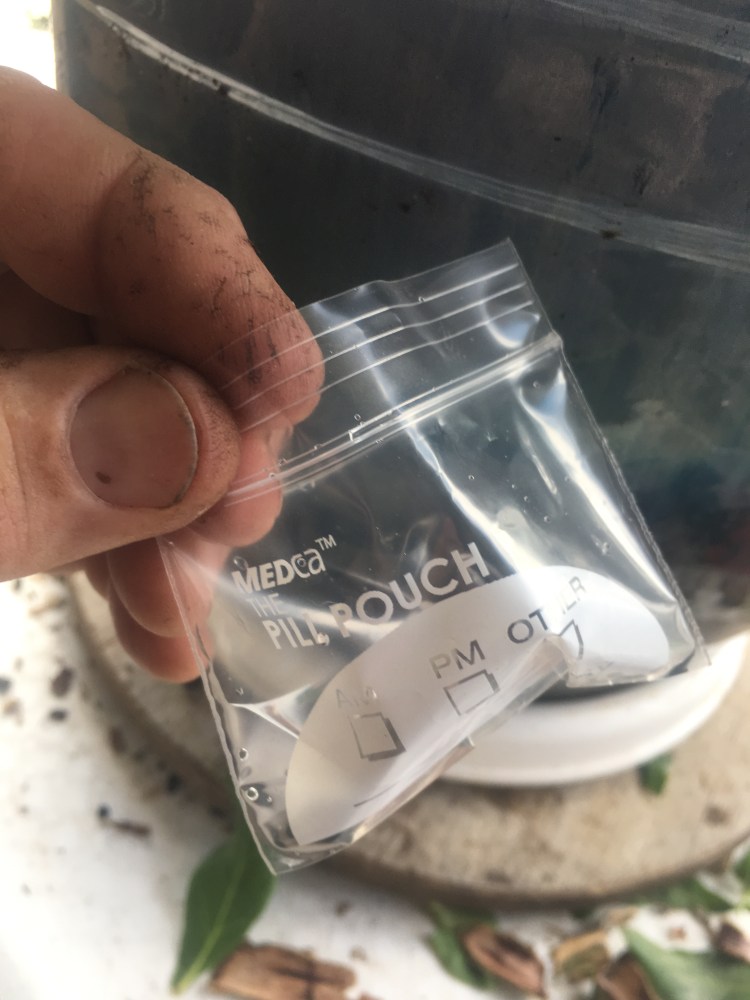 ….I put some sphagnum inside (to hold water)….
The baggie is going to go over the existing leaves on the scion to get water to it. Until the graft takes, the scion (basically a cutting) doesn’t have a way to take in water except through the stomata on the leaf surface (the stomata are the “breathing holes” through which co2 and o2 are exchanged. But on some trees, especially trees in arid biomes, a plant can absorb water through the stomata, say through morning dew, and survive periods of drought. These holes are also how trees absorb foliar fertilizing applications).
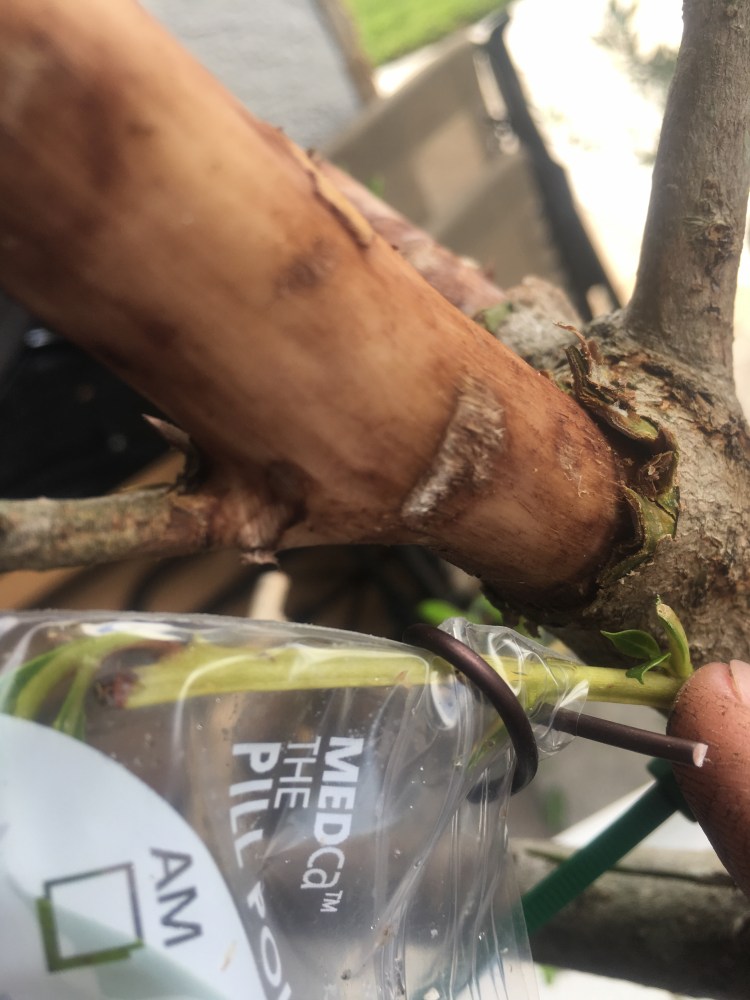
This “tenting” or “greenhousing” is pretty standard for grafting. If you ever saw them and wondered why, there you go. 
And now, we wait. 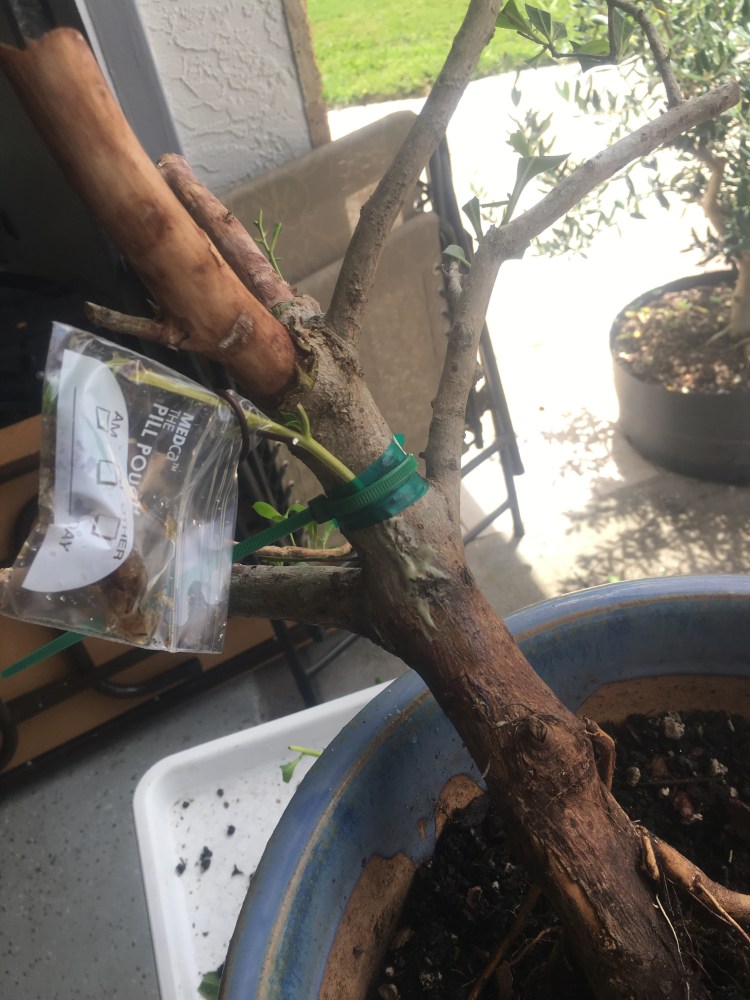
I’ll update you all next month to let you know if it works.
I hope it does, as there are some really nice buttonwoods with the green petiole, but superior deadwood and movement, that just never look good with the foliage only out at the branch tips.
Grafting on buttonwood (not only this technique but all of them) would open up hundreds of “meh” trees to levels of spectacular refinement.
Stay tuned!

So your saying my tree is a”meh” 😪
LikeLiked by 1 person
Yours will be awesome!
LikeLike
Did this graft end up taking? Also my fingers are crossed for the BSF convention to not be cancelled. Very much looking forward to your ilex demo.
LikeLike