Here’s the big tree I promised you in the last post.
I think I’m finally getting into the swing of things again too, this is a large tree (I won’t be doing any swinging anytime soon though, if you know what I mean, though this was a group effort).
We have before you, a celtis laevigata, or, a sugarberry, southern hackberry or just hackberry.

I first wrote about it here, which was one of the best posts I’ve ever written. There’s drama, pretty girls, intrigue, fascinating trees, and lots of smartass prose. Check it out, if for no other reason than to know what has come before.
This is how I left it, and at Epcot no less.

Since the ongoing theme of the last few posts has been repotting, you know what’s coming next. With a tree this big, I need to break out The Hook.

And, to the delight of some, I will be getting my hands dirty.
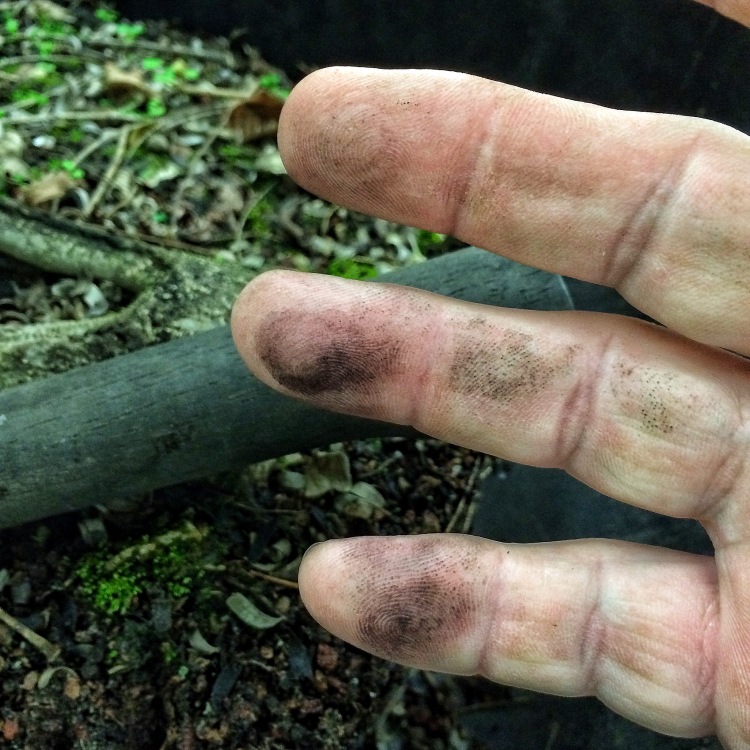
The tree definitely needed repotting, when I watered, the water would pool on top and it dried out faster than it should have. One thing to say about it, it surely has good roots.

You never know what you’re gonna find in a tree you get from someone else.
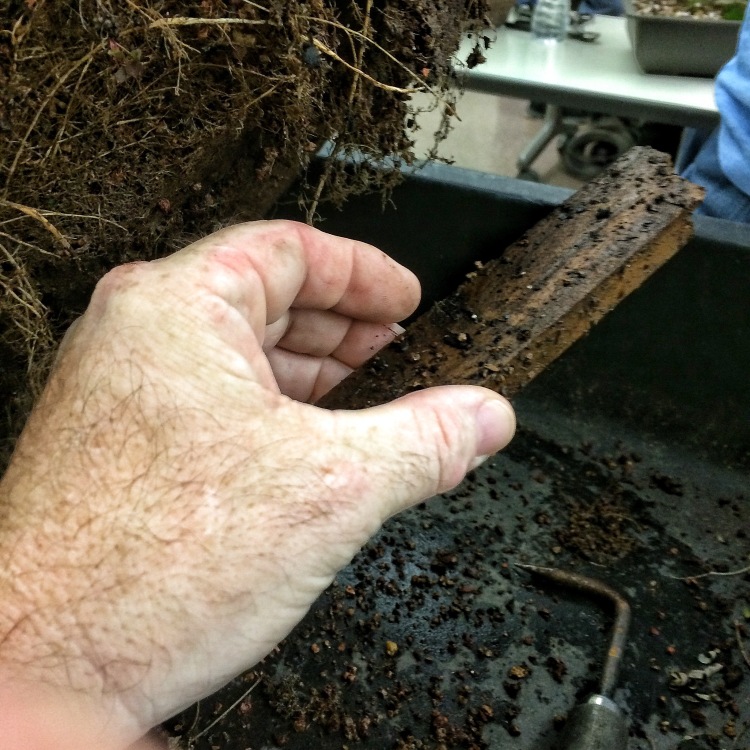
How does that saying go? Something about a splinter and a plank in you’re eye? This is definitely a plank.
Anyway, this hidden root is a good development.

I think an angle change is in order to show it off.

Nice, a little more dynamic.
In the last post I had already pointed out the need to trim some roots. At this angle it makes that need even more pressing.
Here:

Needs to be cut back at the line.
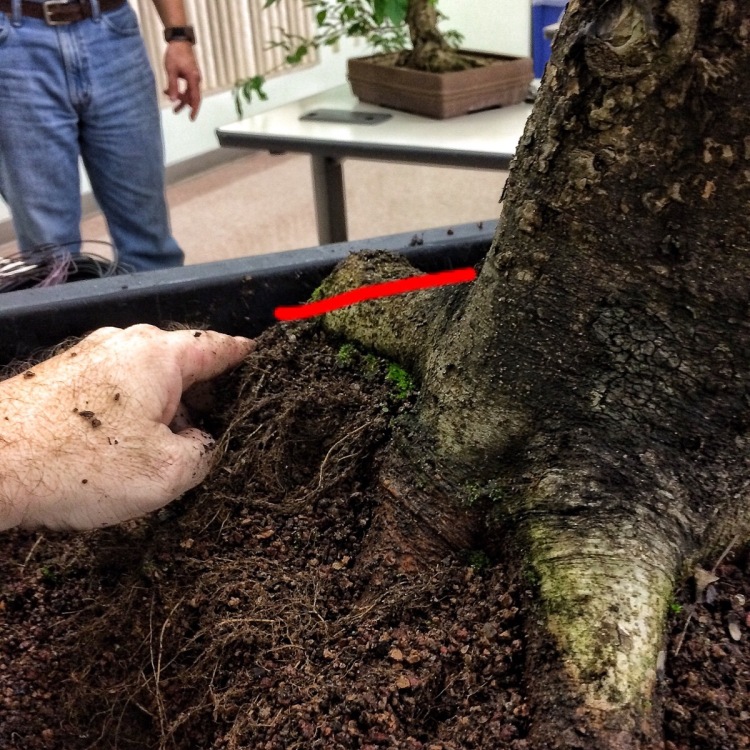
With a tree in this style it’s important that the roots have a smooth transition into the soil. It gives the tree a sense of gravitas and stability.
Sharp saw (much needed, this wood is dense)

And I get to sit back and have my brother-in-law Steve do the sawing while Evan and my wife hold the tree steady.

Bifurcating a root like this shouldn’t be done unless the tree has copious roots (a lot, many, like, mucho mondo roots).

Otherwise the surface root could just die.
Here’s how it looks, let me point out that it needs some carving.

Not only does this operation make the root look like it’s transitioning into the ground smoothly, but it essentially splits the root into two.
The root on the right in the front needs work too.

It looks like a ham bone I might throw to the cats to gnaw on.
Again, I wouldn’t do this unless there’s good roots below the cut.

Standing back and looking at the roots, you can see the improvements.

Standing way back, you can see a battle.

Looking from the side, there are two competing apices (that would be the plural of apex), even though the one on the right, which would be the rear one, is shorter.

The thicknesses of the two are too similar in size.
Where do I cut it?
Let me pot it first.

Since I’ll be asked, this mix…
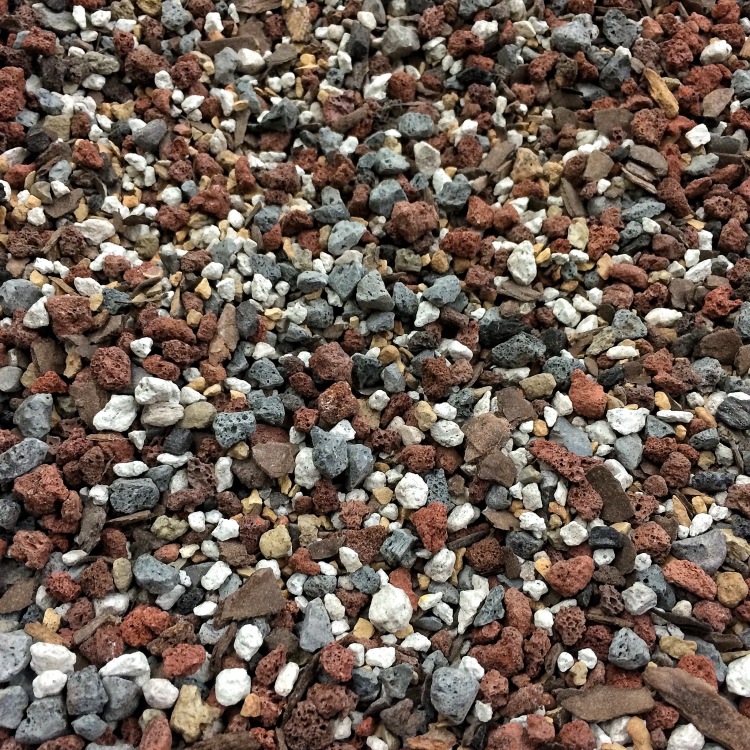
…..contains red lava, pumice, expanded slate, some charcoal, calcined clay, and pine bark.
Continuing….

…..and done.

Ok, where do I cut it? What do you think Benjamin?

That is correct sir.

Now it’s time to go home. I’m exhausted from all that work.


I’m sure you’ve all read the article published recently saying that men who share excessive self-shot photos of themselves (Selfies) tend toward narcissistic psychopathy. It’s a good thing those two pics above were taken by Benjamin, right?
Right?
Anyway, the above surgery all took place at the last Central Florida Bonsai Club meeting, but I ran out of time and energy that night.
That was a Friday, on Sunday (it rained all day Saturday) I did the top work.
Good thing I repotted when I did, the buds are about to pop.

I must digress and mention how beautiful the sun was that day, these golden days are the why that we live in Florida. Here it is, the middle of January, and I’m out in short sleeves and basking in the sunshine, working on bonsai.
Getting back to the tree, you’re wondering where you start on a big bonsai like this. How do you even begin trimming it?
Simple. You go back to basics.
That means, this being a deciduous tree, you first remove any winter dieback.

A hackberry tends toward a little more dieback than some.
Next, trim any crossing branches, those growing in branch junctions or multiple twigs emerging from the same place. Those growing up or down, etc. You know the drill.
By practicing the basics, any tree will come into shape easier than you think.
I believe now is the time to address the trunk chop scar.

It’s kinda hard to miss, like an elephant in the room.

Or a big mouth. We all know how hard it is to ignore a bigmouth.
It won’t ever close (heal) so I’ll have to just deal with it.

I’ll drill out the middle down to the hambone root to provide a pathway for water to flow.

The red circles (with the arrows pointing to them) are pruning wounds that I will carve out to connect to the drain hole.
But not now. I’ll wait until August, after the tree has settled in the pot a bit.
With that explanation out of the way, time to prune.

The before:

And I’m done.
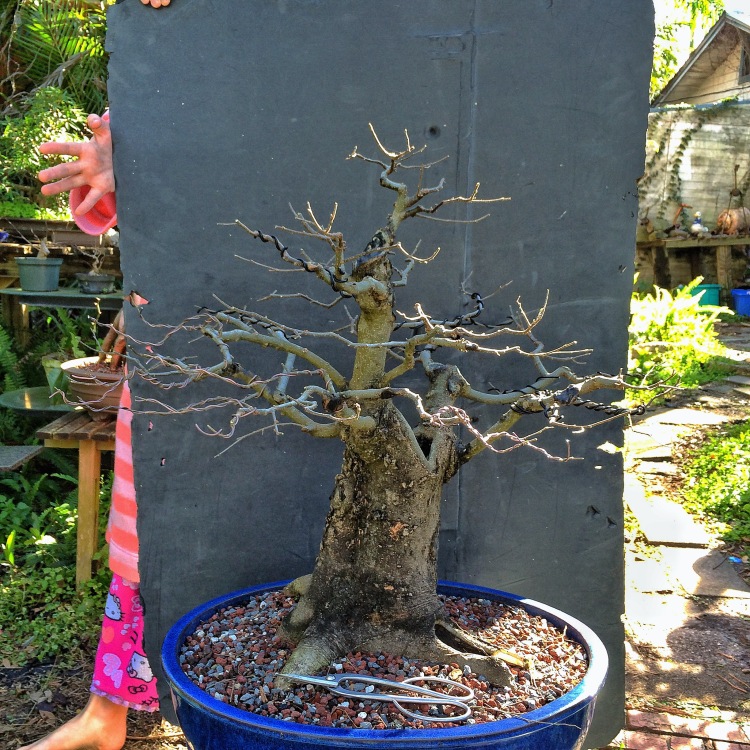
That’s shot is a little hard to see (not to mention the distraction that my daughter, in the bathrobe and Hello Kitty pajama pants provides. Just to give you the proper timeline, it was four in the afternoon when I took the picture. She had just turned thirteen a few days earlier and was practicing the privilege of teenager-hood by sleeping in, most of the afternoon)
This pic shows off the branching better.

Pheweee!
What a tree!
Next one up is either an elm or a trident.
Which one do ya’ll want to see?
I vote elm
LikeLike
Either would be good, but I’ll vote Trident.
LikeLike
I vote trident. The hackberry looks great! look forward to seeing the carving. So glad you didnt make me wear hello kitty jammies.
LikeLike
I vote Elm. I so enjoyed your tutorial, beautiful work!!!!!
LikeLike
I am breaking the tie, for now and going for Elm! go Elm!!
LikeLike
If anyone wants to see what happened to the the part of the tree I thought should come off, click: http://jaminwithben.weebly.com/bonsai/some-hackberry-roots-from-my-friend-adam
Enjoy!
Benjamin
LikeLike
Trident 😀
LikeLike
Fabulous! I’d like to see a trident next, please, but it really doesn’t matter, since everything you address is educational and fun—lots of fun! Glad to see you are getting back into it and feeling better. Hopefully, you actually feel as good as you look in the pics (narcissist!). Many well-wishes for continued recovery and gaining strength! Kathrin
LikeLike
What a hag, children would definitely not want to get near it if it’s not a bonsai. I want to ask you a hundred dollars question (because to fill up that pot with those soil components purchase online to be shipped to you, it would cost that much): Any good source locally in Florida that you can just drive there to pick up those soil components: Expanded slate, pumice, larva?
Good to see you getting stronger each day. I want to drop some weight to look like you but wify said no, WeightWatcher’s program could cost up to thousands.
LikeLike
For lava: up towards the north of Florida in Ocala you have D&L nursery for lava. In central Florida you have me or Schley’s Bonsai. Down southwest fl there’s Wigert’s bonsai. Pumice is hard to come by in Florida. Only BonsaiJack has it readily available at the moment. He’s southwest fl as well.
Expanded slate can be had at BWI agricultural distributors. There’s one in central fl and one in Miami. You’ll have to call to make sure they have it. Its Espoma brand, Soil Perfector. Good luck and thanks
LikeLike
Thanks Adam
LikeLike
with this crazy Florida weather, some of my trees (elms, etc) are budding out and I’ve repotted a few of them. if it gets really cold again should i bring them inside? great tree,BTW!
LikeLike
I would if the temp is going to be below freezing or they call for frost
LikeLike
Vote – trident, field grown/repotted if possible. Our club will go on a field-grown-trident dig in Central Texas on 2/21 so any info. in that direction would be great. This will be my first trident, as I am more a pine guy.
Good to see that you are feeling better.
Cheers,
Vern
LikeLike
Sorry Vern, I’ve started on the elm post but I’ll have the trident one out before you go. It was a field grown specimen so I’ll try to address that. Thanks
LikeLike