Here’s a challenge

I think I’ve let it grow enough.
What do you think?
Even the weeds are bigger than some $35 starter bonsai trees for sale on eBay.
I got the tree from Mike Cartrett (Palm Beach Bonsai) in a trade. I think I came out on top on that trade.
It is from Puerto Rico originally (that’s where they grow) but I’m not sure who he got it from.
I’ve had it for a year and a half and I’ve been waiting…..savoring the anticipation, putting off working on it….
Today’s the day!
I’m so excited!
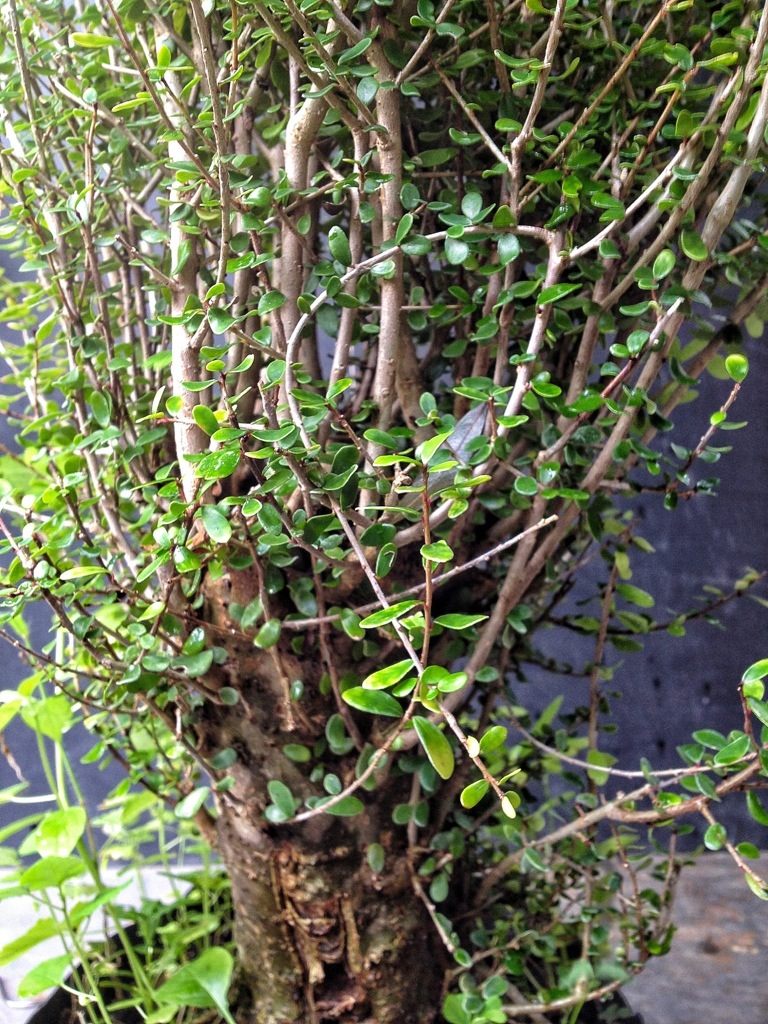
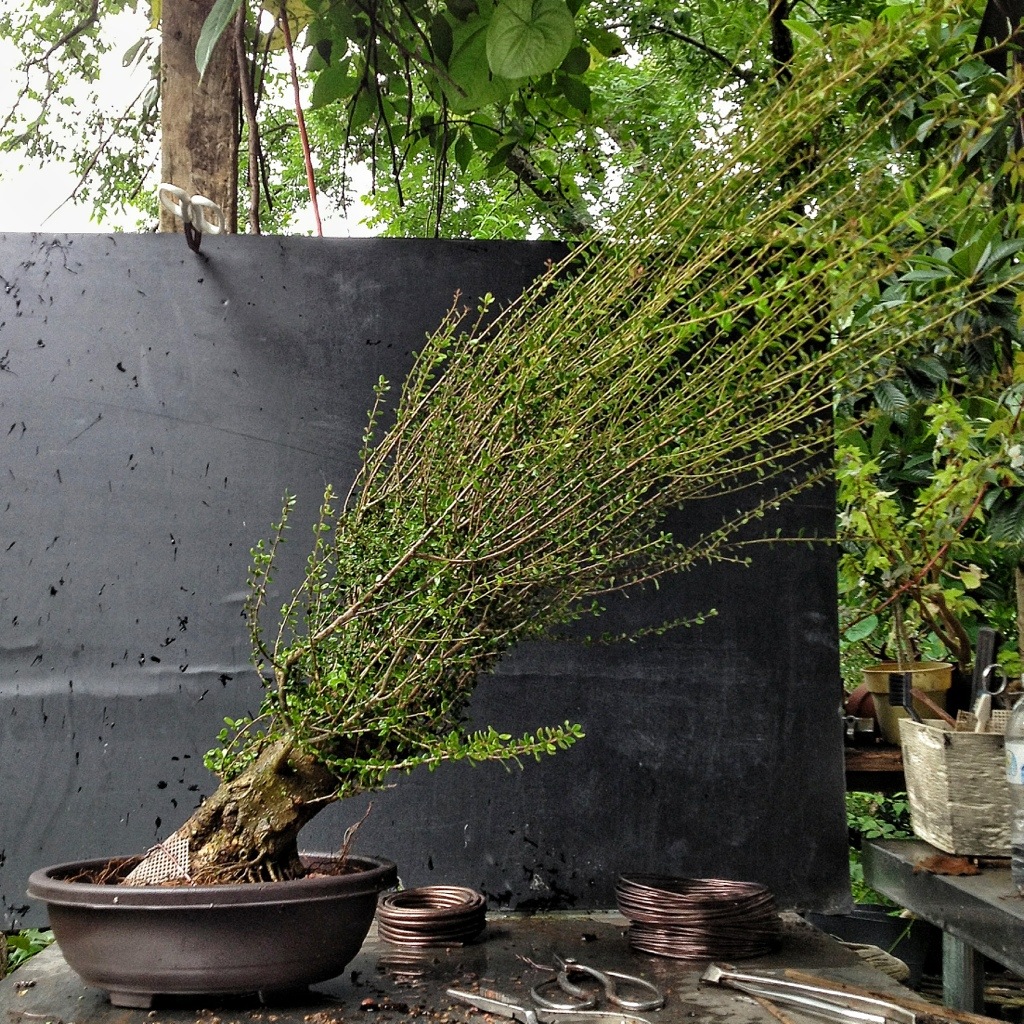
There are plenty of branches to choose from (that’s what we in the cunning linguist department call understatement).
Here’s a lesson:
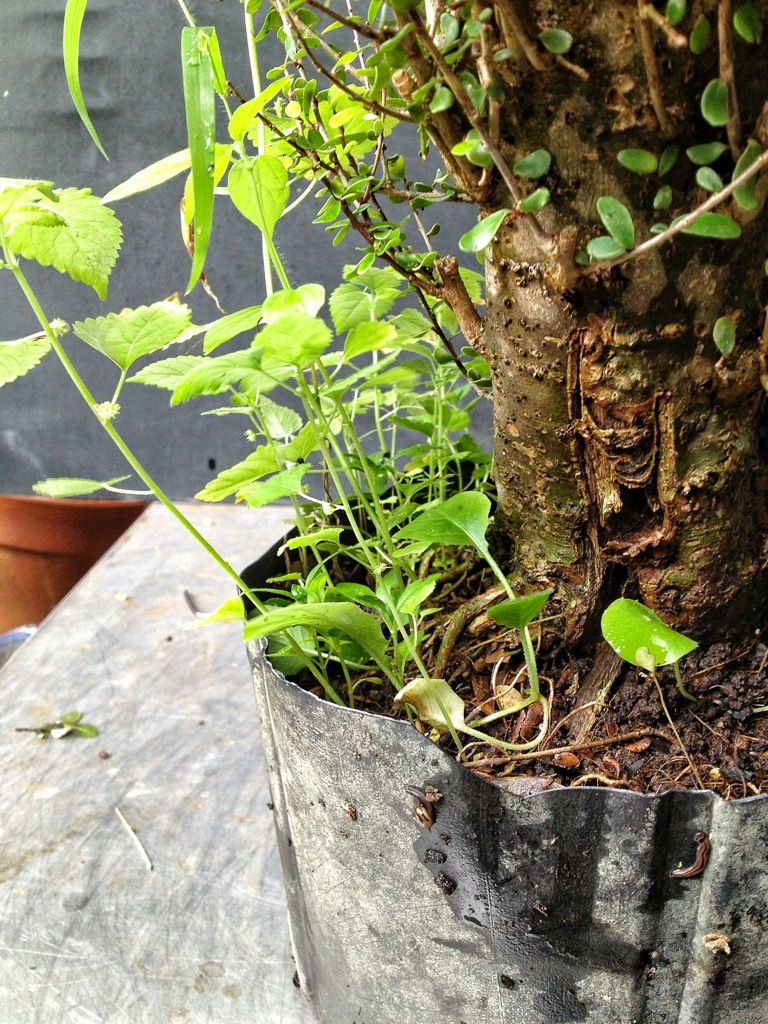
This is my initial front
I am basing it on branching and the superficial surface rootage.
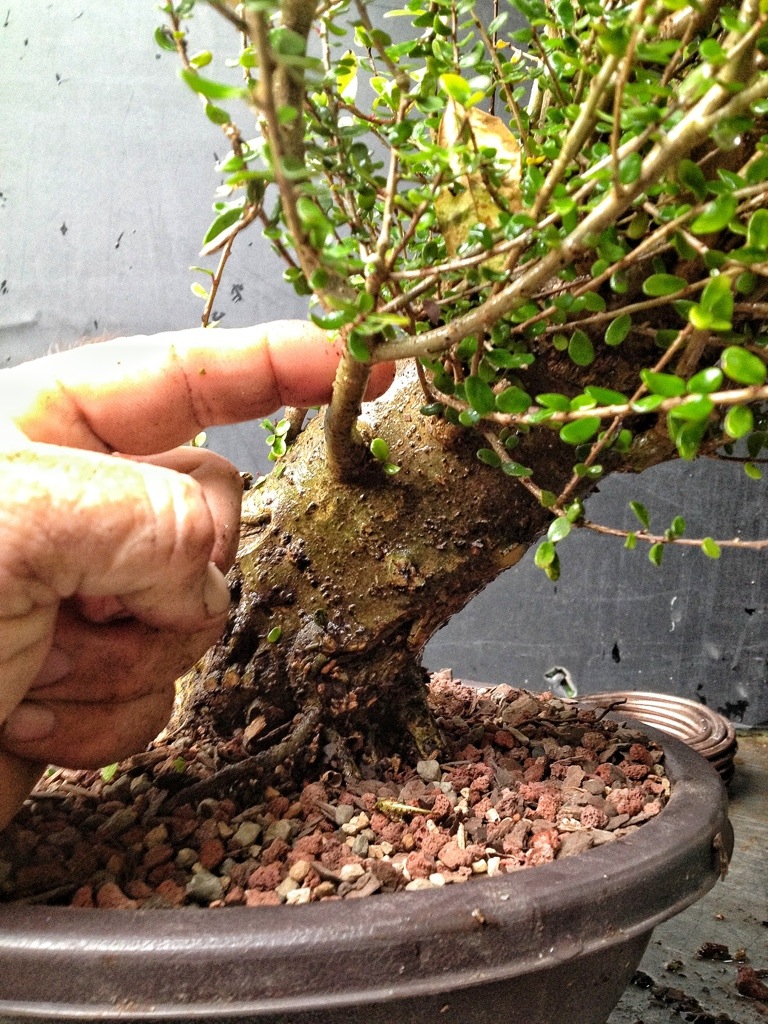
The lesson: always dig down to find the base. This tree was collected (I know this because they’re not cultivated, they’re basically a weed growing in the mountains) and the common practice when collecting a tree is to bury the base deeper to conserve moisture loss.
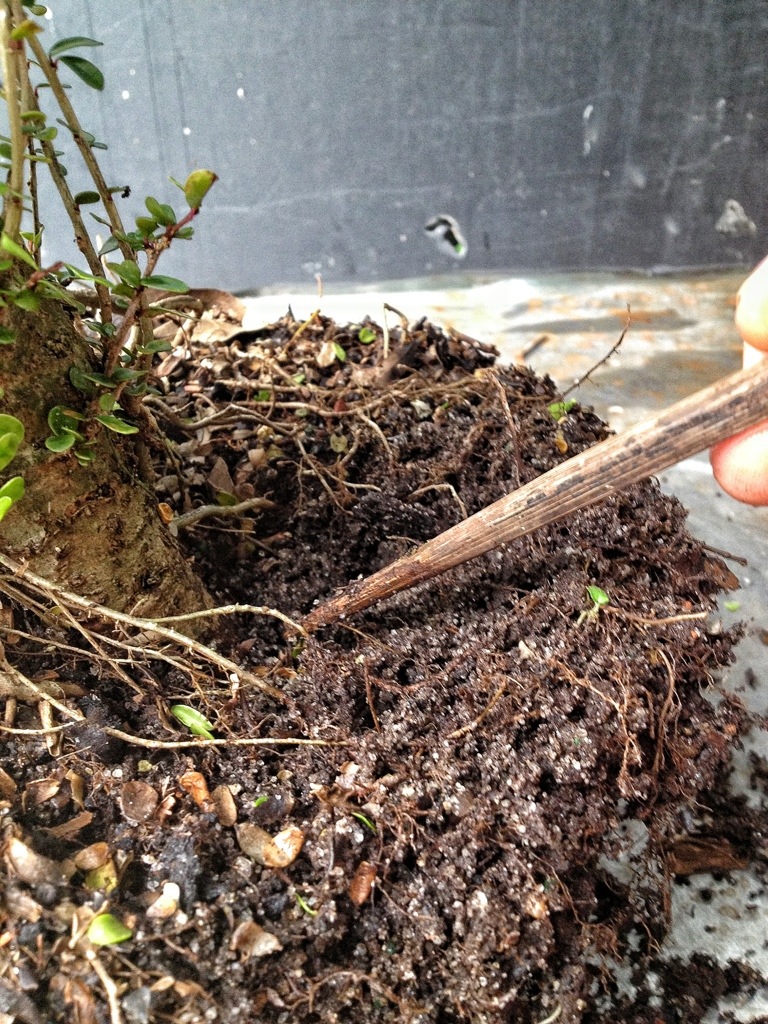
Some root raking
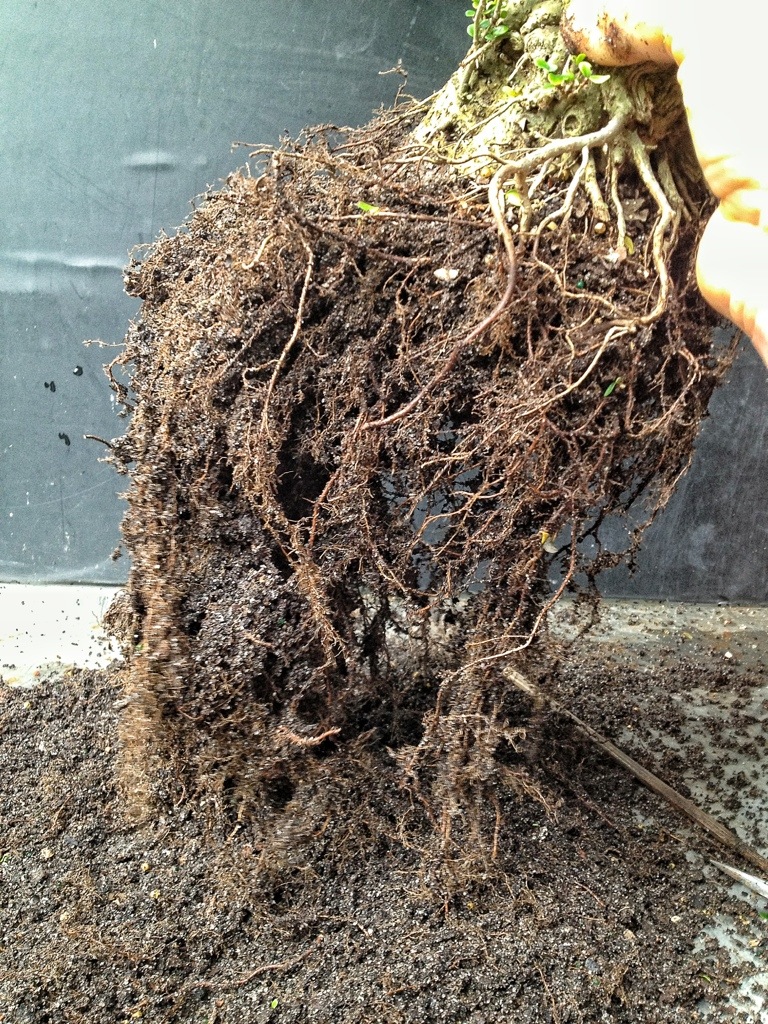
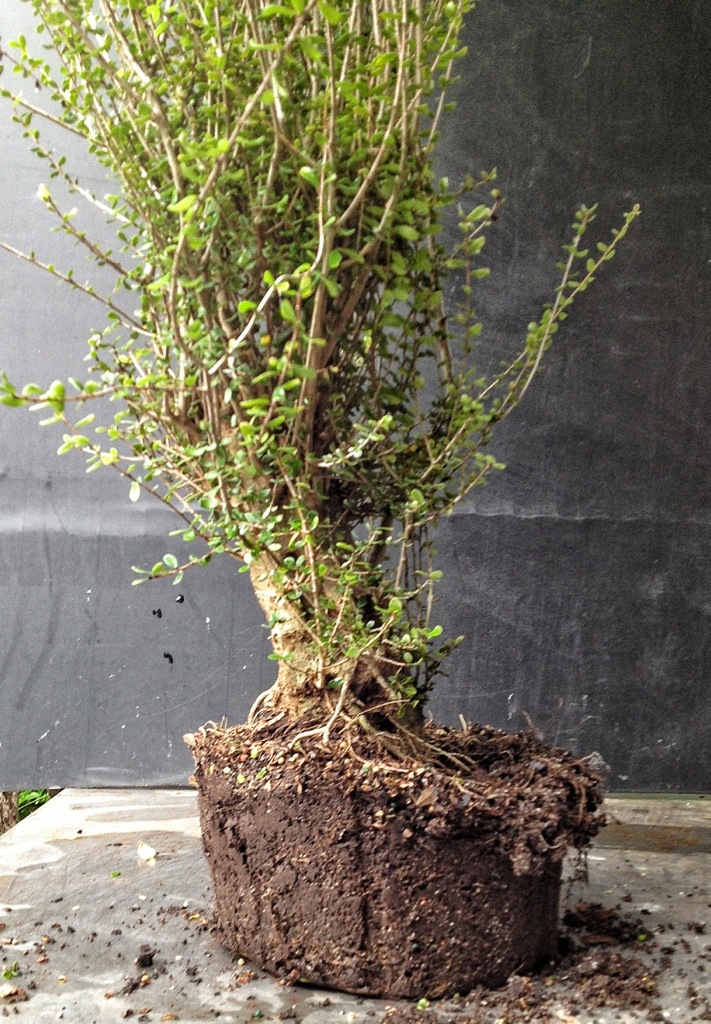
And I discover that the bottom of the tree is actually sawn off at an angle.
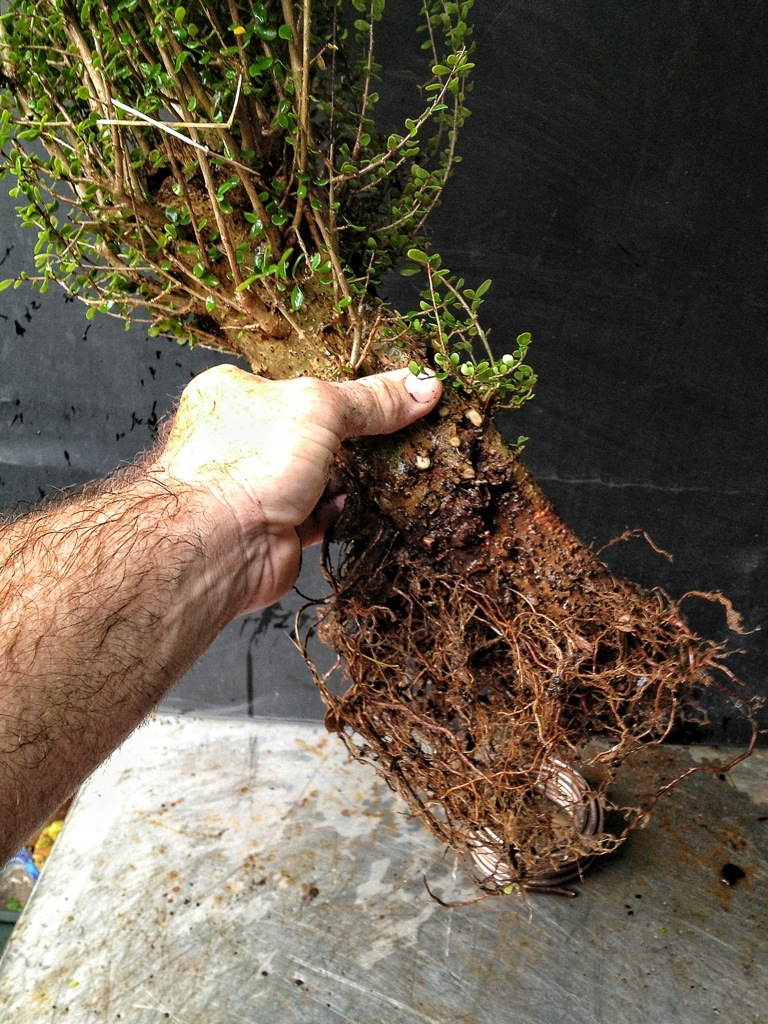
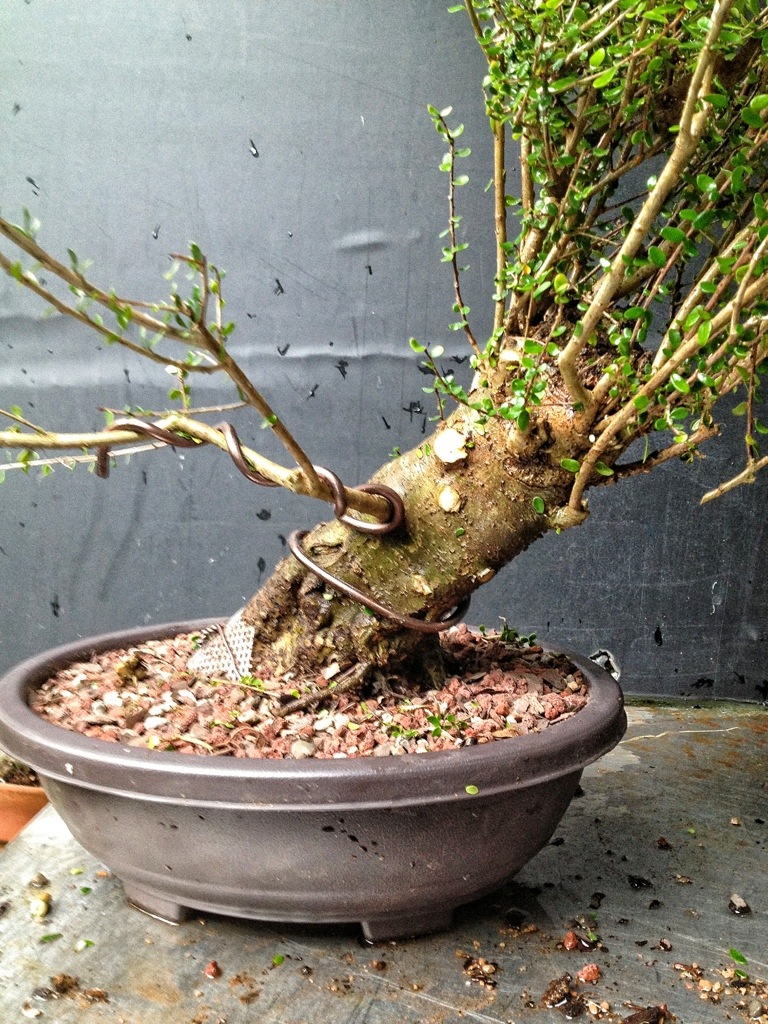
Instead of this

The tree will sit like this

I’m not sure why it was planted in the pot straight up and down, the angle is about 45 degrees.
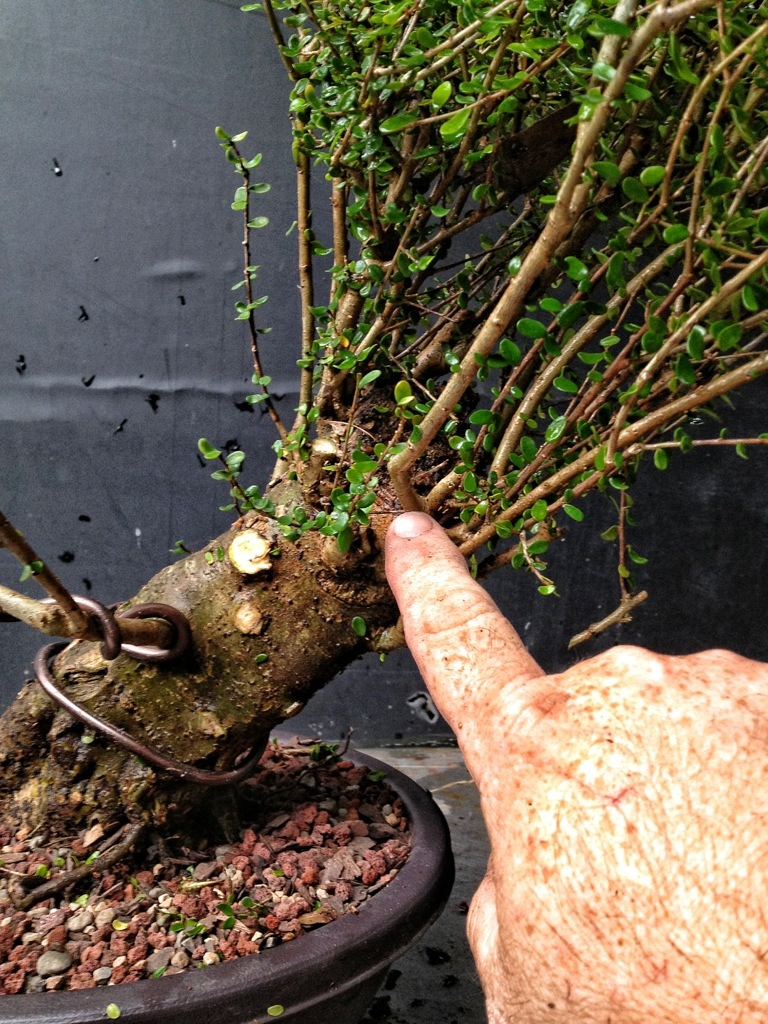
So now, with more of the trunk exposed, which is the front?
My first choice:
Or the other side (it’s one or the other)

Considering I pointed out that this was a lesson, you’ve probably deduced that the front will be side two.
My basis for this decision is this cleft
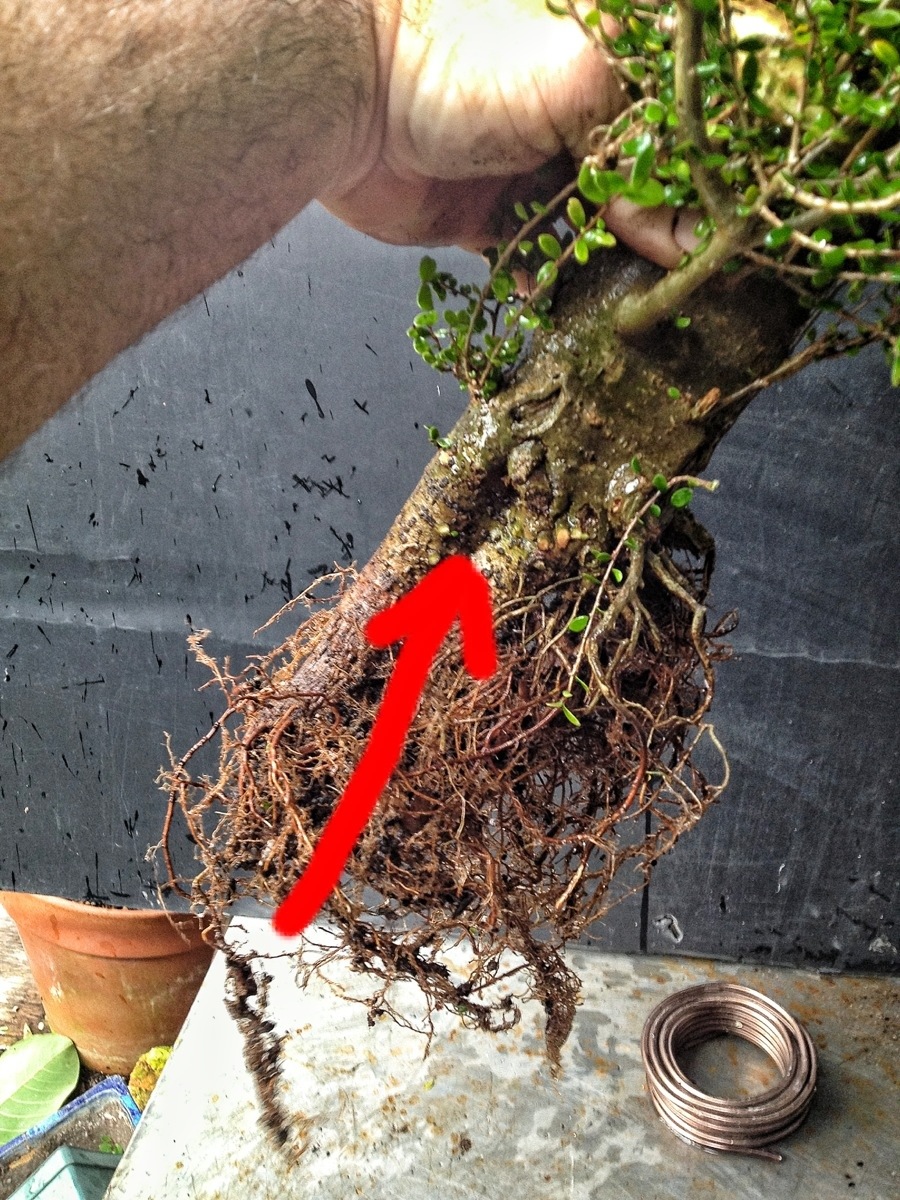
Which was totally buried in the nursery container.
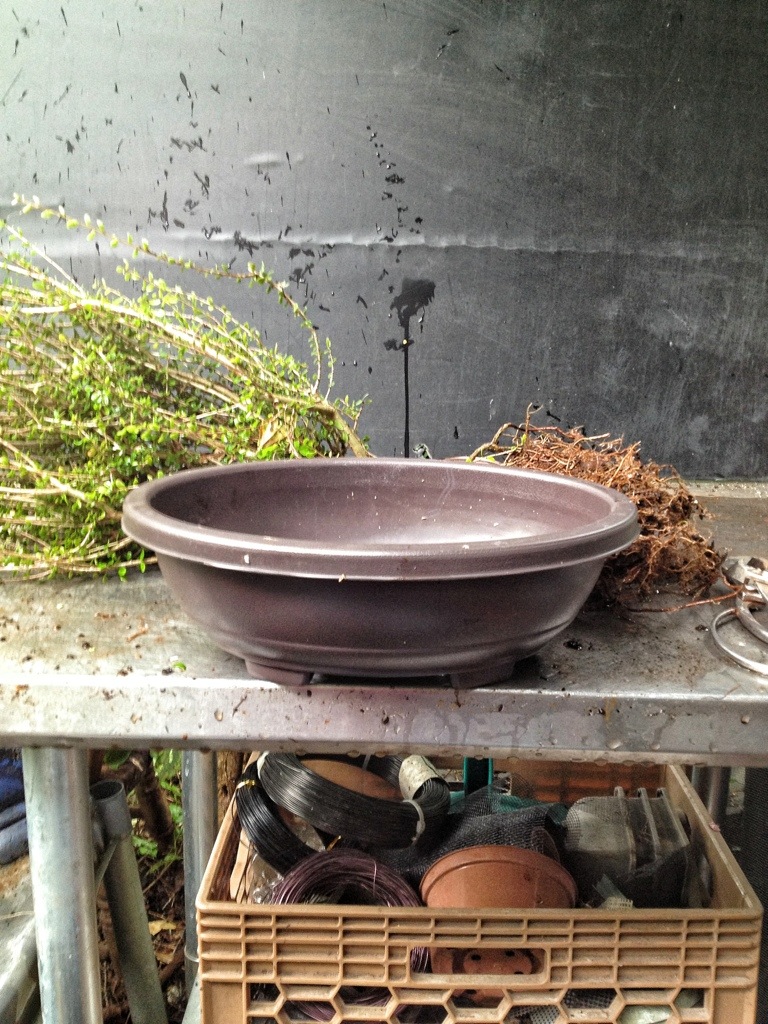
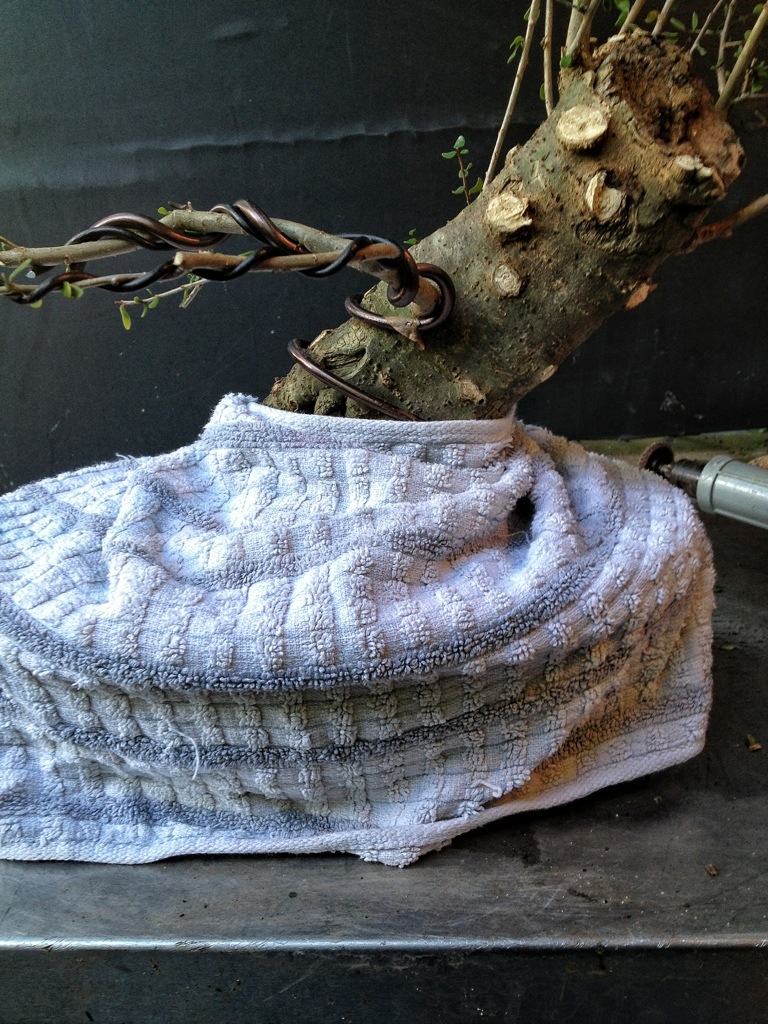
A new training pot and some good bonsai soil-
I tie it down and, since the bark is very fragile, I use a screen to protect it

I need it to be secure in the pot as I am styling the tree out of my regular order (which is: prune, carve,pot, wire) and the carving will be rough.

Ok, what’s next?
I think I’ve stumbled upon the technique that Robert Stevens uses when making those sweet wind swept trees without a bit of wire
I should just leave it like this.
Naaaa…
I have one good branch
Except that it’s pointing to the right, up and forward.
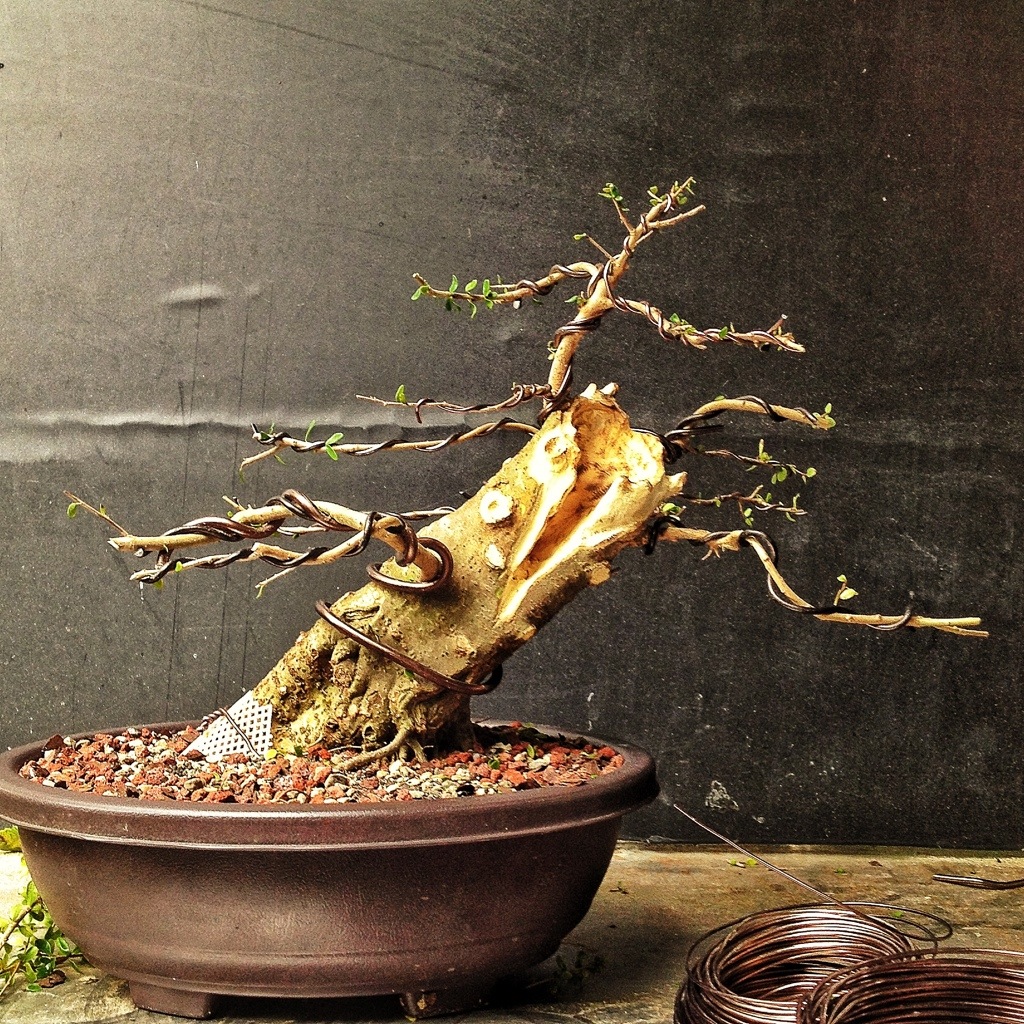
A little wire (well, a big wire) will fix that

Ok, I can see the tree much better now.
My plan for the tree is to carve the end and the front and try to make this tree look like maybe the top had gotten ripped off by a hurricane or, as they say in Puerto Rico, your-icane (that might account for the extreme tilt too) and the tree has survived and regrown itself.
All this:
Must go

Before I carve, let us reflect

At this point I think I’ll show off a bit and do some sketching


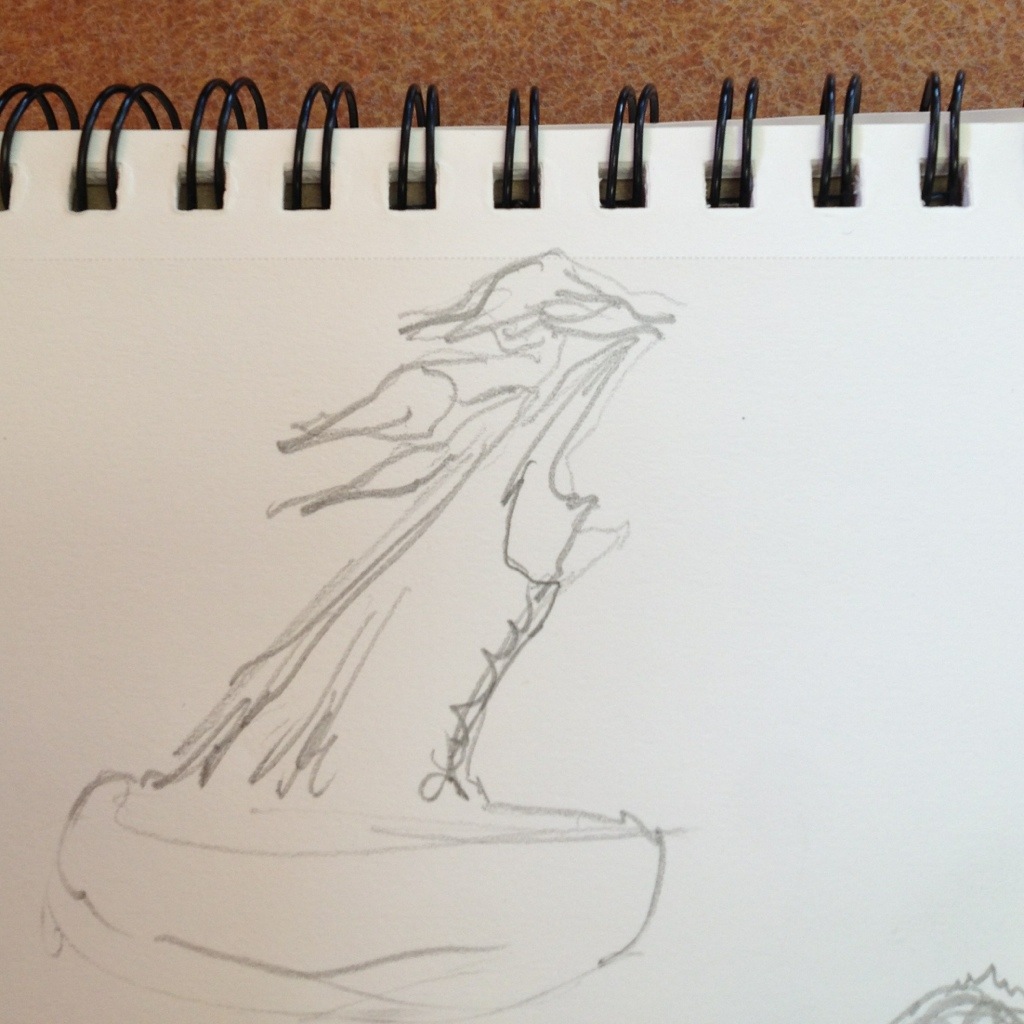
As you see, there are several options with branch placement and removal.
First I need to carve it and see what I accidentally chop off, then we’ll see what stays……no, seriously, all these branches are in the danger zone
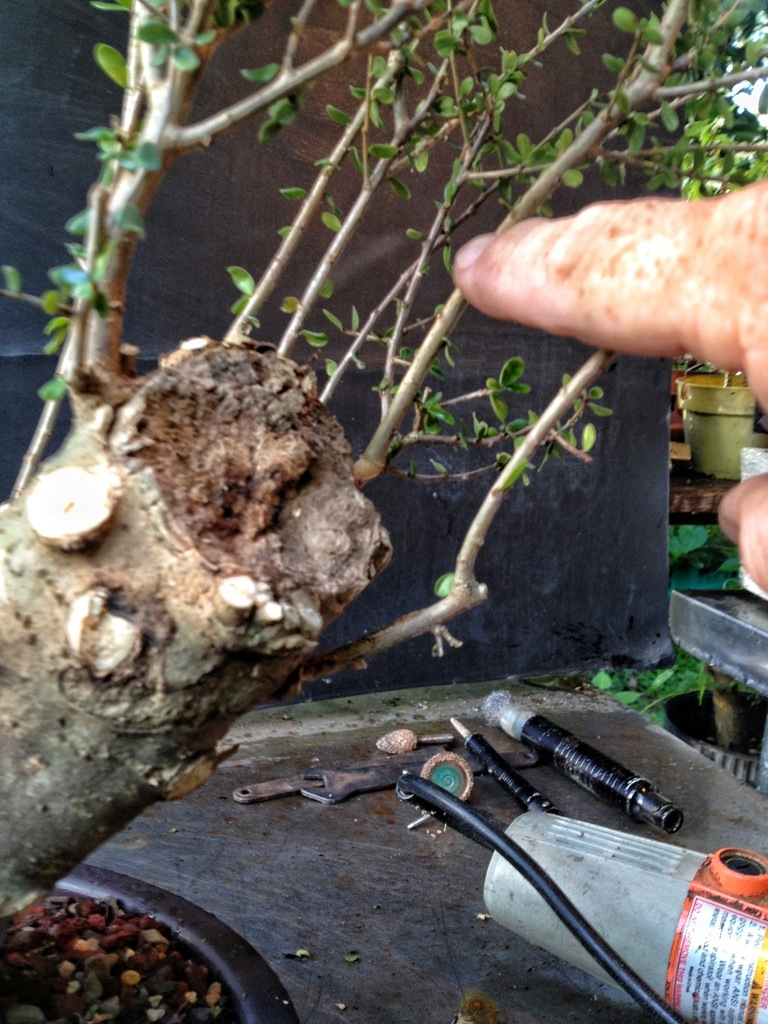
A bib to keep the sawdust off (I don’t want fine sawdust in my beautifully sifted soil)
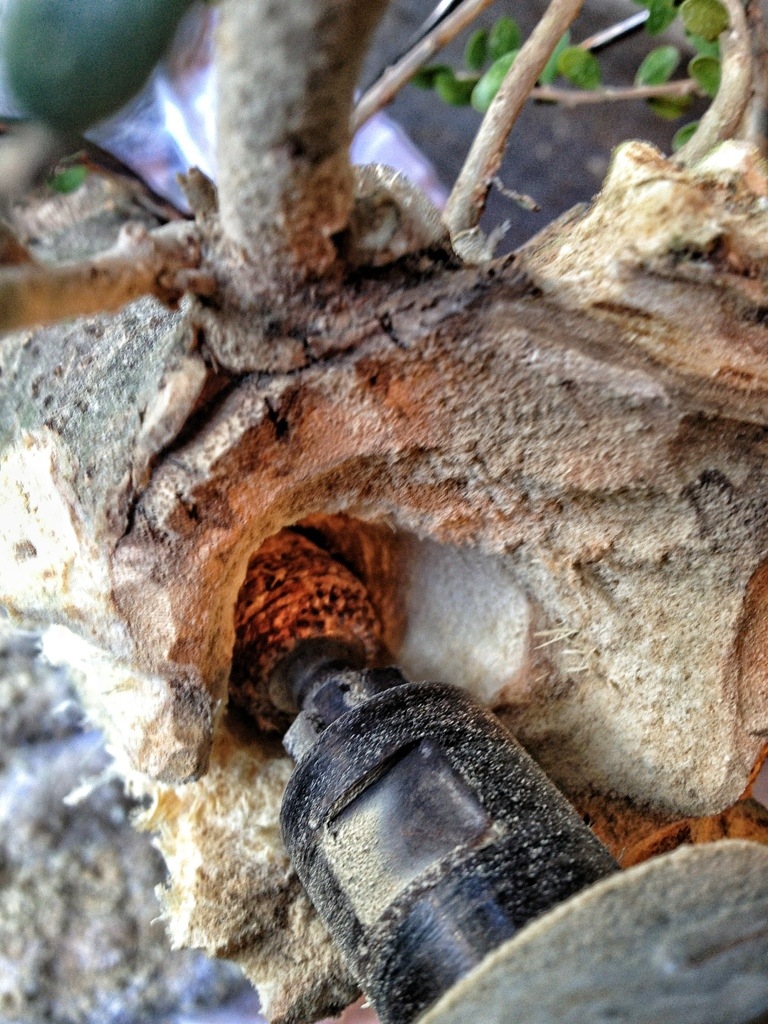
My die grinder
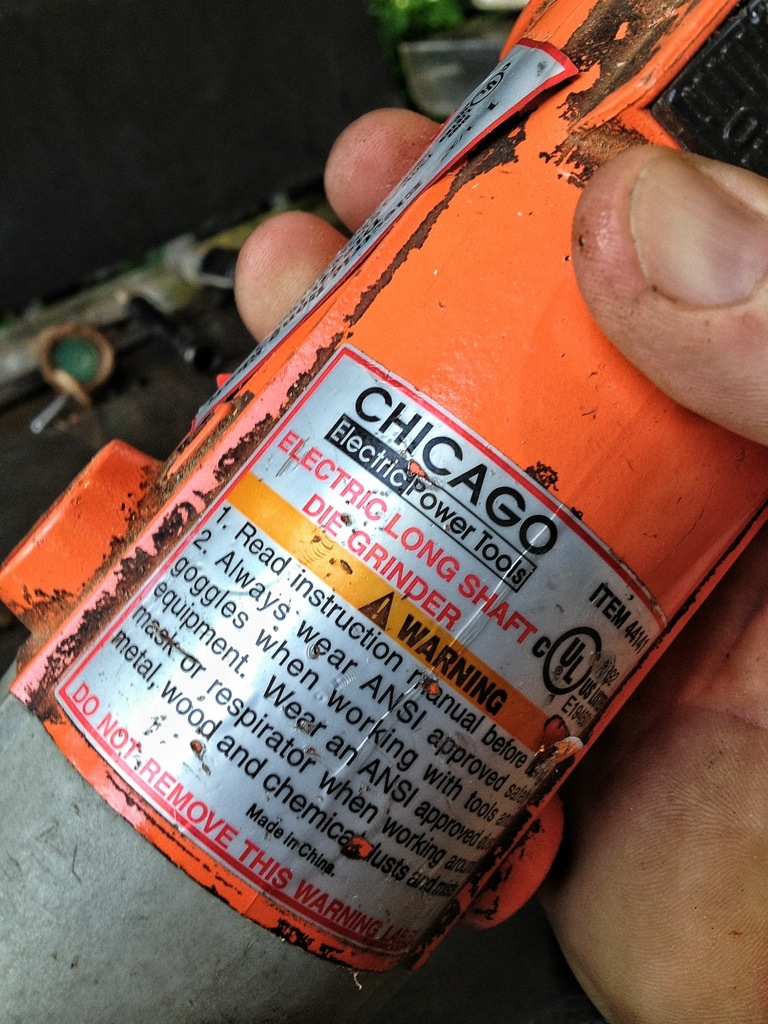
Most people have a short shafted tool (not much better than a glorified Dremel) whereas my long shaft allows me to really plunge deep into the hole I’m grinding.
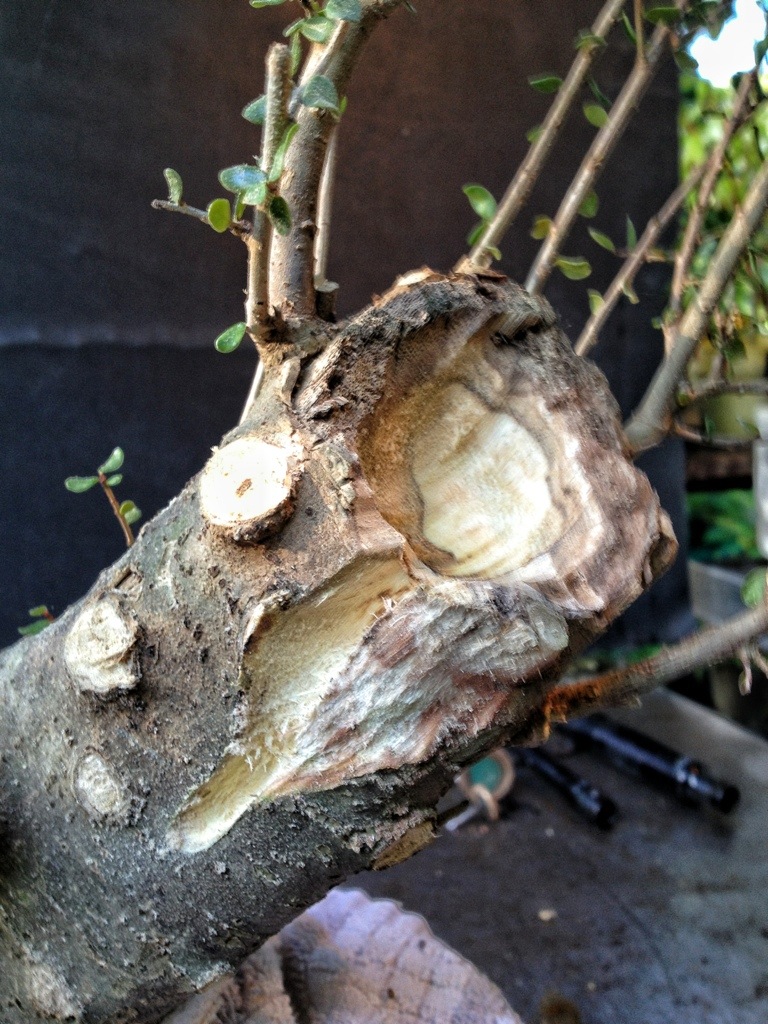
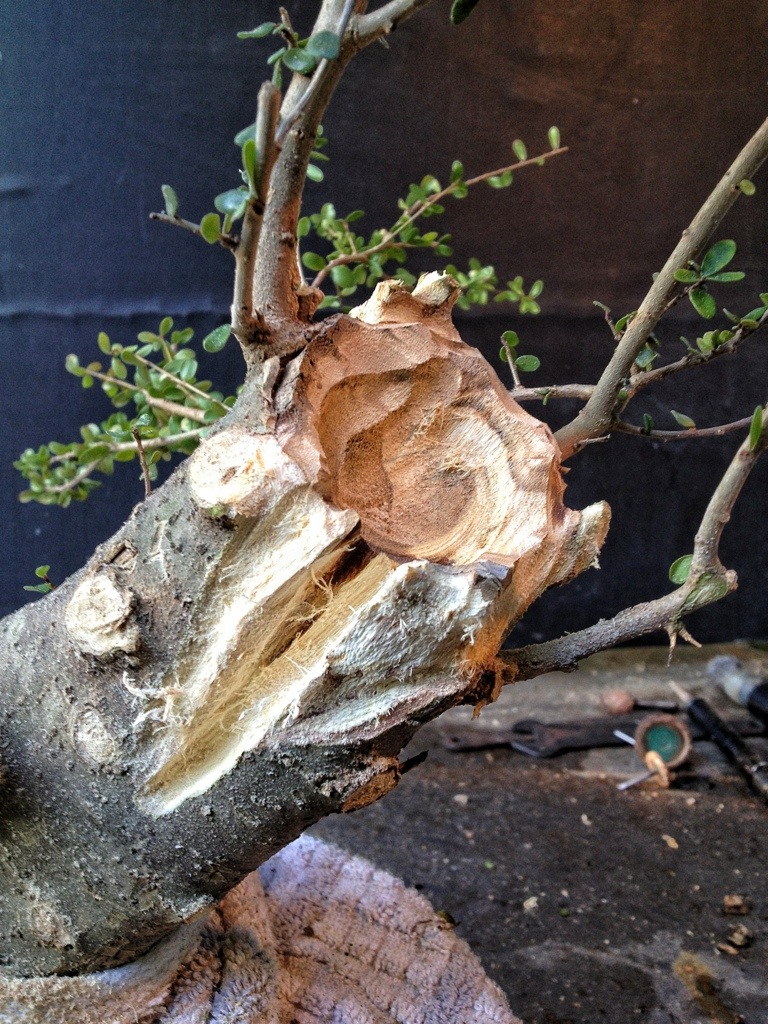
Here is a progression of the carving process.
I won’t talk too much, I know you guys just skip over the words anyway
A pony tail


Some of the bits I use

I’d like to see you do this with a samurai or ninja
People ask me why I carve hollow trunks a lot. Well, that’s the way most trees show deadwood.
Sharp sticks only happen on juniper and pine (trees with very resinous heartwood) and buttonwood (which is preserved by the salt).
Broadleaf trees rot from within.
A change of tool: flex shaft carver with my micro hand piece.

The wood on this tree is very fibrous. Lots of little pithy leftovers.
Time to freak out with the torch
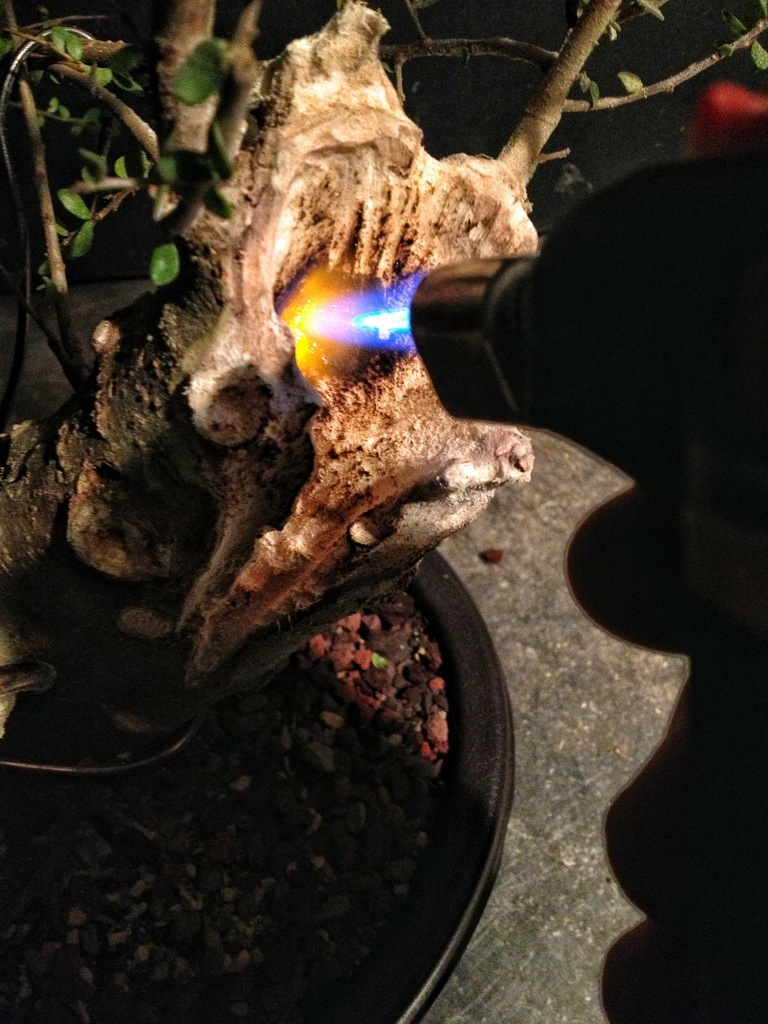

Ok, that’s as far as I can go tonight. I have a very important conference call concerning a bonsai event next year. I’ll let y’all in on that secret when I have the go ahead.
Next day:
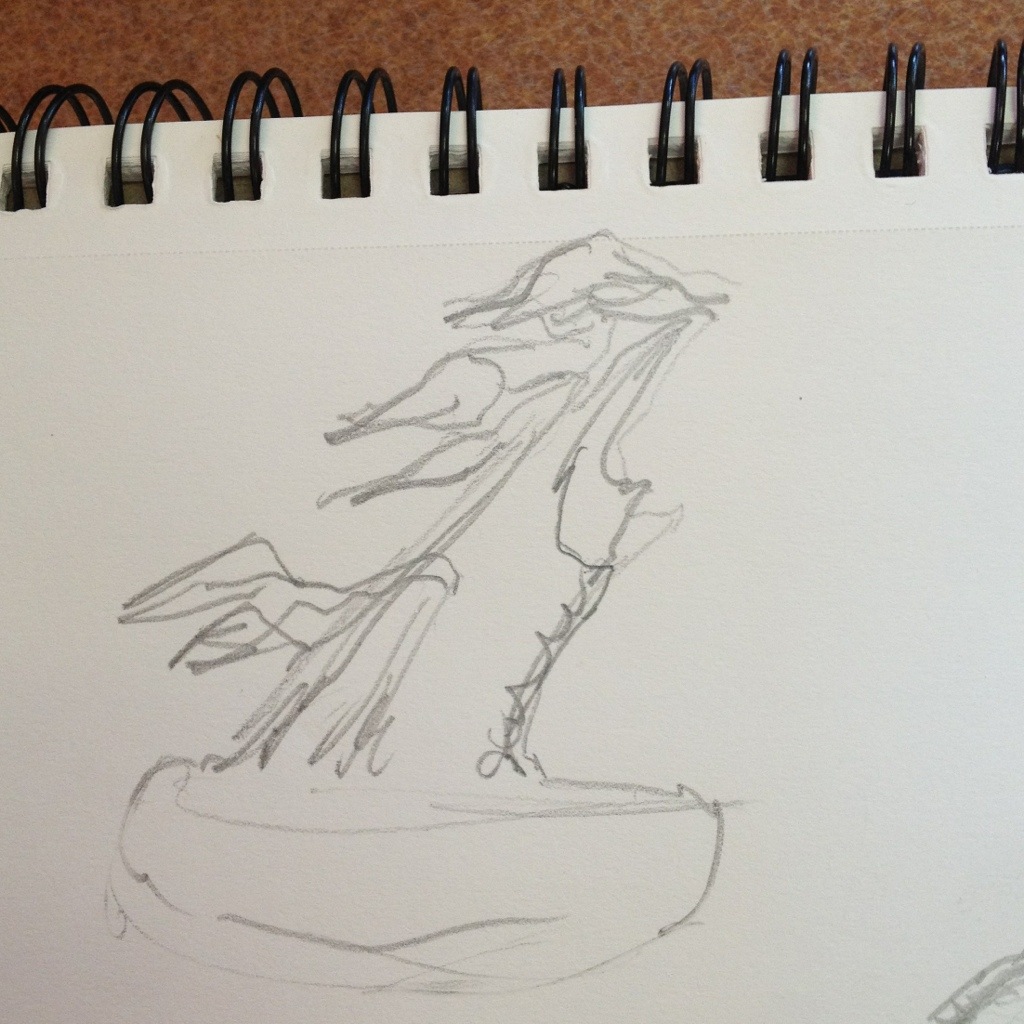
While sitting in Starbucks I drew another sketch
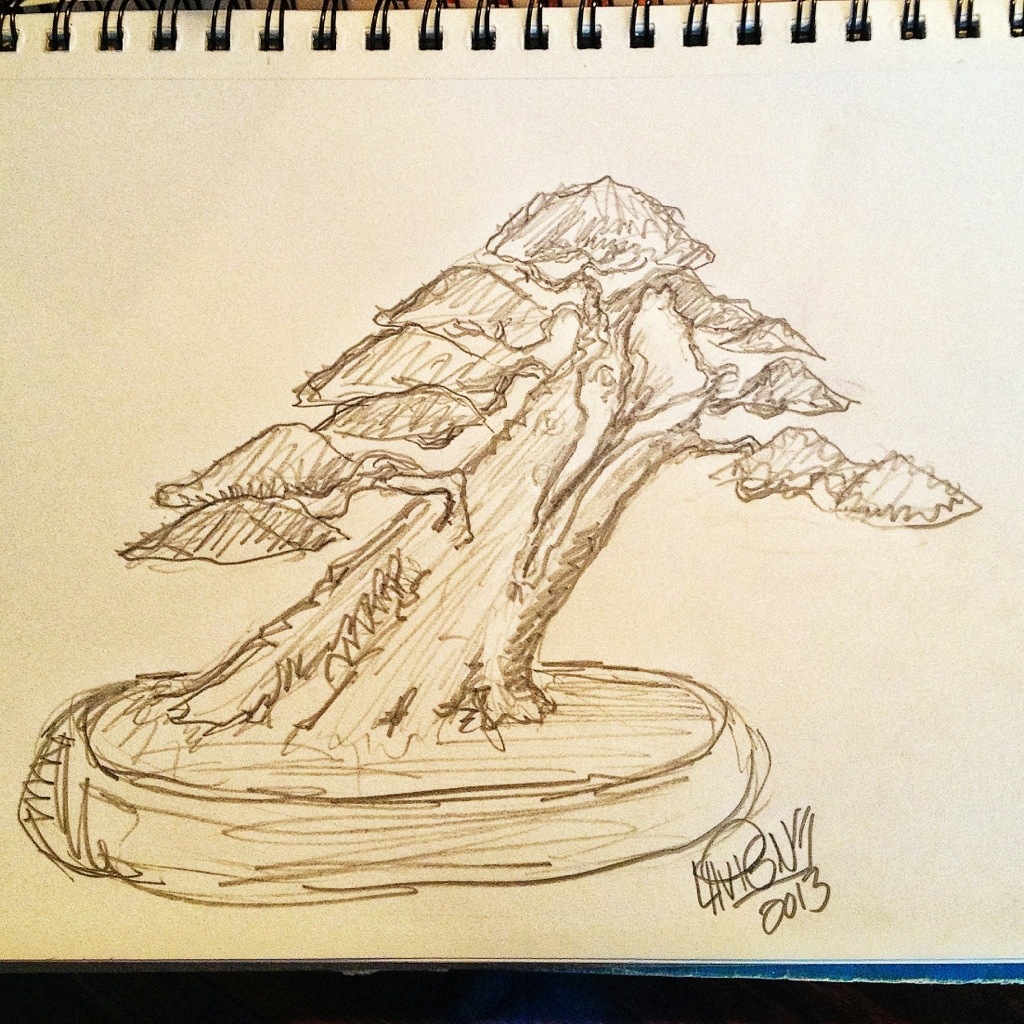
Slow day at work I guess.
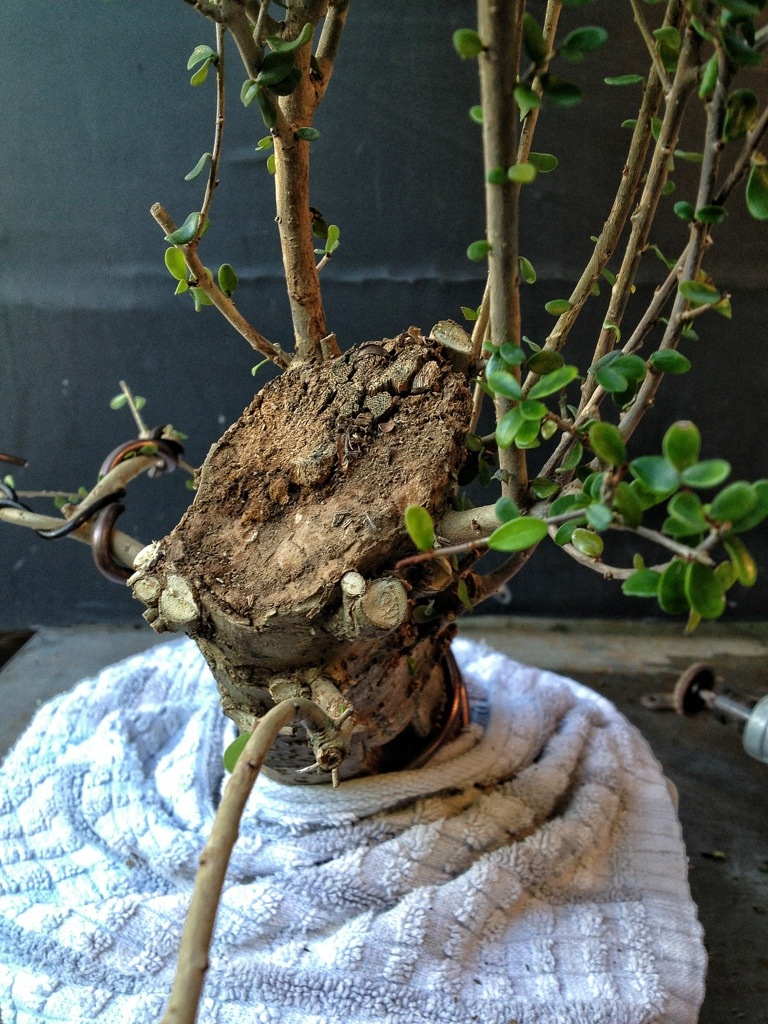
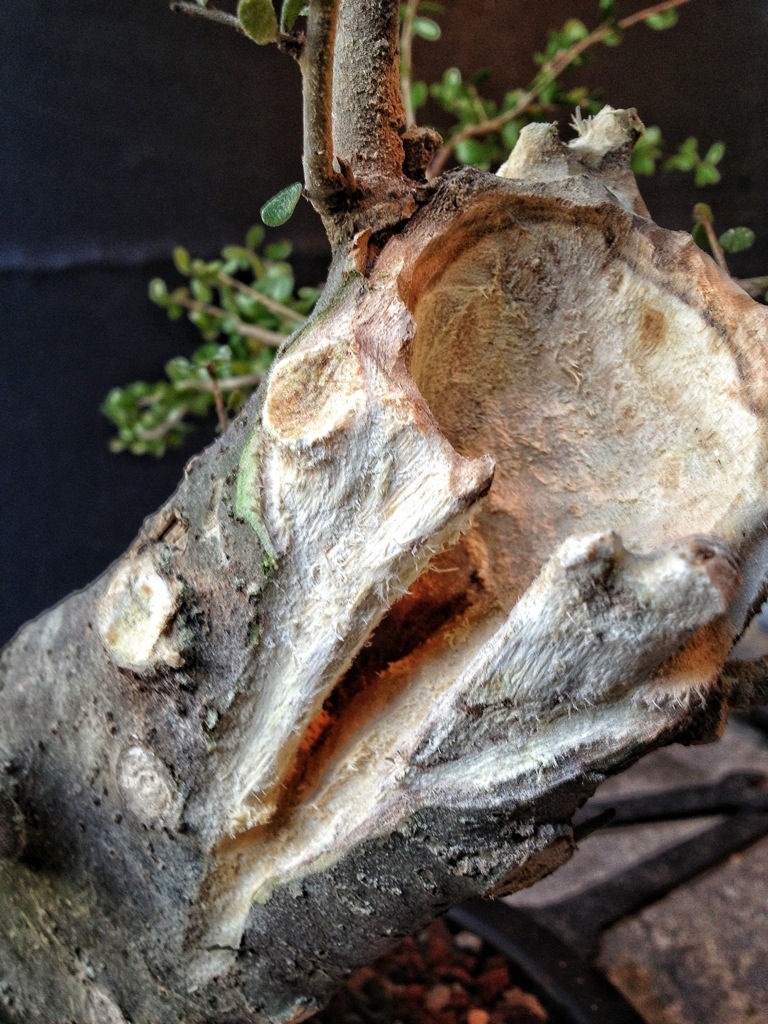
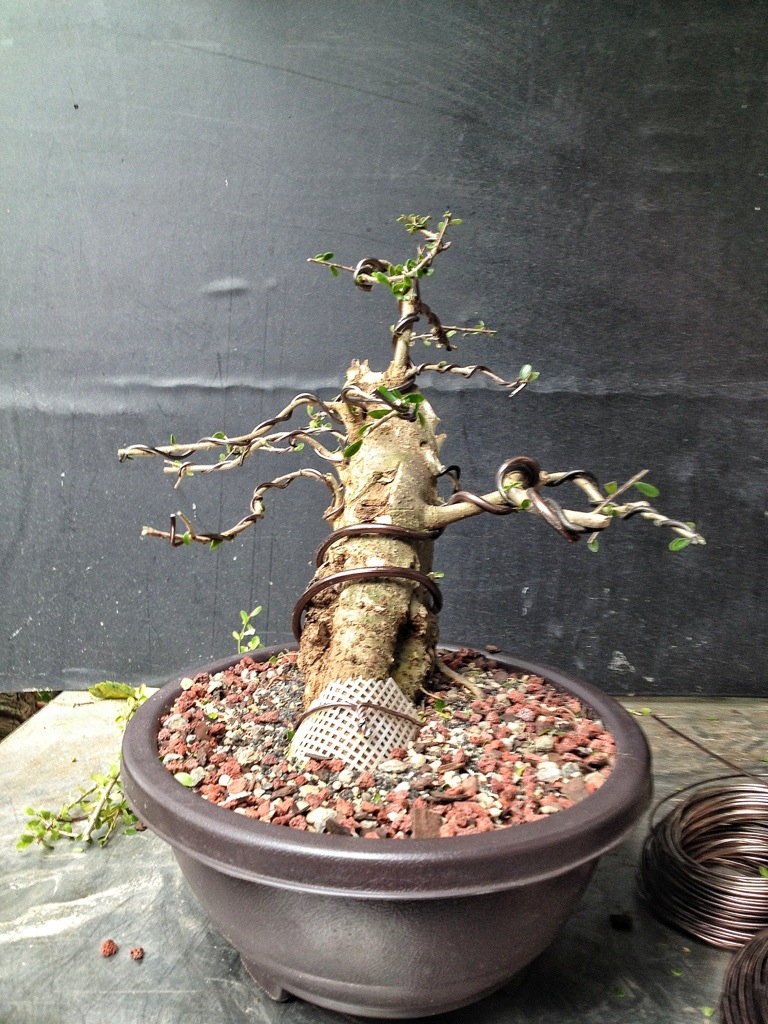
Here’s the tree in the light of the day

It’s a little rough still, it’s going to take some time to smooth itself out. I’m a patient man. What’s surprising to me is the enduring nature of this wood. Most tropical trees rot very quickly; not so with the neea.
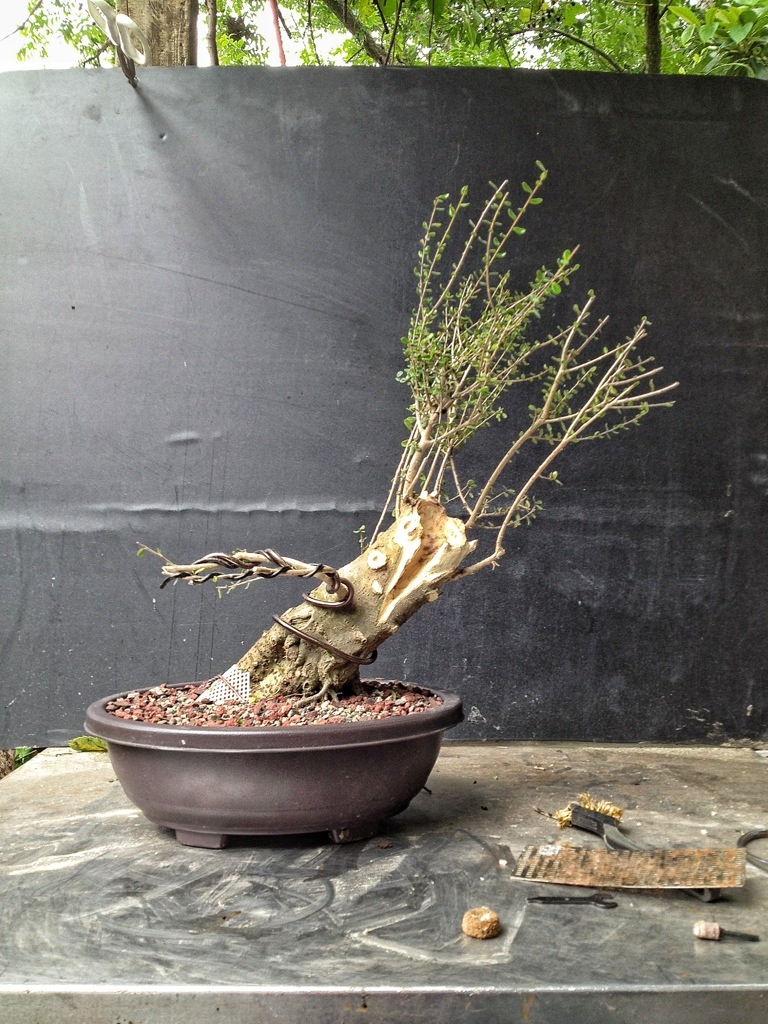
It’s wire time
Tough top
I’ve left it a little taller than it will be (an initial design is like a battle plan, you throw it out after the first development)
I do have adequate branching for a nice three dimensional tree
A last sketch (I know, I’m just a big show off)
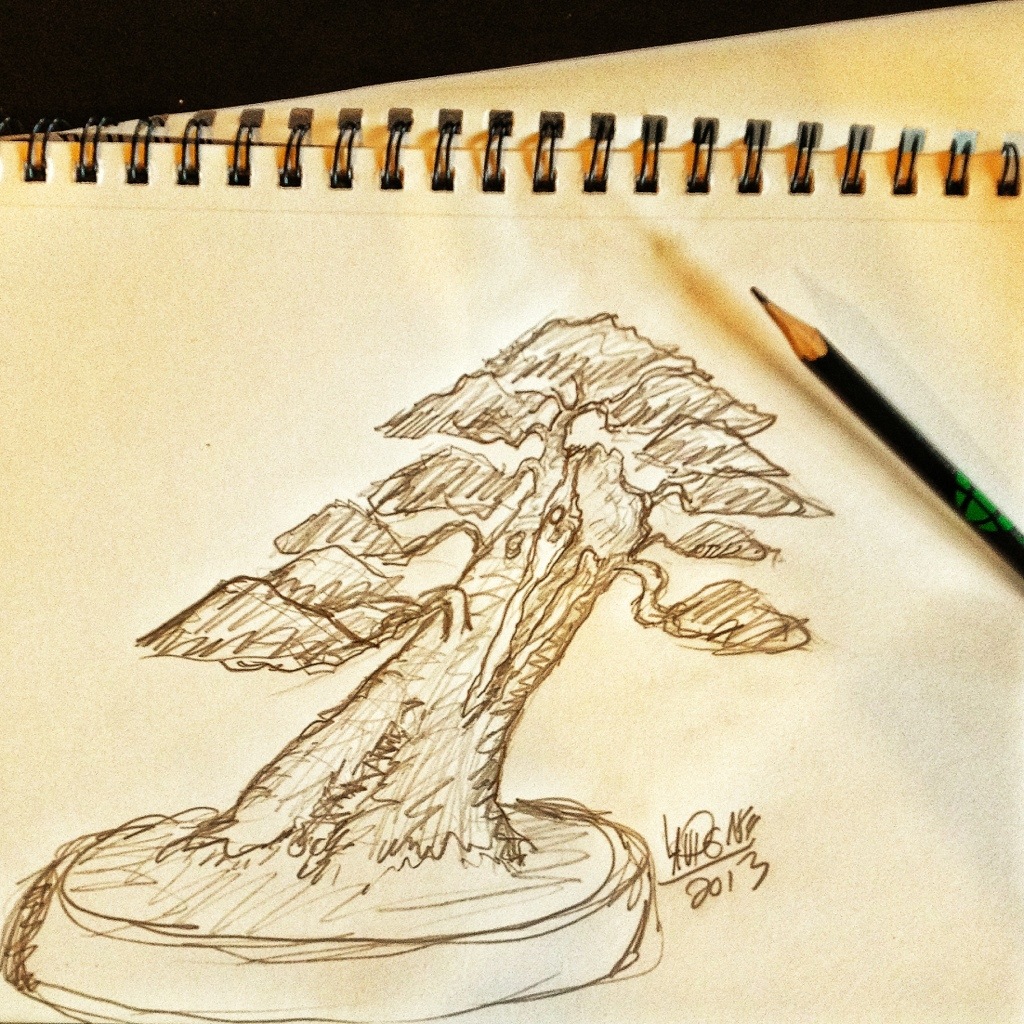
If you compare the previous sketches, I combined the best parts of each one.
And a word from experience, if you get a neea and you repot it like I did, don’t be surprised by black, dead leaves about 2-3 days after the process. They are very resilient and will rebound quickly.
They will also grow faster if you provide them with partial shade (I think it’s an adaption to being an understory tree, and it’s trying to push past the shade into the sun) . The leaf will be a darker green as well in the shade. I think the tree produces more chlorophyll to make up for the reduced sunlight.
Or not. I’m not a botanist.
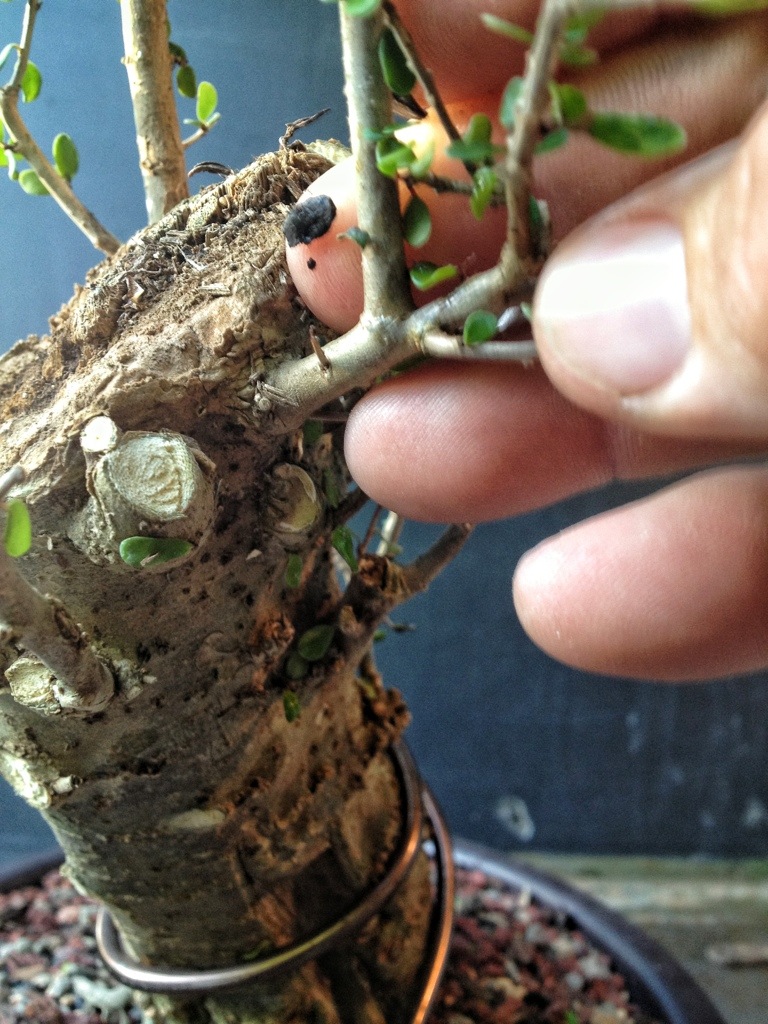
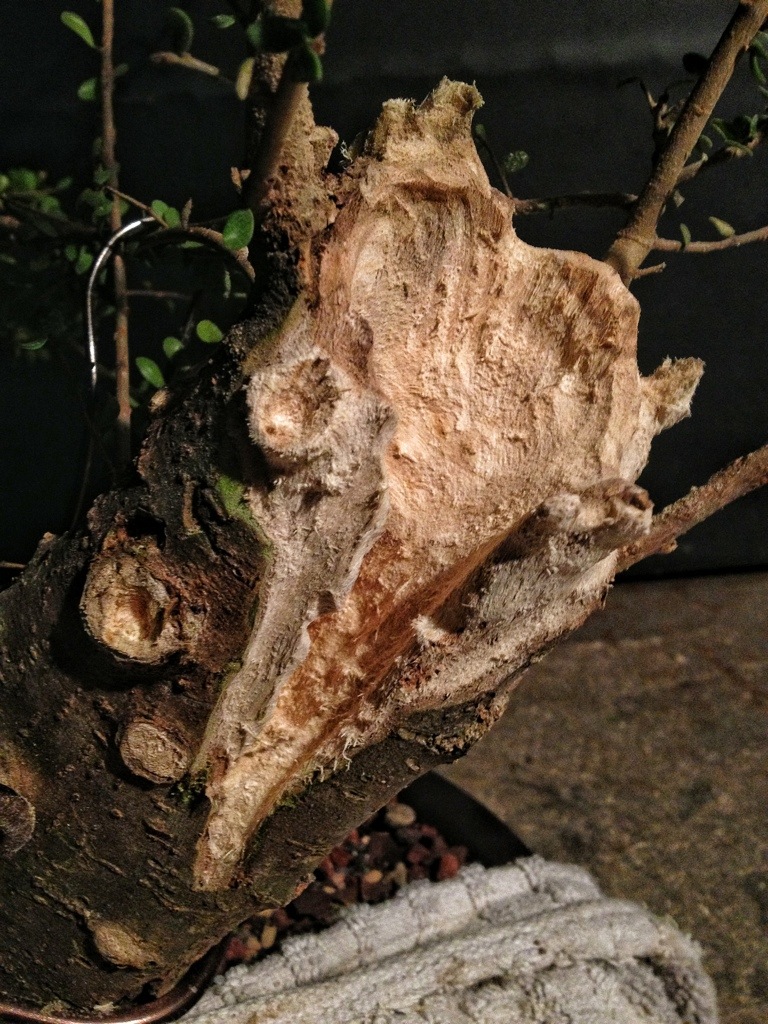
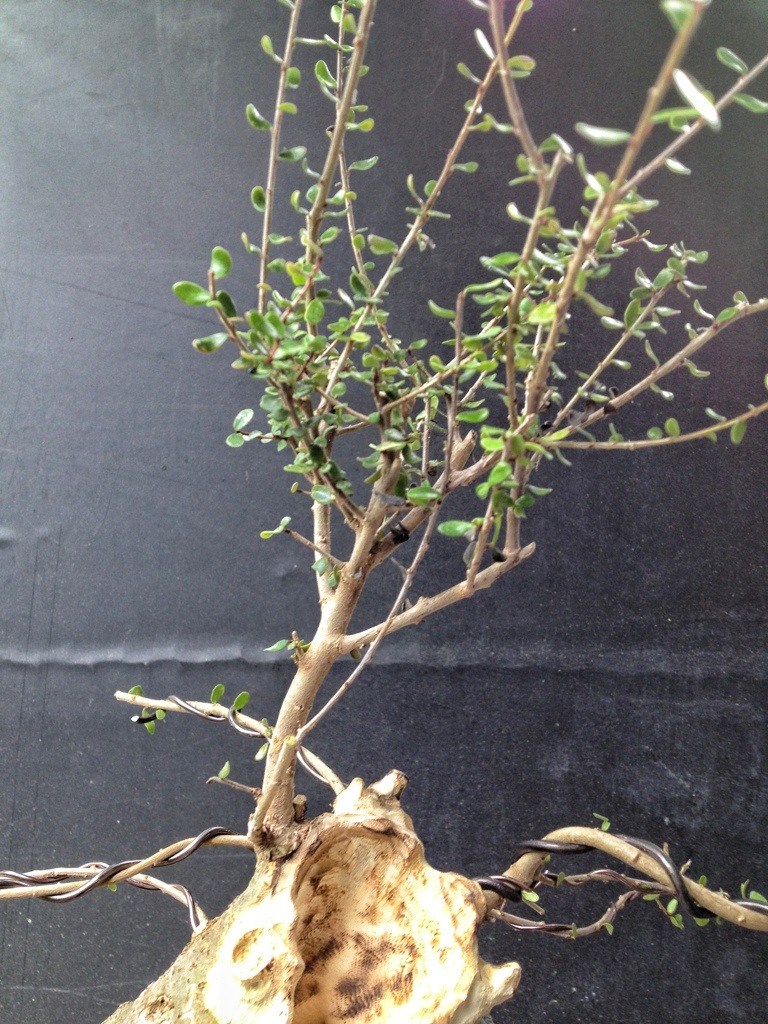
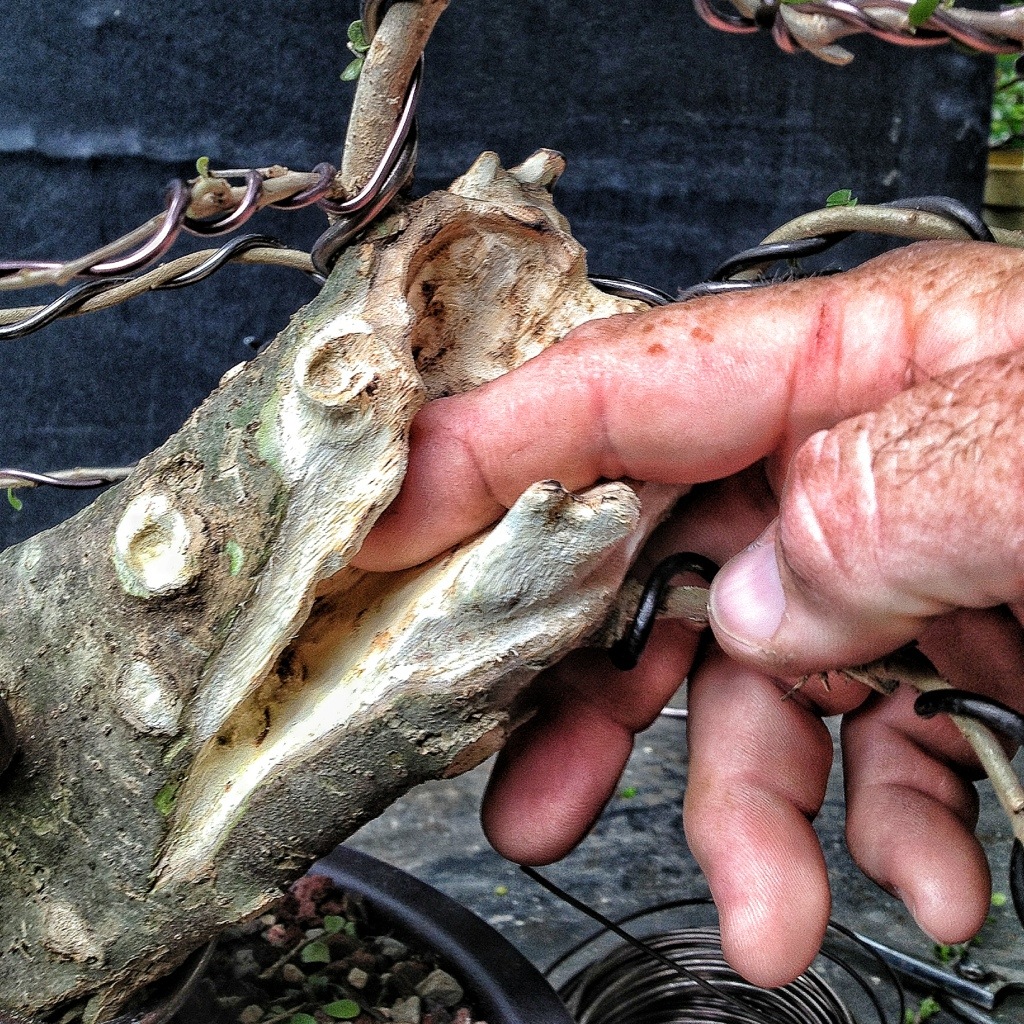
One last look at the tree

And, whoops, it got my finger!
- Comment
- Reblog
-
Subscribe
Subscribed
Already have a WordPress.com account? Log in now.

If one were to compare nea to a more common plant what would it be?
LikeLike
The Latin name compares it to a boxwood (buxifolia- leaves like a boxwood) but the growth habit is much more vigorous.
Its much like ficus salicaria in that it buds profusely and grows fast.
The flower is a small, yellow, waxy flower and the fruit is much like that on a Fukian tea; small and red.
It’s like many plants but its mostly unique to itself.
LikeLike
Hmm it looks like your website ate my first comment (it was super long) so I guess I’ll just sum it up what I submitted and say, I’m thoroughly enjoying your blog.
I too am an aspiring blog blogger but I’m still new to everything. Do you have any helpful hints for newbie blog writers? I’d really appreciate it.
LikeLike
Just write what makes you happy
LikeLike
“I should just leave it like this.
Naaaa…” hehe. That made me chuckle.
Nice chunk of nia there. Looking forward to watching you develop it.
LikeLike