What shall you do with a ginseng ficus, – a Ficus sea shanty

We will begin with the end. Then, by the time my rambling storytelling actually gets to the end, you’ll have forgotten the end and it’ll be like the beginning again. Or something philosophic like that. It seems to be a popular and successful plot device in stories recently…..
As you see above (and at the end, which was the beginning) The tree is turning out well. But how did we get there? Well, here’s the real beginning, from about 2 years ago….

Here’s the tree even before, awwwww, it’s just as a baby..

I tend to make a big trip in the summer months, touring several clubs and performing, working in private sessions (which this is) or workshops. I call myself a “Bonsai Roadwarrior” and in 2019, I found myself, in all places I could have found myself, Toledo, Ohio (a good place to lose oneself too).
I was at John and Julie’s place, actually just outside of Toledo, in Maumee, declared an All-American City in 2006 (per the National Civic League, whoever they are). It was, coincidently, the home of Betty Ford, founder of the Betty Ford Center, a famous drug treatment center, and both the Soldedad Brothers, a punk blues band, and Necros, one of the first punk hardcore bands. But I digress. As usual.
Let’s turn our inquisitive view upon our tree, a ficus microcarpa, seed grown, called in the trade, a “ginseng ficus”.
They are known for those bulbous, potato like roots that are, depending upon your experience and aesthetic sensibilities, either lauded or derided.
Much like yours truly.
John and I decided to ground layer the roots, to give them more of a “tree-like” look and less of the “spud-like” look. Its what I usually do in La Florida, where it happens naturally, (but contrary to this post). As a counter point, here’s an article here where I keep the potato look on several trees.
Ground layering is much like air layering, except we do it on the ground (easier on the knees….) or soil line.
First cut is to remove the bark and cambium layers to the woody part (called by the pointy heads “xylem”. The bark and those tissues below are the phloem, and between the two is the cambium. The xylem moves water and minerals throughout, mostly up, the tree, the phloem moves carbohydrates and sugars, mostly down, and the cambium, in the simplest terms, grows the new xylem and phloem cells, thickening the trunk.
A ground layer’s (and air layers) purpose is to make the tree grow roots at the cut site. The top will still get water through the xylem, but the carbohydrates have no place to go, so the tree grows new roots, to store the carbohydrates from the result of photosynthesis (one of the jobs of roots is to store the energy of the tree for later use).
The first cut is to remove a strip of bark (and cambium) from the raised roots.
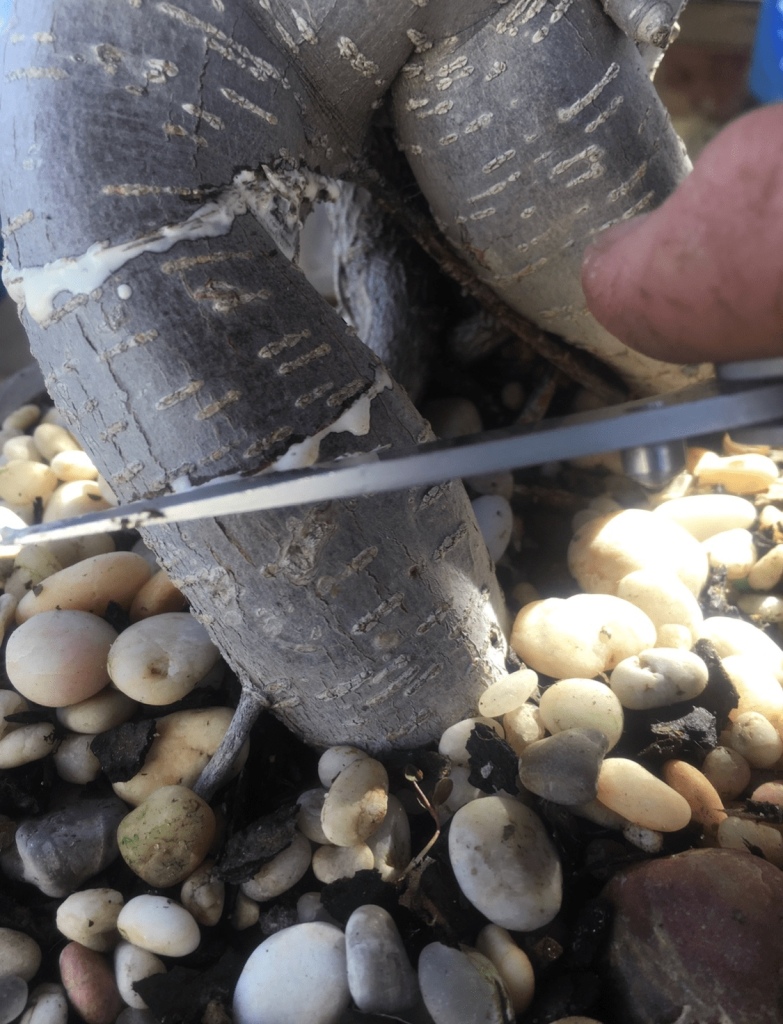
All the way to the wood.
Sphagnum and, since I’m up North, we used indole-3-butyric acid powder, what people call a rooting hormone.

And I prefer aluminum foil to hold the sphagnum in place while the roots grow.

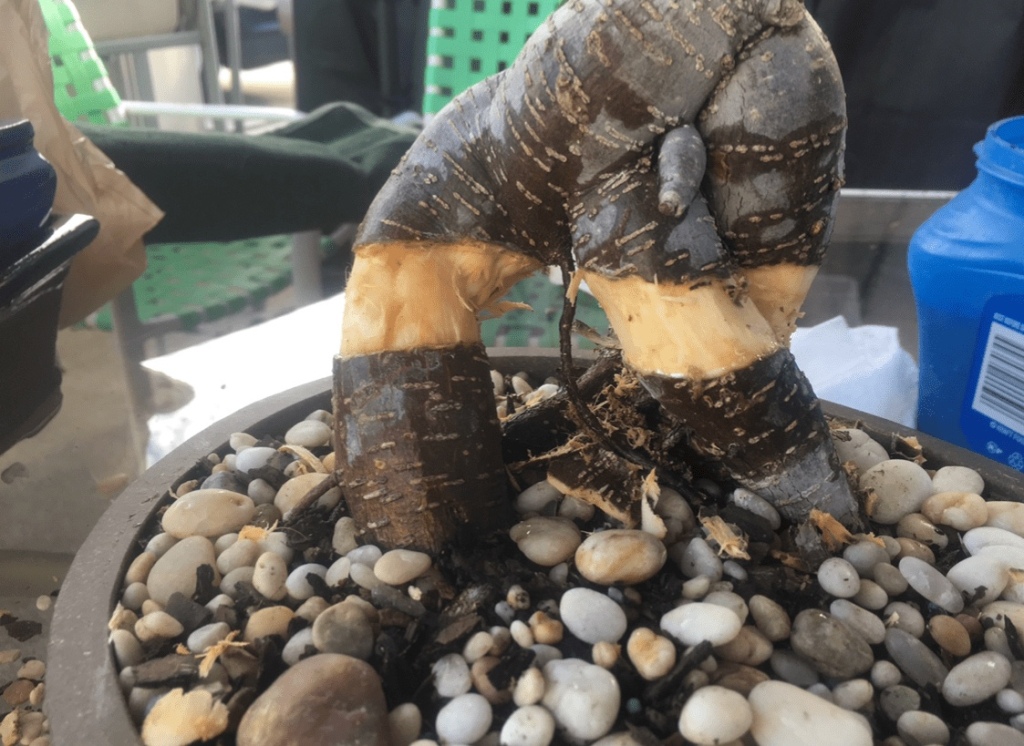
Last year, 2020, during Lockdown, John separated the top from the bottom. Unsupervised even, which, if you know John, he needs supervision. That’s what Julie is for, she takes care of him.

Looks like John has had great success so far. I say that because I just applied the layer, he’s been taking care of the tree all this time.

He potted it up, using my soil mix he had delivered in from American Bonsai Tools. Since it was lockdown I wasn’t able to make the usual trip and deliver it for him.

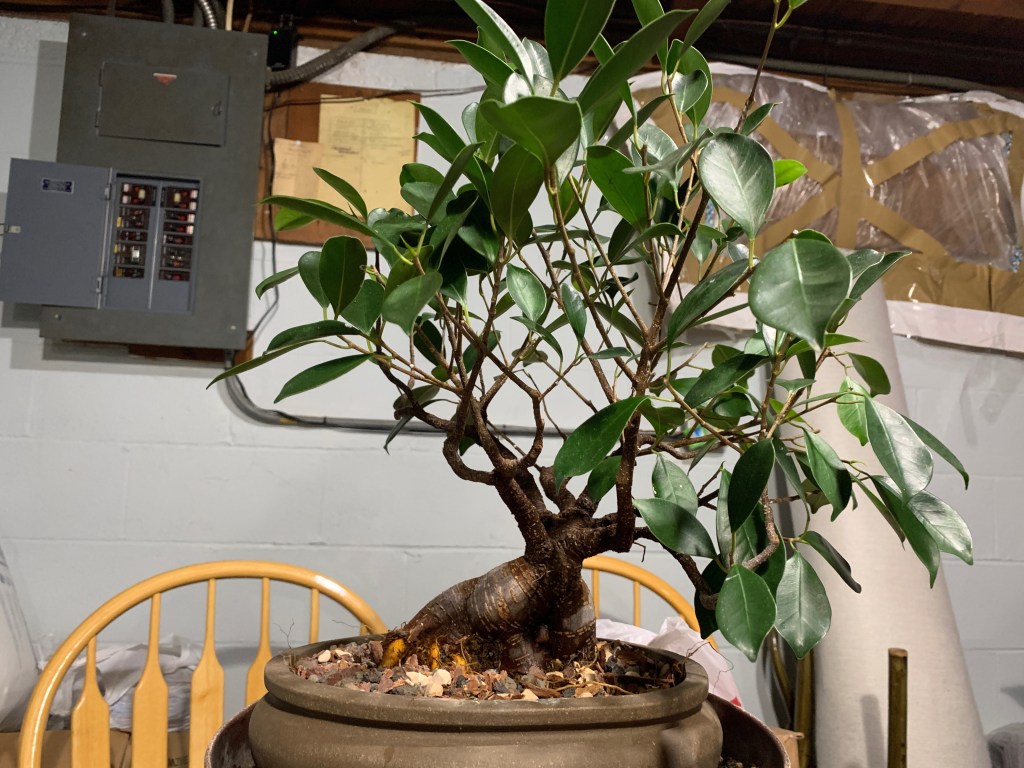
You’ll notice he’s inside. John brings his trees into the basement with a grow light and a heating pad underneath for his winter set up. The light is for photosynthesis (a lesson he learned: he was using a florescent grow light and about halfway through the cold dark winter, his trees began to suffer. A florescent light will lose intensity as it gets older. We can’t tell the difference, but the trees do. So get the new LED grow lights, they are fantastic). The horticultural heating pad keeps the roots at about 65F (18C), a temp that keeps metabolic processes moving in plants.
And now we are mid-June, this year, 2021. I’m in Toledo, drinking Scotch with John (and working trees…).

The roots are maturing, getting some age and girth.


The soil mix has done its job, creating new fine roots.


What I’ll do is to lower the soil level a bit more, straighten out the crossing ones, and do some sculpting with my knife.
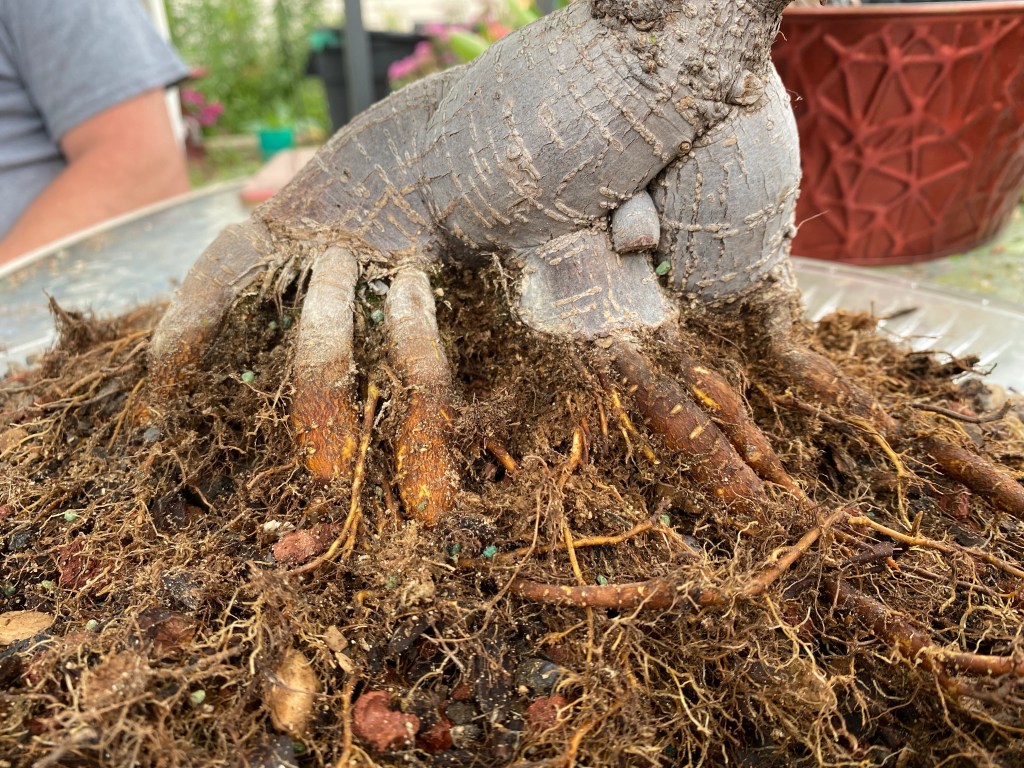
I want a more shallow pot, to spread out those roots and give the nebari room to widen. Let’s see how this one works.
Not a bad pot.

Well, not so good it seems. It’s a little little.

Luckily, John has a small to-go food tray, made from aluminum.

Perfect size!

And no, the aluminum won’t hurt the tree, it’ll only be in there for a season or two (metal toxicity takes years, the metal has to build up in the soil over time, and we change the mix out every repot, mostly), and from research I’ve seen, plants grown in metal seem to stay cooler in the summer and warmer in the winter.
Now for that sculpting (and an operation).

The transition from the trunk to the roots is abrupt, from the cut I made at the beginning of the layering process. What I’m doing is just making a V-cut to alleviate that straight edge where the roots come off the trunk.


And, as uncomfortable as it may be for some readers, I must geld the poor tree.

Looks better as girl anyway.

Now to refine the top a little. The chop scar needs some re-carving to get it to heal totally.

If you have a cut you want to heal, re-cut the edge about every two years. It’s a frustrating phenomenon that wounds tend to stop healing after about two years, so we re-cut to stimulate new healing.

Now the top. Let’s reduce the branches, only keeping what we need, and I’ll cut everything back to the last active bud.

The regular F. microcarpa does have dieback, if you don’t always keep an active branch or bud. So, in an abundance of caution (and being up North where the tree spends half the year inside) I keep green at the branch tip).

“Chasing the green back” is the phrase we use.

Now to the “pot”. Some drain holes…

Into the new “pot”…

With my “coarse” soil, of course. A shallow tray doesn’t drain as well as deeper ones, so I use more coarse soil to help drainage and get better root growth. An axiom to remember, the drier a mix is (bigger particles) the better growth will be. As you get near the refinement you reduce particle size and this slows growth, making it easier to keep up with refinement.
Chasing the green back and some wire.


Fertilizer, in this case, Miracle Grow Shake ‘N Feed. I like it because it has both synthetic nitrogen and organic components that feed the soil microbes.

And that’s it for June.


Fast forward a month and John has sent me some shots of the growth the tree has put on.


Lots of back budding, even where I left just nubs.

To review, baby pic

2019, layering.

June, 2021, repot and restyle.

And July 2021, new growth and back budding.

I’ll update it the next time I’m up in Ohio.
Thank you John for the opportunity to experiment on your tree, and for all the update pics.
And the Scotch of course. And to Julie for putting up with us working on trees all that day. You’re a saint.
See you soon!

Looking great! Thanks for the informative post. I’m always looking forward to the next one! And thank you for taking the time to document your Chronicles of Bonsai ™, it really is a joy to read.
LikeLike
Thanks for your entertaining way of teaching. Greetings from Belgium😉
LikeLike
Reblogged this on Wolf's Birding and Bonsai Blog.
LikeLike